
In the photo above, Bridget is using Leading Position 8 to ask Boots to go through a gate.
Leading Position 8 (LP8) is anytime we are facing the side of the horse. We can be in LP8 facing his ribs, his head/neck or his hindquarters. Still to come in future blogs are notes about LP7 – facing the front of the horse, and then LP6 facing his tail, as when walking behind him (long-reining) or sending toward something away from us, or asking for a back-up from behind the horse.
Remember, when we say ‘leading position’ we mean any position we use to orchestrate the horse’s feet, whether we want them to move or to remain still.
I want to look at LP8 next, because it is the Leading Position we often use for grooming, saddling/unsaddling, mounting and dismounting. For all of these, we need the horse to be comfortable standing still while we move around him.

We are in LP8 when we saddle the horse as well as for mounting and dismounting.
Clip #49 in my HorseGym with Boots playlist looks at our position when we are grooming, saddling and checking for relaxation.
Boots is not always relaxed about being brushed. It’s not something she experienced early in life before I got her. Giving her something else to think about, like the cloth in the video clip, seems to act as a ‘soother’.
Some horses love rubbing and cuddles while others are much more aloof. When Smoky and Boots lived together, the difference was very obvious. Smoky adored being groomed and fussed with. When we sat with him Sharing Time and Space, he would nibble and lick and want to be very close.
Boots learned to tolerate being touched all over for grooming, but sometimes finds it hard to relax into being brushed or massaged without a lot of licking, chewing and yawning. In summer, when we groom every day, she is able to settle into it a bit more.
When Smoky and Boots indulged in mutual grooming, Smoky was very tentative because after a few mutual nibbles, Boots would have had enough and give him a nip.
Any time we are along the horse’s side and pointing our belly button toward him, we are in Leading Position 8.

We can use signals behind his withers to ask the horse to move forward, shift his hindquarters or move his whole body sideways.
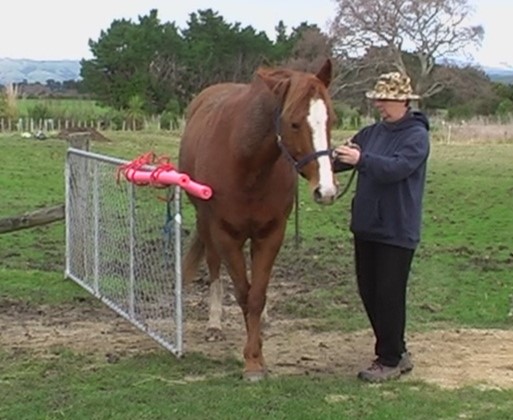
To get Boots used to the idea of shafts in a cart, I asked her to move sideways to push the gate along. Another LP8 position.
LP8 allows us to use signals in front of withers (the base of the neck) to ask the horse to yield his shoulders to change direction.
LP8 is handy for teaching a horse to become fluid with ‘walk on’, ‘halt’ and ‘back-up’ signals when we are facing him side-on. These skills lead nicely into teaching the horse to work in a circle on a long line or reverse pen.

Teaching circles has us facing the side of the horse.
Slices:
For illustration, please see clip #48 in my HorseGym with Boots series. Please note that I use a body extension only to make my signal clear for the horse and be able to give a clear signal from further away. Once the horse understands the ‘tap behind the withers signal’, a finger tap is all that’s needed. The rope texting at the end of the clip is next month’s theme.
‘Walk On’ Signal
- Ensure the horse is comfortable halting in the lane or alongside the fence (on a mat if you like).
- Stand facing the horse’s withers, at a distance which allows you to easily tap him gently behind the withers with your fingeers or your body extension.
- Move into and out of this position a few times with click&treat for the horse remaining in a relaxed halt.
- When 3 is ho-hum, rub the horse all over with your body extension or your hands; click&treat for relaxation. To encourage relaxation, pause and turn your energy away from the horse at every indication of relaxation (lowering head, sighing, softer ears, more relaxed lower lip, cocking a hip).
- For this part of the training, it helps a lot to have a mat or cone at which the horse knows he gets a click&treat, just a few feet in front of the horse.
- When the horse can stay relaxed as you move into position facing his ribs and you can rub him all over, tap him behind the withers, then ask him to walk forward to the mat or cone, click&treat.
- If the horse does not understand at first, just tap, then guide him to the cone or mat. He will quickly pick up that the tap means, move foreward to the cone or mat.
- As his confidence increases, stop moving with him to the cone or mat. Wait until he gets there before you click&treat.
- When the horse reliably steps forward when you tap gently, gradually increase the number of steps before you click&treat by moving the destination mat or cone further away. Always stop tapping the very instant the horse moves and relax your body language.
- Eventually, set out a circle of cones or mats and and ask him to move between them with a click&treat at each one, followed by a wither tap to move to the next one.
- If you are using a leadrope, keep a float (smile) in the lead rope. At first you may find yourself changing from LP8 into LP3 (shoulder to shoulder) or LP5 (beside hindquarters) and back to LP8 again.
- Once he understands the tap signal, add in your usual ‘breathe in strongly’ and voice signal (e.g. ‘walk on’) that you will always use. You could include these earlier, but I like to make sure the horse understands the tap signal on its own. (See Number 16 in the Blog Contents link at the top of the page for details about smooth ‘walk on’ and ‘halt’ transitions.)
- When he is smooth on one side, teach it from the beginning on his other side.
- Generalize using this ‘walk on’ signal in other venues and situations.
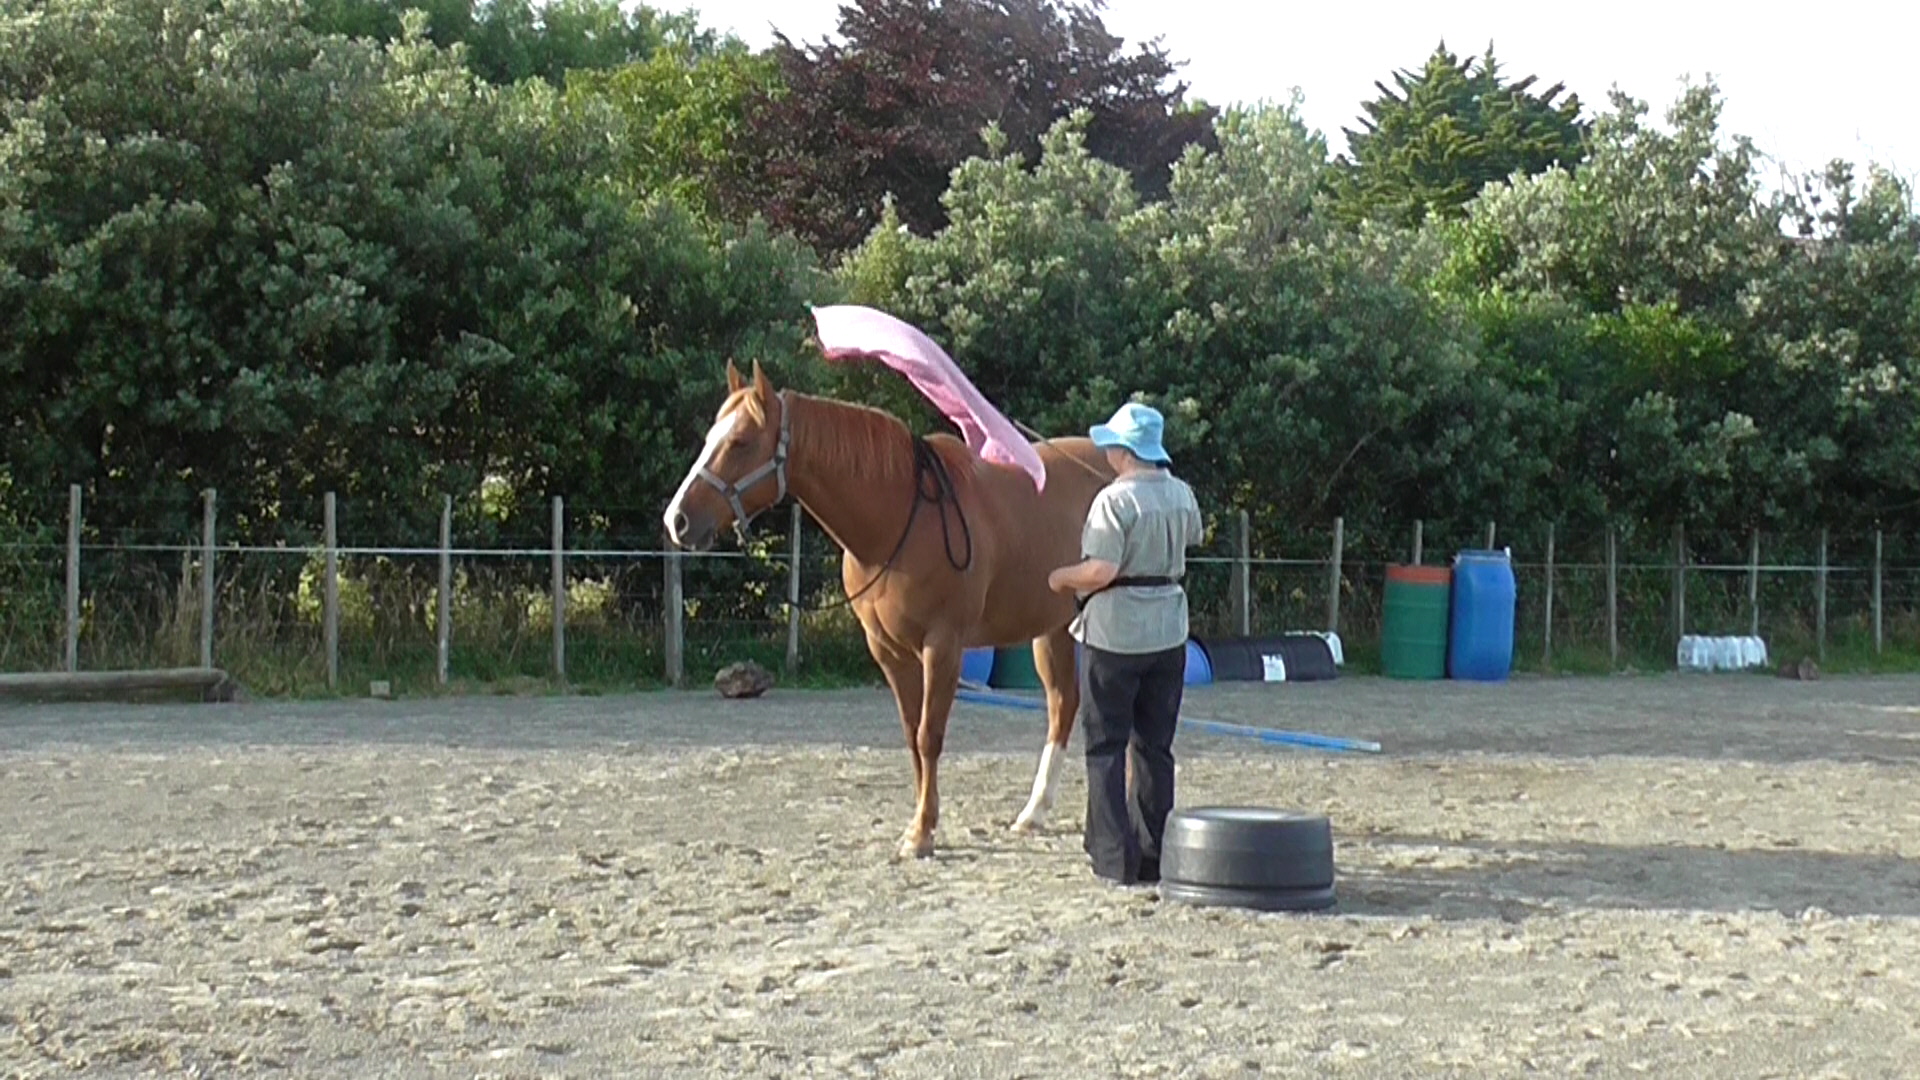
Here I am in LP8 getting Boots confident with flapping things moving across her for a Horse Agility course.
