Category Archives: Reading Horses

Leading Position 5

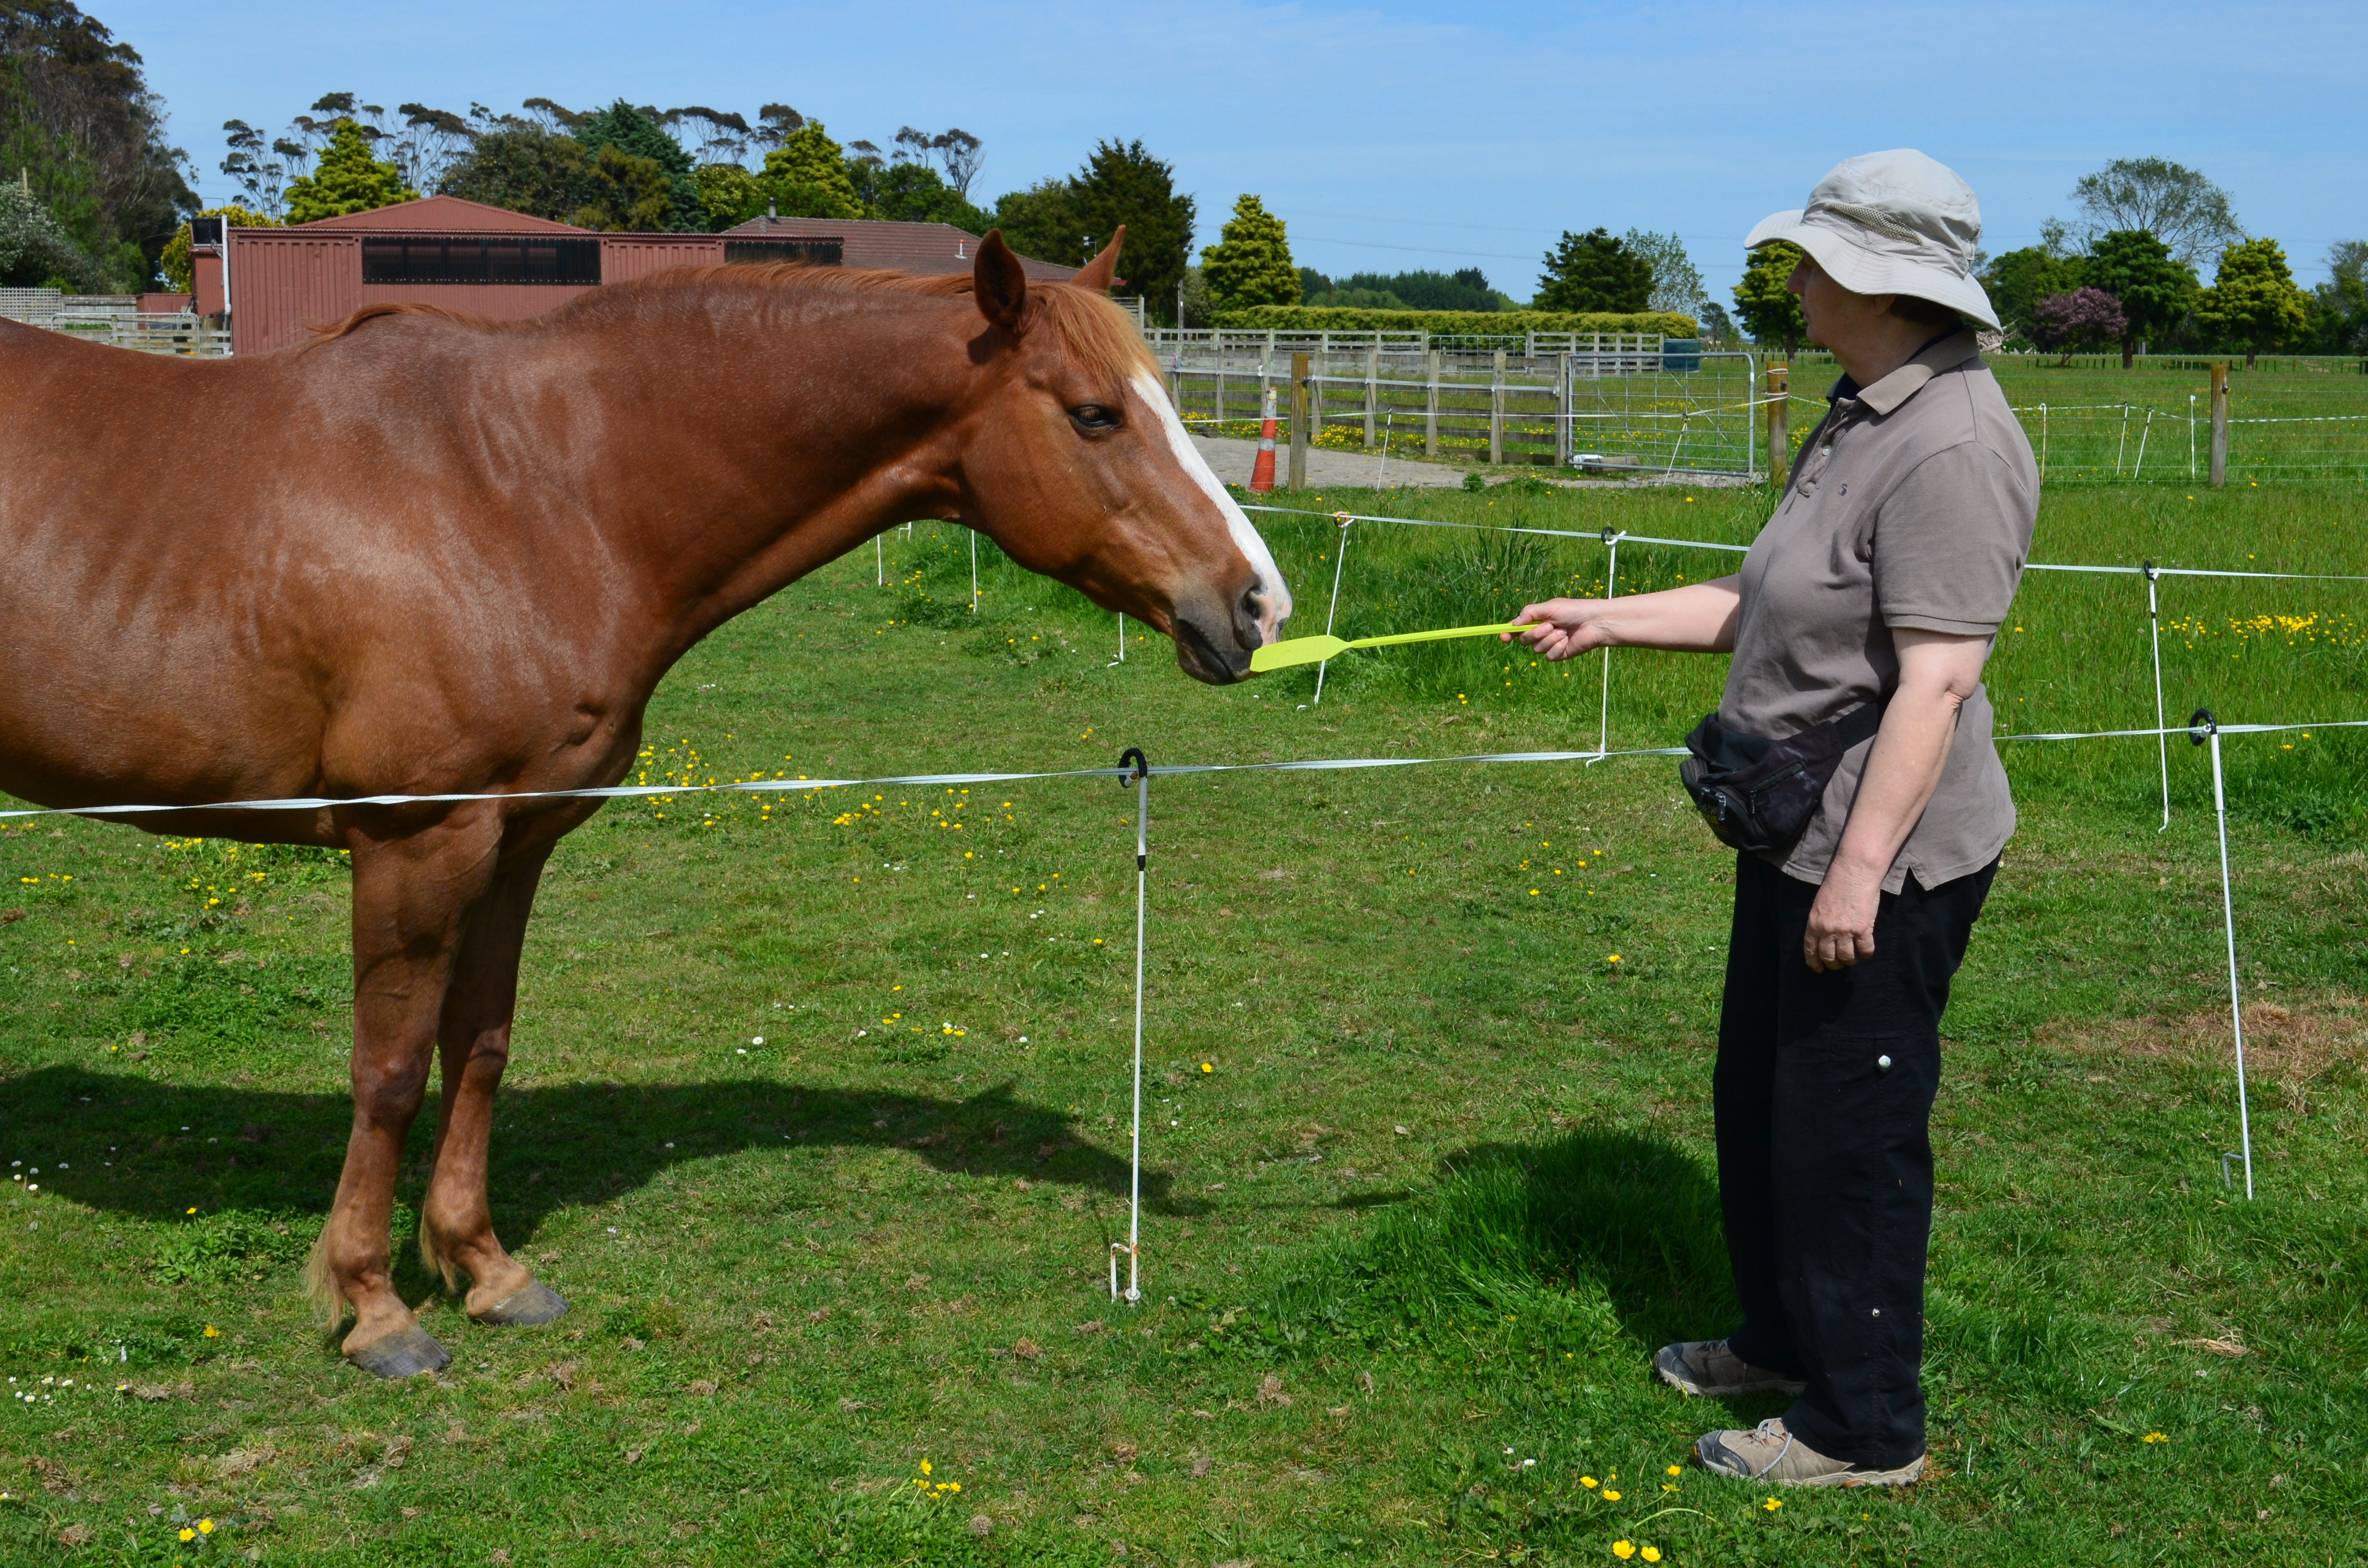
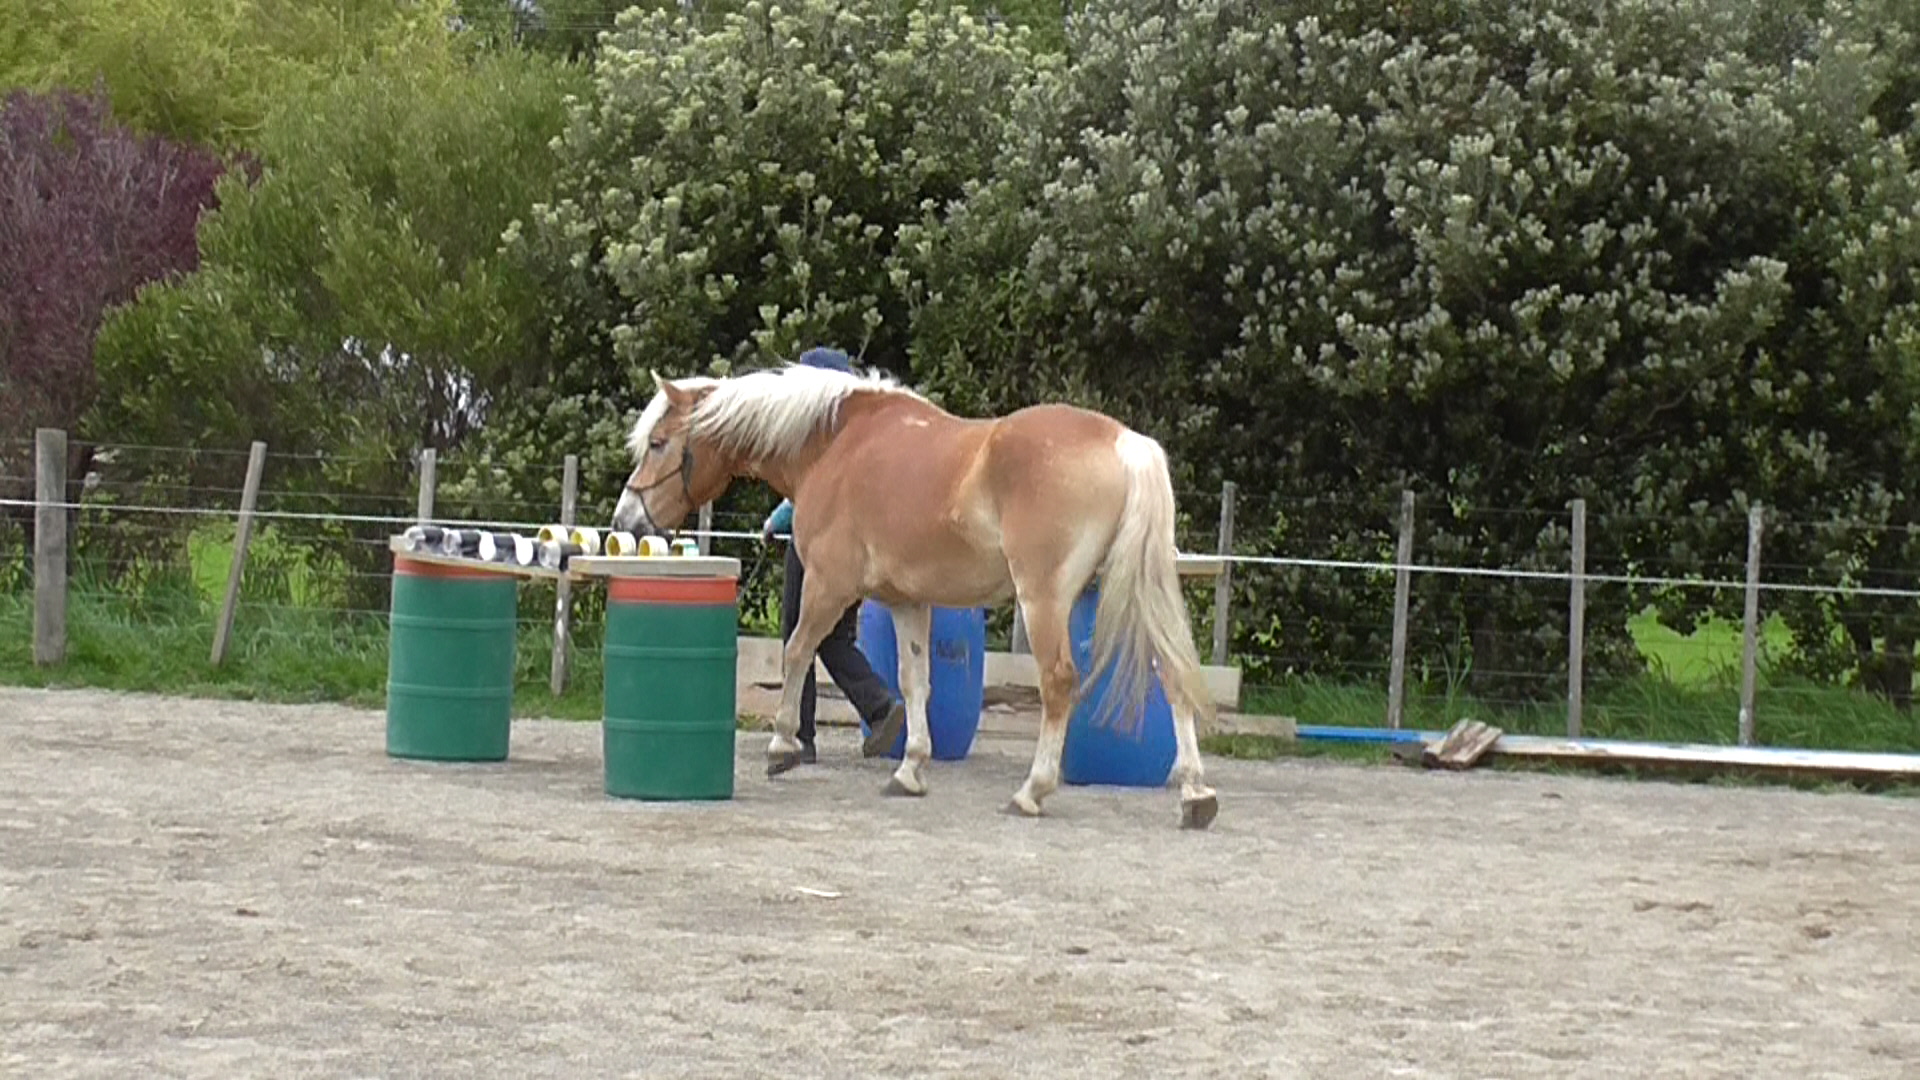
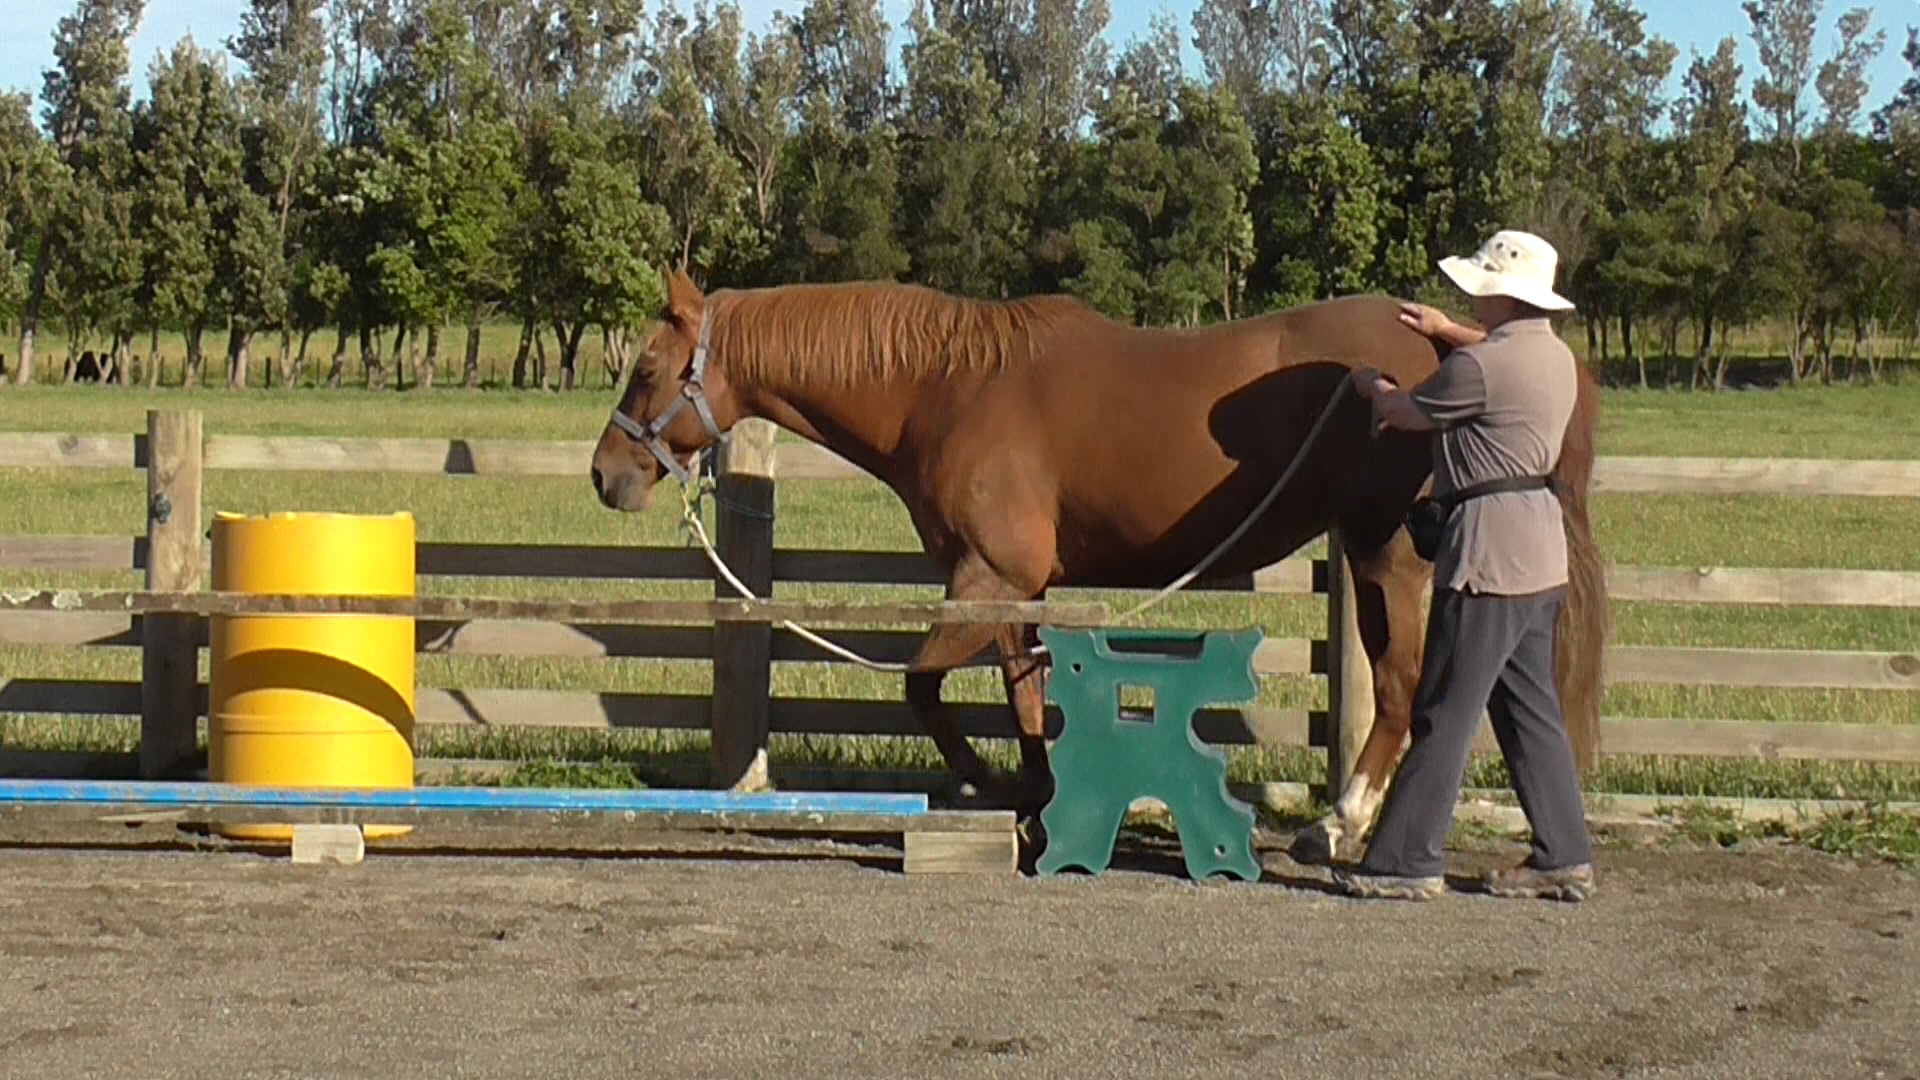
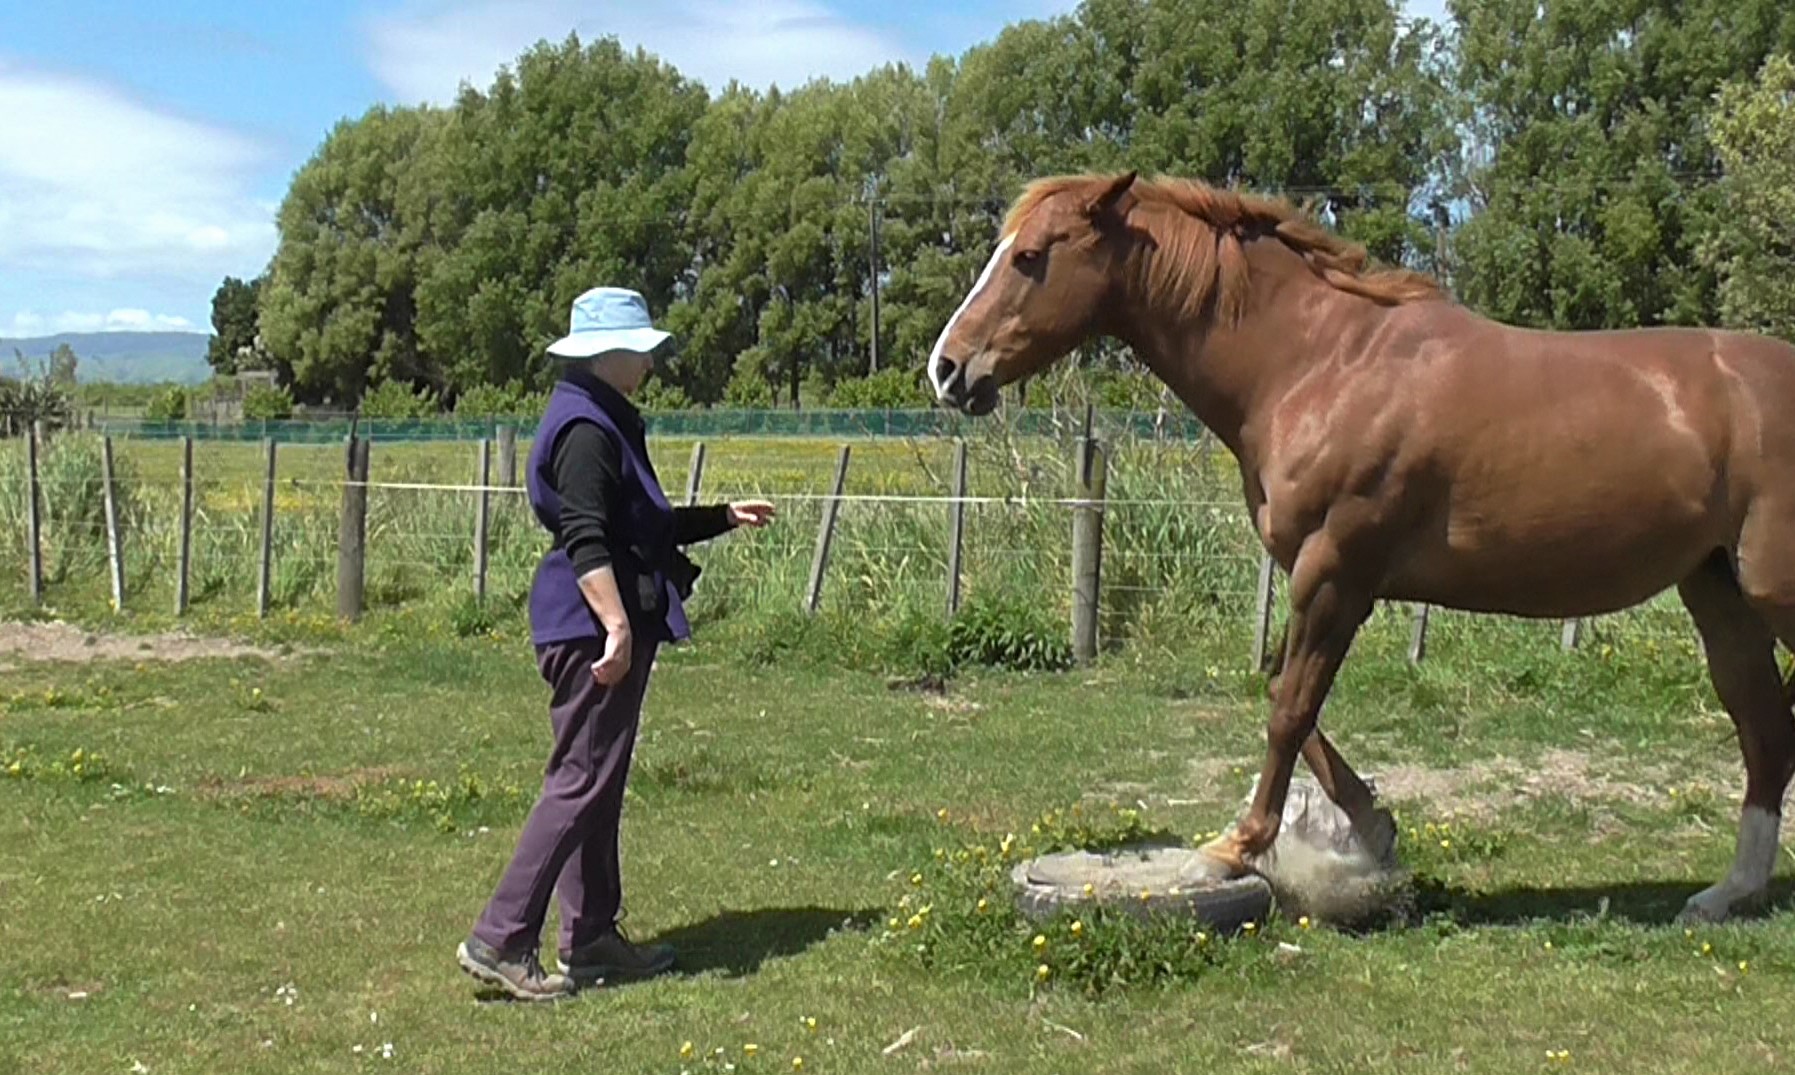
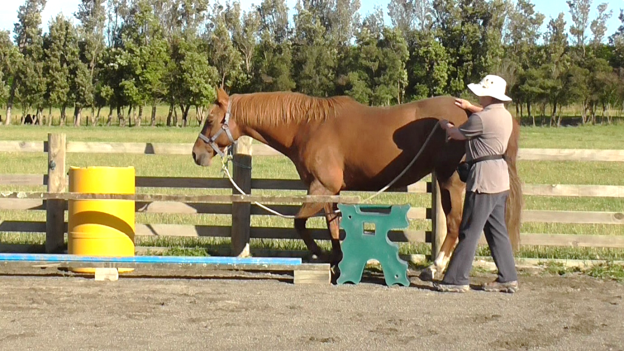
In the photo above, I am starting Boots’ education about LP5 by asking her to walk into a lane to target the yellow barrel. Using a lane ensures that she does not get used to turning toward me when I click while I’m beside her hindquarters. I move forward promptly but quietly to deliver the treat.

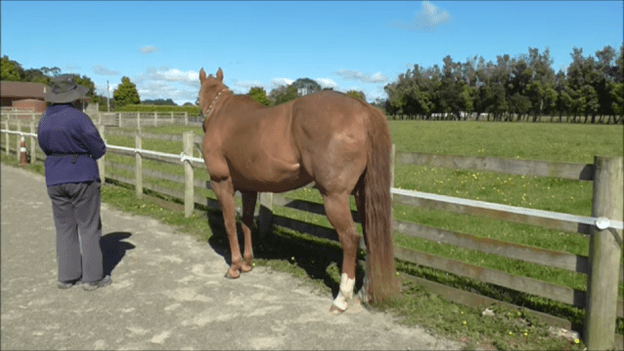
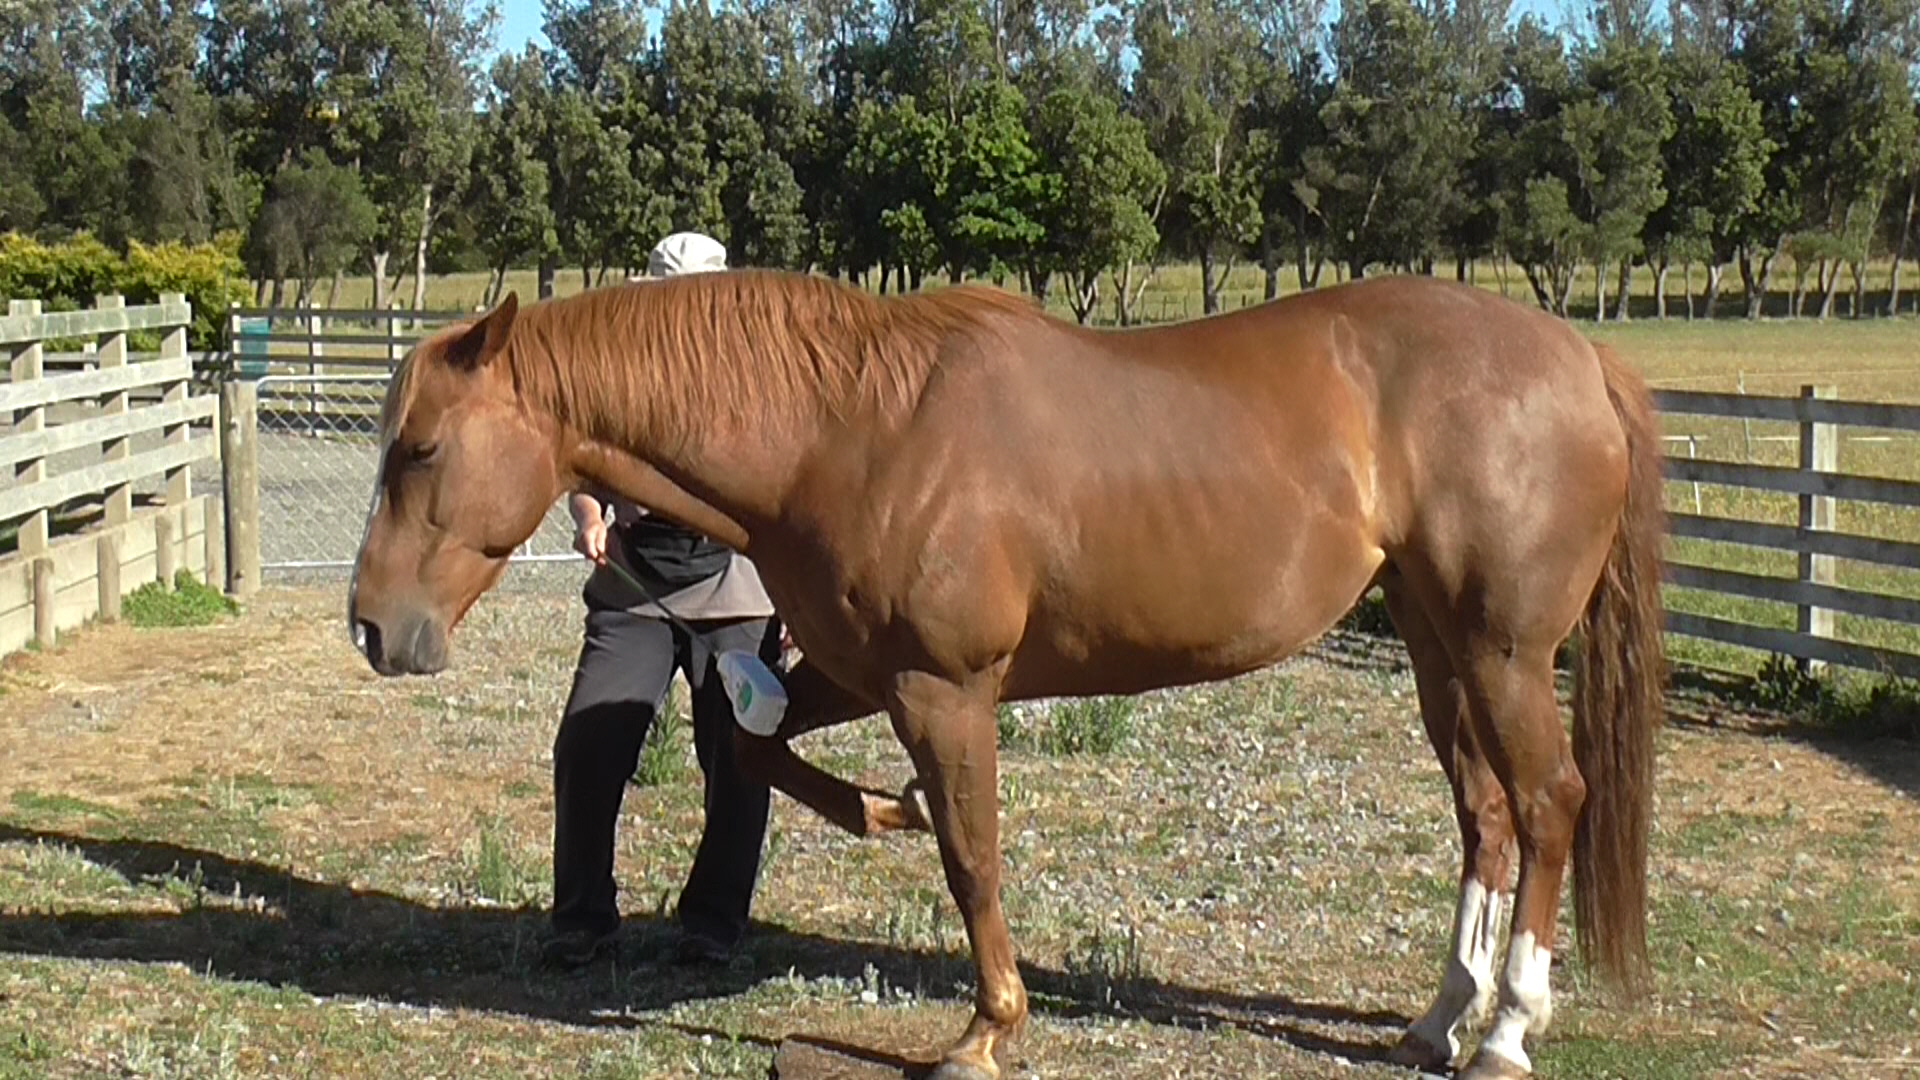
Leading Position 5 (LP5) finds us beside the hindquarters. We can be facing the same direction as the horse, facing his hindquarters, or we can be facing backwards (as for hoof care). If we are facing the horse side on, we are in both LP5 and LP8.

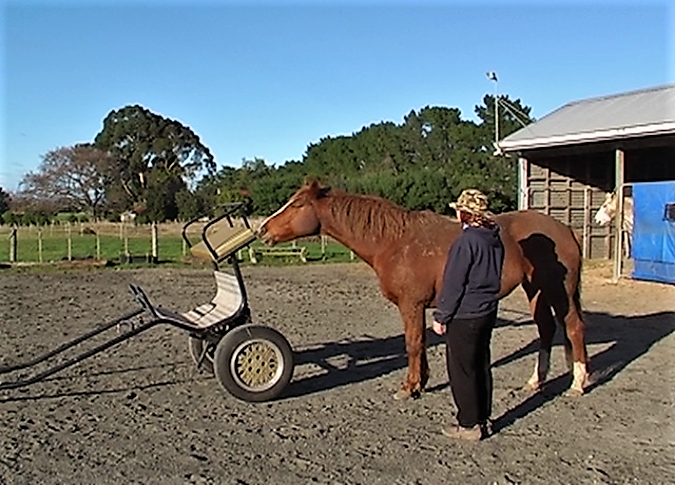
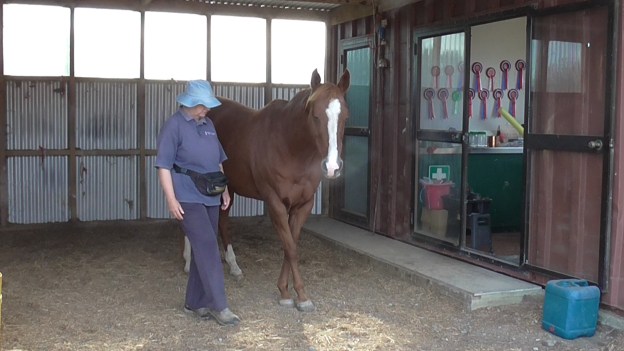
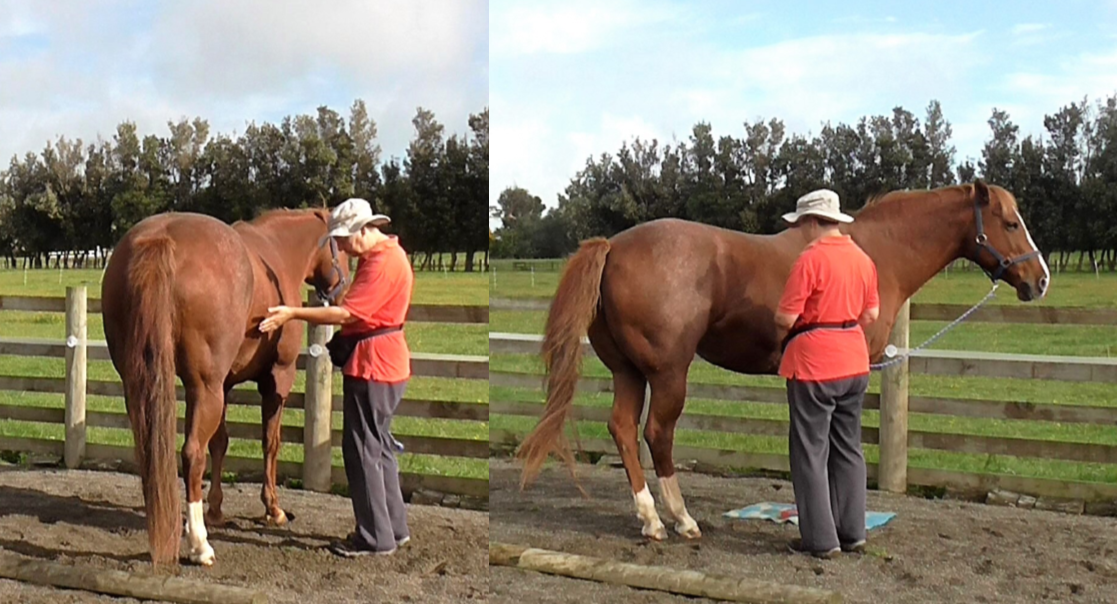
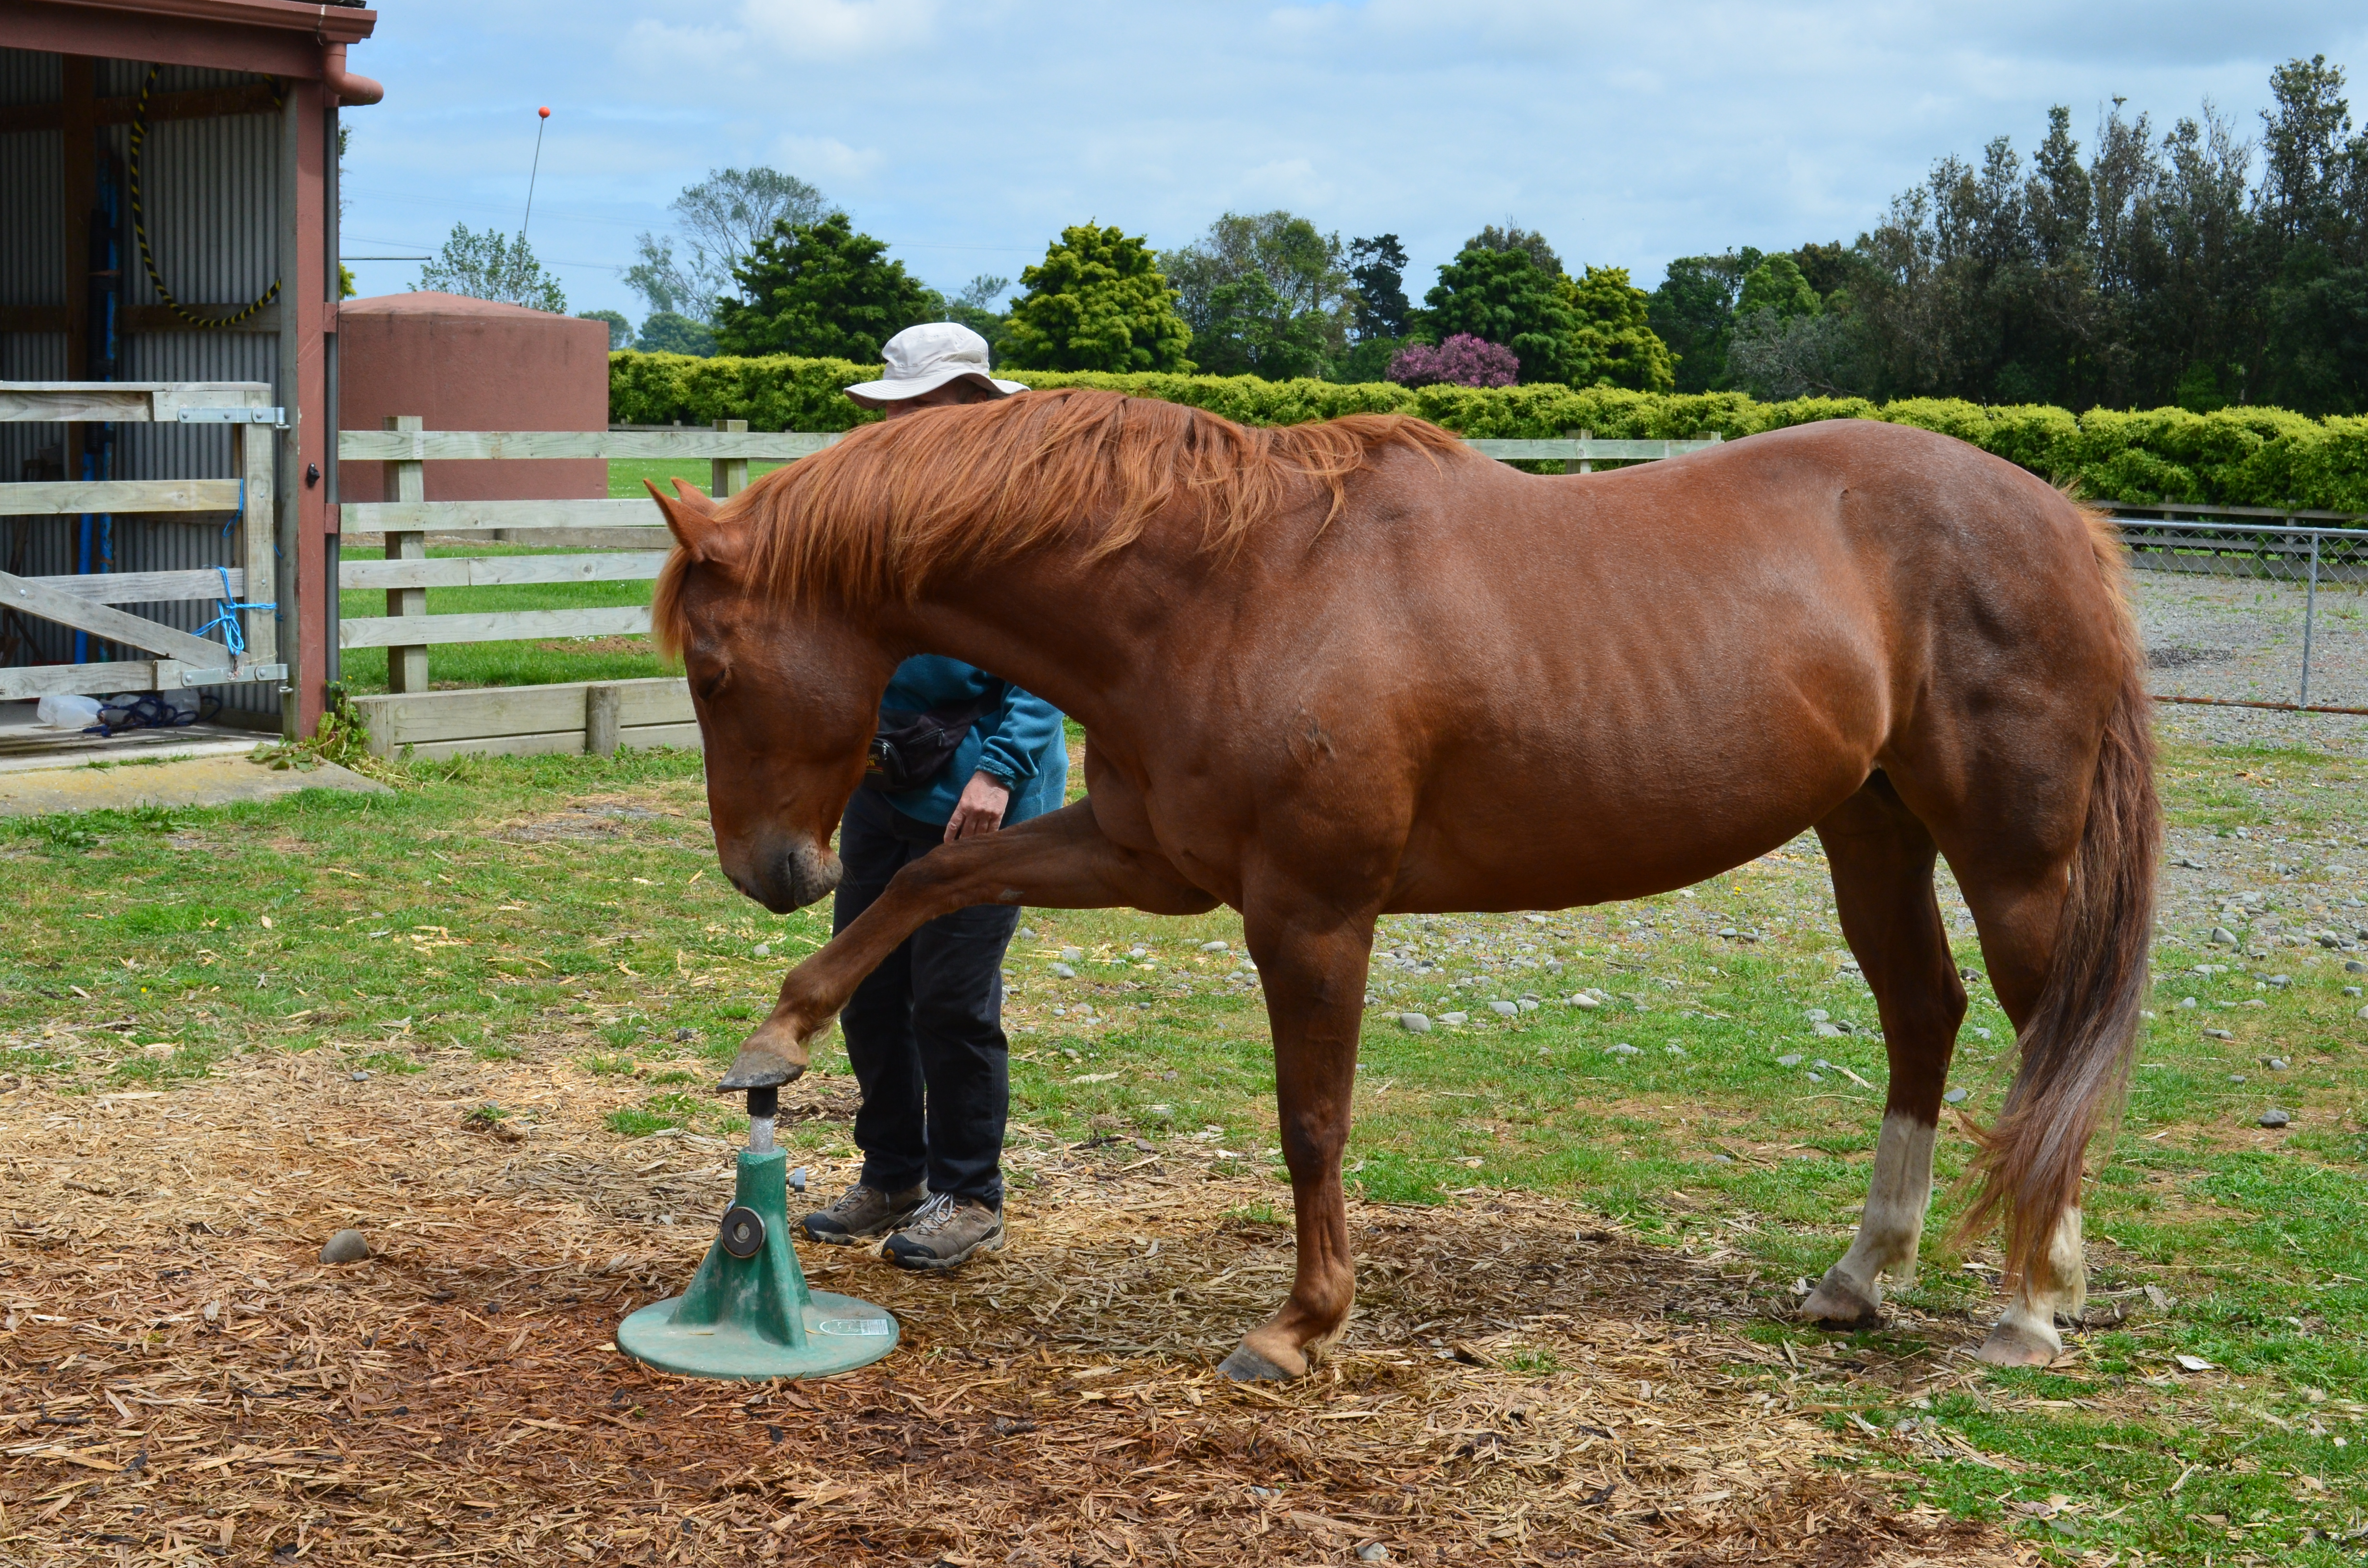
Grooming, care of the tail, hind legs and hind feet all require us to be in LP5. It’s also the position vets use to insert a thermometer. LP5 is another intermediate position toward having the horse comfortable with us right behind him in Leading Position 6 as we would use for long reining or driving. We also use LP5 for everyday care like putting covers on and off, as well as harnessing and unharnessing if we drive our horse.

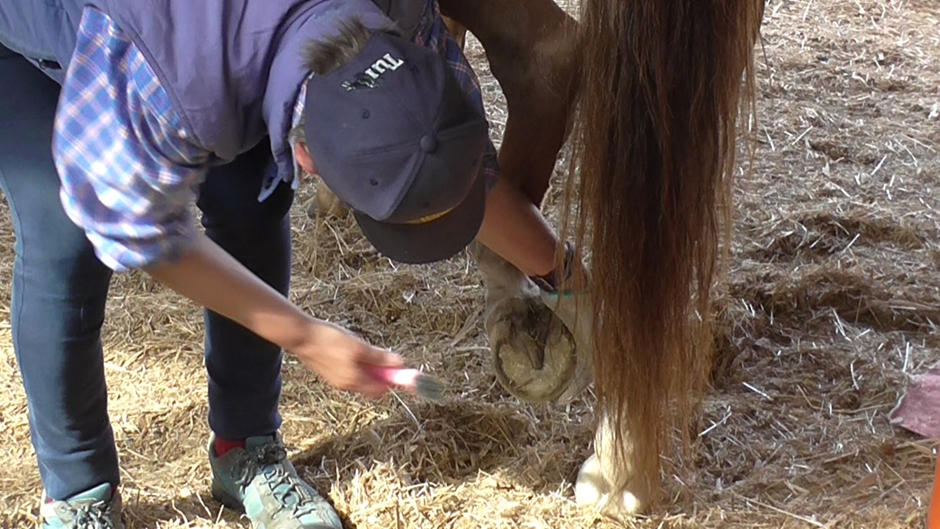
Tending hind legs, feet and tail require the horse to be confident with us in that position.

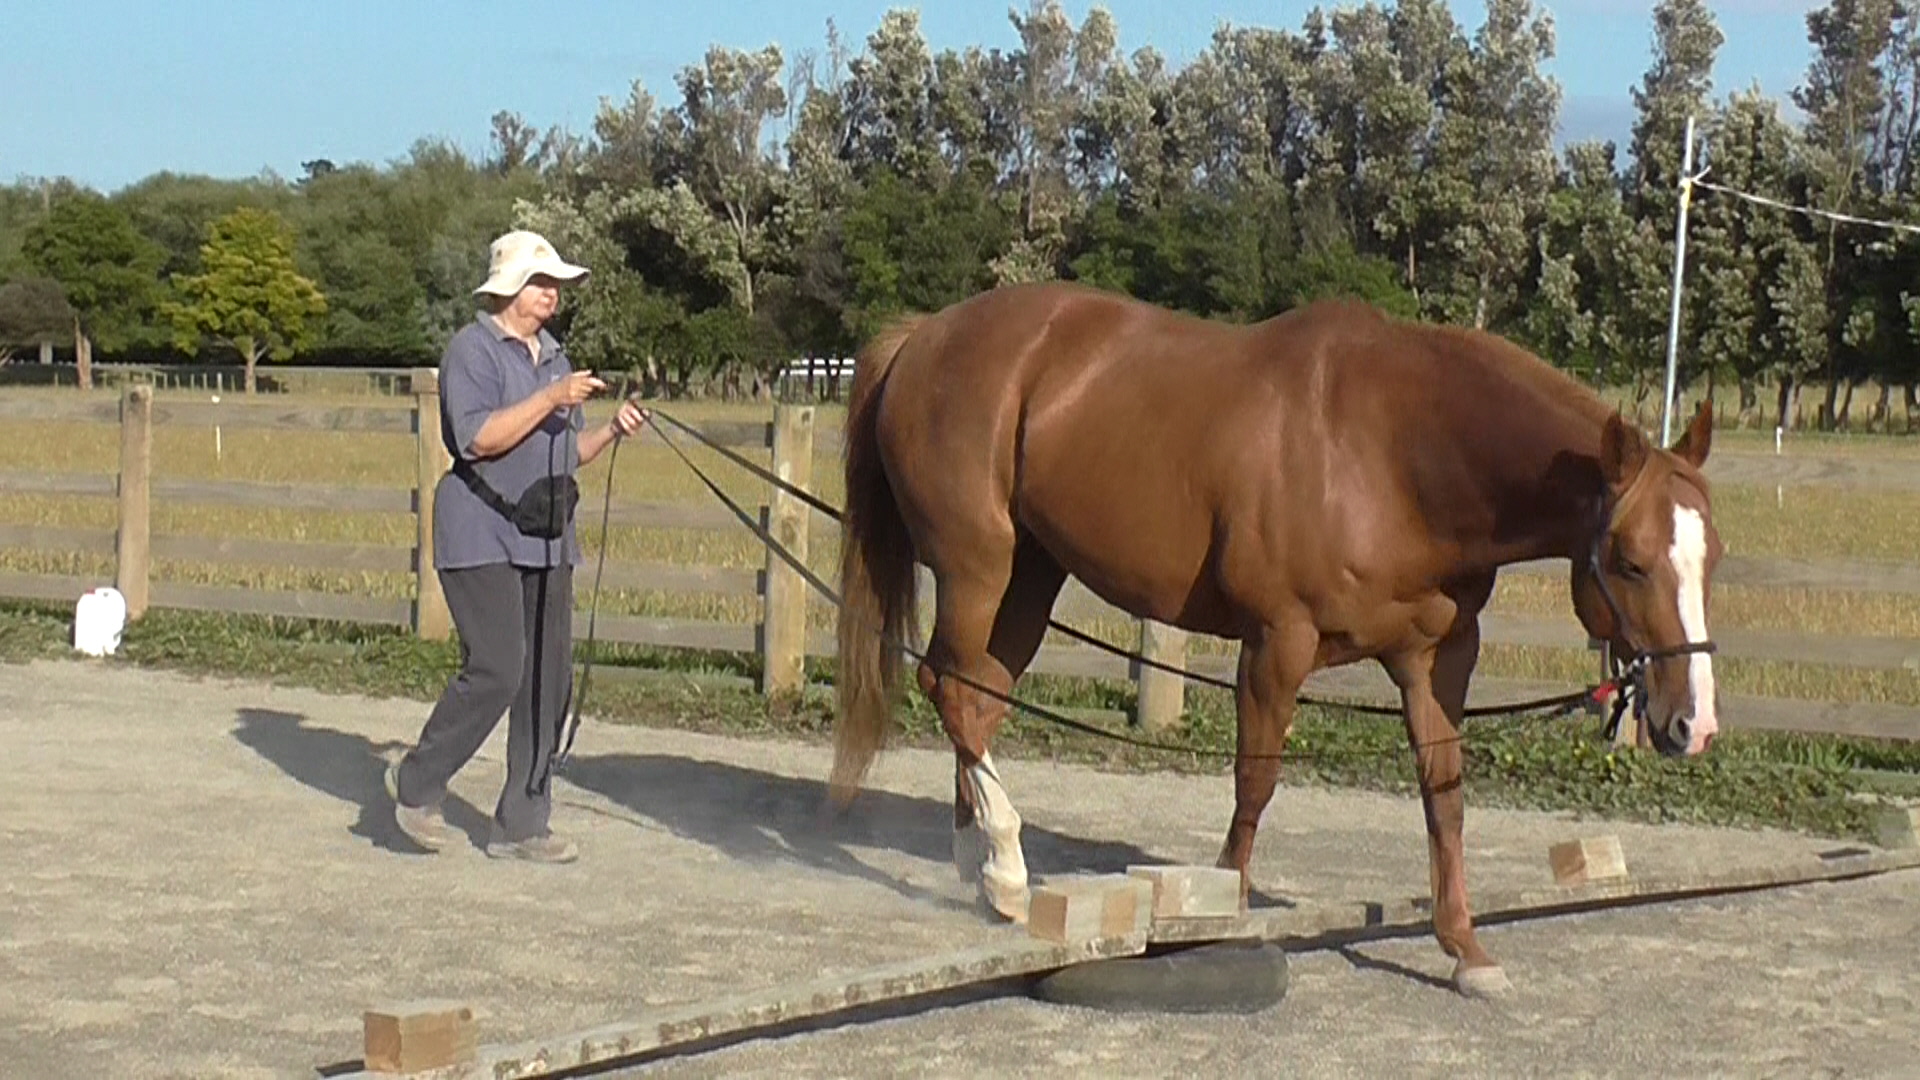
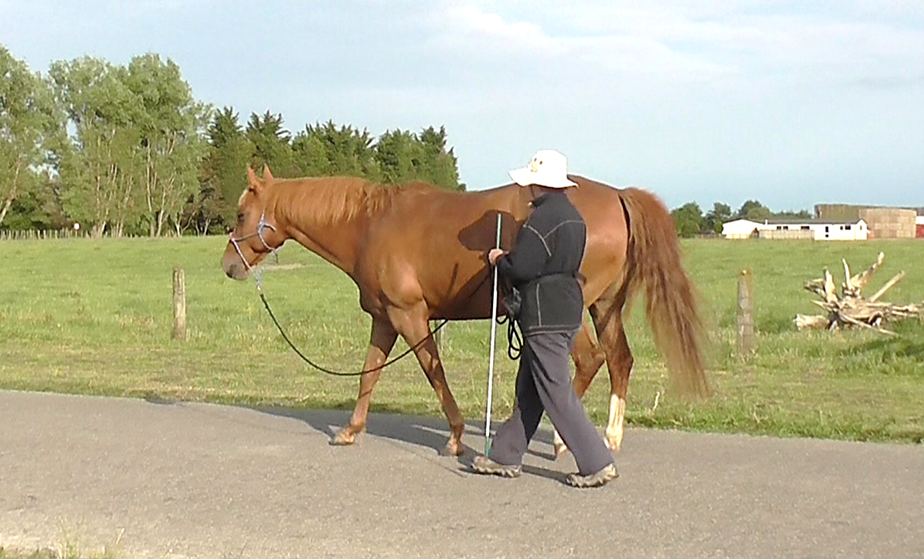
Walking beside the hindquarters builds the horse’s confidence about having us remain well behind his drive line as we walk along, as well as responding to our go and whoa signals while he is walking with most of his body ahead of us.

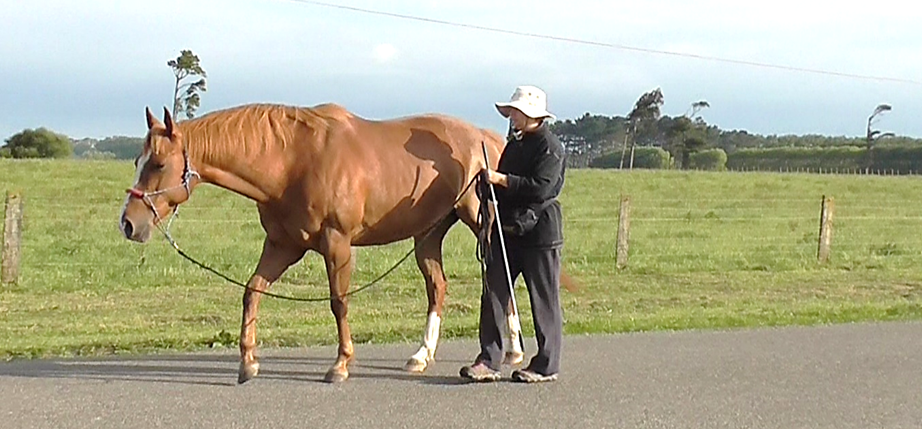
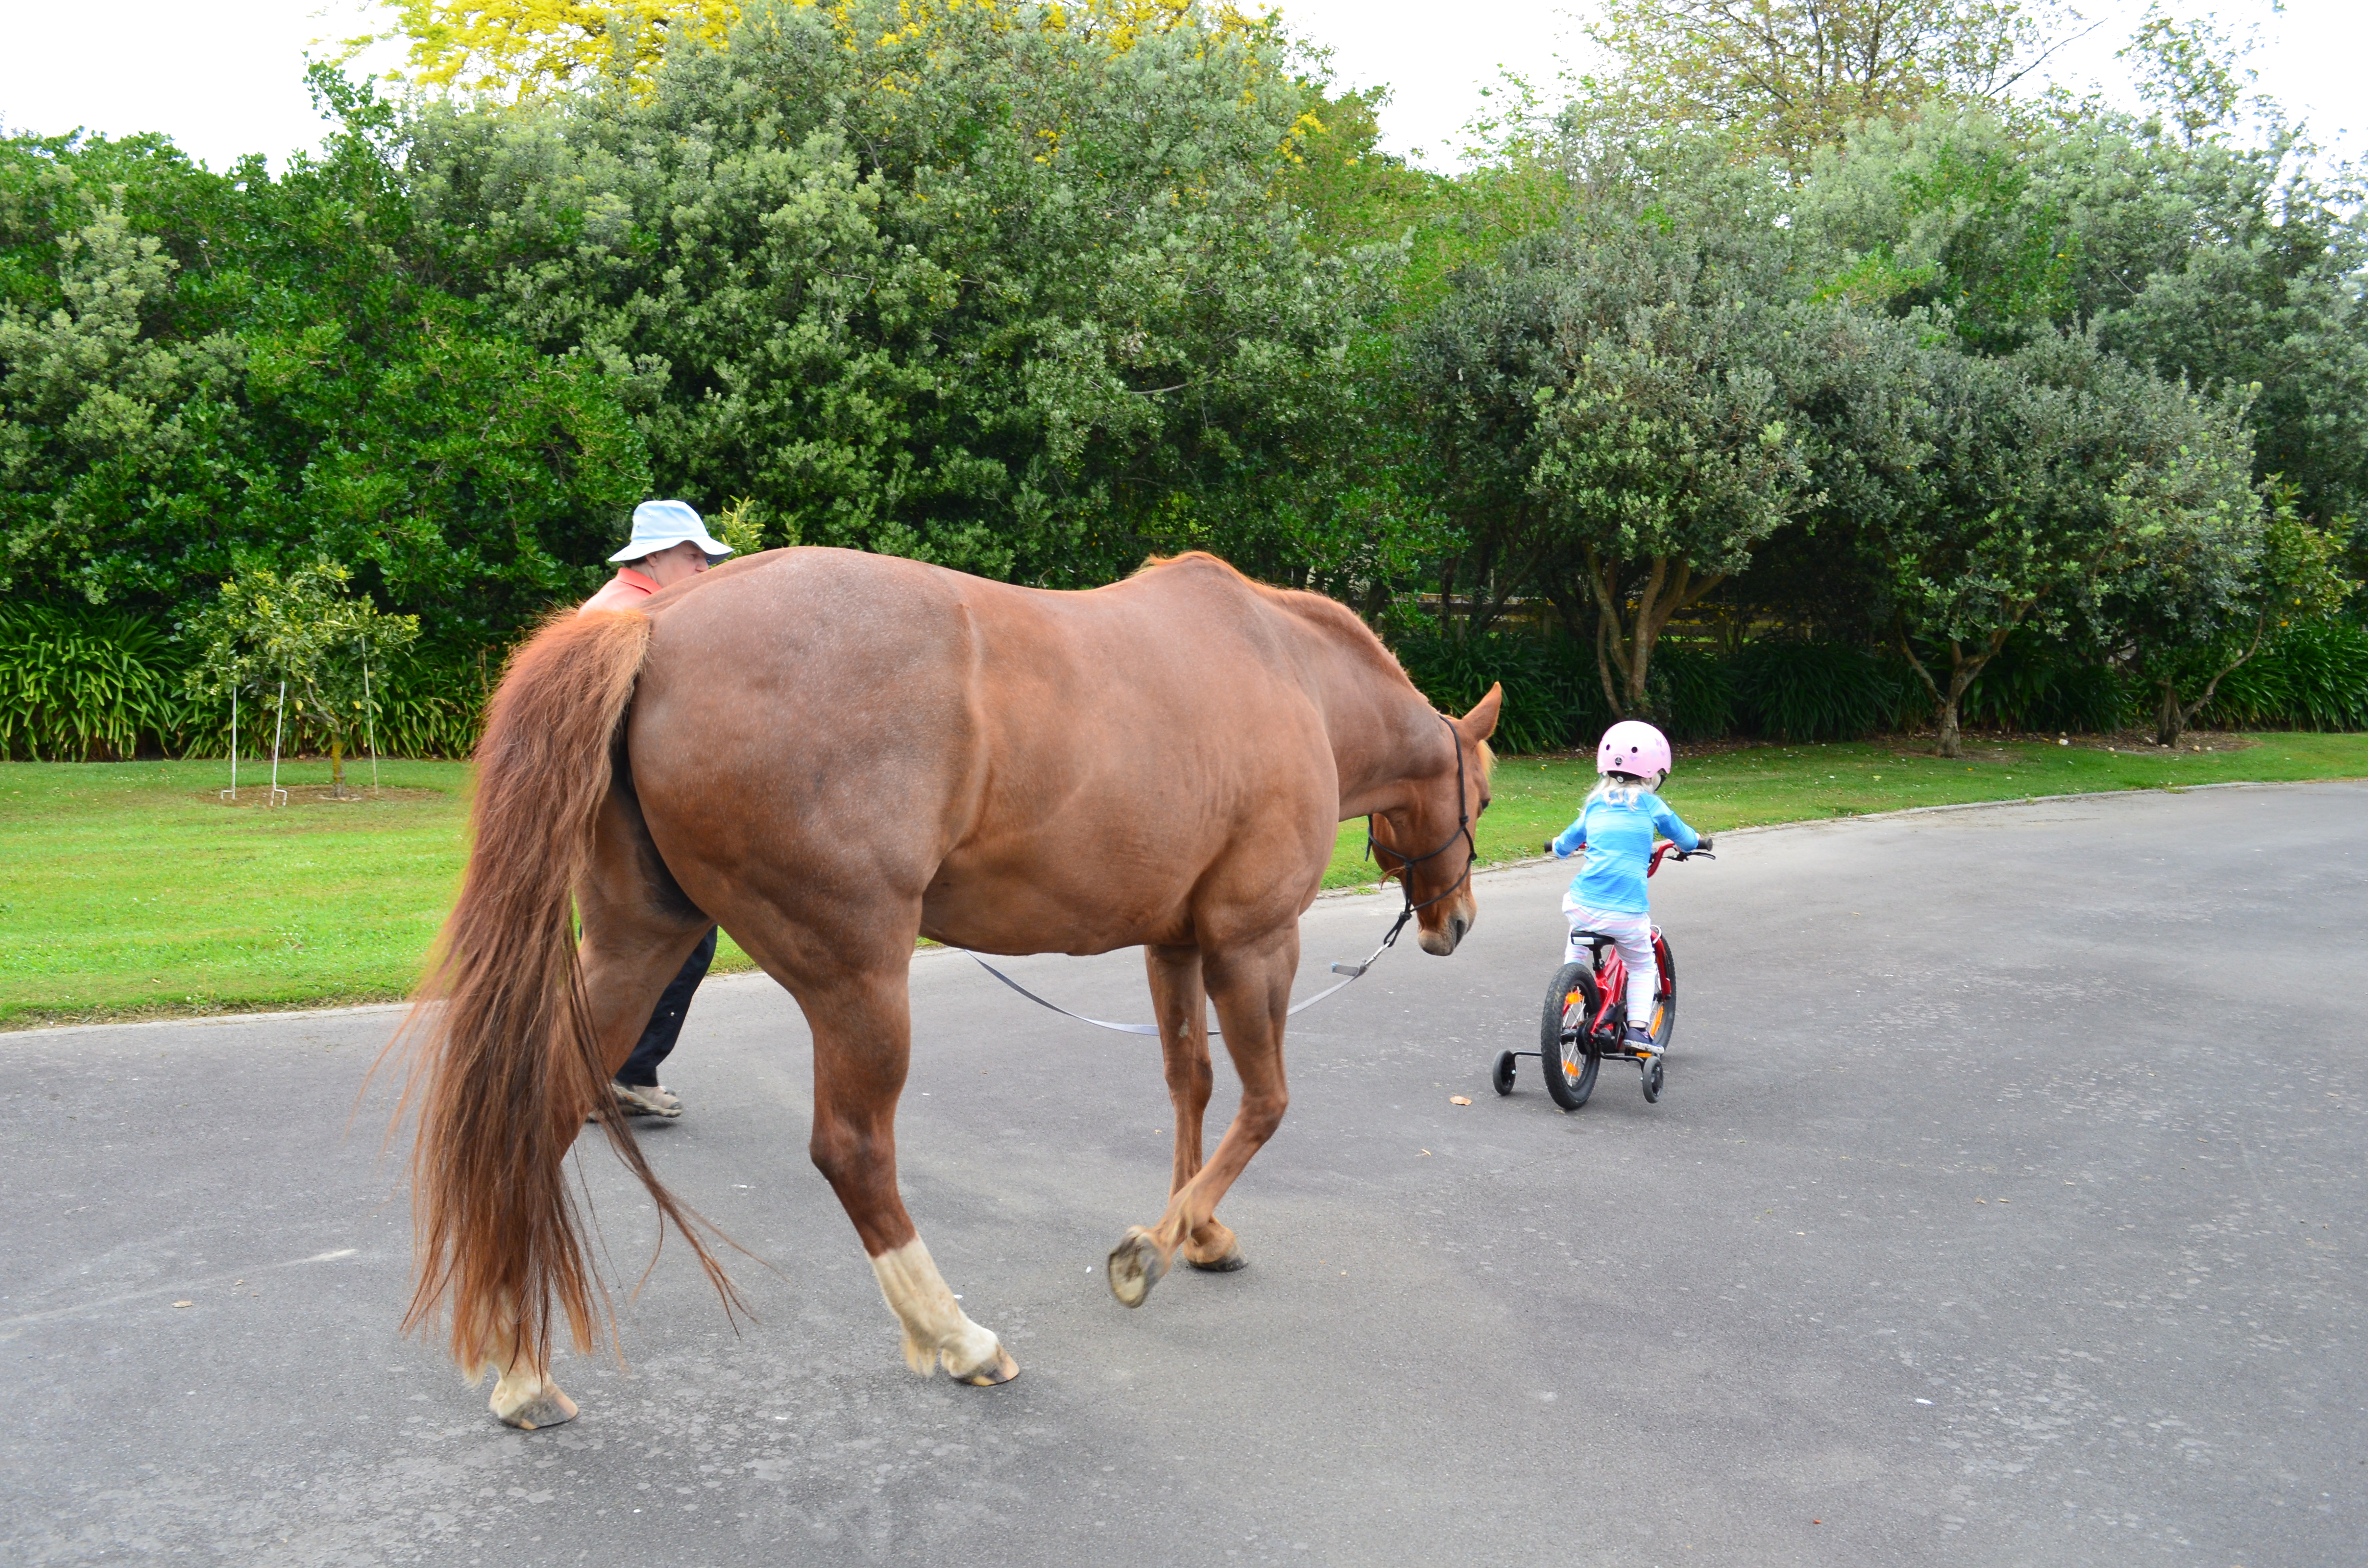
Walking out and about on the road in LP 5 is a great exercise to prepare for riding, long-reining or driving.

If the horse shows anxiety or unease when we are by his hindquarters, he is giving us important feedback.

It means we have to write a thin-sliced Individual Training Program to address what the horse is telling us about his comfort zones. For information about the ART of thin-slicing, see Number 13 in my Blog Contents Quick Links at the top of the page. Also, for much more detail, see my book, How to Create Good Horse Training Plans (link to my books is also at the top of the page). Information about comfort zones is at Number 107 in my Blog Contents Quick Links.

It’s definitely worthwhile to spend time and effort to have our horse confident about our presence alongside his hindquarters. We also need him to be sensitive to any signal we may give to ask him to halt, move forward, and eventually to yield his hindquarters or bring his hind end toward us.

Training Plan

Aim

To have the horse confident when we move from LP4 into LP5 while he is walking along.

Environment

  • Horse in an area where he is usually relaxed and confident.
  • Herd buddies not able to interfere but in view if possible.
  • Horse in a learning frame of mind.
  • Body extension to clarify signals as necessary to send energy toward the horse’s front end to inhibit turning to face the handler, but use it only to clarify your intent. Otherwise it is in neutral by your side.
  • Halter and lead. As lightweight a lead as possible. It’s important to keep a drape or ‘smile’ in the rope at all times, so we are not giving the horse ‘please turn toward me’ signals without realizing it.
  • During the teaching phase, destinations such as treats in a series of buckets, or mats which the horse knows as targets where he will get a click&treat, will give this exercise meaning for the horse and create willingness to move forward at your suggestion without turning toward you.
  • The ideal way to begin this exercise is to create a lane with a low barrier so the barrier doesn’t get in the way of the lead rope (horse in the lane, handler on the outside).
  • And later, a safe straight fence or a roomy round pen (walking around the outside or the inside).
  • As you move further back, it helps if the horse confidently and reliably responds to a voice ‘halt/whoa’ signal. Practice ‘walk on’ and ‘halt’ in LP3, using rope texting for the halt as necessary, until a voice signal for the halt/whoa reliably replaces the need for jiggling the rope. As the horse halts, quickly but smoothly glide to his head to deliver the treat. You want his head to stay straight. (See Number 16 in my Blog Contents Quick Links for smooth walk and and halt in LP3 (alongside neck/shoulder).

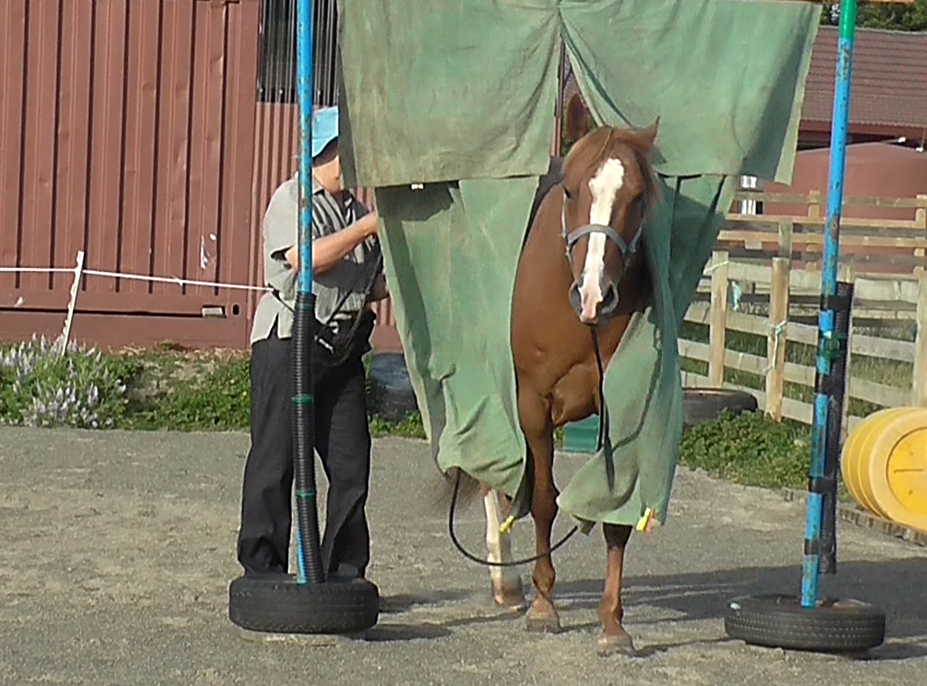
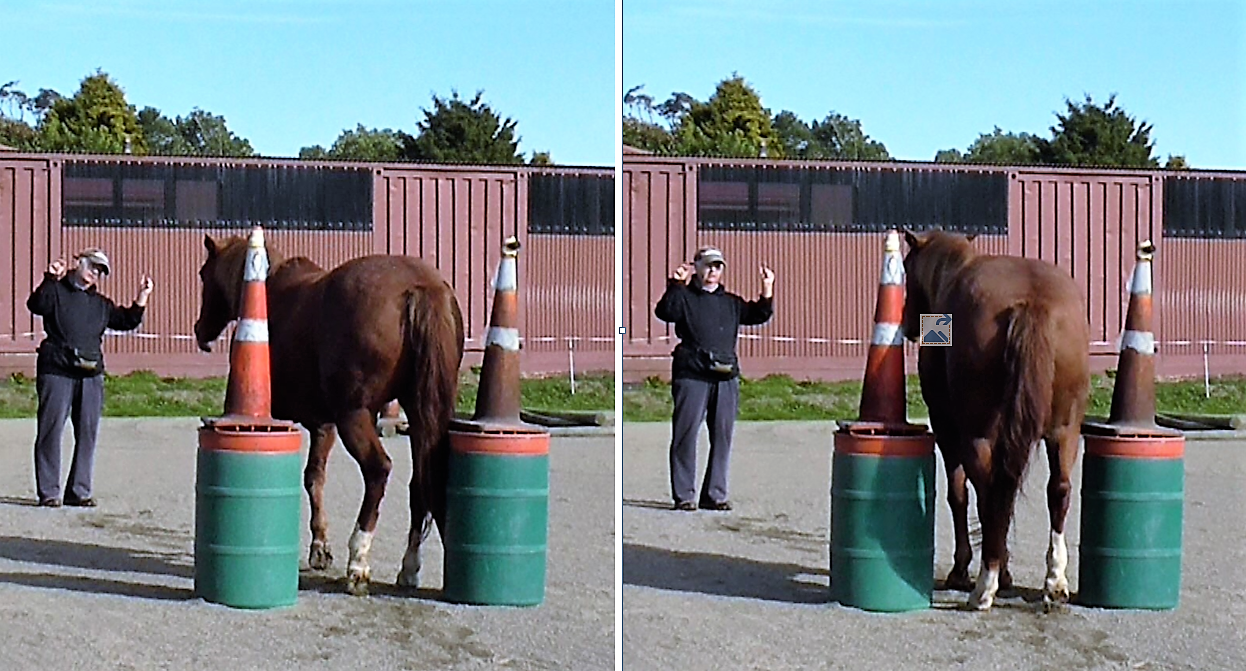
Once Boots understood how to respond to my walk-on and halt signals from LP5, it was easy to send her ahead of me through a curtain for Horse Agility.

Slices

  1. Begin by walking with the horse in LP3 (beside neck/shoulder). Use a lane to keep the horse straight (i.e. not turning to face the handler) for the initial teaching. The handler walks on the outside of the lane. use destination mats or nose targets to help the horse focus and move forward without wanting to turn toward you.
  2. After reaching each destination, work out a way to smoothly change direction so you pass through the lane on the horse’s other side next time through. As always, we want the horse equally confident whether we are on his left side or his right side.
  3. For all of these slices, if the horse wants to turn toward you, disturb the air with your body extension to inhibit that choice. The instant he turns his nose forward again, click, put the body extension into neutral and quickly move to his head to deliver the treat.
  4. The key is to reward the horse for continuing to face forward. Having pre-set destinations is the easiest way to inspire the horse to stay straight as we position ourselves further and further back.
  5. Gradually drift back until you are walking in LP4 (behind withers) toward a pre-set destination. As the horse approaches each destination with the intention of stopping there, use your voice, breathing and body language ‘halt’ (drop into your hips plus big breath out) signals; relax (click&treat) as soon as the horse stops. Quickly glide to his head to deliver the treat. We dont’ want him to turn toward you.
  6. It’s important to keep a drape or ‘smile’ in the rope at all times. Some horses are extremely tuned in to rope signals on the halter and will read any tension in the rope as a signal that you want them to turn toward you.
  7. When 5 above is smooth and reliable,, add in a HALT before reaching your destination point. That is, ask for a halt in the middle of the lane; (click&treat – move promptly to his head to deliver the treat), then walk on to the pre-set destination. At first you may need to wiggle the rope to support your body, breathing and voice ‘halt’ signal. We want the horse to halt on our voice signal at any time, and stay straight to earn his click&treat.
  8. Start in LP3 again, drift back into LP4, then drift a bit further back into LP5 and walk on to your destination, staying in LP5. Relax (click&treat) at the destination.
  9. After treat delivery, move into LP4 (behind the withers) and ask the horse to ‘walk on’ from LP4 adding a light tapping signal with your fingers just behind the withers.
  10.  As 9 above, but now ask for a halt (while you are in LP5) halfway through the lane; relax (click&treat – moving promptly to his head to deliver the treat). Then slip back into LP4 and tap behind the withers as a signal to ‘walk on’ to your set destination.
  11.  When 10 above is ho-hum moving through both directions in the lane, have both of you walk on the outside of the lane, with the lane barrier on the far side of the horse. Use the same destinations, so you have only changed one parameter. (Lots about Parameters in Number 8 of the Blog Contents Quick links.)
  12.  When 11 above is ho-hum, take away the lane and work along the fence.
  13.  Put your destinations further and further apart as the horse gains confidence. Ask for halts between your destinations. Every time you halt, be sure to move quickly to the horse’s head after the click in order to deliver the treat. It’s much easier to prevent turning than to try to stop the turning if he has formed a ‘turning’ habit. Then glide back into LP4 to give the ‘walk on’ signal then glide into position beside his hindquarters.
  14.  Work toward being able to use voice, body language and breath energy signals for the ‘walk on’ and the ‘halt’. Unless it is very windy or noisy, your horse will be able to hear you breathing in or out deeply. He can also see and feel your energy rising or dropping as you make yourself larger (for walk on) or smaller when you drop into your hips (for halt) in LP4 alongside his ribs. (See number 16 in my Blog Contents Quick Links for detail about this.)
  15.  At some point, you will be ready to ask for the ‘walk on’ from LP5, beside his butt. If you used a tap behind the withers to ask for ‘walk on’, the horse will readily learn to understand a tap on his butt as a ‘walk on’ signal. You may want to return to using the lane to teach the tap on the butt as a ‘walk on’ signal.
  16. It is also helpful, once LP 5 is solid, to teach a clear signal for when you do want him to turn and come toward you. We want the horse to understand that sometimes we ask him to turn and come, other times we simply want him to ‘walk on’ while we walk with him beside his butt. However, teach that lesson well away from the venue where you are teaching and refining this lesson.
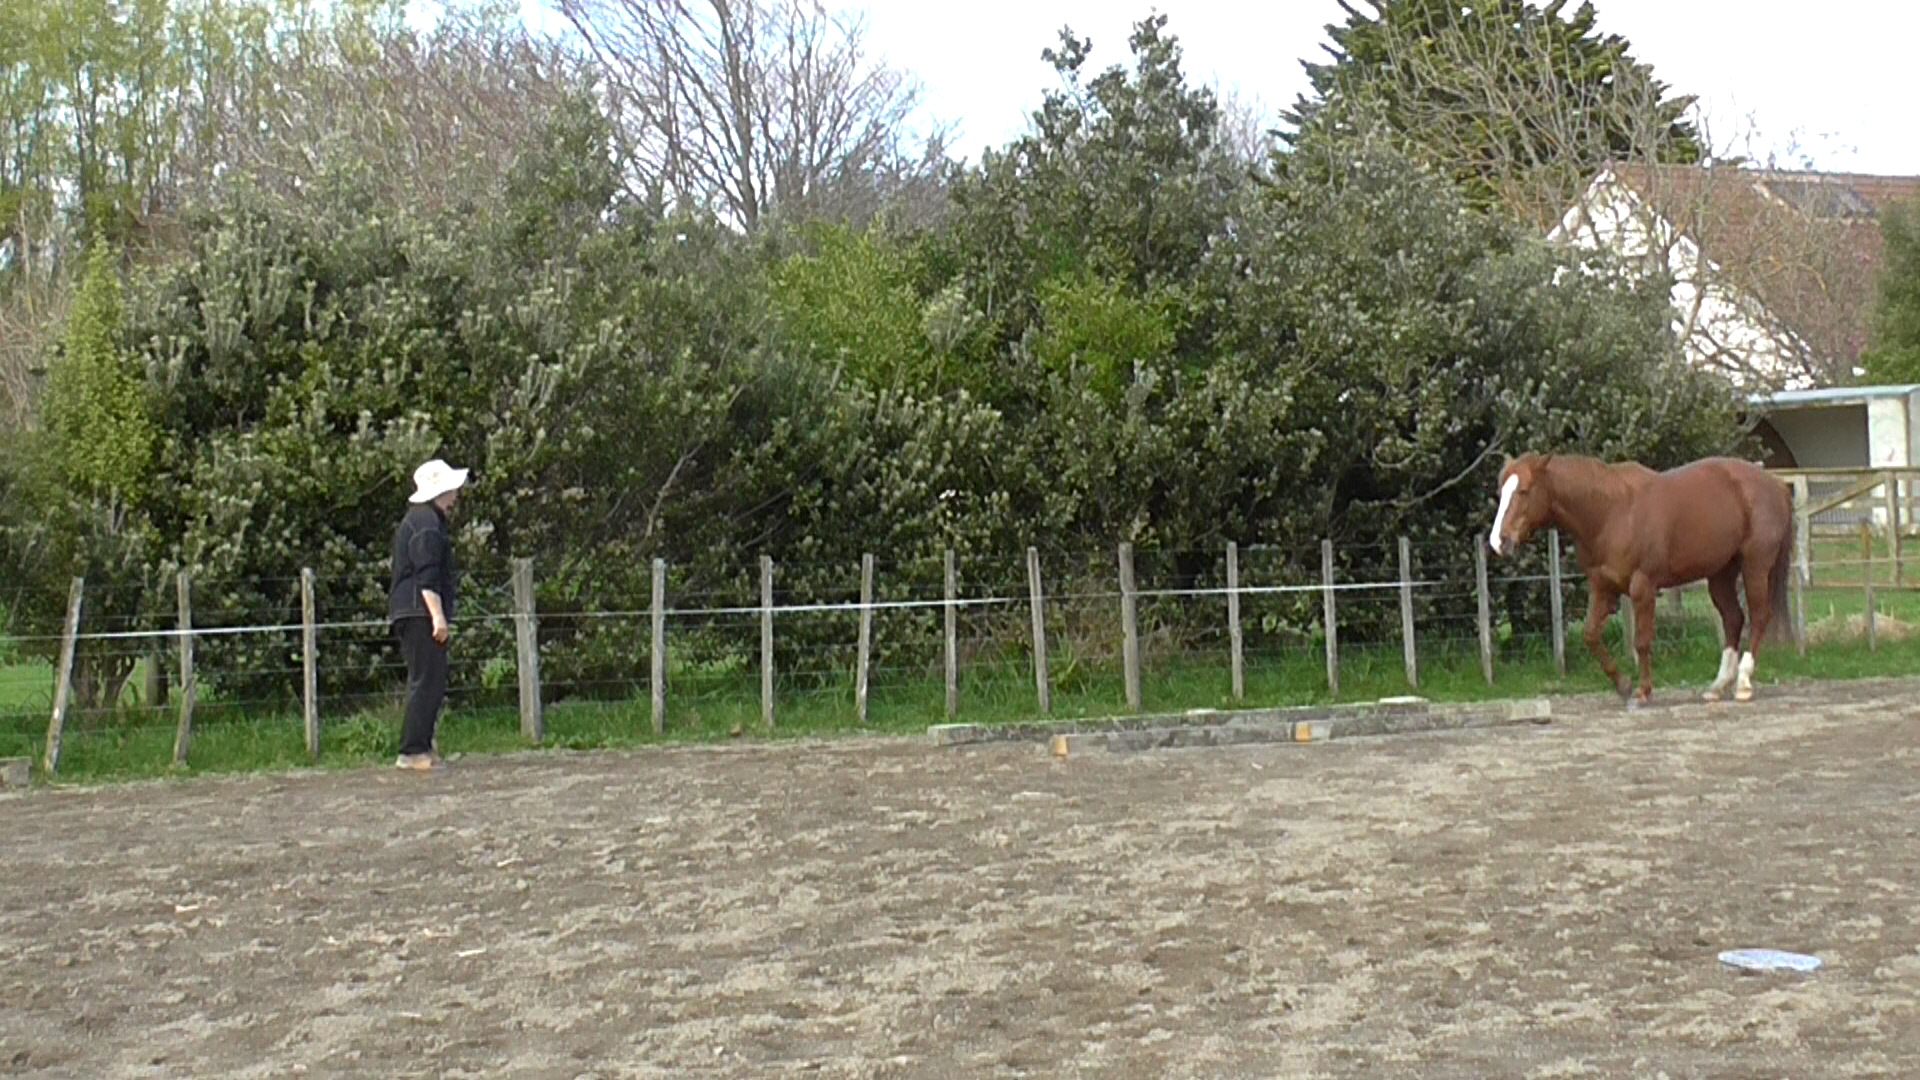
Generalization

Play with moving through Leading Positions 1 to 5, first with the horse between you and a safe fence When that is good, we can progress to open spaces. Gradually add more ‘halts’ between the pre-set destinations as your ‘whoa’ gets well established. I.e. Repeat in the open space just what you did in the lane and along the fence. Use destinations to start with. If you have progressed to the road or paddock, it can work to toss a frisbee out ahead as a destination: click&treat when he targets the frisbee. If you’ve taught him to ‘fetch’, he may pick it up for you!

  1. Start in LP1 (in front facing same way as horse).
  2. Move into LP2 (just in front of horse’s nose in a parallel track).
  3. Step back into LP3 (beside his neck/shoulder).
  4. Drift back into LP4 (behind his withers).
  5. Glide back into LP5 (beside his butt).

Then do it in reverse order, ie. drift forward through the positions. Relax (click&treat) for good effort. Keep a body extension with you to quietly inhibit any attempt to turn toward you, in case the horse ‘forgets’. Remember to occasionally relax (click&treat) when the horse is moving along staying straight.

We want to let him know, via click&treat, when he is in the action of being correct, rather than after a correction. At this point, I generally build in a voice signal for ‘straight’ when I want him to stay straight. It is handy later when I teach voice signals for right and left turns.

Be careful not to give halter touch signals with the rope without being aware of it. Use the lightest rope or web lunge line that you have available, or can make with cord from the hardware store.

If the horse is totally relaxed with us walking beside his hindquarters, teaching long-reining or ‘guiding from behind’ will probably proceed smoothly.

The video that follows is the same one as in the December blog for Leading Position 4, as the only difference is that we gradually move back so we are beside the hindquarters rather than beside the ribs.

Leading Position Seven

I’m going to focus on Leading Position 7 next because Leading Positions 1 and 2 require us to be in front of the horse, facing away from him.

Leading Position 7 (LP7) has the handler face to face with the horse, either directly in front or a bit to the right or left of the horse’s head.

Remember that horses have a blind spot right in front of them for about 3 feet or a meter, due to the way their eyes are positioned at the side of the head. You can check this out for yourself by cupping your hands in around and in front of your nose to imitate a horse’s long nose. You will notice that you can no longer see right in front of yourself.

In order to feel safe in front of the horse facing away, we want to know that the horse backs up easily whenever we ask him to do so.

Face to face interactions include:

  • Greeting (horseman’s handshake).
  • Teaching the horse to put his nose on a hand-held target often has us standing facing. him, maybe at a bit of an angle.
  • Recall, e.g., asking the horse to come to us from the paddock.
  • Recall across unusual surfaces, and in a variety of other situations.
  • Rope Relaxation: tossing the rope around the horse’s head left to right and right to left.
  • Asking for back-up.
  • Protecting our personal space bubble while sharing time and space.
  • Backing up over a rail and recall over a rail.
  • Teaching sideways with the mirroring technique which can grow into a ‘square dance’ when it is paired with back-up and recall.
  • Teaching poll relaxation and flexion.
  • Tummy crunches

Greeting

When horses approach each other front-on, they usually greet by sniffing noses. If they don’t know each other, a sparring match might follow. If there is a sparring match, typically, one horse will strike out with a front leg. The other horse then retaliates or backs away.

Eventually one will capitulate and move out of range of the other. They may play a chasing game. Or they might both tire of the game and go back to eating or snoozing.

Two horses carefully checking each other out.

So it appears that a face-on approach from the front can be recognized as a greeting or a challenge/confrontation. If the horses belong to the same ‘in-group’, the approach from the front is usually a friendly greeting showing recognition. It resembles the smile and nod we exchange with colleagues at work. 

Once we have established a positive relationship with our horse, we can maintain the bond by offering the standard ‘Greeting’ every time we approach. We extend the back of our hand – which stands in for another horse’s nose. We allow the horse to close the last inch of the gap to touch our hand, then we carry on with our business, as would another horse in the herd.   

OLYMPUS DIGITAL CAMERA

We must let the horse close the final gap between his nose and the back of our hand.

If the horse is not interested in closing the gap to touch our hand, we have powerful feedback. For some reason, at that moment, the horse is not in the mood to greet us. The horse has spoken, but are we listening? We have an opportunity to reflect on why this might be.

We want to develop this into a habit for each time we visit with the horse. To teach the horse, we use the Greet & Go procedure. This seems deceptively simple, but it is extremely powerful to both establish and maintain the connection between the horse and the person.

Generally, horses are not comfortable with having people’s hands all over their faces to ‘say hello’. Horses don’t go around patting each other on the head. Getting people to stop doing this is quite a challenge.

This desire that people have to rub on a horsse’s face is a factor in the biting urge that some horses exhibit around people.

This is sometimes called “The Horseman’s Handshake”. As soon as Boots touched the back of Ada’s hand, Ada walked away. She is using the “Greet and Go” procedure. A greeting like this is the polite way to approach any horse. Once the “Greet and Go” procedure is well established, we can “Greet”, then carry on with what we plan to do with the horse.

Targeting: Teaching the horse to put his nose on a hand-held target often has us standing facing him, maybe at a bit of an angle.

We need to remember that horses have a blind spot right in front of them for about 3 feet or a meter, due to the way their eyes are positioned at the side of the head.

Teaching Back-Up Signals

Straight body with raised fingers tapping the air, plus a voice signal are our cues for backing up while in front of the horse. Here we are working on a straight back-up between two rails.

The following four short video clips show the many ways we can play with Leading Position 7. Be aware that sometimes I use a body extension to help amplify my signal to make it clearer for the horse. Once the horseunderstands what I am asking, the body extension is no longer needed. Eventually we can do most things at liberty with gesture and voice cues.

The body extension is never a ‘punishment’. It merely makes it easier for the horse to understand what behaviour will both remove the signal presssure (negative reinforcement) and earn the click&treat (positive reinforcement). It’s easy to use both methods of reinforcement at the same time. For some tasks, it makes out intention much clearer for the horse. Horses thrive an clarity. I know some people in the clicker training world find this highly problematic, but it doesn’t need to be. It depends on how much finesse, and how many different moves, we want to build into our training program.

Recall

Once the horse knows that a ‘recall’ signal (my rounded open arm position, leaning forward slightly, and voice cue) will result in a treat, we can practice from further and further away. For paddock recall, I use a whistle and reward the coming with an ample treat.

Boots likes to show off her ‘bow’ because she knows it always results in a treat .

Be sure to check out my blog number 13 (see the ‘Blog Contents Quick Links’ at the top of the page) for using thin-slicing to plan a Training Program. Each task or move you want to teach your horse needs careful consideration of how you will make it easy for the horse to understand what you want – you need to design a Training Plan for each task.

I’d love to hear which move you have chosen and how it is going.

Signal Opportunities

The photo above illustrates a moment when it would not be a good idea to give the horse a signal/cue, becaue her attention is strongly focussed on something happening on the road.

Horses are generally co-operative beings. Most horses are happy to comply if the message is clear for them and if what we ask is within their emotional, mental and physical capability.

On the other hand, if we send mumbled or mixed messages or use non-natural signals that the horse has not learned, or which he physically can’t do (perhaos due to pain) the horse is in a real bind. A horse in this situation may react in one of the following ways.

  1. He may try to fill in with what he thinks the handler might mean, best as he can.
  2. He may give up trying to understand and opt out mentally.
  3. He may opt out physically by moving his feet to escape the situation, if he can. 
  4. If he can’t escape, he may ‘take over’ physically by pushing on, through or over the handler.
  5. He may ‘freeze’ into a catatonic state. Some horses simply collapse.

Choosing the right opportunity to ask our horse to do something is important. It’s pointless to ask our horse to do something unless there is a 99% chance that he can and will do it. Otherwise we are teaching him to ignore our requests because they are too hard to understand or beyond his physical ability at the moment.

Setting Up Opportunities

Do we set up lots of occasions for the horse to practice learning what we want him to learn?

By playing with picking up, then walking, carrying her feed bucket every day, Boots became adept at it.

In other words, do we give the horse ample opportunity to learn in a controlled environment where he can gradually build his confidence and expand his comfort zone as he comes to understand each new thing we are teaching?

Traditional training was geared to what the human wanted right now, and proceeded to demand it with force, coercion and body extensions designed to inflict increasing discomfort. 

Since what people want is usually not part of a horse’s natural repertoire of behavior, the horse is often catapulted into a state of bewilderment.

How much more comfortable and safer all around, if we thin-slice a large task into its smallest parts, teach each part and then chain the parts together to achieve the whole task?

When we do this, we allow the horse opportunity and time to master each small part before moving on. Please see Blog Numbers 13 and 106 on the Quick Contents Page for lots of detail about thin-slicing.

We want to allow the horse to keep his integrity and we want to keep his goodwill. We allow him to adjust to the strange life he must live with us. We earn his trust so that he is willing to put the placement of his feet into our hands. For an animal, whose sole defense is the ability to flee from perceived danger, this is a big ask.

To build the horse’s knowledge and confidence, we need to first get (and reward) the behavior that we want, then we can add a specific signal to it. Often a signal arises naturally out of the way we initiated the behavior.

The desired behavior here is for the horse to target a specific object. We make it easy at first and set it up with the least distractions, so we can quickly click&treat the behaviour we want. Once it is good 99% of the time with a simple set-up, we can add verbal and gesture signals to ask for the behavior. Then we can start to ask the horse to touch all kinds of things with his nose, so building his confidence and courage.

Because Boots had a long history of touching unusual objects with her nose, she willinging targetted the cart.

Once the horse understands the key signal, we can layer in other signal types. We can also replace a signal by adding a new one and fading out the earlier one.

Most horses don’t seem to have any trouble understanding several signals for the same thing. For example, my horse will ‘walk on’ with a verbal signal, a ‘breath-in’ signal, an arm gesture signal and an ‘outside leg steps forward’ signal. If we are doing work on a long line or reverse round pen, she understands the verbal, breathing and arm gesture signals from different angles and distances.

Additionally, horses can understand one signal in a variety of different situations. My horse understands the verbal ‘whoa’ signal when walking beside me, when she is behind me, when I am walking behind her as in long-reining, and from the riding position.

It’s also essential to be aware of the ways that our horse signals to us. Often, we are so immersed in working out what we want the horse to do, we miss the signals the horse is sending us about what he need us to do so he can remain confident.

By reading the horse, we can decide whether we should:

  • Carry on with what we are doing.
  • Go back a step or more to regain confidence.
  • Have a break and do something that’s already easy.
  • Stop for the day or for this session.

The Concept of ‘Feel’

In the photo above, Bridget can FEEL that Boots is relaxed enough for her to carry on with foot care.

Feel is an aspect of horsemanship that sometimes seems elusive, but it doesn’t have to be. It is closely linked with the idea of empathy. Empathy itself is the ability to ‘feel’ what another being is probably feeling.

When dealing with horses, empathy and feel are involved with everything we do. The more we understand about the nature of horses as a prey species that depends on rapid moving away from danger and group life for security, the more empathetic we can be when our horse shows us that he is uncomfortable about something we are asking him to do.

The more we understand that the horse’s digestive system is geared toward a steady flow of low nutrient forage, the better job we can do at providing such forage. We know that to keep the horse comfortable, we must feed the bacteria in the gut in a way that keeps them happy. 

OLYMPUS DIGITAL CAMERA

Horse have evolved to reqire a constant supply of low-energy forage to keep their microbiome in good working condition.

Horses have small stomachs and a large caecum where bacteria break down the food so it can be absorbed by the horse. These bacteria need a constant flow of food and do not like sudden changes of diet.

The more we understand how the horse’s circulation system depends on slow, regular walking movement over 24 hours, the less inclined we will be to confine horses in boxes. After all, they are not chocolates.

The horse’s feet compress and expand with each step the horse takes. Foot movements work like four extra pumps to help send blood the very long way up the legs back to the heart. 

Horses step along as they graze. The only time they are still is for the few hours that they sleep, which are spread over 24 hours. Consistent movement is an integral part of horse circulation health.

Horses are naturally active on a 24-hour rhythm, not a day/night rhythm like we are. By ‘putting them in at night’ and by ‘feeding them meals’ in one place, we are seriously mucking about with their movement, their blood circulation and their natural biorhythms.

Many horse ‘problems’ stem from unnatural housing and unnatural feeding regimes as well as the damage caused by nailing inflexible steel shoes to a dynamic live foot mechanism.

As we develop empathy and ‘feel’ about what a horse is experiencing in the strange human-based world in which he finds himself, it becomes easier to know what we should do to ensure the horse is as comfortable as possible.

A horse high on adrenalin will find comfort in being allowed to trot or run the adrenalin out of his system. When he becomes high-headed and agitated, a handler with feel gives him the opportunity to move until he can switch from reactive mode to responsive mode.

A strong-spirited, low-energy horse can be extremely frustrating. A handler with feel for this sort of horse will use click&treat motivation as much as possible. Then it is easier to appreciate the reliable nature of this type of horse once he is on-side with the handler rather than trying to outwit him or her.

As soon as we can see our horse, he can see us. As soon as he can see us, he is gauging our energy level. He is ‘feeling’ us. A person with ‘feel’ will be doing the same with the horse – gauging his mood, the way he is moving or grazing, checking for anything out of the ordinary.

As soon as a horse sees us, he is feeling our mood, our energy level and our intent.

When a handler develops ‘feel’ of this sort, s/he is not frustrated by undesirable horse behaviors. S/he seeks the cause(s) and adjusts the horse’s lifestyle plus his Individual Education Program (IEP) to accommodate the horse. This is the essence of a handler’s emotional neutrality. 

Horses don’t do things just to annoy us. At any moment in time the horse is doing what he believes is the best thing do.

With careful education, we can enlarge the horse’s comfort zone and areas of expertise. We can expand his repertoire of things he can do with confidence.

It takes considerable time and effort, but done at the horse’s pace, he will gain skills to help him through his whole life.

27-1: Some concepts of ‘feel’

‘Feel’ comes in many guises.  Here are some of them.

  1. Feeling the difference between reaction and response
  2. Realizing that every horse will feel different, and that to the horse, each handler feels different
  3. Knowing the precise moment to release signal pressure (click&treat)
  4. Acknowledging the difference between teaching and forcing
  5. Knowing when we are pushing too much, resulting in a loss of willingness
  6. Knowing when we are pausing too much, resulting in a loss of interest
  7. Recognizing physical well-being, so that lack of wellness stands out
  8. Finding the ‘balance’ between the two extremes of ‘unbalanced’
  9. Able to cause a subtle shift in the horse so he regains balance
  10. Staying grounded when the horse loses his physical, mental and/or emotional balance
  11. Able to pause for lesson absorption or for a shift in balance
  12. Able to ignore unwanted behavior and quietly ‘re-set’ a task
  13. Understanding a specific horse’s underlying character type
  14. Recognizing when the horse is ready to move on to the next slice of the new learning
  15. Recognizing when the horse-human connection is present and when it is absent
  16. Not taking the horse’s trust for granted
  17. Understanding the lives of horses in the wild; their natural 24 hour and seasonal rhythms
  18. Understanding physical, mental and emotional thresholds of a specific horse
  19. Understanding how habituation works
  20. Understanding how desensitization works
  21. Understanding how sensitization works
  22. Physical feel through the rope
  23. Physical feel through the reins
  24. Physical and emotional feel through the whole body when riding
  25. Feel for two-way communication playing at liberty. If the horse decides to leave, knowing how to motivate him to join up again or deciding to call it a day
  26. Knowing when to stop a session, or a part within the session
  27. Understanding that the way the handler feels is instantly picked up by the horse, good feelings and bad feelings equally.

Developing Our Spatial Awareness

In the photo above, Boots demonstrates how aware of, and responsive to, a horse can become if our body movements are taught and used with total consistency.

During everyday management of our horses, basic care or getting them ready for a walk or ride, we tend to move in and out of their personal space without thinking about it. When we do ground work, we move into and out of various positions as part of the signals we are giving.

Sometimes we forget that horses notice everything. If we can learn to become more conscious of our positions, we can use ‘position’ as part of our communication package.

If we are aware of, and consistent with, our relative body position, the position itself can become the signal if the horse is closely tuned-in to what we are doing. The horse will become more and more mentally connected to our intent. If we are totally consistent, it will seem as if the horse is reading our mind.

We can approach everything we do with one of two mind-sets. We can see horse behaviors we don’t want as dark problems we have to ‘fix’ or overcome. Or we can recognize that a horse always does what he feels is best at that moment. We can enjoy the challenge of creating a relationship with such a sensitive being by gradually building a mutual communication system.

By increasing our spatial awareness, our signals can become much lighter. The horse begins to find staying ‘in tune’ with us much easier because our body language has less ‘static’ or ‘background noise’ in it.

The more we can eliminate meaningless movement (and chatter), the clearer the horse will find our communication.

Expanding our Concept of ‘Leading’

We can expanded our concept of ‘leading’. When we think of someone leading a horse, we usually visualize a person walking beside a horse or in front with the horse closely behind.

We usually see a lead rope as part of the picture. But when we begin to think deeply about ‘leading’ it is easy to see that there is much more involved.

We can enlarge our concept of “leading” to encompass all the ways that we influence where the horse puts his nose or his feet. That is, when we want to make our idea his idea.

We can be on the ground, riding, using headgear, a neck-rope, or have the horse at liberty. We can be using any combination of body language, shifts in our weight, changes in orientation, rope/reins, and voice. With clicker training, we use a marker signal plus a treat to ‘capture’ or reward specific behaviors that we like.

In other words, everything we do when we want to influence the horse comes under the umbrella of ‘leading’.

We might:

  • Call him out of the paddock.
  • Ask him to wait while we go through a gate first.
  • Ask him to offer his head for haltering.
  • Ask him to back up out of our personal space.
  • Pick up a foot to clean it or trim it or dress a wound.
  • Ask him to step on, over and across unusual surfaces.
  • Ask him to step into and out of a tight spot like a trailer, lane, or water.
  • Ask him to move away from us as in circle work with a reverse round pen or playing at liberty.
  • Ride, or drive with long reins.
  • Ask him to stay tied up or parked.
  • Guide him through an agility obstacle.

In simplest terms, any time we want the horse to do something specific with his nose or his feet, we are ‘leading’ him. ‘Guiding’ may be a better word. We are orchestrating his movement, or lack of movement if we need him to stand still.

There are eight key leading positions which can be static or dynamic. They may flow into each other as we make a request, the horse complies, and we move or stand quietly together.

Horses value clarity of intent. They generally are happy to comply as long as they can understand what we want and we make our request politely and reward a positive effort.

Doing things with our horse is comparable to being on a sailboat. At every moment the sailor is conscious of the wind, the waves, and the relationship of his sails to how the boat is responding. He makes constant adjustments to keep his boat sailing smoothly.

Every moment we are with our horse, we need a similar consciousness of the immediate environment, the distant environment, how we are asking the horse to do what we want and how the horse is responding to our request.

We have to quickly compute the horse’s large responses, plus the nuances of his body language, so we can gauge his emotional, intellectual and physical comfort at the moment. As we get better at seeing all these things, it becomes easier to know the best way forward to yield the result we want.

Pictorial Summary of Eight Leading Positions

Leading Position 1: The horse is in relaxed mode on a morning walk. I carefully keep a drape (smile) in the lead. This is how horses in a herd follow each other during quiet movement from A to B.

Leading Postion 2: Horse keeps his nose and eye just behind the handler’s shoulder.

Leading Position 3: Anywhere between the ears and the shoulder. A versatile position that we can use as our basic leading position for all kinds of things.

Leading Position 4: Behind the withers, alongside the ribs. This position has the horse moving out in front of us like he will be if we ride . Horses used to following behind can find this difficult at first, so we teach it en route to a stationary target where he knows he will earn and click&treat.

Leading Position 5: Beside the horse’s hindquarters. If the horse knows a touch signal on his butt as a ‘walk on’ signal, we have a way of sending him in front of us into a narrow space like a trailer or a gate. Again, teaching this first with a well-known stationary target makes it easy for the horse to understand our intent.

Leading Position 6: Behind the horse: Long-reining is a superb way to teach the horse all about turning and backing signals applied to his head gear via reins from behind, before adding the complication of a rider.

Leading Position 7: Face to face: I asked Boots to wait so we could do a recall. She is just beginning her recall. We also use face to face when we want the horse to back up away from us.

Leading Position 8: Facing the side of the horse. I’m in relaxed mode while waving the flag over her for a Horse Agility task. She is more interested in what is going on next door. Obviously grooming and foot care, tacking up and mounting also require this position.

Conclusion

An awareness of leading positons allows us to include ‘position’ as one of the key elements of any signal we use to communicate with the horse. By dissecting each leading position we can see the training possibilities it presents.

We often drift from one position into another without realizing that the shift can have a lot of meaning for the horse.

Confidence with Unusual Surfaces

The key prerequisite for all the tasks shown in the clips below about UNUSUAL SURFACES is having first mastered smooth ‘walk on’ and ‘halt’ transitions. If we have to first work on this prerequisite, we can do it using target destinations and training ourselves to be really clear when we are requesting ‘walk on’ and when we are requesting ‘halt’. Blog Number 16 in my Blog Contents Quick Links demonstrates. Below is a quick revision.

Walk-on Body Language

These four things are done all together – a ‘multi-signal’.

  1. Breathe in deeply (horses hear this) plus raise your torso and body anergy.
  2. Forward gesture with your outside hand. If you are using a hand-held target to first teach this, as in the video below, the action of moving the target forward into play will soon morph into just an arm signal.
  3. Step off with your ouside foot. It’s easier for the horse to see your outside foot moving forward.
  4. Use your chosen voice signal for ‘walk-on’.

Halt Body Language

These four things are done together – again, a multi-signal.

  1. Drain the energy from your body while you –
  2. Drop your weight down into your butt (as we want the horse to do when he halts)
  3. Breathe out loudly (horses hear this)
  4. Use your ‘halt’ or ‘whoa’ voice signal

The following clip was made to support relaxed foot care, so there is a bit at the very end about backing up to shift the horse’s weight

When ‘walk-on’ and ‘halt’ are solidly in place, we can carry on with unusual surfaces.

Thin-Slicing the 1m Board

Thin-Slicing Walking on Plastic Bottles

More About Unusual Surfaces and Backing Up

Other related blogs: You can find the links easily on my Blog Contents Quick Links page.

  • No. 9: Mats: Parking or Stationing and Much More
  • No. 10: ‘Zero Intent’ and ‘Intent’
  • No. 17: Destination Training
  • No. 26: Getting a Smooth Halt in Many Situations
  • No. 33: Willing Response to a Halt Voice Signal
  • No. 51: Reverse Pens
  • No. 68: 20 Steps Exercise
  • No. 101: Precision Leading

Also, all the routines in my book, Companion Horse Training Using Positive Reinforcement, refine the skills of walking with a handler. The book works through a series of activities that require minimal equipment (set of rags and a fence). They are designed to make the horse ‘handy’ and happy following our clear body language including turns and backing up.

Moving Away From Touch or Gesture

In the photo above, Boots is lifting her foot in response to Bridget’s arm signal gesture and the intent of her body language. It makes hoof care so much easier.

Shaping with Touch Guidance

Research on dopamine release shows that knowing how to avoid or decrease a stimulus we don’t like gives a ‘reward hit’ to the brain, similar to how achieving something desirable feels rewarding. For example; stopping in time for a red light gives an instant feeling of relief and accomplishment.

This is why the training system made popular by Pat and Linda Parelli gave such ‘good’ results in teaching horses how to respond to human requests. People who have been considered ‘good’ horsemen over the years have used the same principle for millenia.

The principle is basically this: Use a consistent touch/gesture signal and remove the touch/gesture the instant the horse complies even just a little bit. Build from there with repeats until the horse responds readily because it understands the cue and the system. This is negative reinforcement – called negative because the touch or gesture energy is removed when the horse responds. The term ‘negative’ is here used in the mathematical sense. It is not related to it’s other common meaning of something ‘bad’.

BUT: It takes considerable skill in reading horses – to know when the horse remains in the learning zone, i.e. under threshold (see Number 107 in the Blog Quick Links for more about this) or has been pushed beyond threshold. Is the horse responding or reacting? If the handler is not sensitive and/or lacks experience helped by a good teacher, it can end up with a confused and unhappy horse. Also, the touch or gesture signal needs to be totally consistent so the horse can depend on it being the same each time.

Pressure is not a dirty word. Horses understand pressure. They use it with each other all the time. It is the nature of the pressure, plus when it is removed, that makes or breaks good training to create a horse confident with people.

Using touch/gesture pressure followed by a click&treat immediately the horse responds, is an essential step in teaching a horse to be resilient in a variety of human environments. We can’t know the future, If our personal situation changes, the horse may have to go elsewhere. If confronted by flood, fire, earthquake, the horse may need to be moved quickly.

Such teaching with negative reinforcement, backed instantly by positive reinforcment, is often called ‘combined reinforcement’. Some people refer to it as negative reinforcement ‘with a cherry on top’, as a way of discounting it. Yet, if we use a neck rope or headgear or our legs for riding, we usually want the horse to move away from our touch. It’s convenient to be able to touch the horse’s chest lightly to get a back up. Or to touch his leg for a lift if we want to tend the hoofs.

Gesture

Horses interacting with each other use gesture as a first communication. If the annoying horse does not move away, the gesture escalates gradually via touch with nose, teeth or hooves. The first suggestion might be a just a ‘look’ or an ear/tail flick. Play between youngsters is full of touch and gesture.

Because horse are super sensitive to movement, they easily pick up the meaning of a specific gesture if we use it with total consistency.

Once a horse understands our meaning:

  • Reaching down to his foot will have him lift a leg.
  • Fingers raised in front of him (far enough back to be out of his blind spot) and tapping the air at his eye level will have him back up.
  • A light touch or gesture to his shoulder will have him move it into a turn on the haunches.
  • A light touch or gesture (or even a focussed look) to the side of his rump will have him move it away into a turn on the forehand.
  • A light touch at (or gesture toward) his ribs will have him sidestep.
  • A light touch to his chest or nose will have him back up.

I taught moving the front end away into a turn on the haunches with touch to the neck and shoulder, but eventually only my focus and a gesture were enough of a cue.

Likewise, I used touch to teach a signal for moving the hind end away from me, but after a while my body orientation. intent and gesture, even from quite a distance, was enough of a cue, even when her front feet were on a pedestal.

A simple arm/hand gesture is enought to tell Boots that she will earn a click&treat for backing off the pedestal.

We spent several weeks perfecting backing between two tall objects at greater and greater distances. In the first photo I am looking toward her right butt to get it to straighten out so she doesn’t knock the barrel. No doubt this one earned a triple treat or a jackpot.

If you have an interest in seeing how we reached this stage in the photo above, I filmed most of the days we worked on this. We did a few repeats over many, many days. Here is the link: https://www.youtube.com/playlist?list=PLHJTeGrtF98Pjy3zvmPhgBxBP6V3lwhkh

First we learned sidestepping along a rail with touch to shoulder and butt in rhythm. Once she had the idea, a light touch to the ribs became the cue. Eventually it only needed a gesture and my focus toward her ribs.

Eventually we didn’t need a rail to do side-stepping, which is a good suppling exercise.

Here I’m using a gesture as well as the idea of ‘follow the feel of the rope’ to teach a twirl. (See Blog Number 116 in the Quick Links.) Confidence with ropes touching the legs is another essential skill we should teach in a gradual, nuanced way. (Not starting with the above photo!). Before long, a voice and gesture signal were enough information for her and she would happily insert a couple of twirls into a recall. It became one of her favorite things to show off. Ample click&treat during the teaching process made it a favorite.

Here we are both doing a twirl or spin during our dancing routine. We are both turning to our right and seem to be in step. As she comes around I will click&treat. What began as a ‘follow the feel of the rope’ exercise morphed into just a combined hand and voice signal at liberty. It’s easiest for the horse if they are already in motion in a recall.

All these skills take time to develop, but are so much fun.

Reading Ears

It’s hard for us to understand how much better horses hear than we do. Our sounds or words easily become signals if we use them consistently. Sounds can also become environmental signals the horse adopts according to the routines of his captivity.

  • house door opening if the horse lives near the handler’s house
  • person’s car arriving at the paddock (with special feed, treats or anticipated adventures)
  • rattle of food buckets or pellets in a tin
  • whistle to recall for a treat or a feed

When we use Clicker Training, we refine this response to sound when we use a click or other unique sound to mark the precise response we want.

Horse ears have ten muscles each, which means they can move their ears almost 180 degrees. The shape of the ear allows horses to capture more sound, and from further away, than our ears. On top of that, horses can pick up sounds at higher and lower frequencies than we can.

The shape and mobility of the two ears allows accurate gauging of the direction of a sound. Sound and vision are obviously linked, but sound serves better when vision is restricted. Due to the horse’s ecosystem role as a prey animal, he is wired to notice any sound, especially sneaky, sudden, or unusual sounds.

Horses have strong emotional responses to sounds. Anxious type horses will find the sounds and tense atmosphere of shows and events over-stimulating and problematic. It helps to gradually habituate them to this sort of environment rather than depend on flooding (overstimulation until the horse ‘shuts down’) to get a horse more able to cope with noisy, unfamiliar surroundings.

Ears, it seems, can give us a large range of signals, ranging from curiosity, acceptance, concentration, irritation, fear, dominance and submission. All we have to do is work out which is which – and when – for each horse in our life!

It seems that horses also pick up vibrations from the ground through their feet or through their whiskers and teeth while grazing. No doubt this relates to the ‘early warning’ horses and other animals can give us about earthquakes and other catastrophes. It might also be why they are waiting at the gate before they can see our car. But that could also be a function of their hearing.

Ear postions might be categorized as:

Alert — forward, scanning in observant or anxious mode.

Alert ears. Probably she is watching for someone to appear with treats to entertain her.

Curious/Interested — forward with head movement up or down to focus the eyes.

Because the lens in the horse’s eye does not adjust like ours, horses have to lower and raise their head to get a good focus on an object – like a person wearing bifocal or trifocal glasses.

Attentive — total focus on what she is doing.

She is extremely focussed on the task. It has her full attention.

Back/Sideways – Tension or Anxious — only the context of the situation and the rest of the horse’s body language can tell us if the ears are back due to anxiety (very stiff), or back/to the side because the horse is strongly focusing on a task, causing natural tension (not as stiff). See also, ‘Working Ears’ below.

Ears are sideways and lower lip is a little bit tight, so Boots is putting a lot of concentration into this task which she is just learning. There is some tension, but the rest of her body language does not, which suggests that she is in focus mode, rather than anxious.

Back/Sideways – Floppy — a chilled out, resting, or casually moseying along horse often has the ears half back in a relaxed state. 

Smoky is dozing beside a favorite person. His eyes are partly closed and his lower lip is floppy. His ears would be soft for the ear-bending test described below.

Pinned — truly pinned ears are a very strong signal that all is not well, and other action will follow if things don’t change immediately. Some horses lay their ears almost flat when they are strongly focusing on a complex task.  This can be more like a ‘frown’ of concentration and we must be careful not to presume the ears are pinned and take evasive/inhibitory action that will confuse the horse who was just busy thinking his way through a problem. 

Truly pinned ears. Boots is giving Smoky a clear message that his presence near the treats is not wanted. Her next move, if there wasn’t a fence between them, would be to lunge at him.

We should always give the horse the benefit of any doubt and read the overall situation and body language rather than just the ears. Truly pinned ears are unmistakable, once seen. They are usually accompanied by a very angry face overall and are often followed by snaky-neck movement toward the cause of annoyance, lunging at the intruder, or wheeling around ready to a kick.

Working Ears:  Back or Sideways, – Focused/Thinking — horses often put their ears to the back or side when they are in ‘thinking mode’.

We often see these sorts of ear positions in horses doing their ‘job’ of the moment; e.g., cutting horses, calf-roping horses, dressage horses, horses doing an agility course or a gymnastic routine.

Because they are carrying out a learned pattern in a known environment, their mind is focused on the task at hand and the precise signals coming from their handler.  Their ears often resemble the ears of a dog working sheep. Back and full of concentration on the job.

Such ears may resemble that of an irritated or disgruntled horse, but if the horse is doing his ‘job’ and his overall tension and body expression suggest that he is focused, we are probably seeing his personal ‘working’ expression. 

Often, as soon as the horse has finished a part of his ‘job’, the ears pop forward before the next obstacle or cow or whatever.

It’s helpful to watch video clips focusing just on the horse’s ears. Usually they are constantly in motion and give us an insight into what may be going on in the horse’s mind. Obviously, we can never be sure, but we can get an idea. 

The Ear Test:

The Ear Test: how easily we can bend the tip of the ear is a good indicator of the                        horse’s overall tension or relaxation.

If we can easily bend the tip of the ear, the horse is generally relaxed. If the ear is too stiff to bend easily, it tells us that the horse has tension in his whole body and lacks confidence or is anxious at the moment.

Each horse’s ear expressions will follow the same general pattern, but at the same time be unique, so we should be careful about generalizing too much between horses.

Ear Expression Summary Chart

More about ears

A. Ear differences between mares and geldings/stallions.

It’s interesting to study the ear differences between mares and geldings or stallions.

I watched YouTube clips of the Pignon brothers Frederic and Jean-Francois. Frederic and his wife, Magali Delgado, were the original stars of Cavalia (2003-2009).

Below is the link if you would like to watch Frederic playing with three of his young stallions. It is interesting to note the way they respond to Frederic’s energy levels. He uses a body extension to help communicate with the horses.

https://youtu.be/w1YO3j-Zh3g (accessed 15.03.24)

In another clip, Jean-Francois Pignon played with a troupe of mares.  

https://youtu.be/qncbDfT5KsU (accessed 15.03.24)

I didn’t know they were mares when I first watched, but their behavior was so different from that of Frederic’s stallions, I presumed they were mares. The message was in the ears.

The mares were constantly using their ears to maintain their individual bubbles while performing their routines which often had them very close together.

Mares in a natural herd situation determine much of the social structure of their group. Social order within a group needs a ready language with all sorts of nuances. Mare’s ears have these nuances.

Mares’ job of giving birth and caring for their foals means that they need to cultivate detailed knowledge of their environment when they live in the wild.

  • Best grazing spots
  • Safe water
  • The nature and habits of the local predators
  • Health of the herd stallion
  • Bachelor groups in the vicinity
  • Intrinsic awareness of their present rank in the group of mares

Horses give way to horses above them in rank, and they expect horses lower in rank to give way to them, just like people do in many situations. Mares need to keep track of many things.

Mares have a full complement of hormones and hormonal cycles. In wild herds, their position in the herd is closely linked with survival of themselves and their offspring during the annual hard times of summer drought and winter cold and snow.

We often like to romanticize wild horses, but there is not much romantic about a life lived in the environmental margins of the deserts, plains and mountains where they manage to survive.

Having had mares and geldings, I have found a distinct difference. All other things being equal (which they never are) mares tend to be more independent-minded, geldings more easy-going. That’s a generalization, but it’s not a coincidence that Cavalia uses only geldings and stallions for their shows. 

B: Ears and Horse Character Type

The detail about how a specific horse uses his ears will also relate to the innate character type of the horse.

We can never put horses into labelled pigeonholes, but often it is helpful to describe what we see and create categories so we can communicate our descriptions to each other more easily.

One way of categorizing horse character types is to look at their tendency to move their feet. A strong need to move suggests an extroverted character type. Less tendency to move suggest a more introverted character.

Another way of looking at horse character types is to note whether the horse is innately bold and curious or if he tends to stay out of the limelight and easily becomes anxious.

Quite likely, an extroverted bold horse will want to know where the party is and get going with it. He’ll often show forward, inquisitive ears. If the handler is not providing fun, he is inclined to create fun for himself.

An extroverted but anxious type of horse, who tends to weigh up the cost/benefit of every situation, may have ears moving through many expressions.

An introverted bold, imaginative horse is usually most interested in the next blade of available grass.  He sees little reason to move if his life is not in danger. He is strongly committed to his own ideas. He will learn things readily enough if we make it worth his while.

Such a horse tends to love food reward reinforcement and easily becomes a Clicker Training star. Once he learns something, he likes to make it his idea. He then tries hard to ‘get it right’. His focus during training may often include ears lying back or sideways as he thinks his way through a puzzle we’ve given him.

An introverted anxious type of horse may have active ears regularly checking out all points of the compass. He may appear externally ‘quiet’ but is heaving with emotions inside. Horses like this are more suddenly ‘explode’ with an inexperienced handler, so it is important to identify them and keep a close eye on where they are in relation to the edge of their comfort zone in a specific context.

These are generalizations but generalizations can help give us an overview. Ears are obviously highly personalized for each horse. In new situations horses behave differently than they do at home, just as we do.  

What I want to highlight is that it is easy to simplify how ears should look on a ‘happy horse’ when we really have little idea of what is going on in the horse’s mind and being expressed in his ears.

We should always read ears in the context of the rest of the horse’s body and the specific context of the moment.

A horse in an enclosed space with little stimulation will have different ear expressions than the same horse out and about with a wide view of things going on all around him.