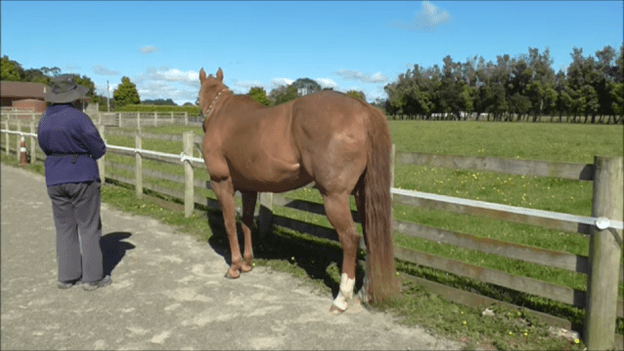
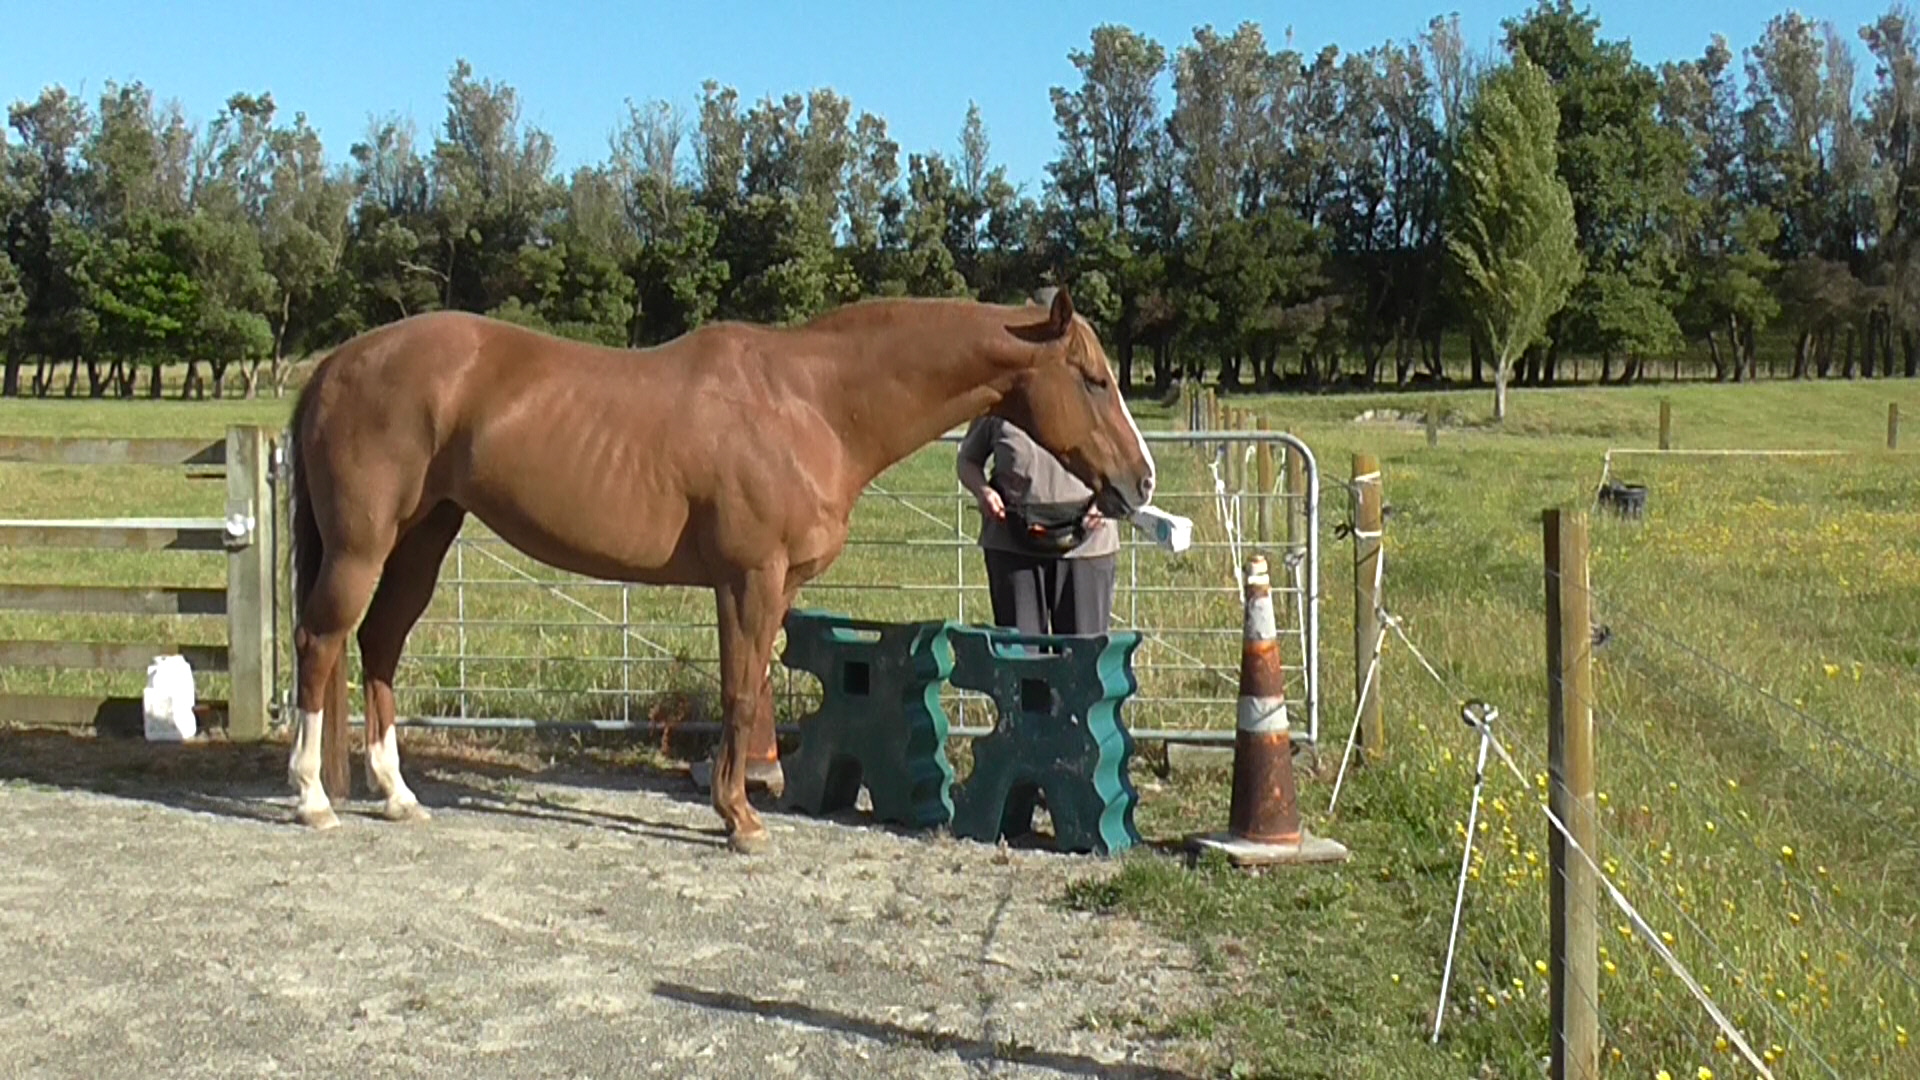
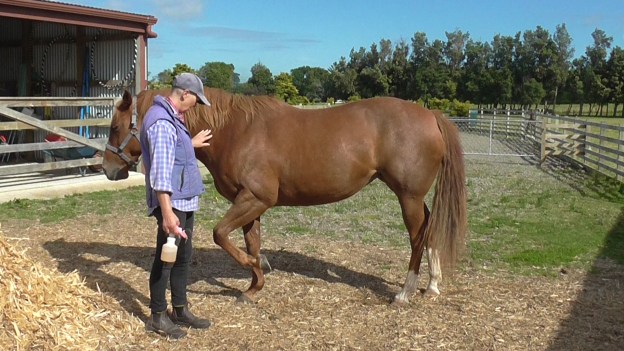
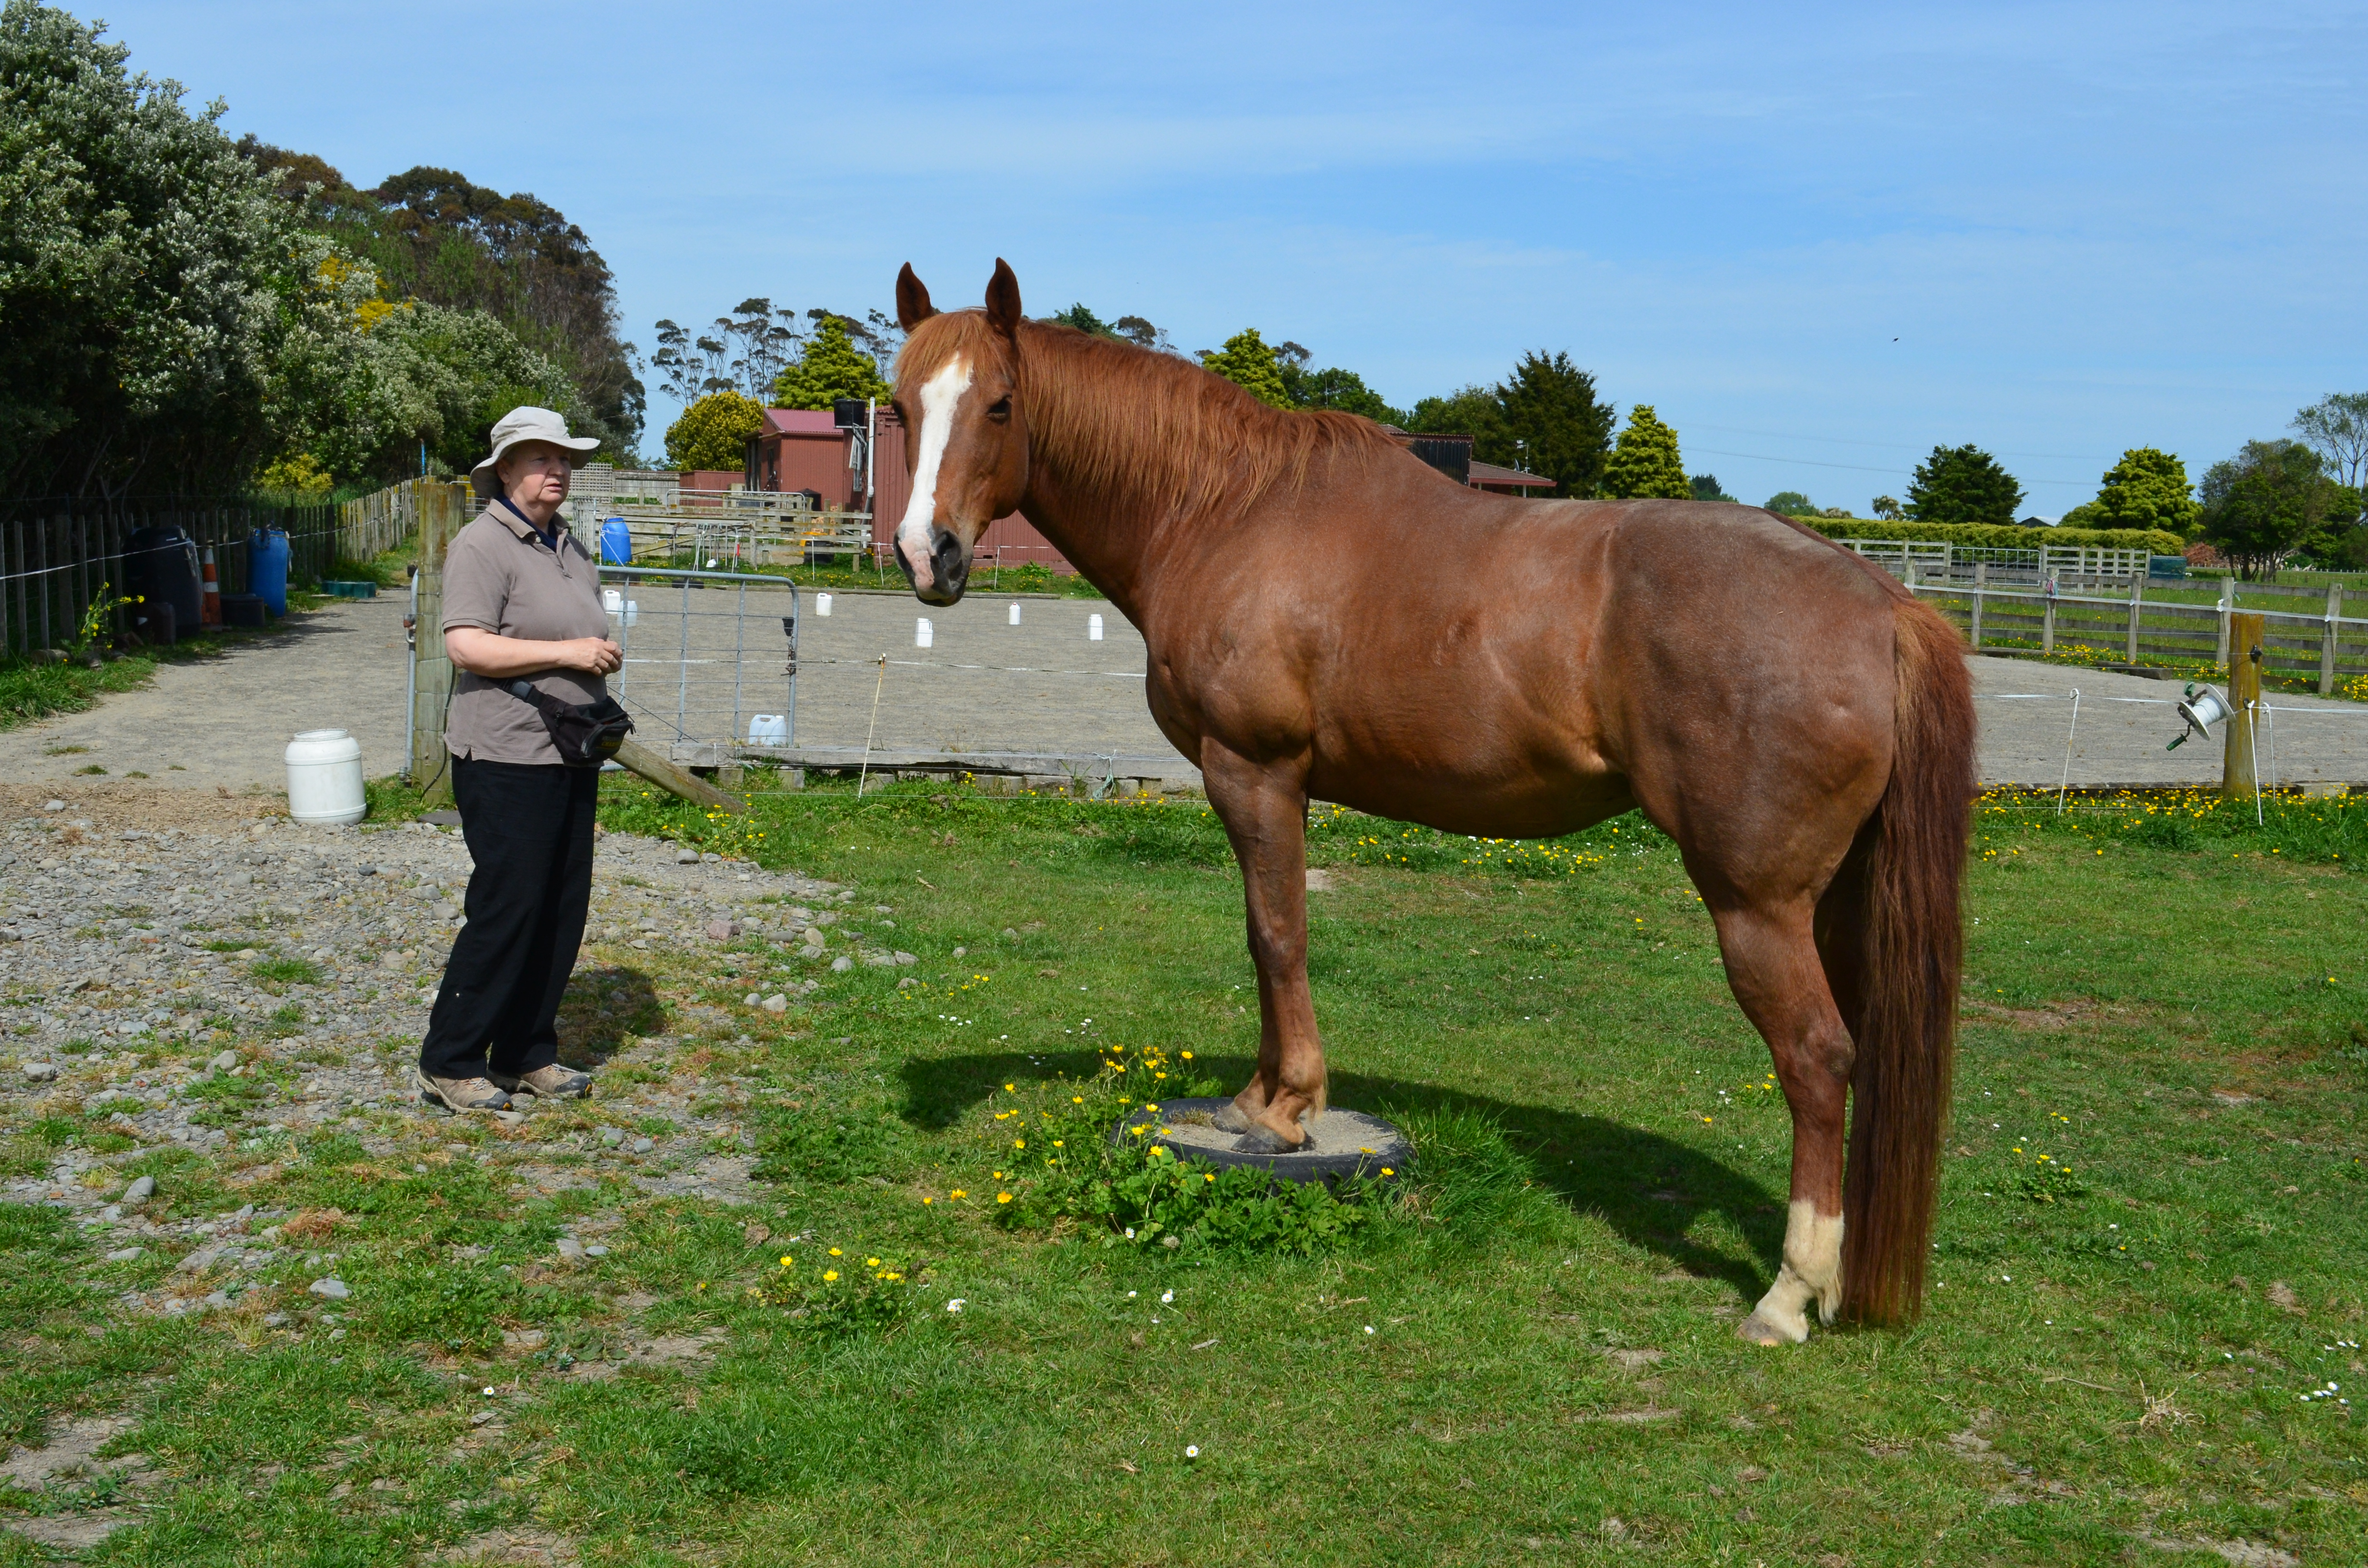
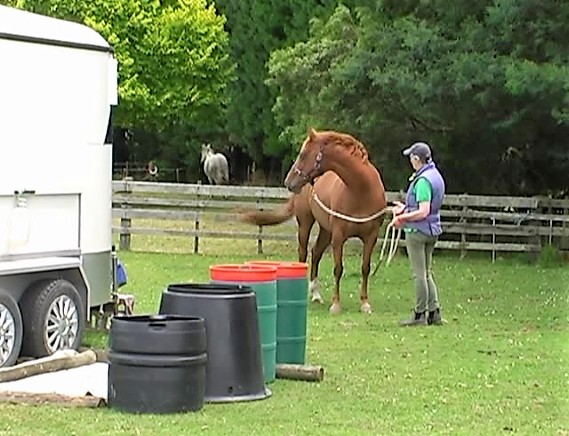
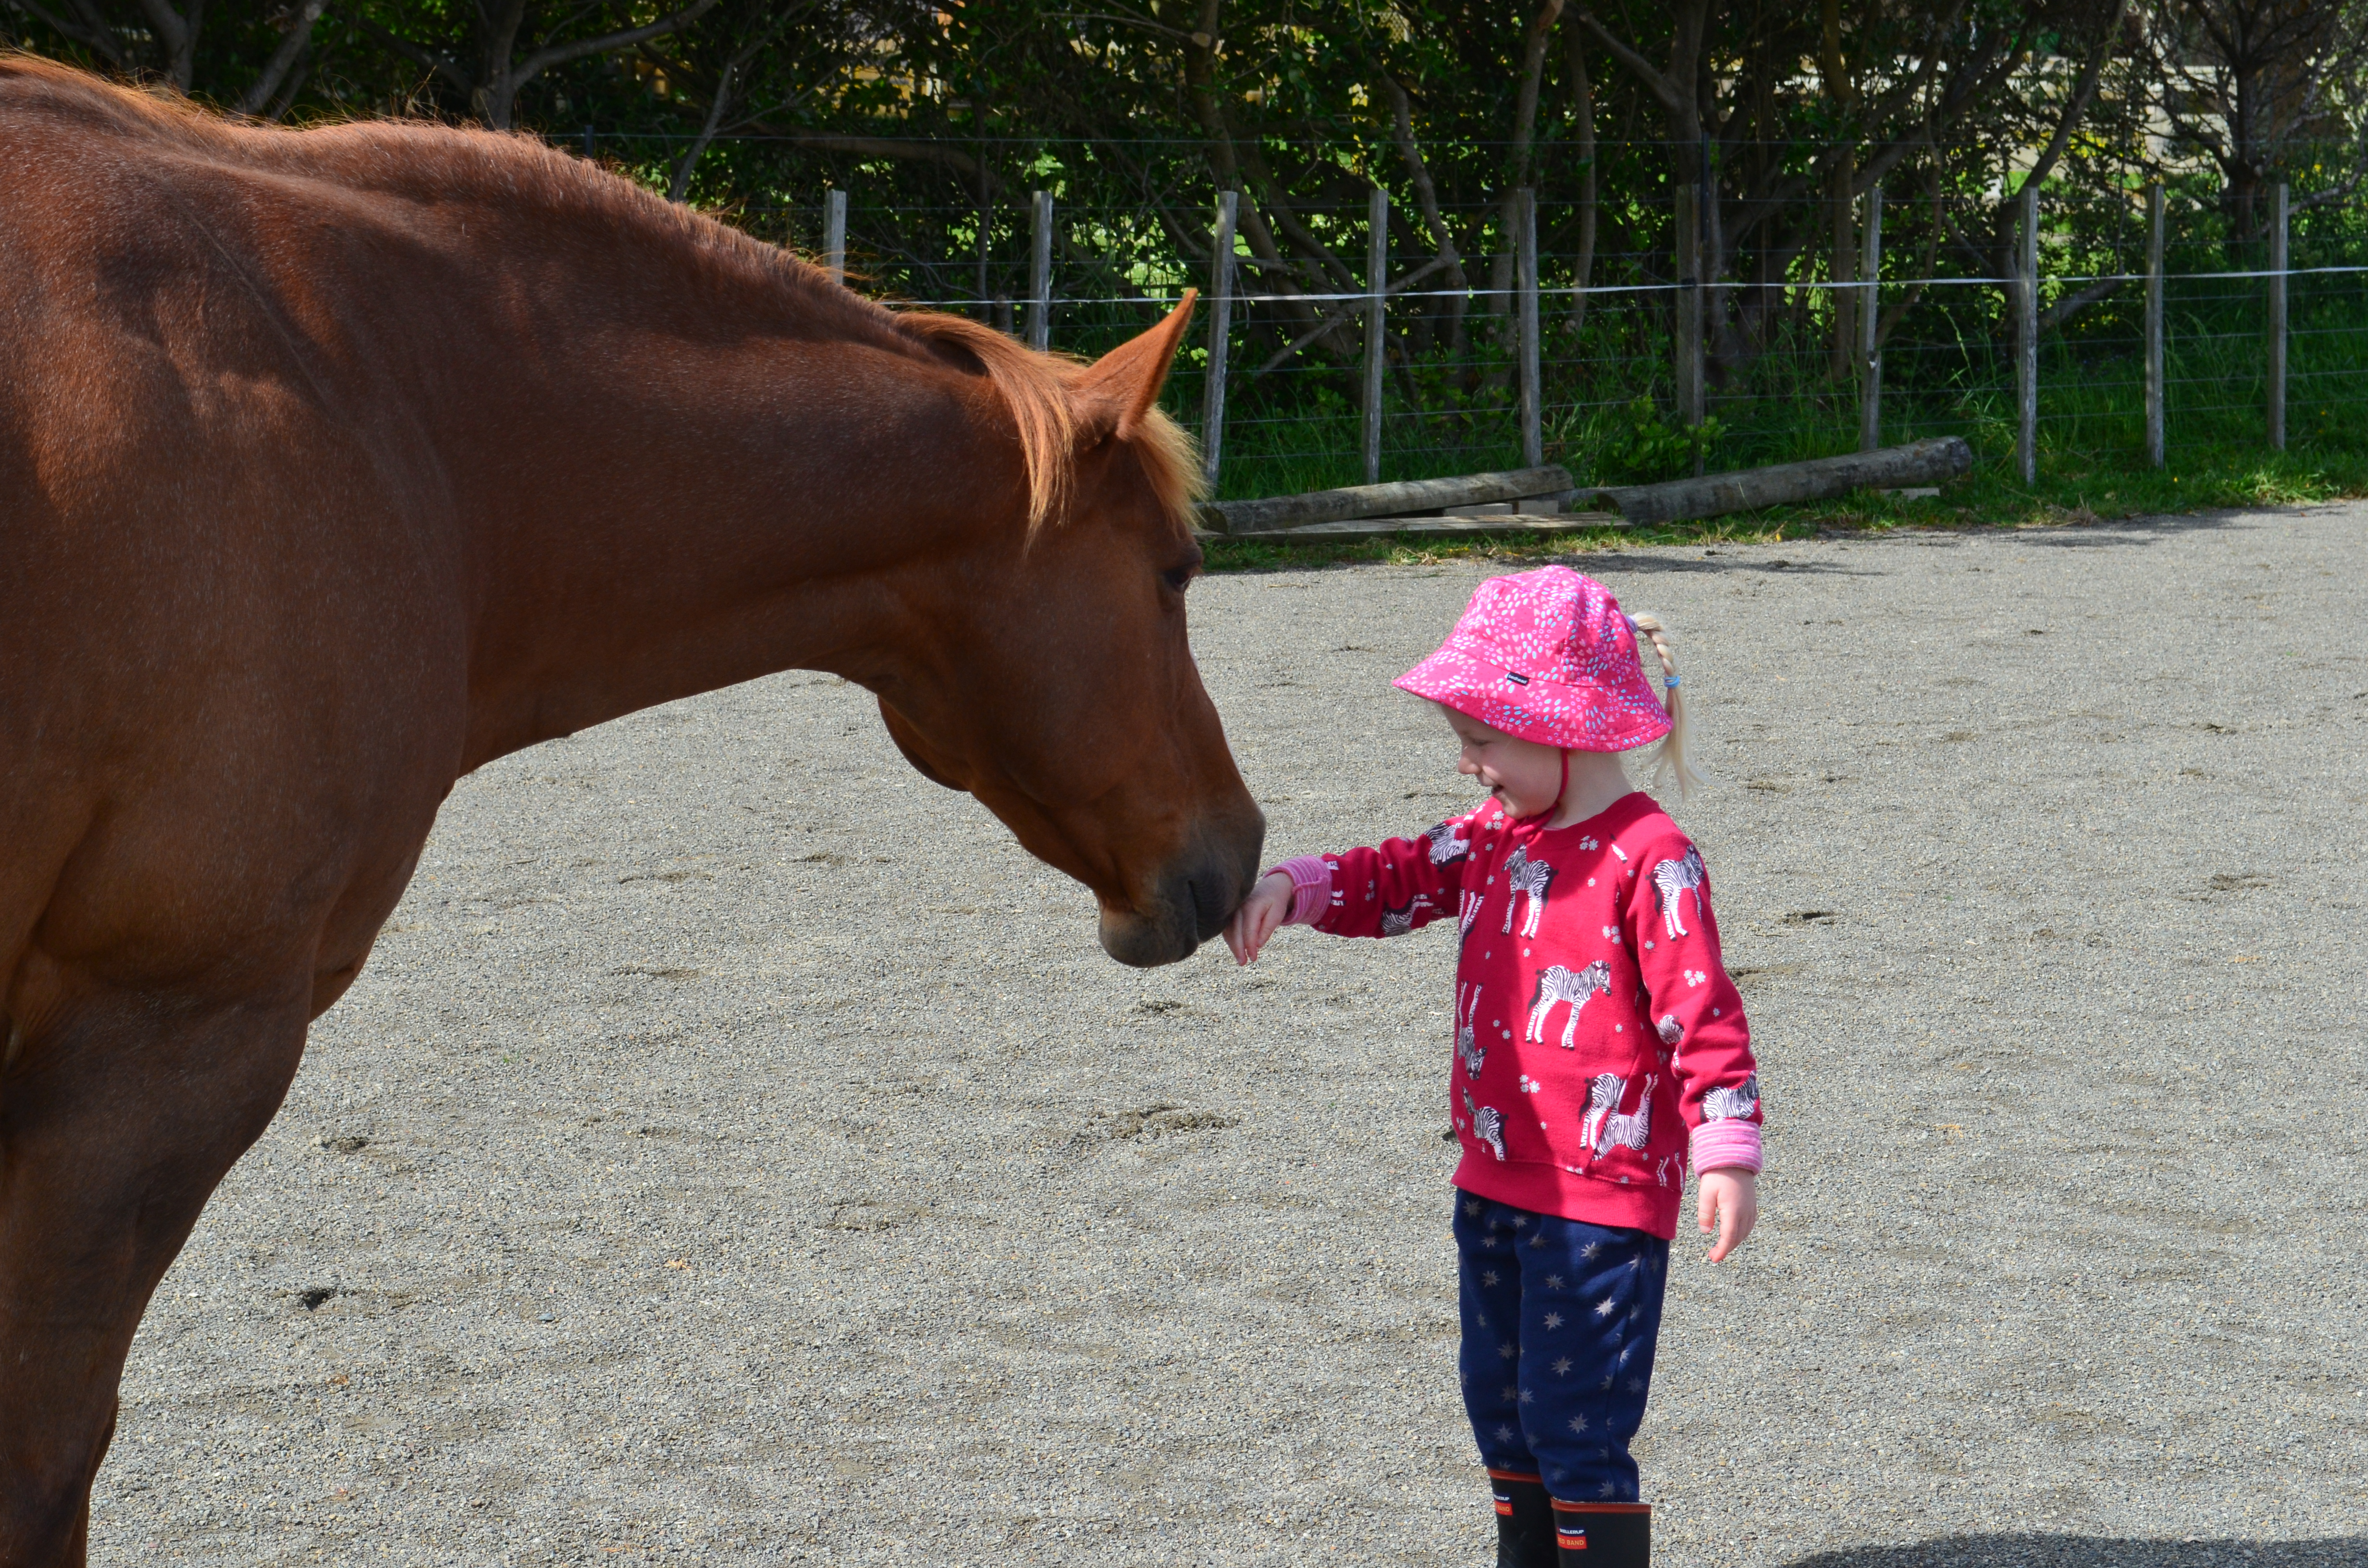
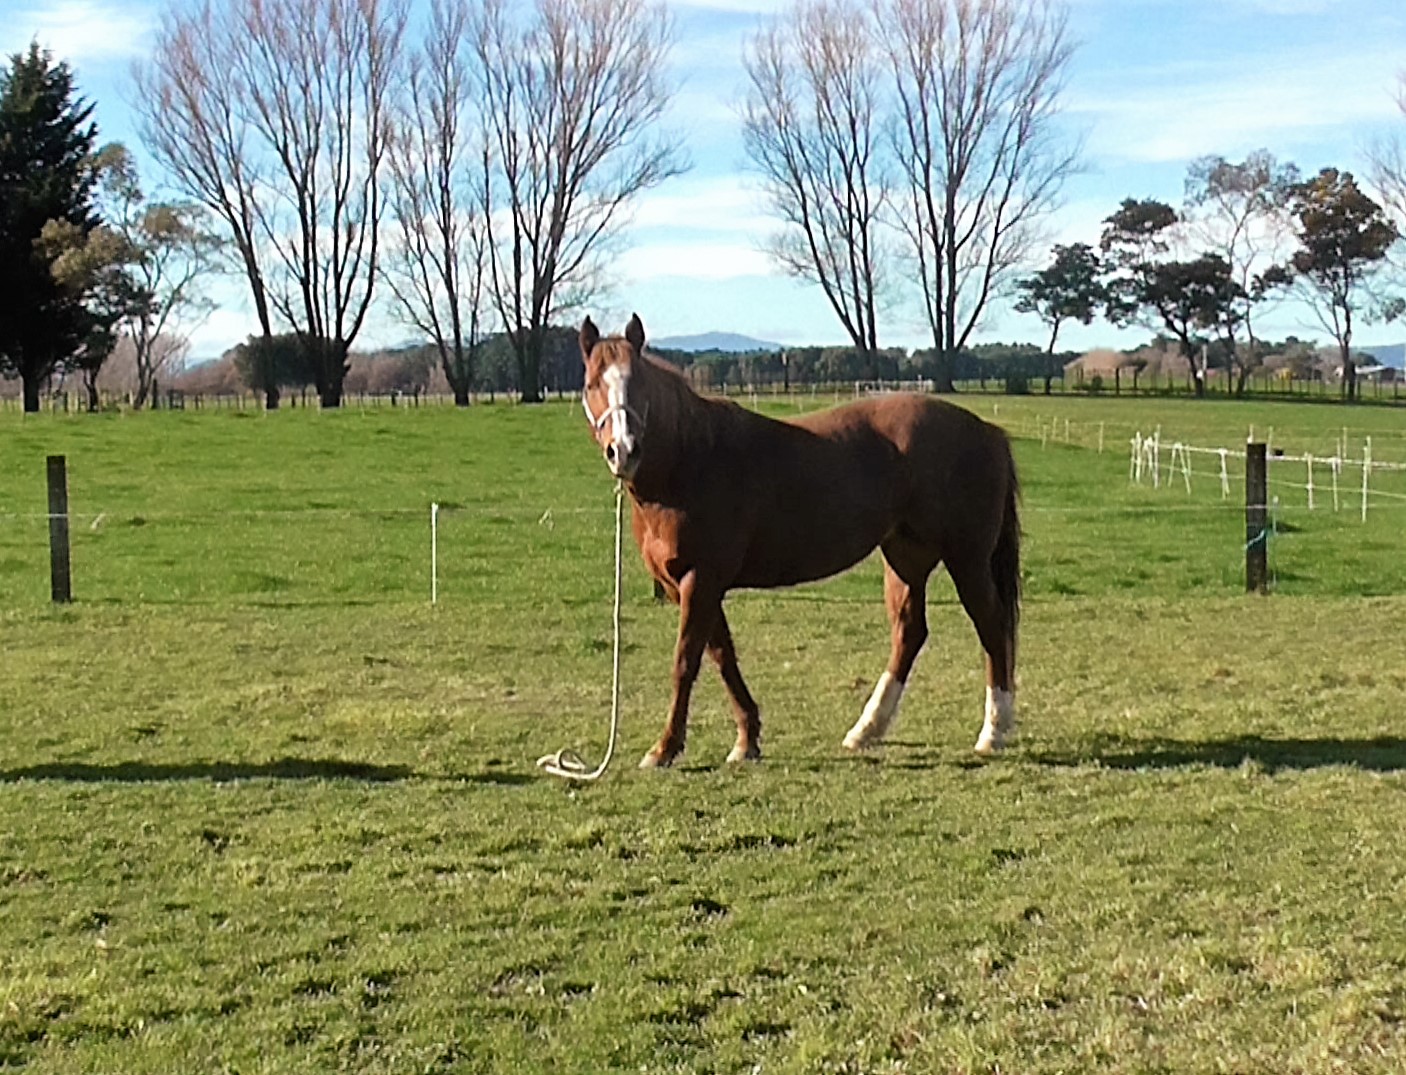
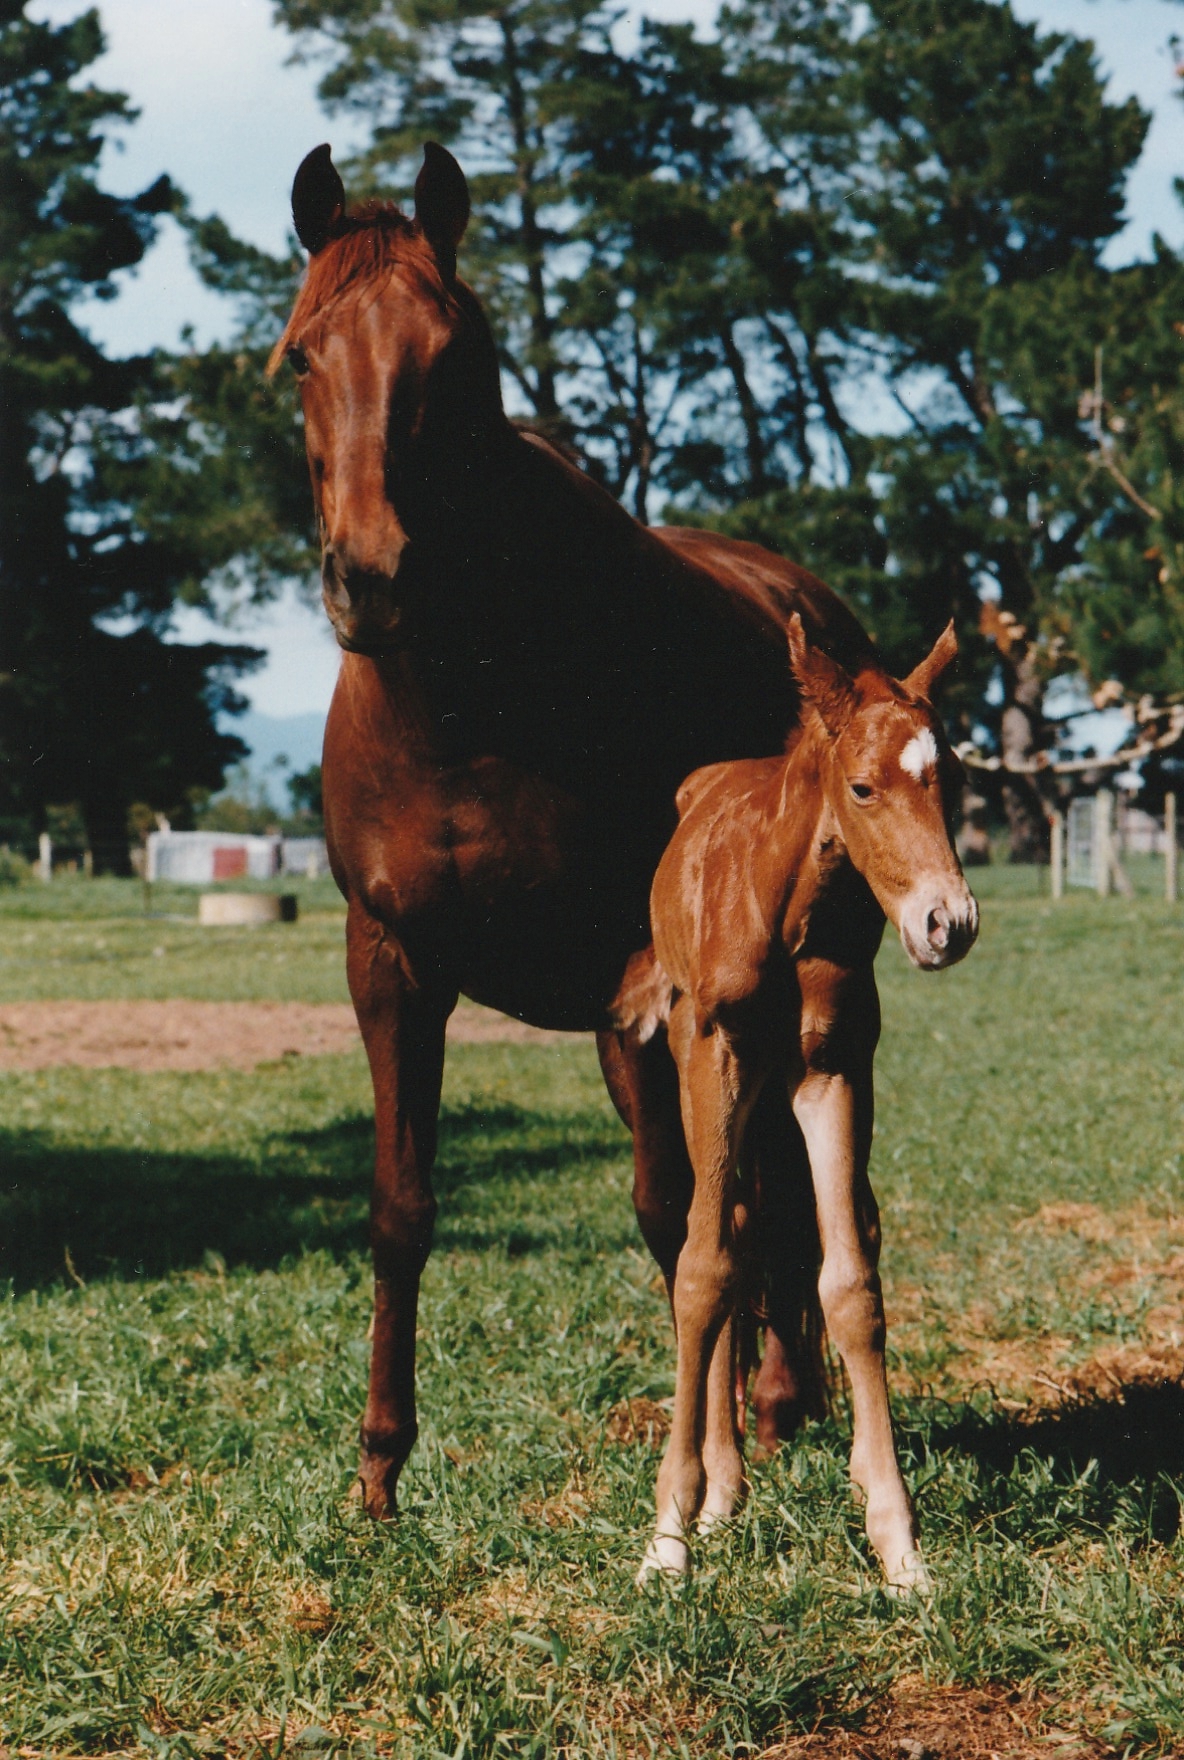
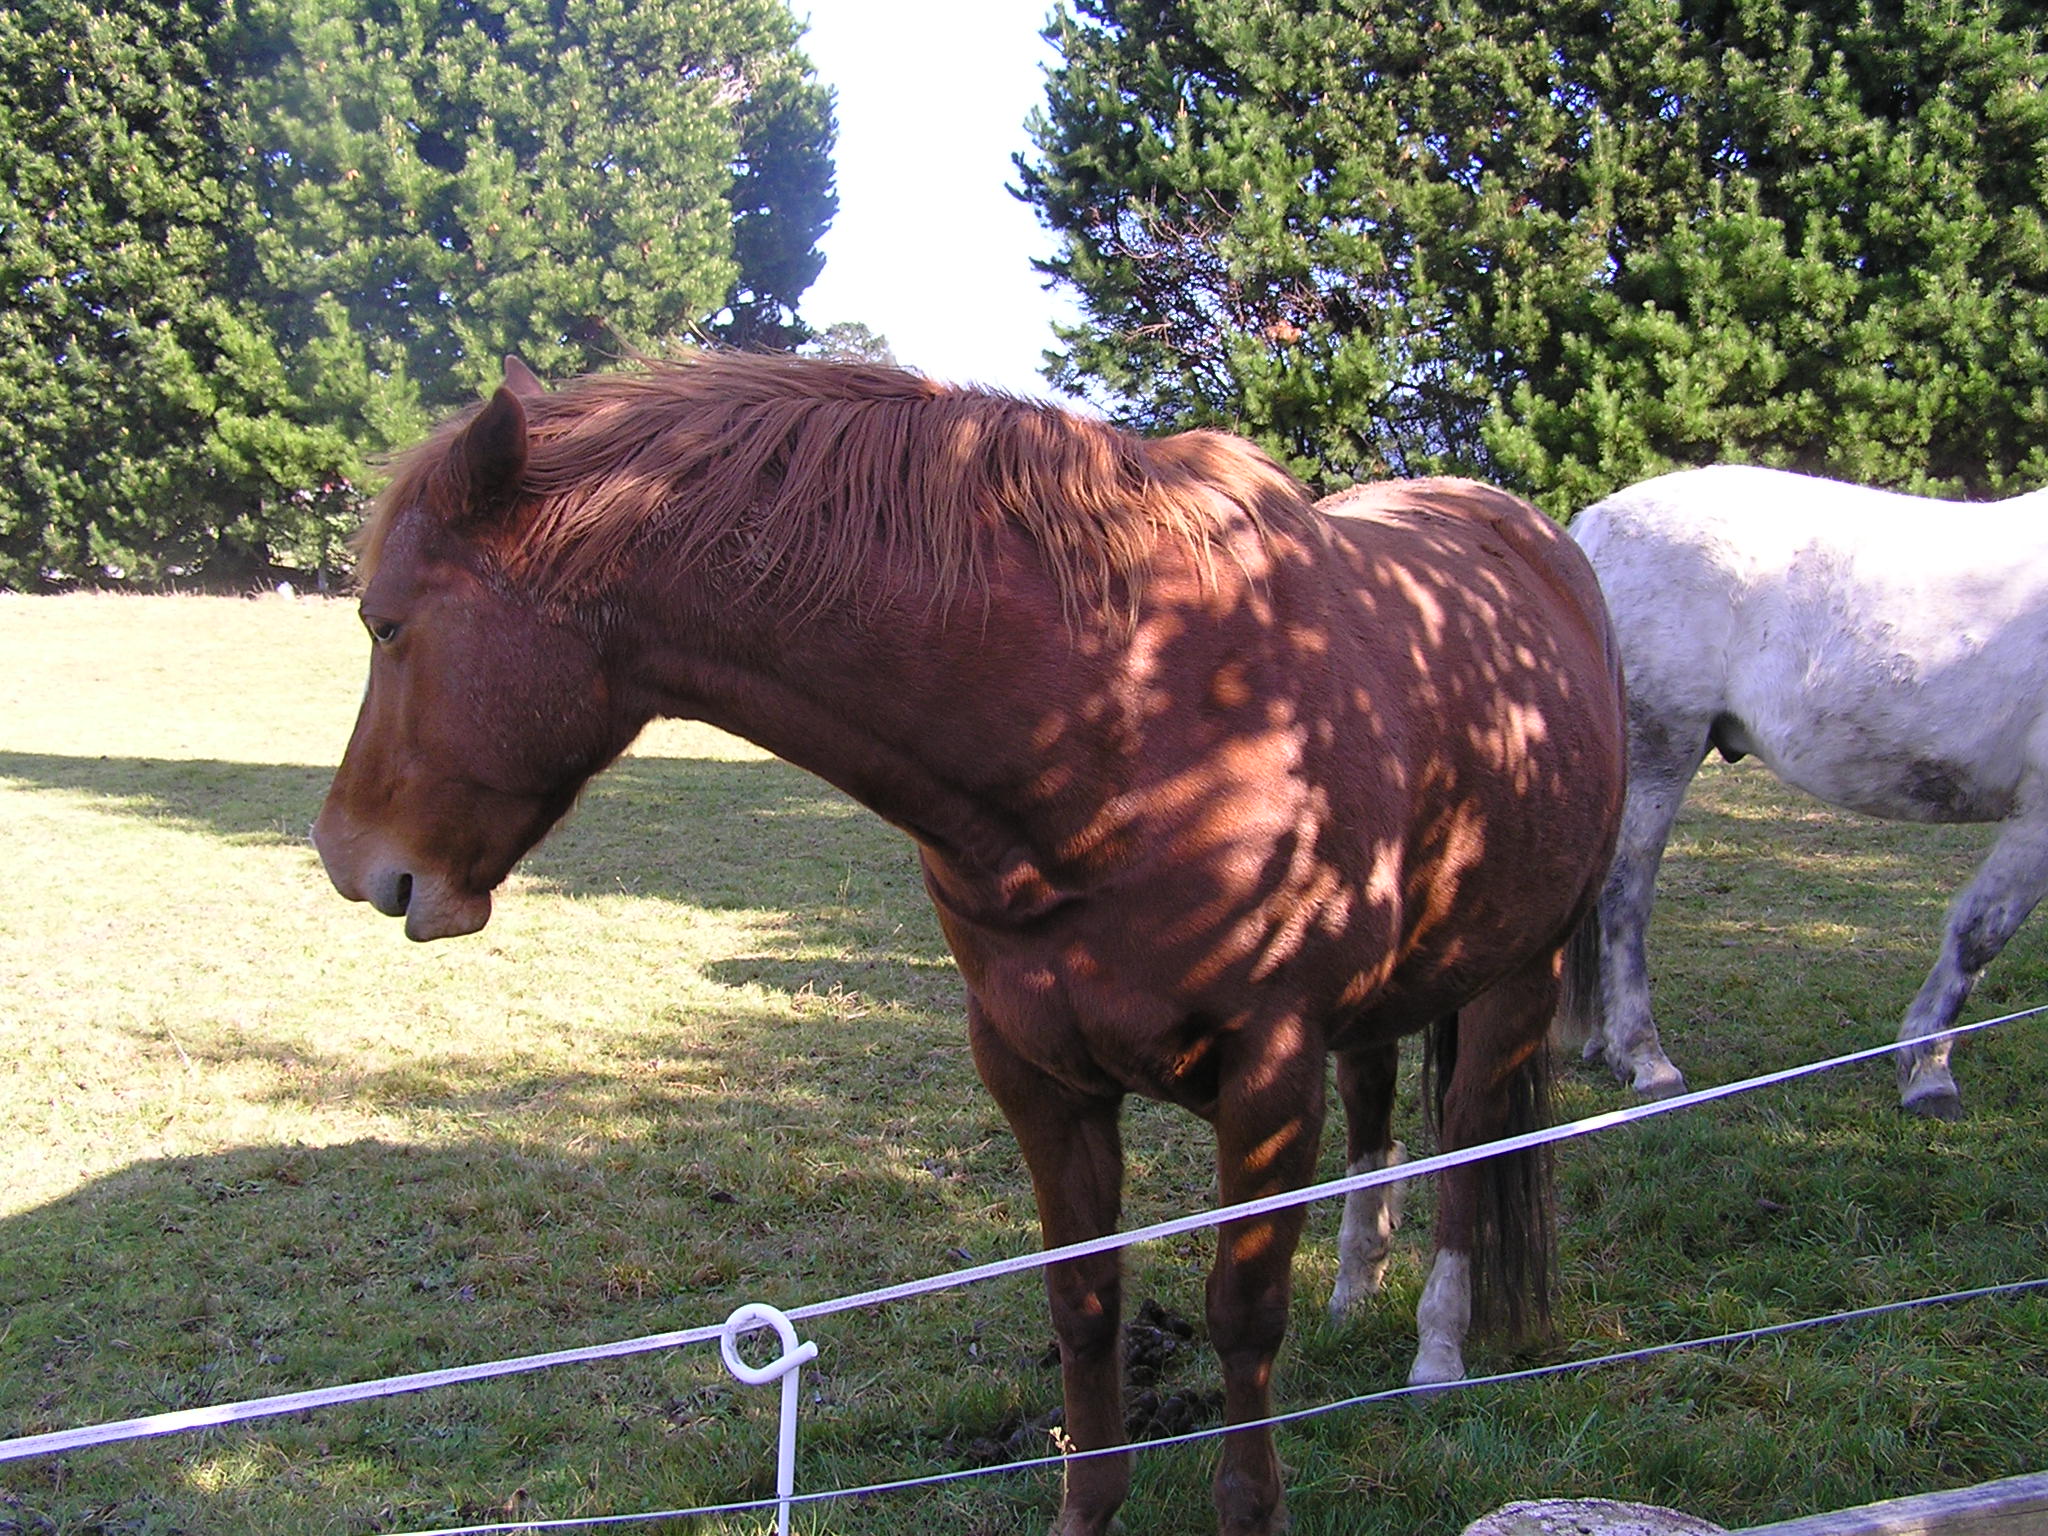
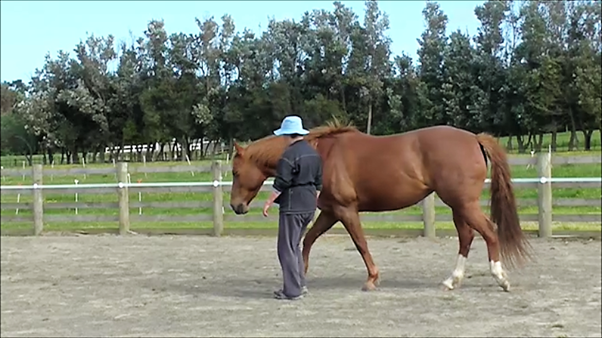
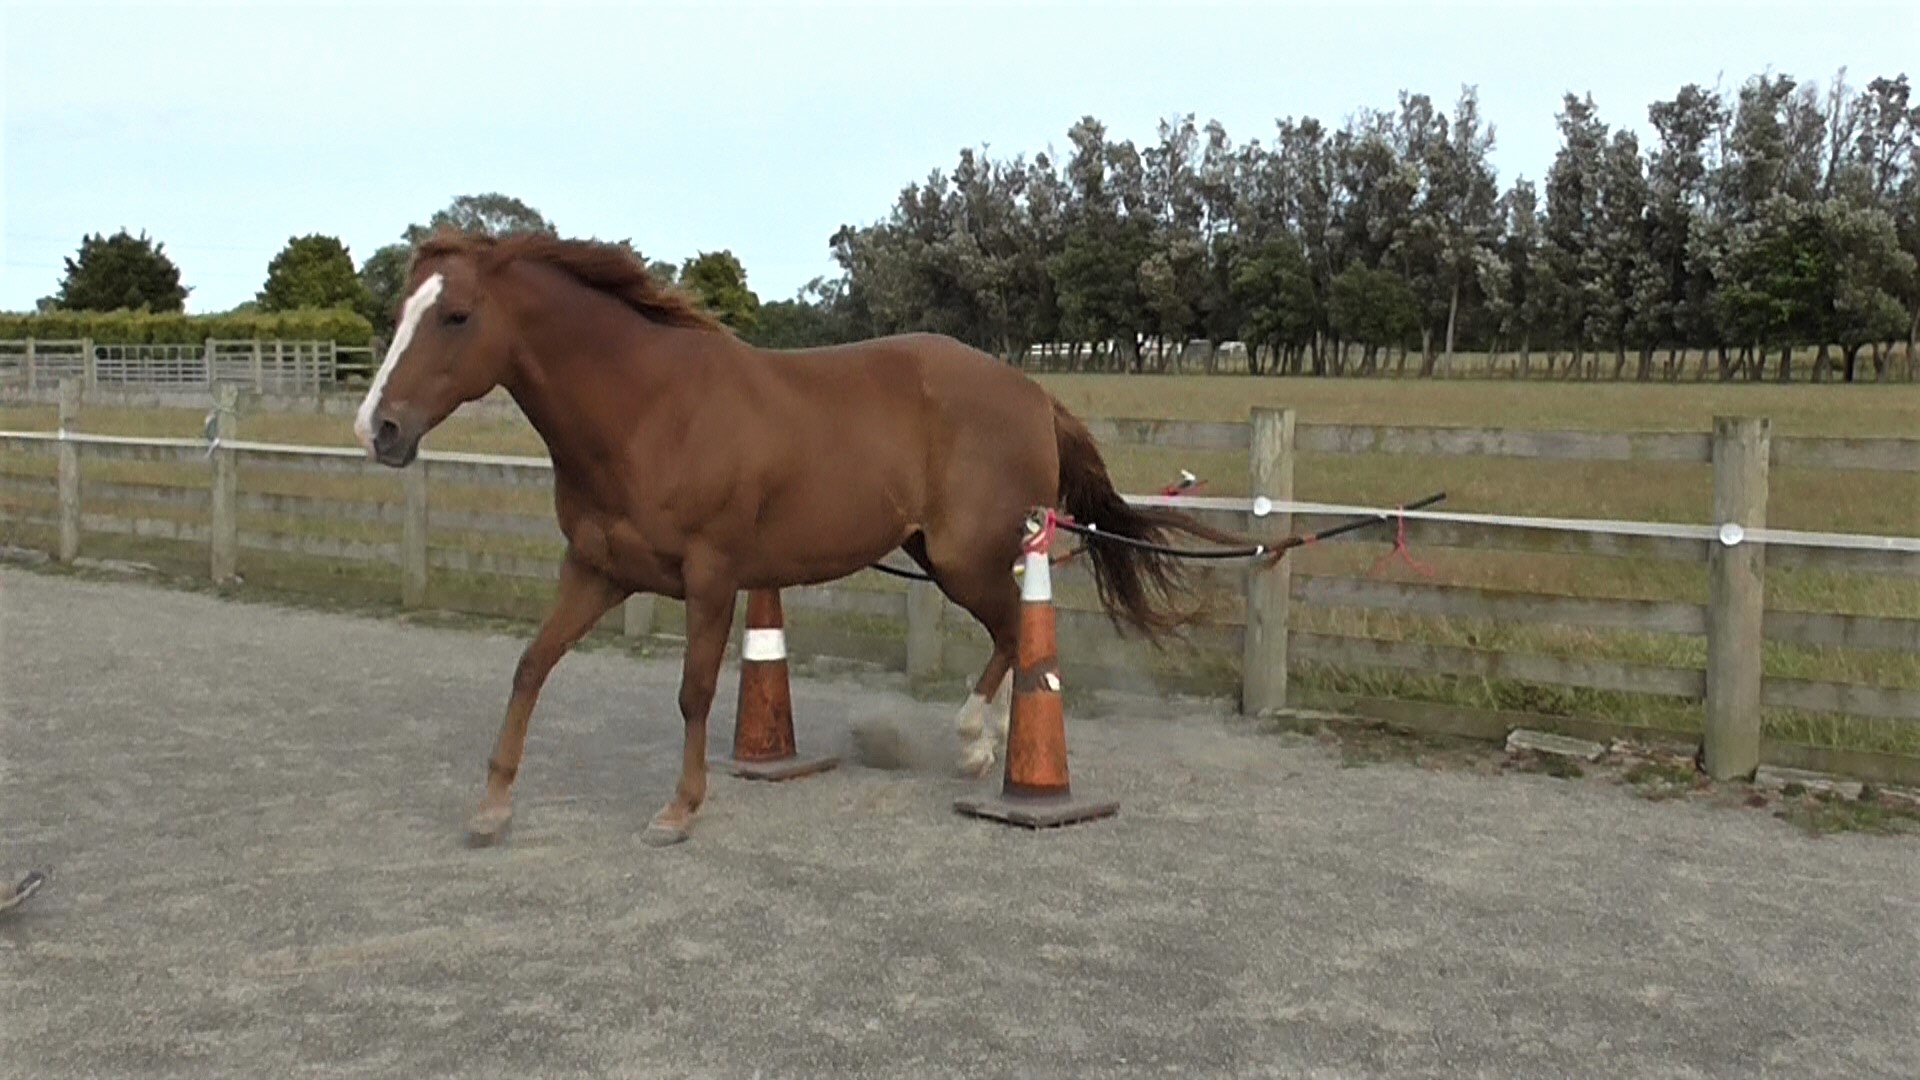
The photo above illustrates a moment when it would not be a good idea to give the horse a signal/cue, becaue her attention is strongly focussed on something happening on the road.
Horses are generally co-operative beings. Most horses are happy to comply if the message is clear for them and if what we ask is within their emotional, mental and physical capability.
On the other hand, if we send mumbled or mixed messages or use non-natural signals that the horse has not learned, or which he physically can’t do (perhaos due to pain) the horse is in a real bind. A horse in this situation may react in one of the following ways.
He may try to fill in with what he thinks the handler might mean, best as he can.
He may give up trying to understand and opt out mentally.
He may opt out physically by moving his feet to escape the situation, if he can.
If he can’t escape, he may ‘take over’ physically by pushing on, through or over the handler.
He may ‘freeze’ into a catatonic state. Some horses simply collapse.
Choosing the right opportunity to ask our horse to do something is important. It’s pointless to ask our horse to do something unless there is a 99% chance that he can and will do it. Otherwise we are teaching him to ignore our requests because they are too hard to understand or beyond his physical ability at the moment.
Setting Up Opportunities
Do we set up lots of occasions for the horse to practice learning what we want him to learn?
By playing with picking up, then walking, carrying her feed bucket every day, Boots became adept at it.
In other words, do we give the horse ample opportunity to learn in a controlled environment where he can gradually build his confidence and expand his comfort zone as he comes to understand each new thing we are teaching?
Traditional training was geared to what the human wanted right now, and proceeded to demand it with force, coercion and body extensions designed to inflict increasing discomfort.
Since what people want is usually not part of a horse’s natural repertoire of behavior, the horse is often catapulted into a state of bewilderment.
How much more comfortable and safer all around, if we thin-slice a large task into its smallest parts, teach each part and then chain the parts together to achieve the whole task?
When we do this, we allow the horse opportunity and time to master each small part before moving on. Please see Blog Numbers 13 and 106 on the Quick Contents Page for lots of detail about thin-slicing.
We want to allow the horse to keep his integrity and we want to keep his goodwill. We allow him to adjust to the strange life he must live with us. We earn his trust so that he is willing to put the placement of his feet into our hands. For an animal, whose sole defense is the ability to flee from perceived danger, this is a big ask.
To build the horse’s knowledge and confidence, we need to first get (and reward) the behavior that we want, then we can add a specific signal to it. Often a signal arises naturally out of the way we initiated the behavior.
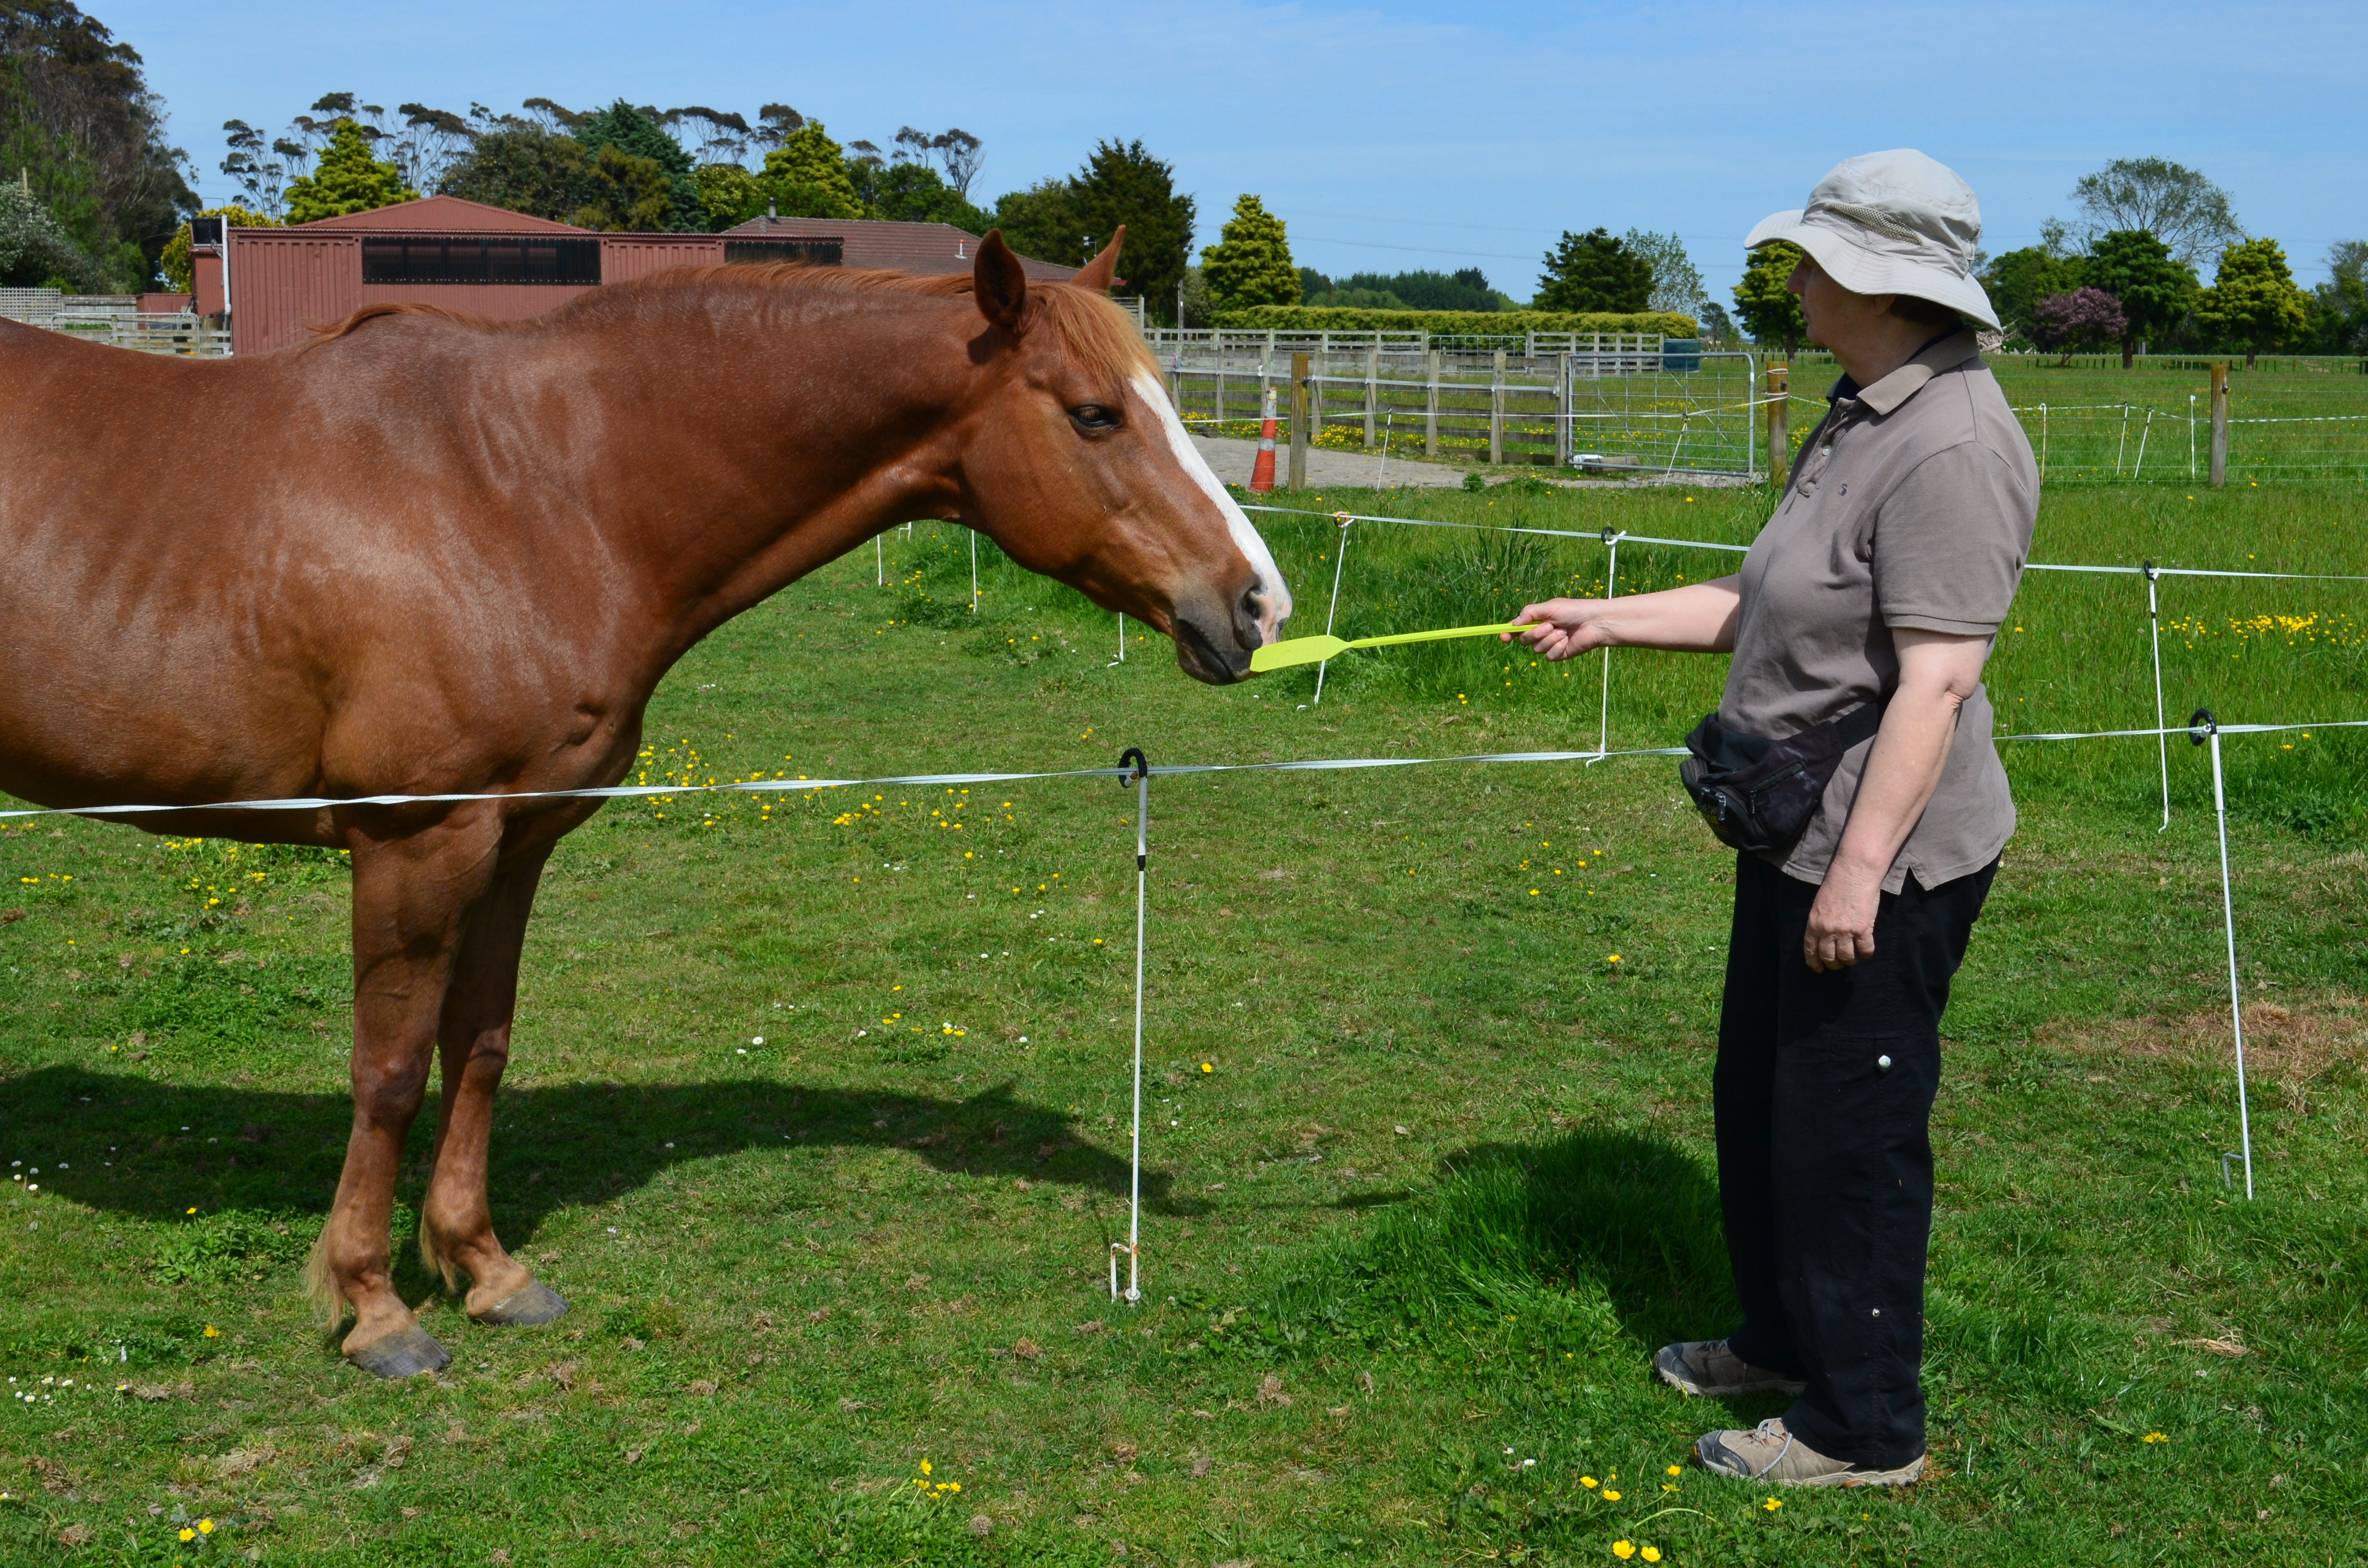
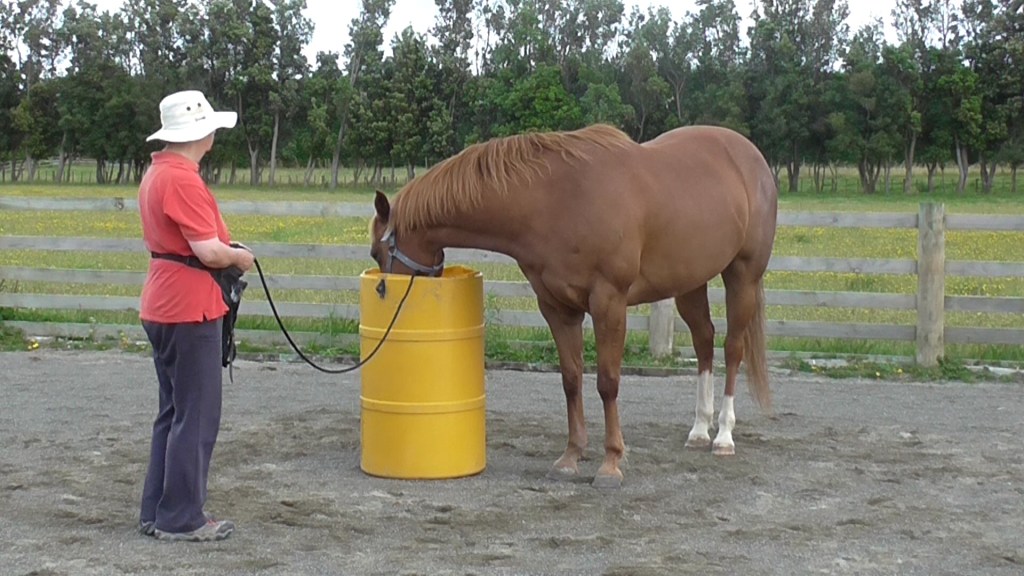
The desired behavior here is for the horse to target a specific object. We make it easy at first and set it up with the least distractions, so we can quickly click&treat the behaviour we want. Once it is good 99% of the time with a simple set-up, we can add verbal and gesture signals to ask for the behavior. Then we can start to ask the horse to touch all kinds of things with his nose, so building his confidence and courage.
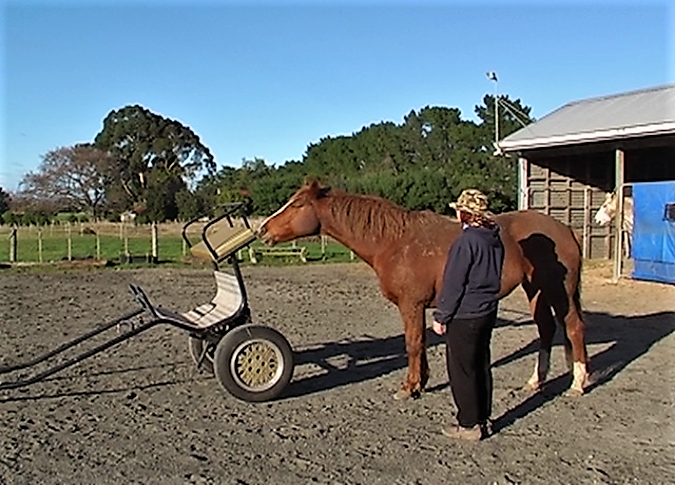
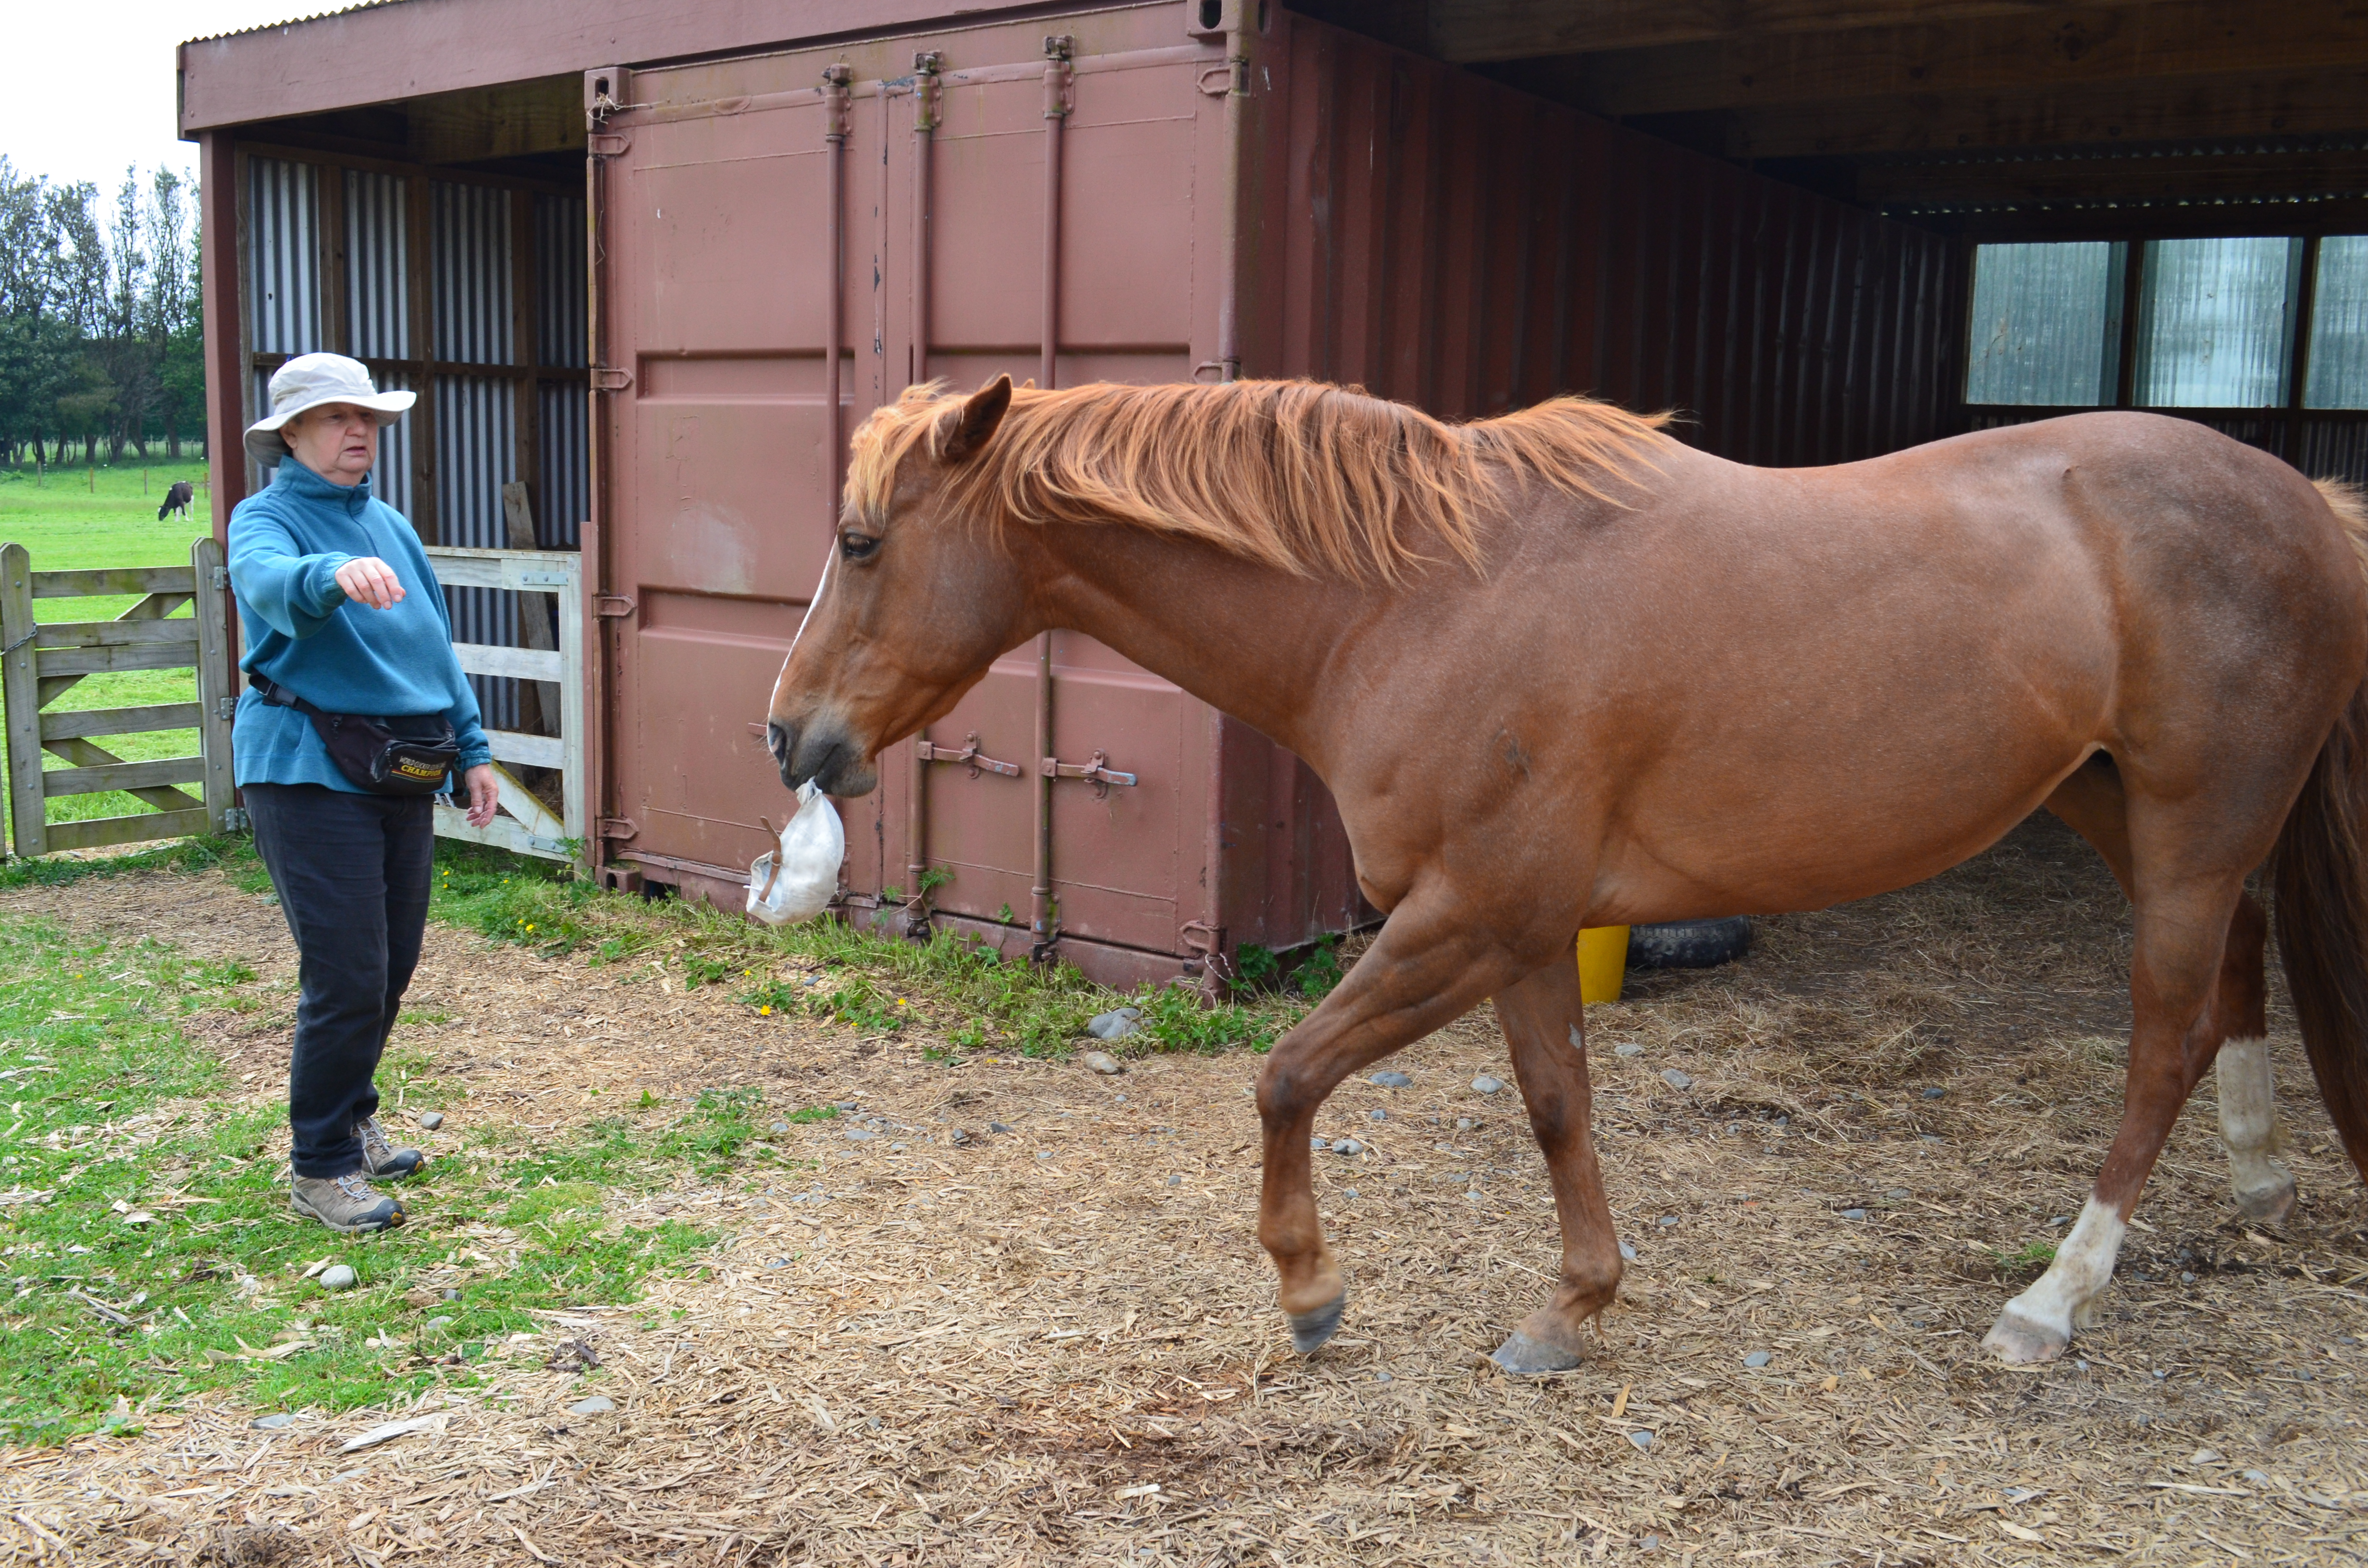
Because Boots had a long history of touching unusual objects with her nose, she willinging targetted the cart.
Once the horse understands the key signal, we can layer in other signal types. We can also replace a signal by adding a new one and fading out the earlier one.
Most horses don’t seem to have any trouble understanding several signals for the same thing. For example, my horse will ‘walk on’ with a verbal signal, a ‘breath-in’ signal, an arm gesture signal and an ‘outside leg steps forward’ signal. If we are doing work on a long line or reverse round pen, she understands the verbal, breathing and arm gesture signals from different angles and distances.
Additionally, horses can understand one signal in a variety of different situations. My horse understands the verbal ‘whoa’ signal when walking beside me, when she is behind me, when I am walking behind her as in long-reining, and from the riding position.
It’s also essential to be aware of the ways that our horse signals to us. Often, we are so immersed in working out what we want the horse to do, we miss the signals the horse is sending us about what he need us to do so he can remain confident.
By reading the horse, we can decide whether we should:
Carry on with what we are doing.
Go back a step or more to regain confidence.
Have a break and do something that’s already easy.
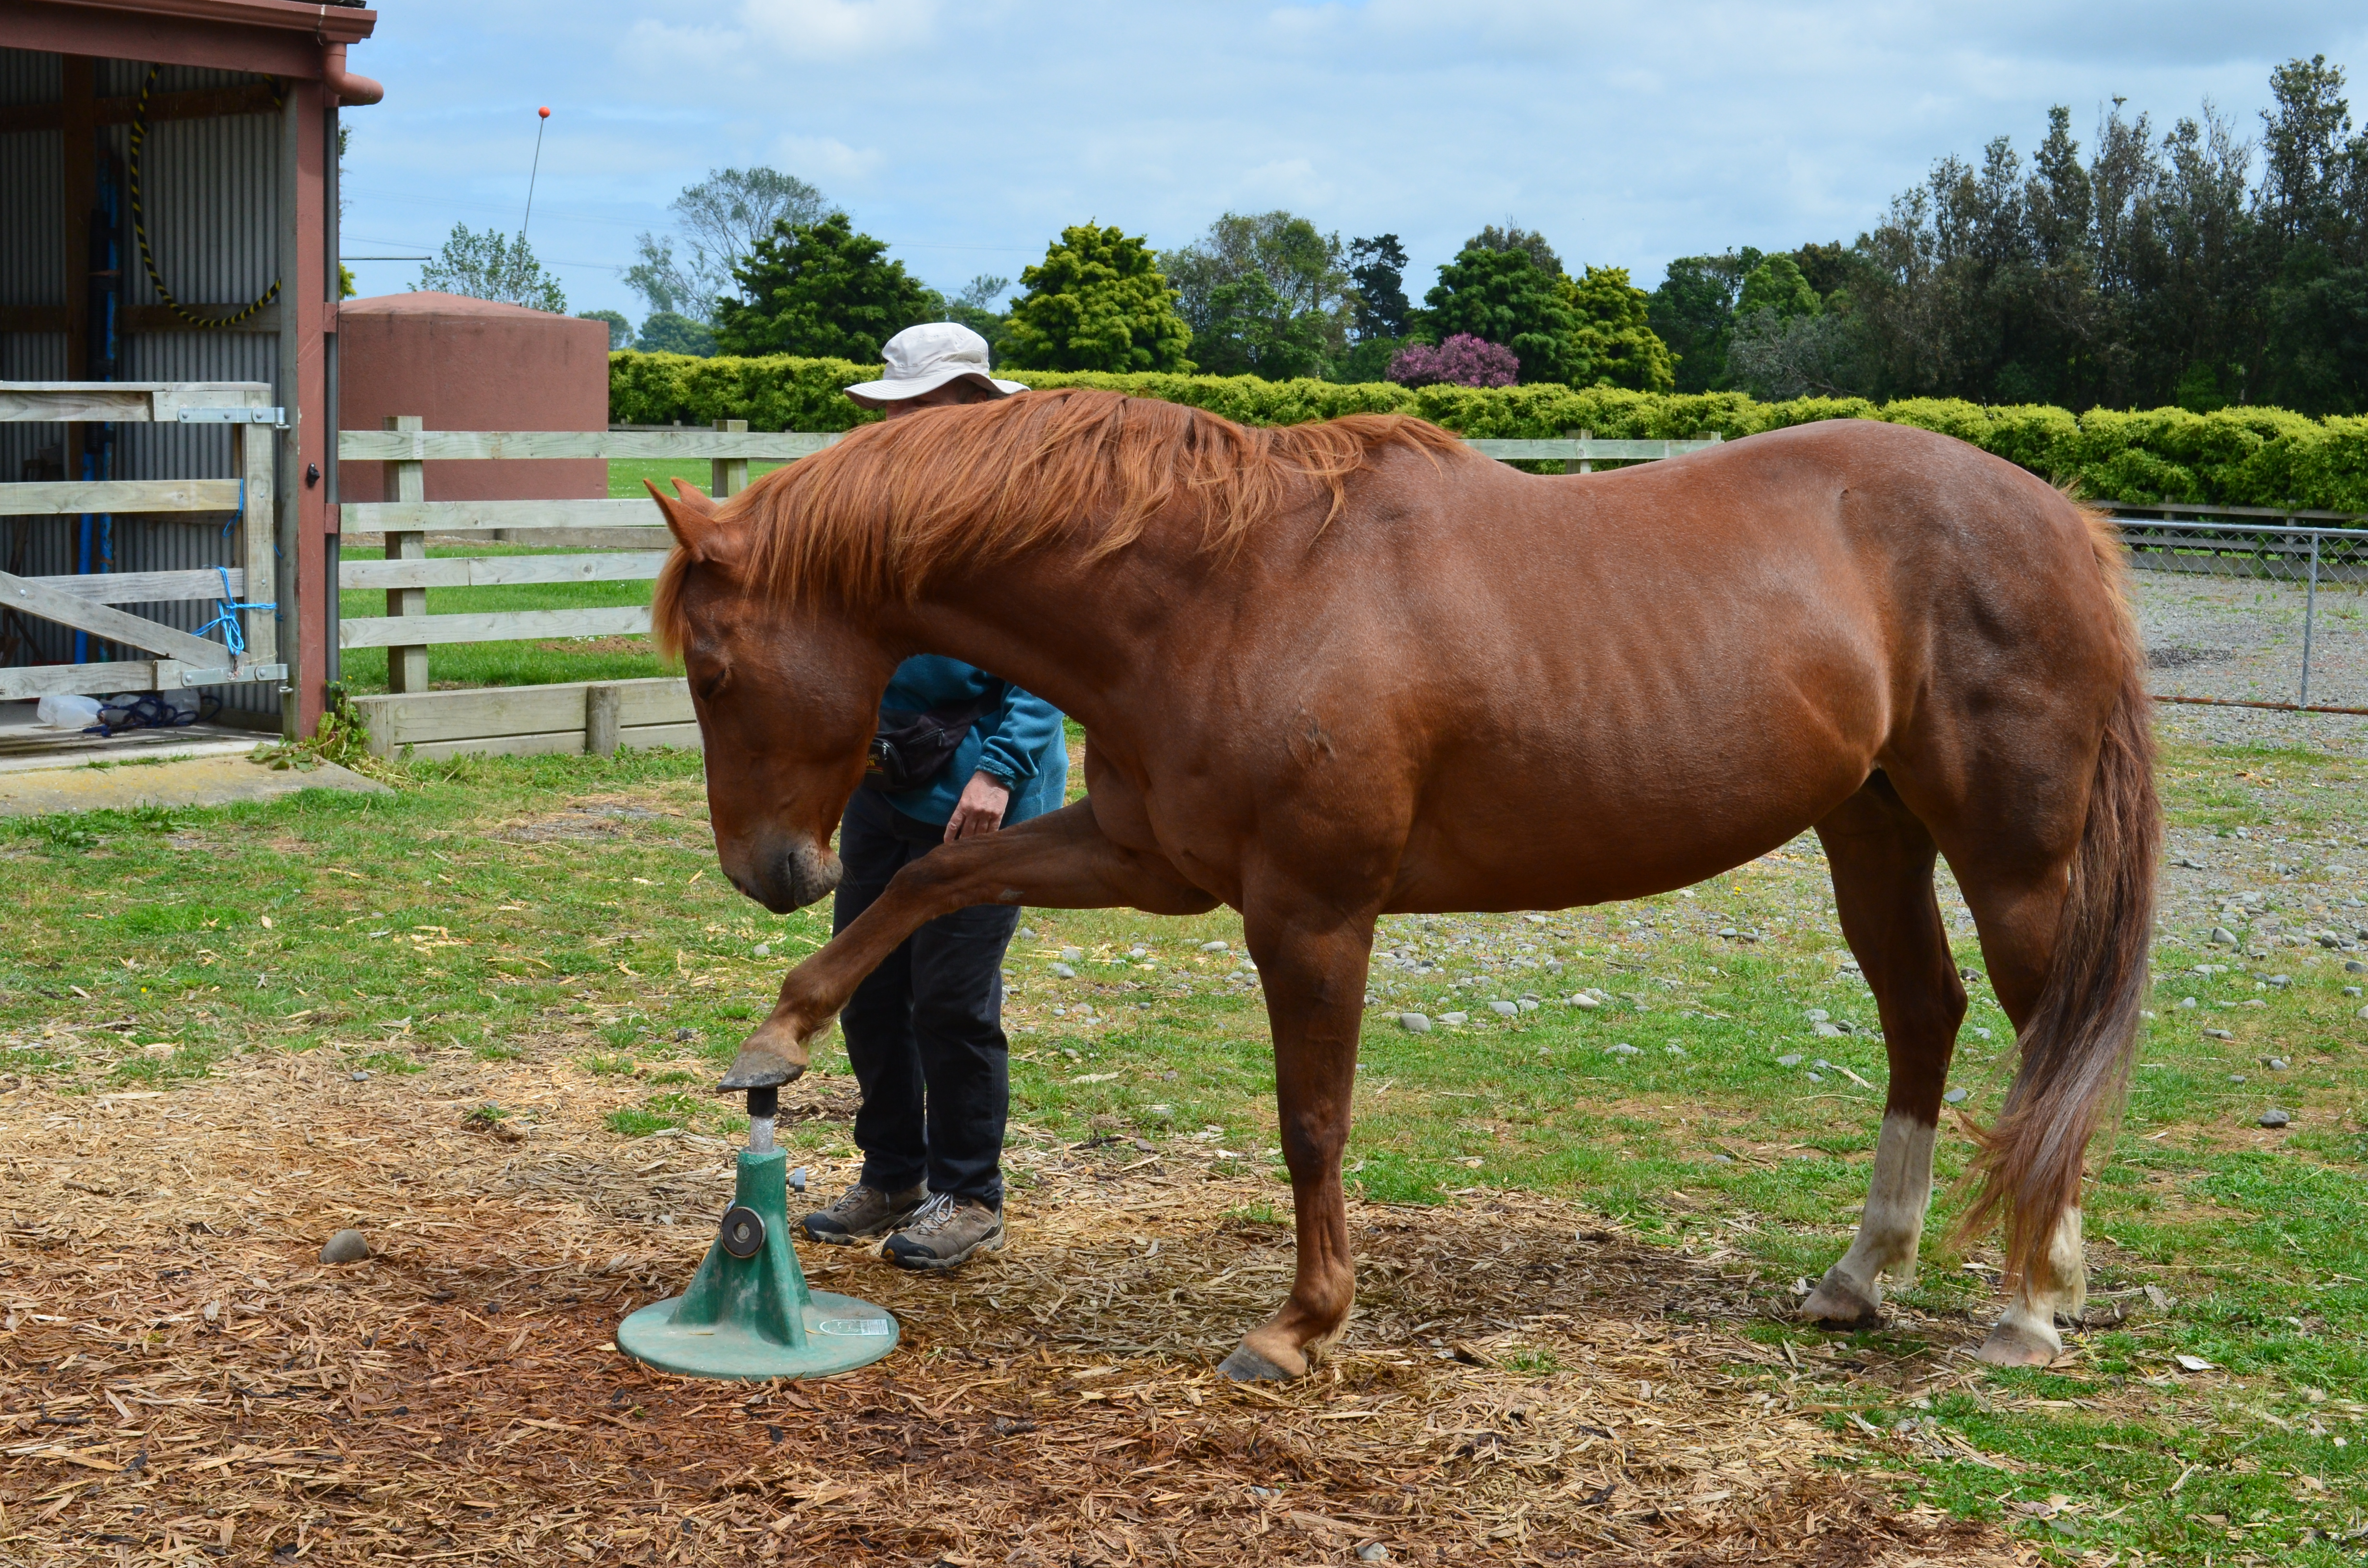
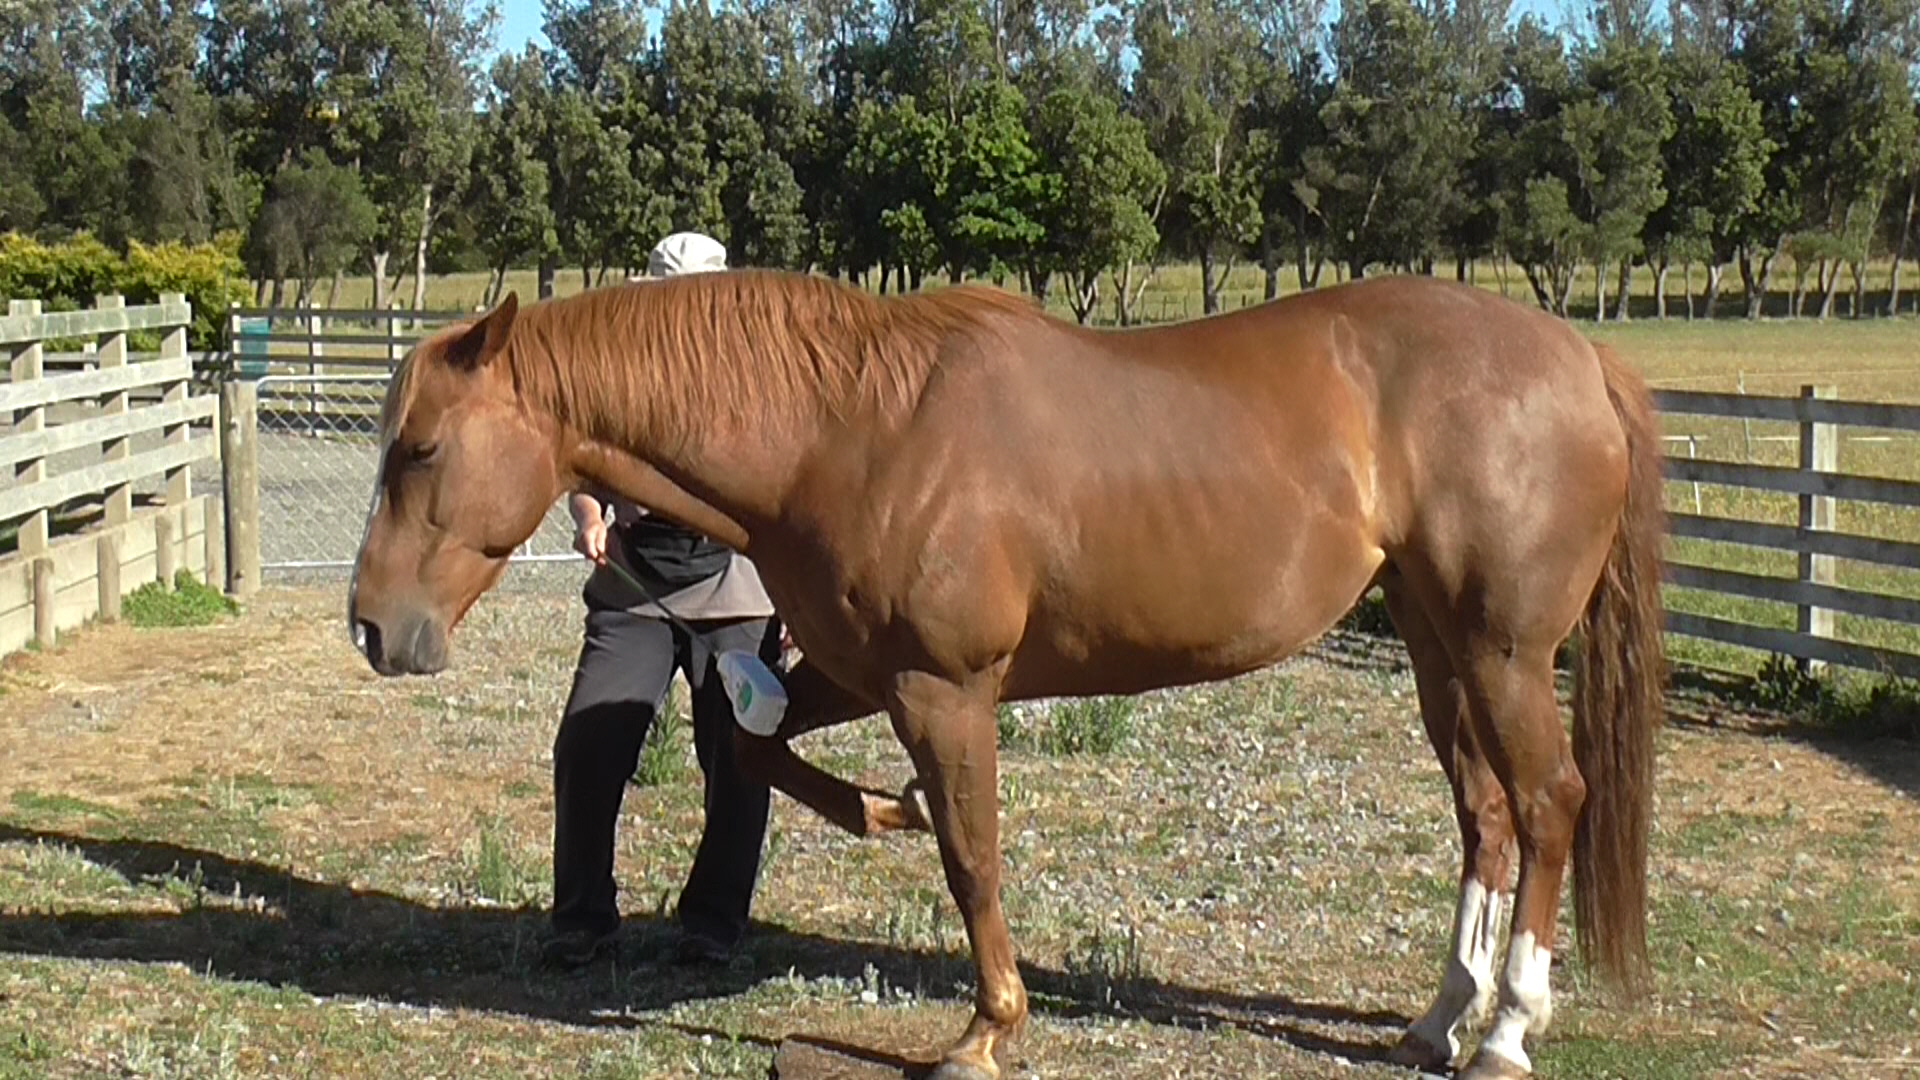
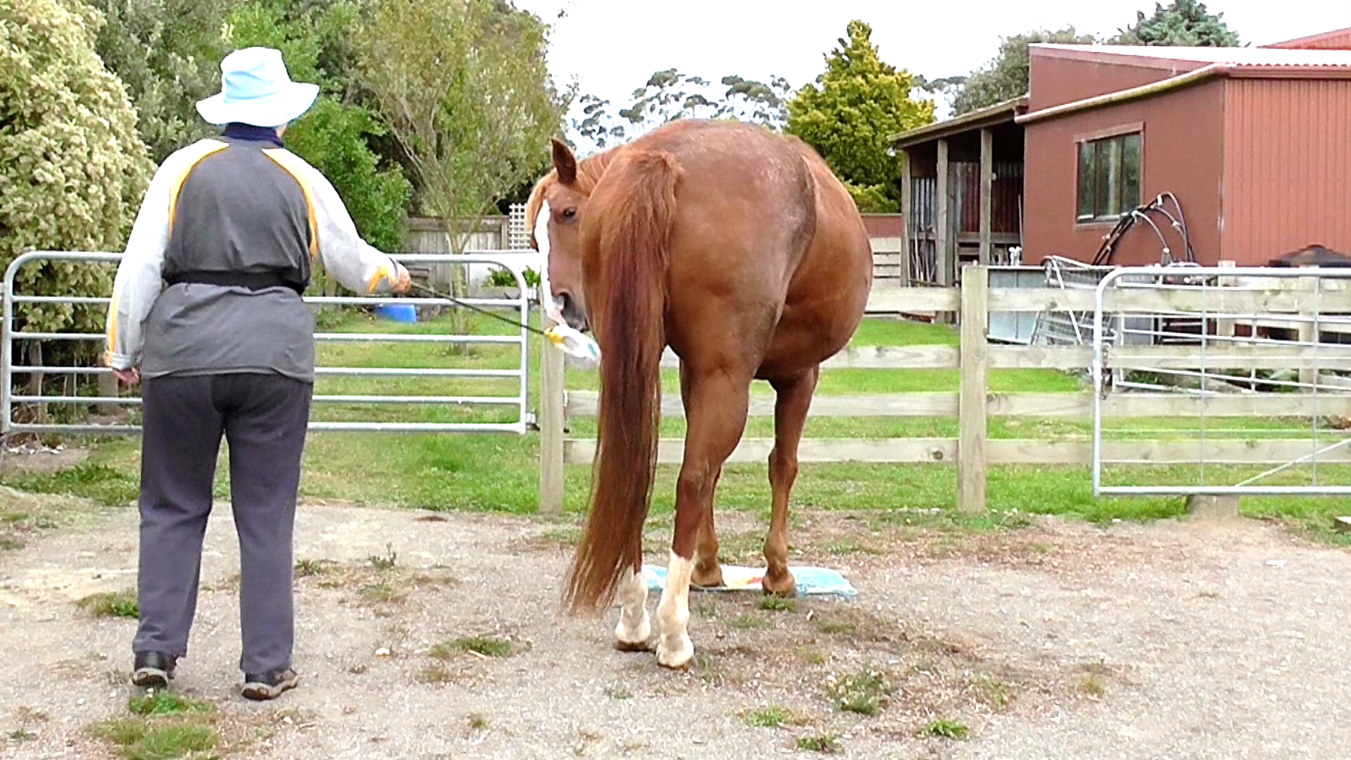
In the photo above, I am using a multi-signal. In terms of environment, I’ve asked Boots to park on the mat. My body orientation is beside her butt, facing backwards. My hand is giving a touch gesture on her hock to ask her to lift her leg. I also say, ‘Lift.’ Because I use this signal bundle or multi-signal consistently, she can link them reliably to foot care.
Behaviors Must be ‘On Signal’
Once we have taught a horse a response, either by free-shaping it or through careful application of approximations to reach a desired ‘finished’ behaviour, it is essential that we put the behaviour ‘on cue’ or ‘on signal’.
Often the last thing we taught our horse is his favorite because it has a recent high level of reinforcement. When I taught Boots to target her hindquarters to my hand, it became her favorite thing. But when she keenly wanted to show it off while I was talking to visitors, it became a bit of a problem.
Let’s look in detail at the topic of signal or cues. It’s imprtant that we are aware of everything that the horse may be observing.
Sometimes we use one type of signal in isolation, but often our signal is a mixture of body orientation, body language and gesture, energy change in our body, and often it has a verbal component. We are in essence using a ‘multi-signal’.
In this photo Bridget is using a signal bundle or multi-signal to ask Smoky to exit the trailer. She is in position behind the trailer, using touch on the tail, a clear ‘back up’ hand signal, and body energy indicating ‘backwards’. I’m in the front of the trailer using a ‘back up’ signal Smoky already understands.
We may think we are giving a clear signal but our energy, orientation and intent may not match what we want the signal to say. The horse will always do what he believes to be the right thing to do at that moment.
Even if we think we are giving one clear signal, the horse is noticing everything that is happening. That is why it is so easy to inadvertently teach horses things we didn’t intend them to learn.
One reason Clicker Training is so powerful is because it allows us to pinpoint exactly what we want the horse to do and teaches us to be more consistent. Horses appreciate this clarity enormously. It removes much of the guesswork for them.
The marker signal (click) tells the horse that what he just did is what we wanted and that he can go into treat-retrieval mode. The treat is offered right after sounding the marker signal.
We must remember that body language is a big deal with horses. It is their first and essential language. It’s what they use with each other. It helps explain why horses who do marvelous groundwork may suddenly become ‘lost’ when their handler mounts up. Suddenly the horse can no longer see all the body language signals that accompany groundwork.
Looking at signals in isolation can make it easier to become more mindful about exactly how we are using:
our environment
our whole body orientation
our gestures
our voice
our hands
any of our body extensions (ropes, reins, lanes, etc.)
our energy
how and where we present the treat after the clicker.
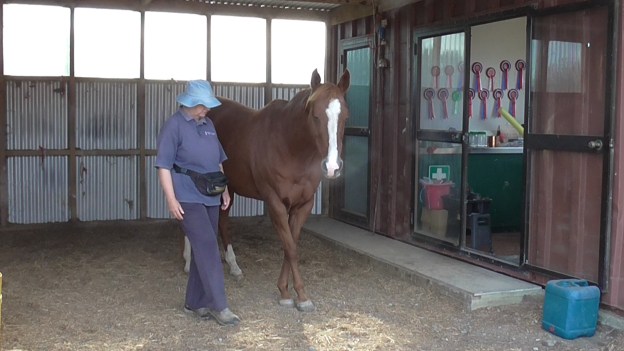
#38 HorseGym with Boots illustrates some of these ideas. You will notice that Boots is so clued in to some of my body orientations that she offers a belly crunch while I face her front on, a front leg lift when I stand shoulder-to-shoulder facing backwards, and a wee back-up when I face her. Now and then I do make a request but mainly I’m asking her to stay parked on the mat and not do anything else. It’s important that I keep my body energy low.
As an exercise, you could work out what you usually ask the horse to when you are in each of these body orientations.
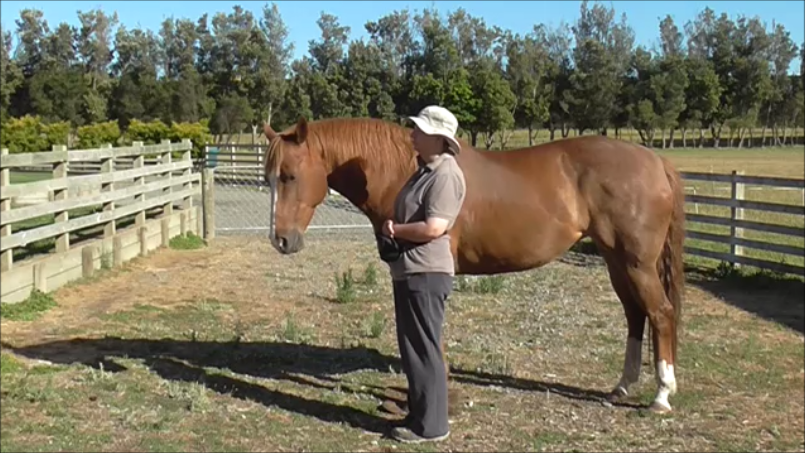
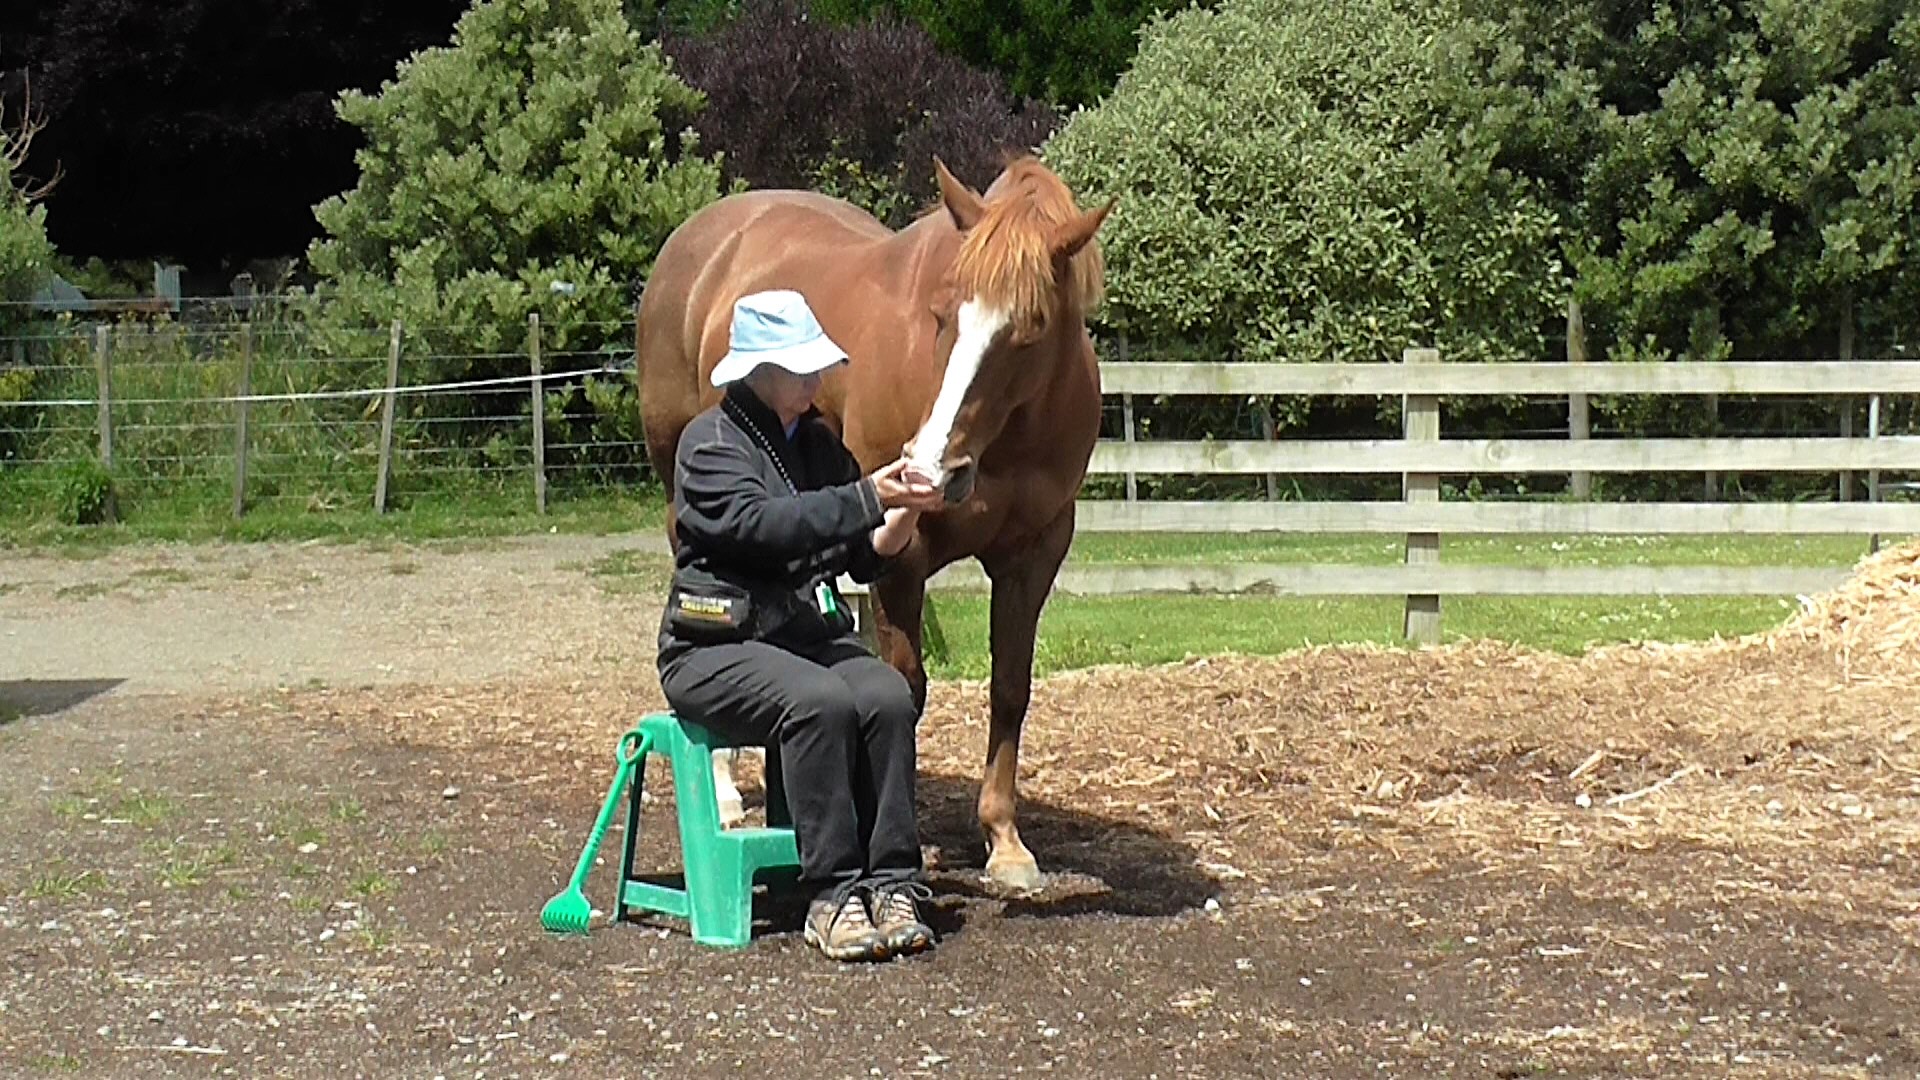
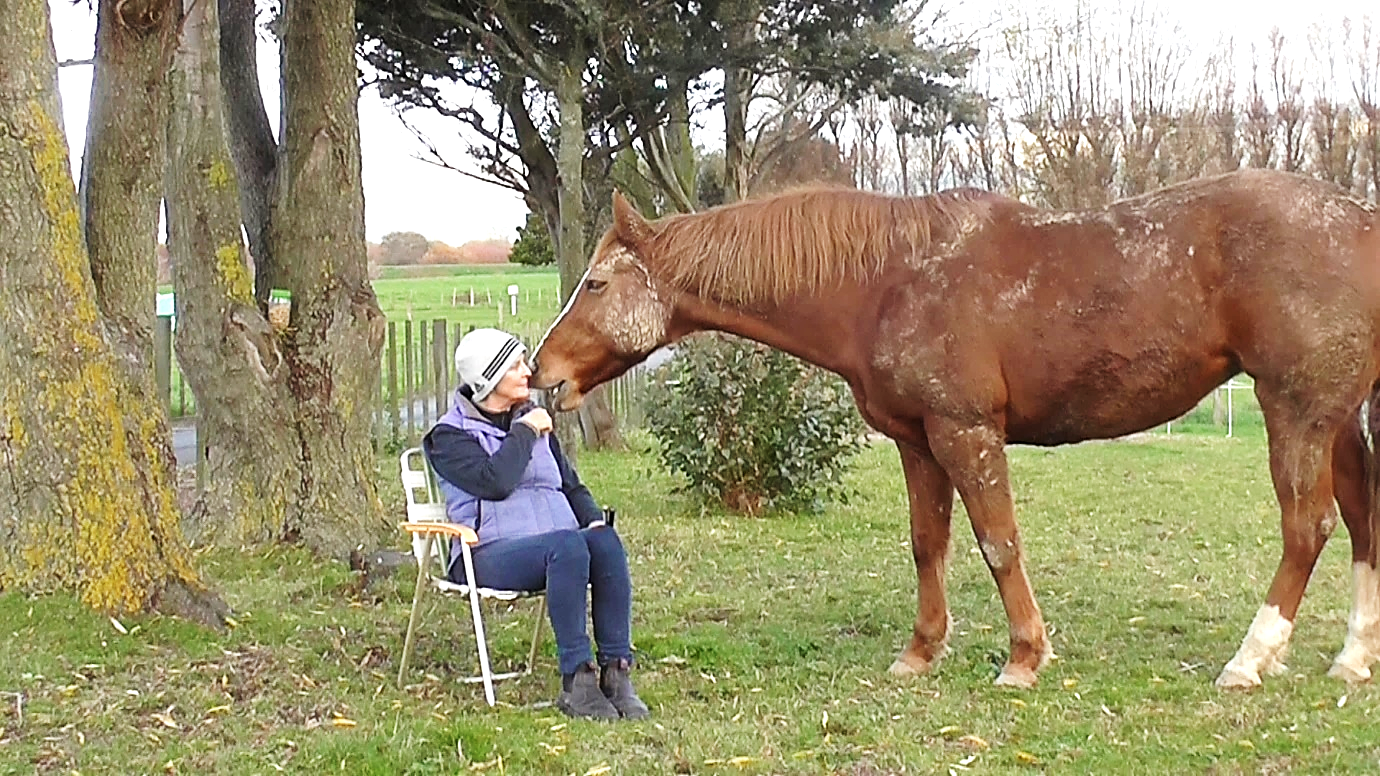
In the photo above, Bridget can FEEL that Boots is relaxed enough for her to carry on with foot care.
Feel is an aspect of horsemanship that sometimes seems elusive, but it doesn’t have to be. It is closely linked with the idea of empathy. Empathy itself is the ability to ‘feel’ what another being is probably feeling.
When dealing with horses, empathy and feel are involved with everything we do. The more we understand about the nature of horses as a prey species that depends on rapid moving away from danger and group life for security, the more empathetic we can be when our horse shows us that he is uncomfortable about something we are asking him to do.
The more we understand that the horse’s digestive system is geared toward a steady flow of low nutrient forage, the better job we can do at providing such forage. We know that to keep the horse comfortable, we must feed the bacteria in the gut in a way that keeps them happy.
OLYMPUS DIGITAL CAMERA
Horse have evolved to reqire a constant supply of low-energy forage to keep their microbiome in good working condition.
Horses have small stomachs and a large caecum where bacteria break down the food so it can be absorbed by the horse. These bacteria need a constant flow of food and do not like sudden changes of diet.
The more we understand how the horse’s circulation system depends on slow, regular walking movement over 24 hours, the less inclined we will be to confine horses in boxes. After all, they are not chocolates.
The horse’s feet compress and expand with each step the horse takes. Foot movements work like four extra pumps to help send blood the very long way up the legs back to the heart.
Horses step along as they graze. The only time they are still is for the few hours that they sleep, which are spread over 24 hours. Consistent movement is an integral part of horse circulation health.
Horses are naturally active on a 24-hour rhythm, not a day/night rhythm like we are. By ‘putting them in at night’ and by ‘feeding them meals’ in one place, we are seriously mucking about with their movement, their blood circulation and their natural biorhythms.
Many horse ‘problems’ stem from unnatural housing and unnatural feeding regimes as well as the damage caused by nailing inflexible steel shoes to a dynamic live foot mechanism.
As we develop empathy and ‘feel’ about what a horse is experiencing in the strange human-based world in which he finds himself, it becomes easier to know what we should do to ensure the horse is as comfortable as possible.
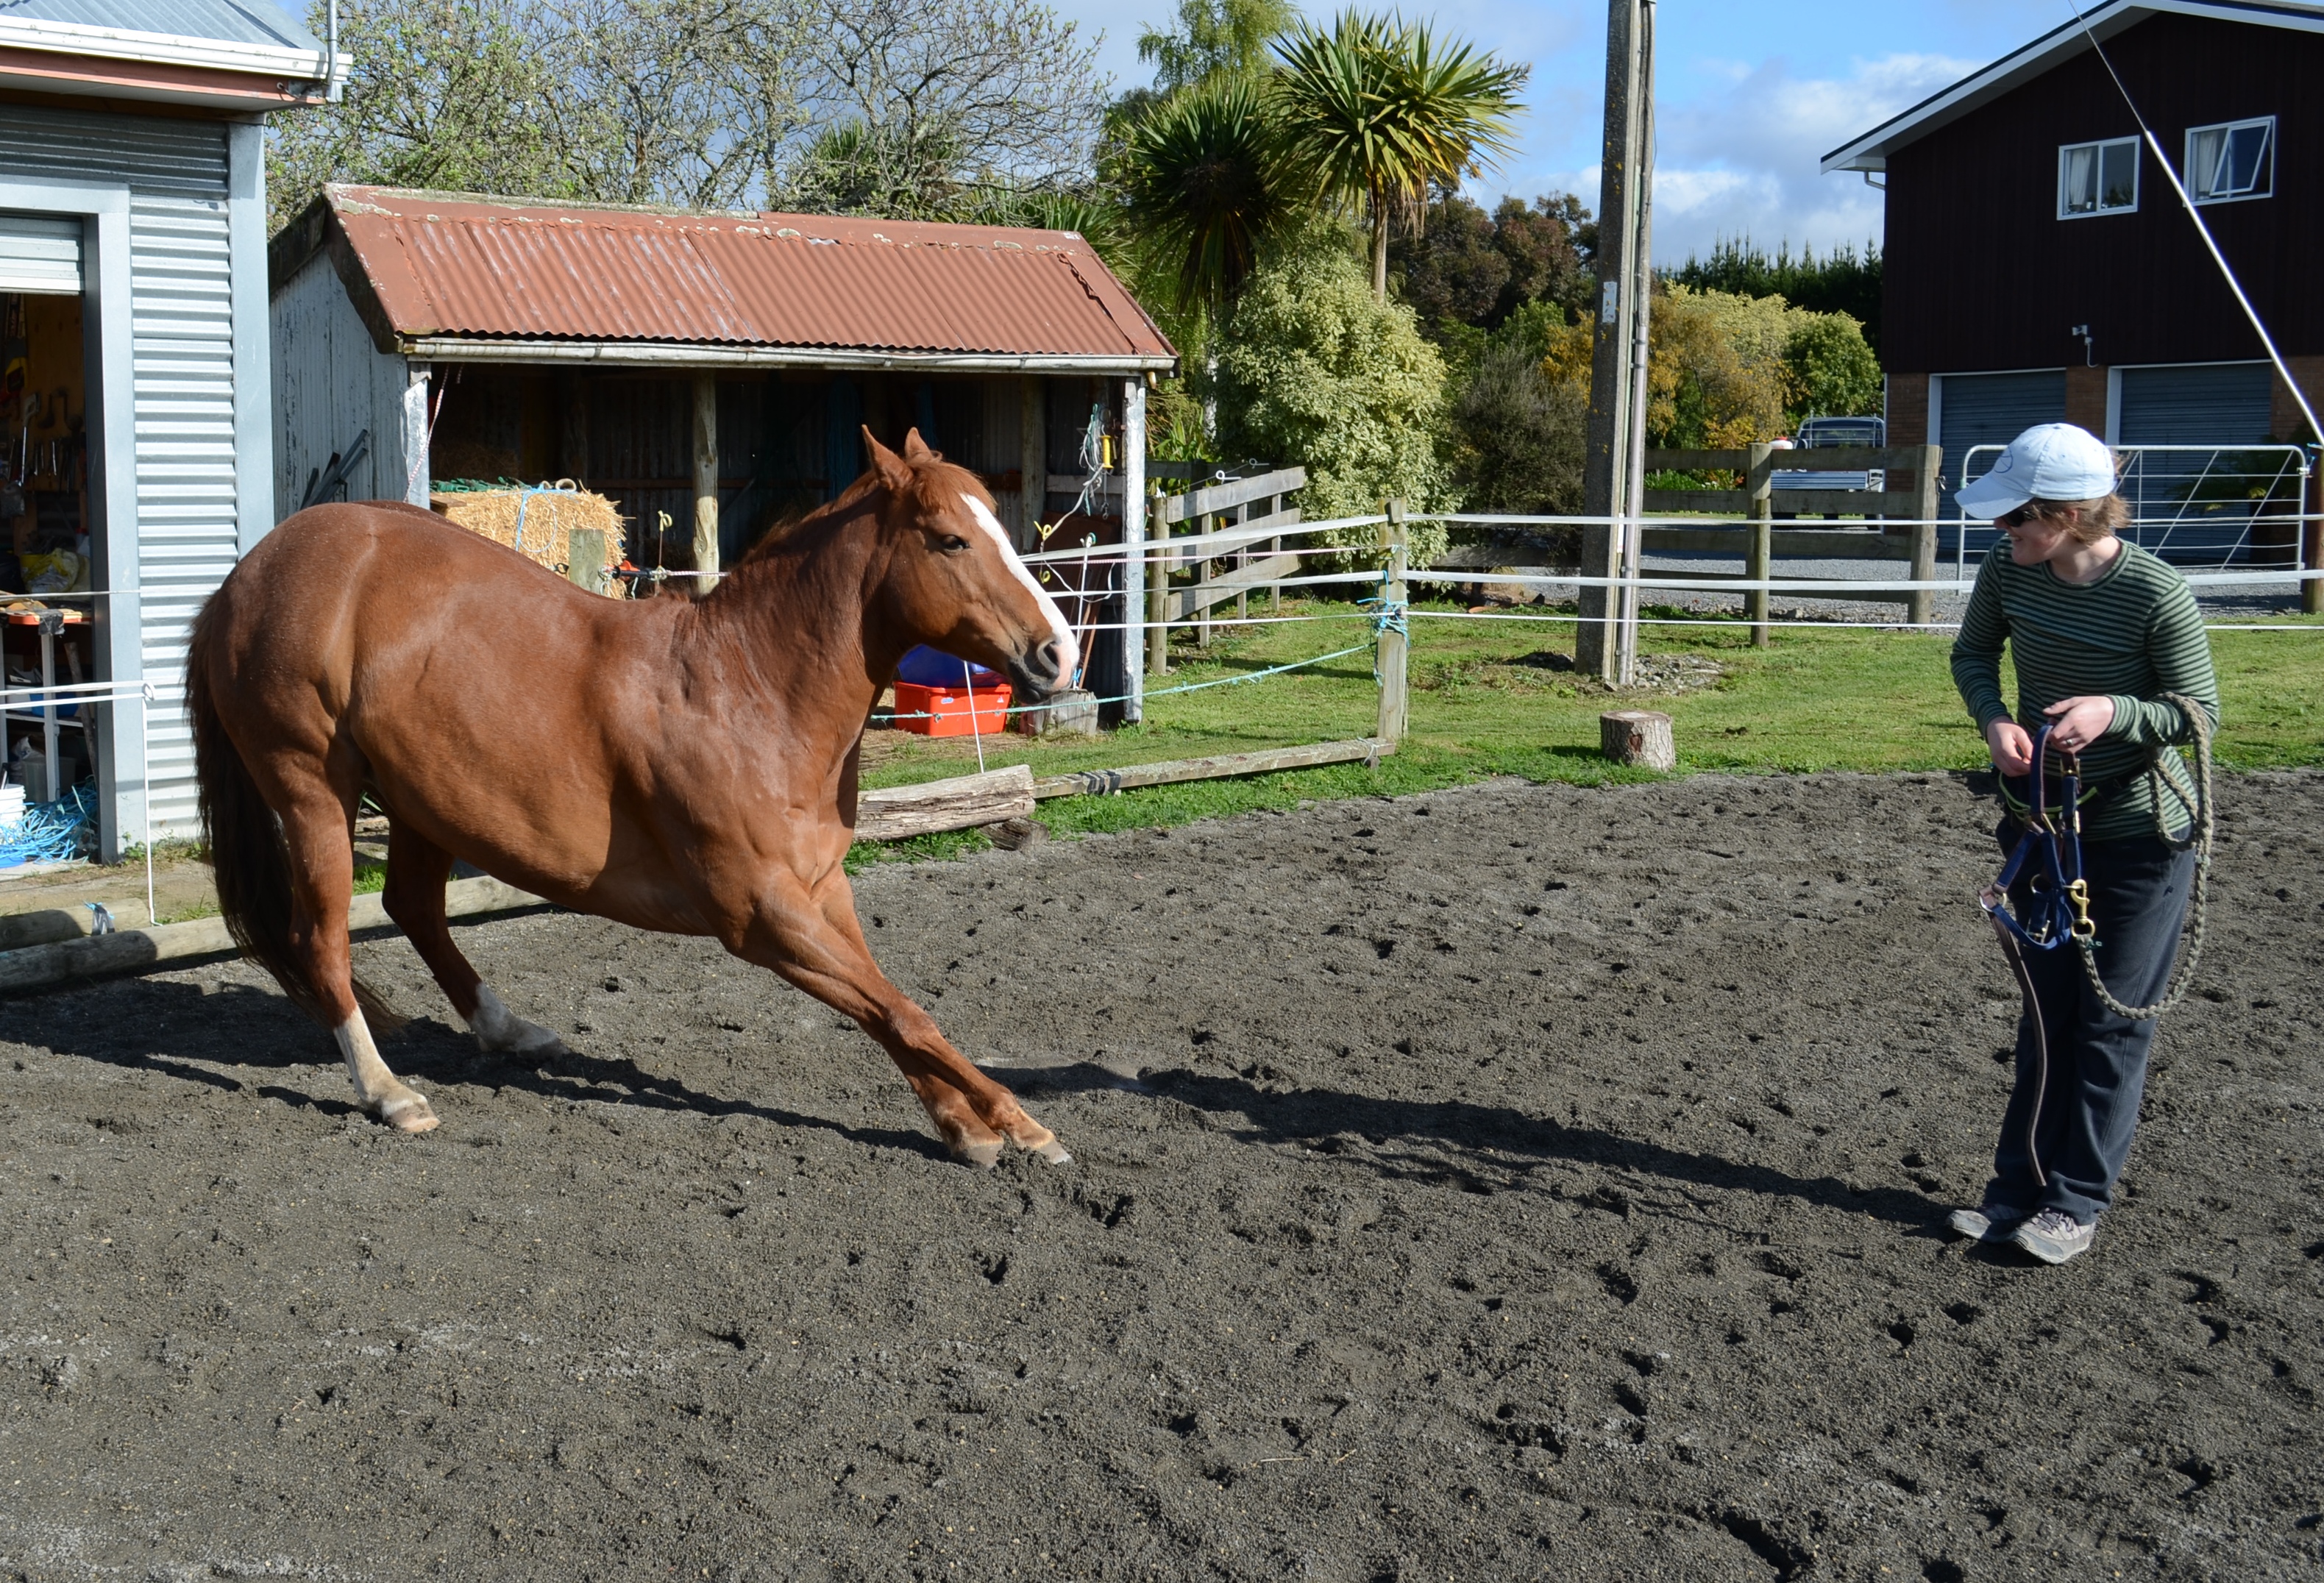
A horse high on adrenalin will find comfort in being allowed to trot or run the adrenalin out of his system. When he becomes high-headed and agitated, a handler with feel gives him the opportunity to move until he can switch from reactive mode to responsive mode.
A strong-spirited, low-energy horse can be extremely frustrating. A handler with feel for this sort of horse will use click&treat motivation as much as possible. Then it is easier to appreciate the reliable nature of this type of horse once he is on-side with the handler rather than trying to outwit him or her.
As soon as we can see our horse, he can see us. As soon as he can see us, he is gauging our energy level. He is ‘feeling’ us. A person with ‘feel’ will be doing the same with the horse – gauging his mood, the way he is moving or grazing, checking for anything out of the ordinary.
As soon as a horse sees us, he is feeling our mood, our energy level and our intent.
When a handler develops ‘feel’ of this sort, s/he is not frustrated by undesirable horse behaviors. S/he seeks the cause(s) and adjusts the horse’s lifestyle plus his Individual Education Program (IEP) to accommodate the horse. This is the essence of a handler’s emotional neutrality.
Horses don’t do things just to annoy us. At any moment in time the horse is doing what he believes is the best thing do.
With careful education, we can enlarge the horse’s comfort zone and areas of expertise. We can expand his repertoire of things he can do with confidence.
It takes considerable time and effort, but done at the horse’s pace, he will gain skills to help him through his whole life.
‘Feel’ comes in many guises. Here are some of them.
Feeling the difference between reaction and response
Realizing that every horse will feel different, and that to the horse, each handler feels different
Knowing the precise moment to release signal pressure (click&treat)
Acknowledging the difference between teaching and forcing
Knowing when we are pushing too much, resulting in a loss of willingness
Knowing when we are pausing too much, resulting in a loss of interest
Recognizing physical well-being, so that lack of wellness stands out
Finding the ‘balance’ between the two extremes of ‘unbalanced’
Able to cause a subtle shift in the horse so he regains balance
Staying grounded when the horse loses his physical, mental and/or emotional balance
Able to pause for lesson absorption or for a shift in balance
Able to ignore unwanted behavior and quietly ‘re-set’ a task
Understanding a specific horse’s underlying character type
Recognizing when the horse is ready to move on to the next slice of the new learning
Recognizing when the horse-human connection is present and when it is absent
Not taking the horse’s trust for granted
Understanding the lives of horses in the wild; their natural 24 hour and seasonal rhythms
Understanding physical, mental and emotional thresholds of a specific horse
Understanding how habituation works
Understanding how desensitization works
Understanding how sensitization works
Physical feel through the rope
Physical feel through the reins
Physical and emotional feel through the whole body when riding
Feel for two-way communication playing at liberty. If the horse decides to leave, knowing how to motivate him to join up again or deciding to call it a day
Knowing when to stop a session, or a part within the session
Understanding that the way the handler feels is instantly picked up by the horse, good feelings and bad feelings equally.
In the photo above, Boots demonstrates how aware of, and responsive to, a horse can become if our body movements are taught and used with total consistency.
During everyday management of our horses, basic care or getting them ready for a walk or ride, we tend to move in and out of their personal space without thinking about it. When we do ground work, we move into and out of various positions as part of the signals we are giving.
Sometimes we forget that horses notice everything. If we can learn to become more conscious of our positions, we can use ‘position’ as part of our communication package.
If we are aware of, and consistent with, our relative body position, the position itself can become the signal if the horse is closely tuned-in to what we are doing. The horse will become more and more mentally connected to our intent. If we are totally consistent, it will seem as if the horse is reading our mind.
We can approach everything we do with one of two mind-sets. We can see horse behaviors we don’t want as dark problems we have to ‘fix’ or overcome. Or we can recognize that a horse always does what he feels is best at that moment. We can enjoy the challenge of creating a relationship with such a sensitive being by gradually building a mutual communication system.
By increasing our spatial awareness, our signals can become much lighter. The horse begins to find staying ‘in tune’ with us much easier because our body language has less ‘static’ or ‘background noise’ in it.
The more we can eliminate meaningless movement (and chatter), the clearer the horse will find our communication.
Expanding our Concept of ‘Leading’
We can expanded our concept of ‘leading’. When we think of someone leading a horse, we usually visualize a person walking beside a horse or in front with the horse closely behind.
We usually see a lead rope as part of the picture. But when we begin to think deeply about ‘leading’ it is easy to see that there is much more involved.
We can enlarge our concept of “leading” to encompass all the ways that we influence where the horse puts his nose or his feet. That is, when we want to make our idea his idea.
We can be on the ground, riding, using headgear, a neck-rope, or have the horse at liberty. We can be using any combination of body language, shifts in our weight, changes in orientation, rope/reins, and voice. With clicker training, we use a marker signal plus a treat to ‘capture’ or reward specific behaviors that we like.
In other words, everything we do when we want to influence the horse comes under the umbrella of ‘leading’.
We might:
Call him out of the paddock.
Ask him to wait while we go through a gate first.
Ask him to offer his head for haltering.
Ask him to back up out of our personal space.
Pick up a foot to clean it or trim it or dress a wound.
Ask him to step on, over and across unusual surfaces.
Ask him to step into and out of a tight spot like a trailer, lane, or water.
Ask him to move away from us as in circle work with a reverse round pen or playing at liberty.
Ride, or drive with long reins.
Ask him to stay tied up or parked.
Guide him through an agility obstacle.
In simplest terms, any time we want the horse to do something specific with his nose or his feet, we are ‘leading’ him. ‘Guiding’ may be a better word. We are orchestrating his movement, or lack of movement if we need him to stand still.
There are eight key leading positions which can be static or dynamic. They may flow into each other as we make a request, the horse complies, and we move or stand quietly together.
Horses value clarity of intent. They generally are happy to comply as long as they can understand what we want and we make our request politely and reward a positive effort.
Doing things with our horse is comparable to being on a sailboat. At every moment the sailor is conscious of the wind, the waves, and the relationship of his sails to how the boat is responding. He makes constant adjustments to keep his boat sailing smoothly.
Every moment we are with our horse, we need a similar consciousness of the immediate environment, the distant environment, how we are asking the horse to do what we want and how the horse is responding to our request.
We have to quickly compute the horse’s large responses, plus the nuances of his body language, so we can gauge his emotional, intellectual and physical comfort at the moment. As we get better at seeing all these things, it becomes easier to know the best way forward to yield the result we want.
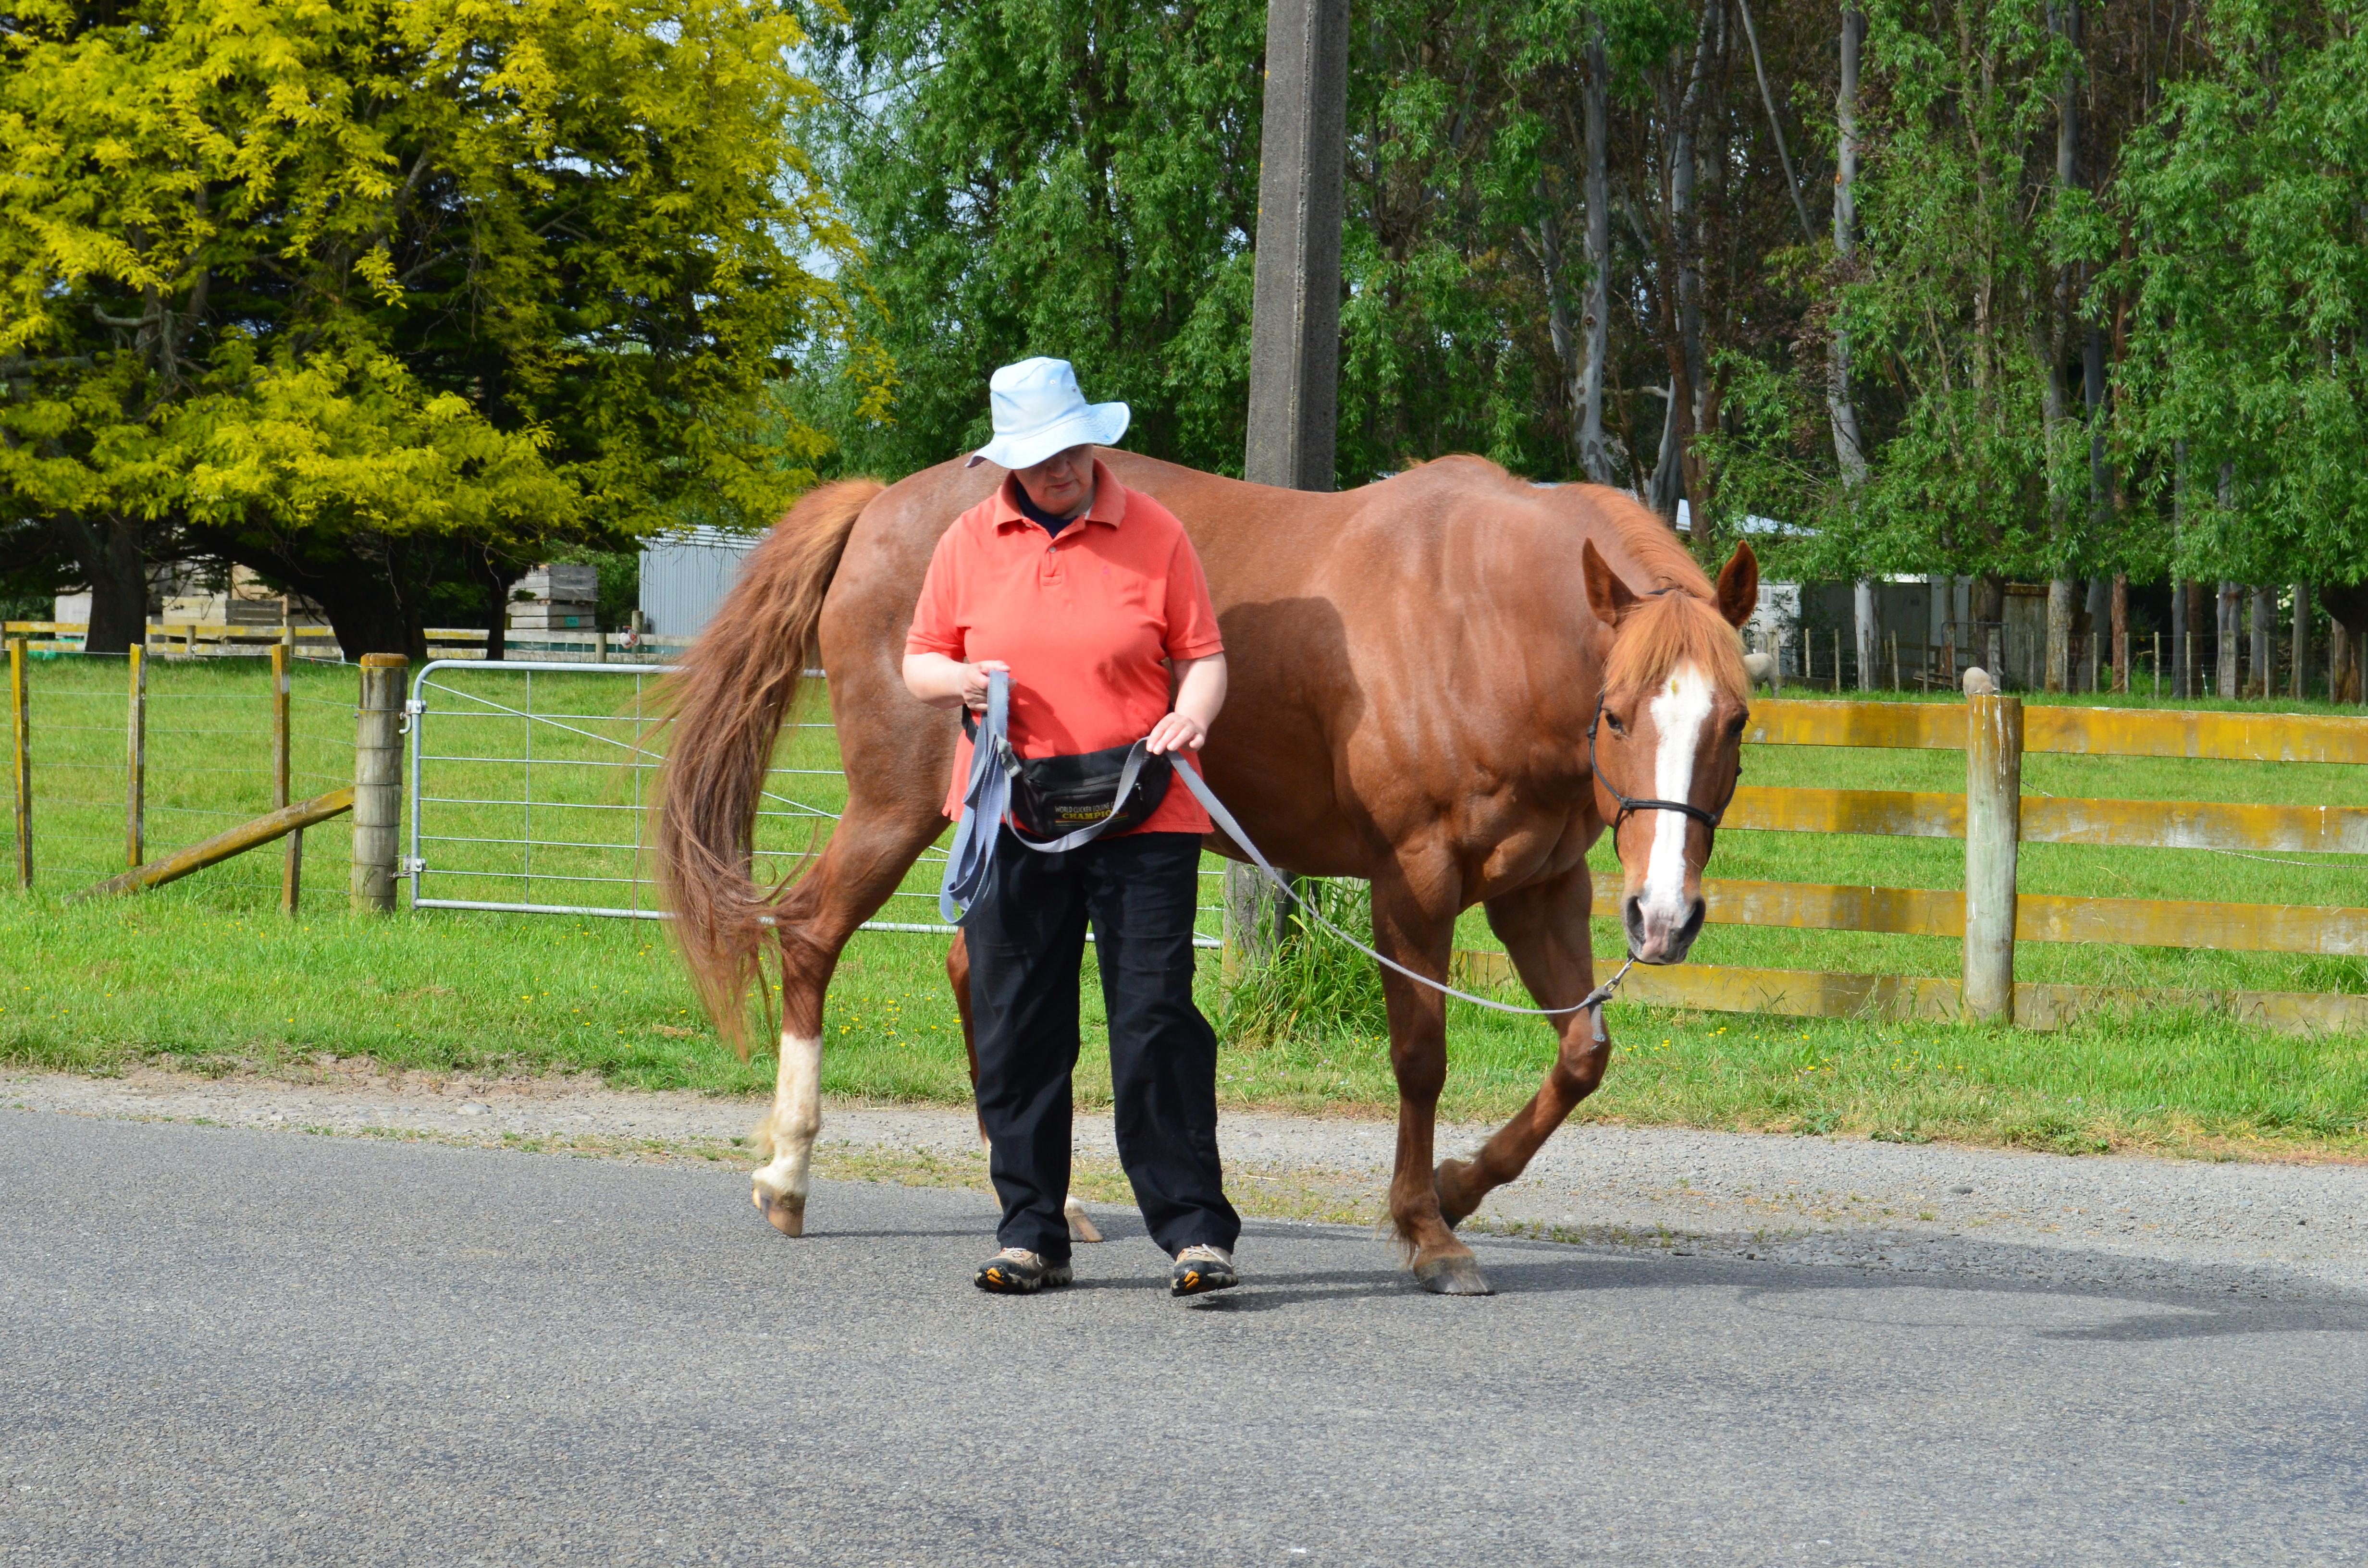
Leading Position 1: The horse is in relaxed mode on a morning walk. I carefully keep a drape (smile) in the lead. This is how horses in a herd follow each other during quiet movement from A to B.
Leading Postion 2: Horse keeps his nose and eye just behind the handler’s shoulder.
Leading Position 3: Anywhere between the ears and the shoulder. A versatile position that we can use as our basic leading position for all kinds of things.
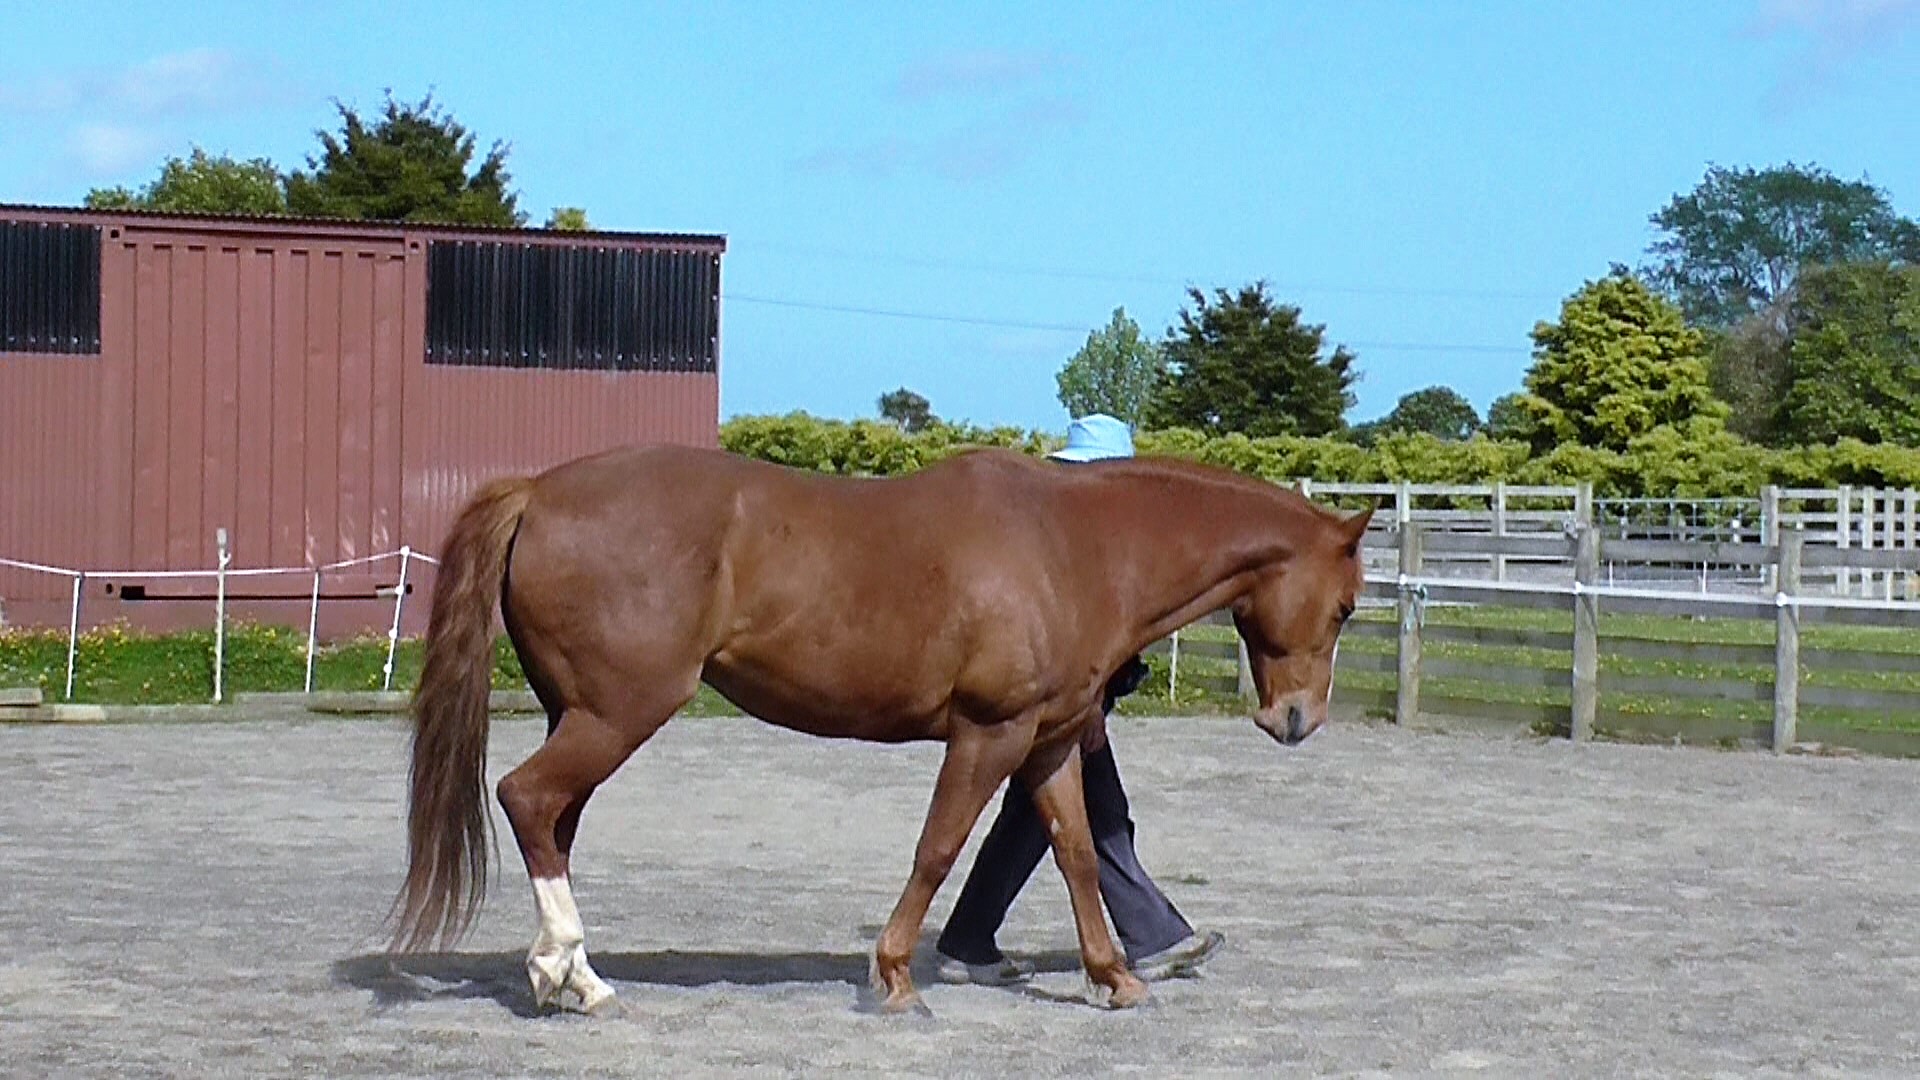
Leading Position 4: Behind the withers, alongside the ribs. This position has the horse moving out in front of us like he will be if we ride . Horses used to following behind can find this difficult at first, so we teach it en route to a stationary target where he knows he will earn and click&treat.
Leading Position 5: Beside the horse’s hindquarters. If the horse knows a touch signal on his butt as a ‘walk on’ signal, we have a way of sending him in front of us into a narrow space like a trailer or a gate.Again, teaching this first with a well-known stationary target makes it easy for the horse to understand our intent.
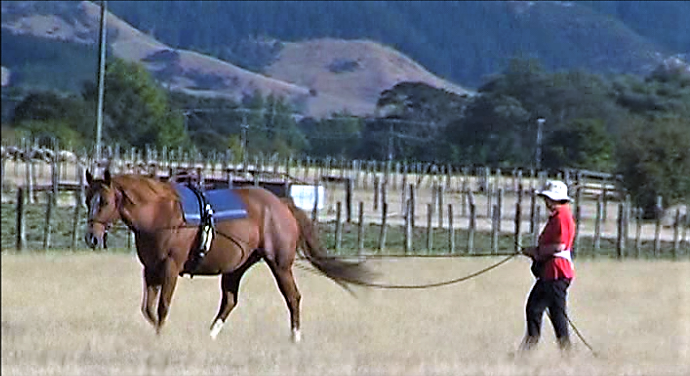
Leading Position 6: Behind the horse: Long-reining is a superb way to teach the horse all about turning and backing signals applied to his head gear via reins from behind, before adding the complication of a rider.
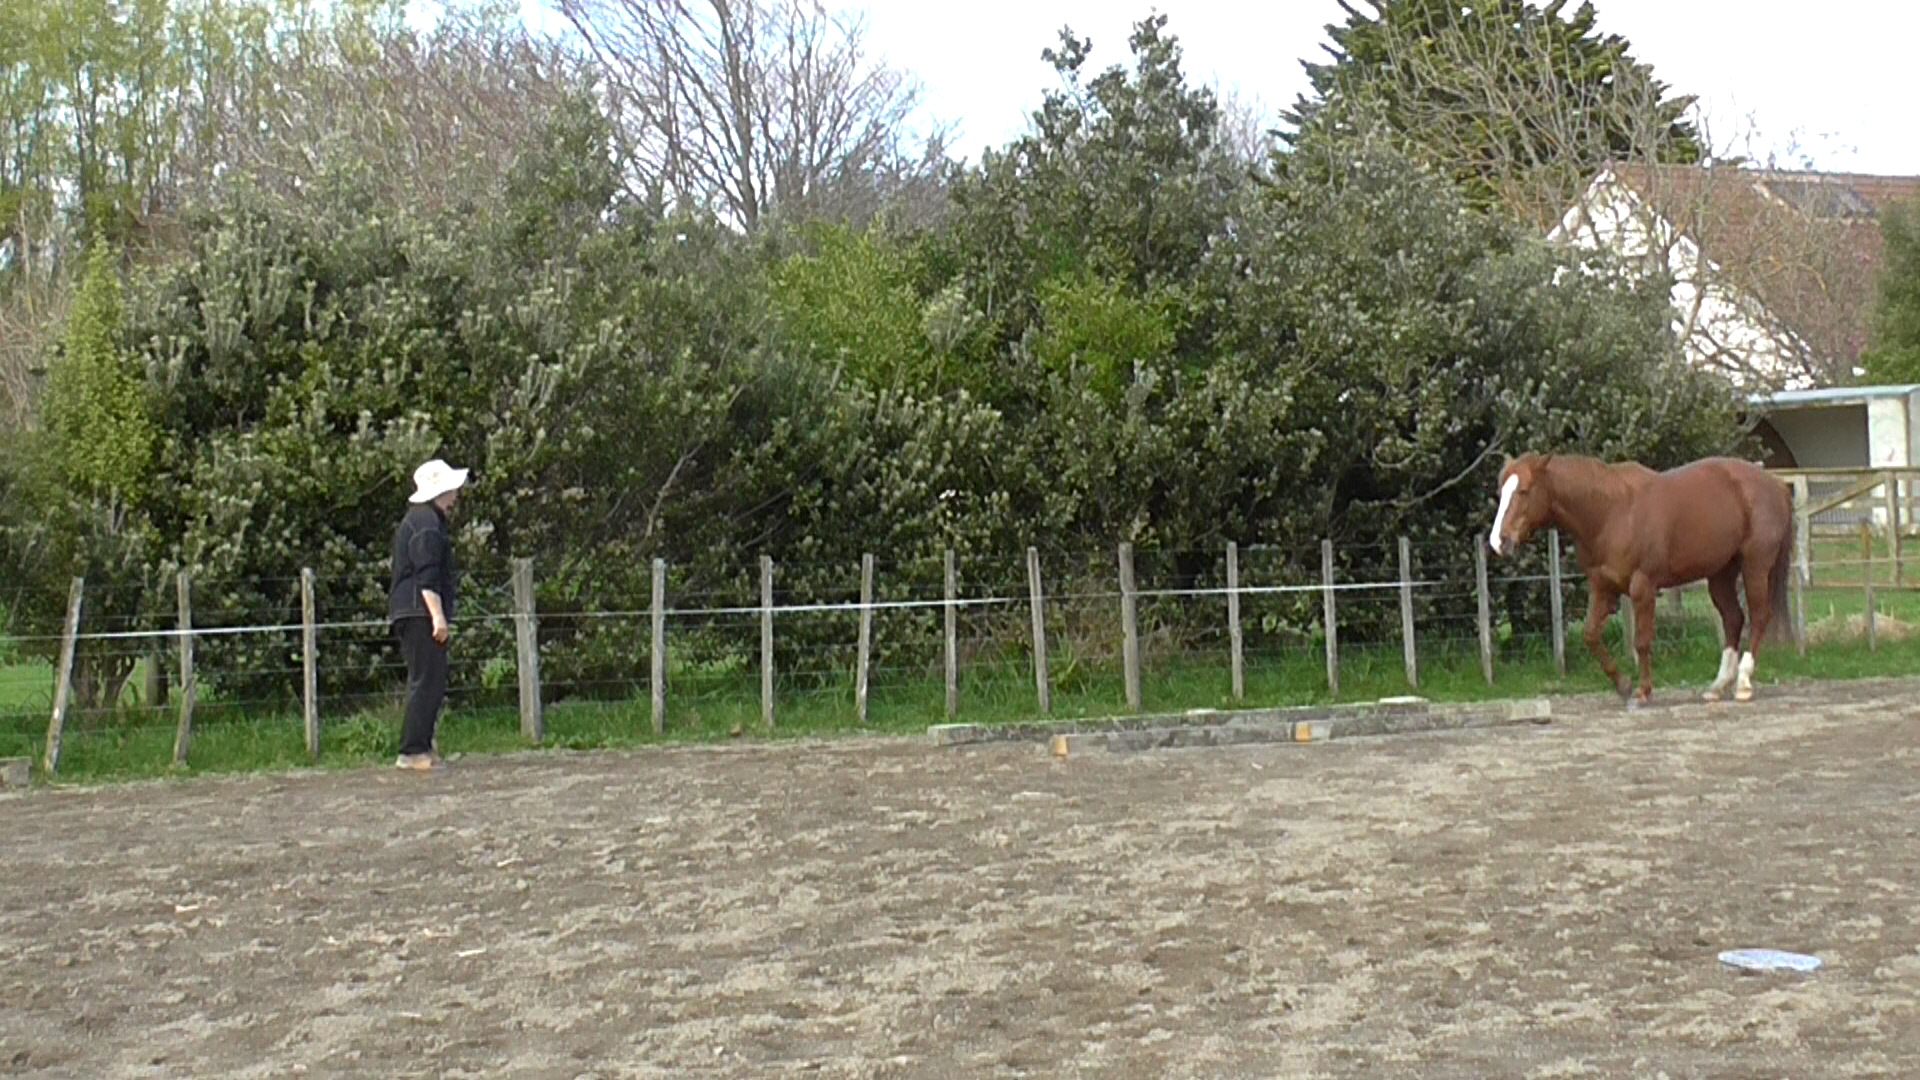
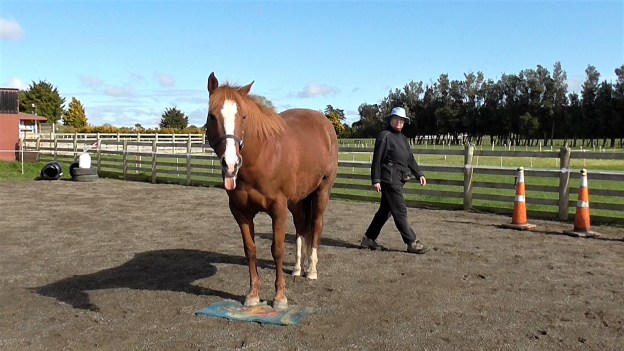
Leading Position 7: Face to face: I asked Boots to wait so we could do a recall. She is just beginning her recall.We also use face to face when we want the horse to back up away from us.
Leading Position 8: Facing the side of the horse. I’m in relaxed mode while waving the flag over her for a Horse Agility task. She is more interested in what is going on next door.Obviously grooming and foot care, tacking up and mounting also require this position.
An awareness of leading positons allows us to include ‘position’ as one of the key elements of any signal we use to communicate with the horse. By dissecting each leading position we can see the training possibilities it presents.
We often drift from one position into another without realizing that the shift can have a lot of meaning for the horse.
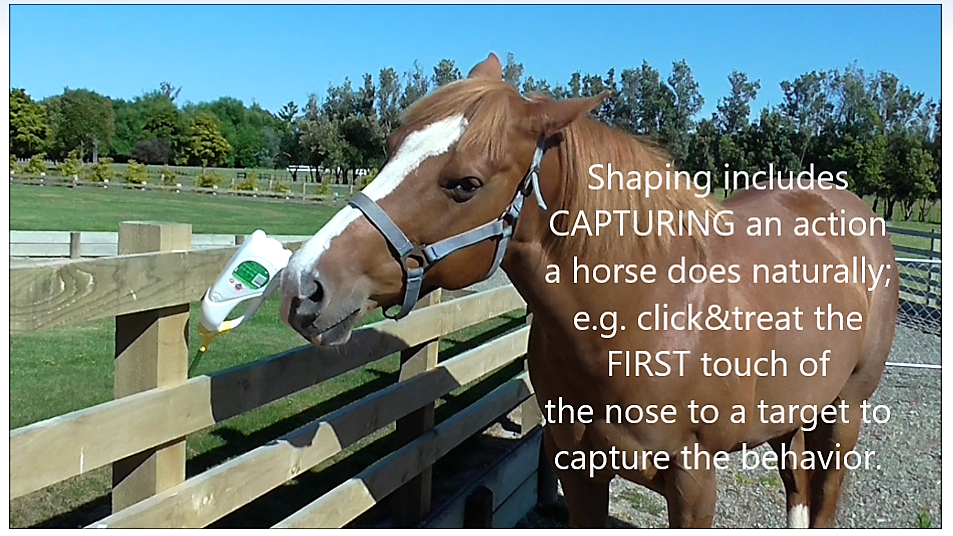
Free-shaping means clicking and treating the moment the horse naturally displays a behaviour you want to encourage. The click&treat encourages the horse to repeat the behaviour that earned the treat.
The first free-shaping exercisemost handers use is to hold (or set) out a target and wait for the horse to investigate it with his his nose = Click&Treat. Most horses pick this up quite readily. Many equine clicker trainers use it to teach their horse the meaning of the ‘click’ or whatever marker sound they are using. My older mare (with a chequered background before I got her) took nine short sessions over a week before she made the connection between her nose touching the target, the click, and the treat that followed.
Because it is the horse’s choice to do the task, they learn it readly because it was their idea in the first place. It gives them a sense of ‘agency’ – being in control. Like us, horses like to be in control of their lives.
Boots has to her nose on a stationary target. I clicked as her nose touched it and I walked to her to deliver the treat. Once the horse loves to do this for a click and treat, we can put such objects all around our training area and walk or trot between them to earn a click&treat at eachone. Also useful for ‘destinations’ when we begin leaving home. We can use destinations for groundwork and riding.
Using a hand-held target, It’s always wise to start out with ‘protected contact‘, i.e., the horse on the other side of a barrier.Until we begin clicker training, we have no idea how the horse will react to food treats from our hand. This is also the time to try out different treats .
Here I’ve created a barrier in a corner, which is another option if you don’t have a suitable fence handy, but with a new horse – maybe make the person’s space a bit bigger!
Your safety barrier for PROTECTED CONTACT does not necessarily have to be fancy.
If you can use electic fence tape for training, make sure the power is turned off during training time.
In this clip, I’m free-shaping head lowering.
Eventually we added a verbal signal, and a body language signal, so when I bowed, she bowed.
The following clip shows an alternative to hand-feeding while teaching the TARGET = CLICK = TREAT process.
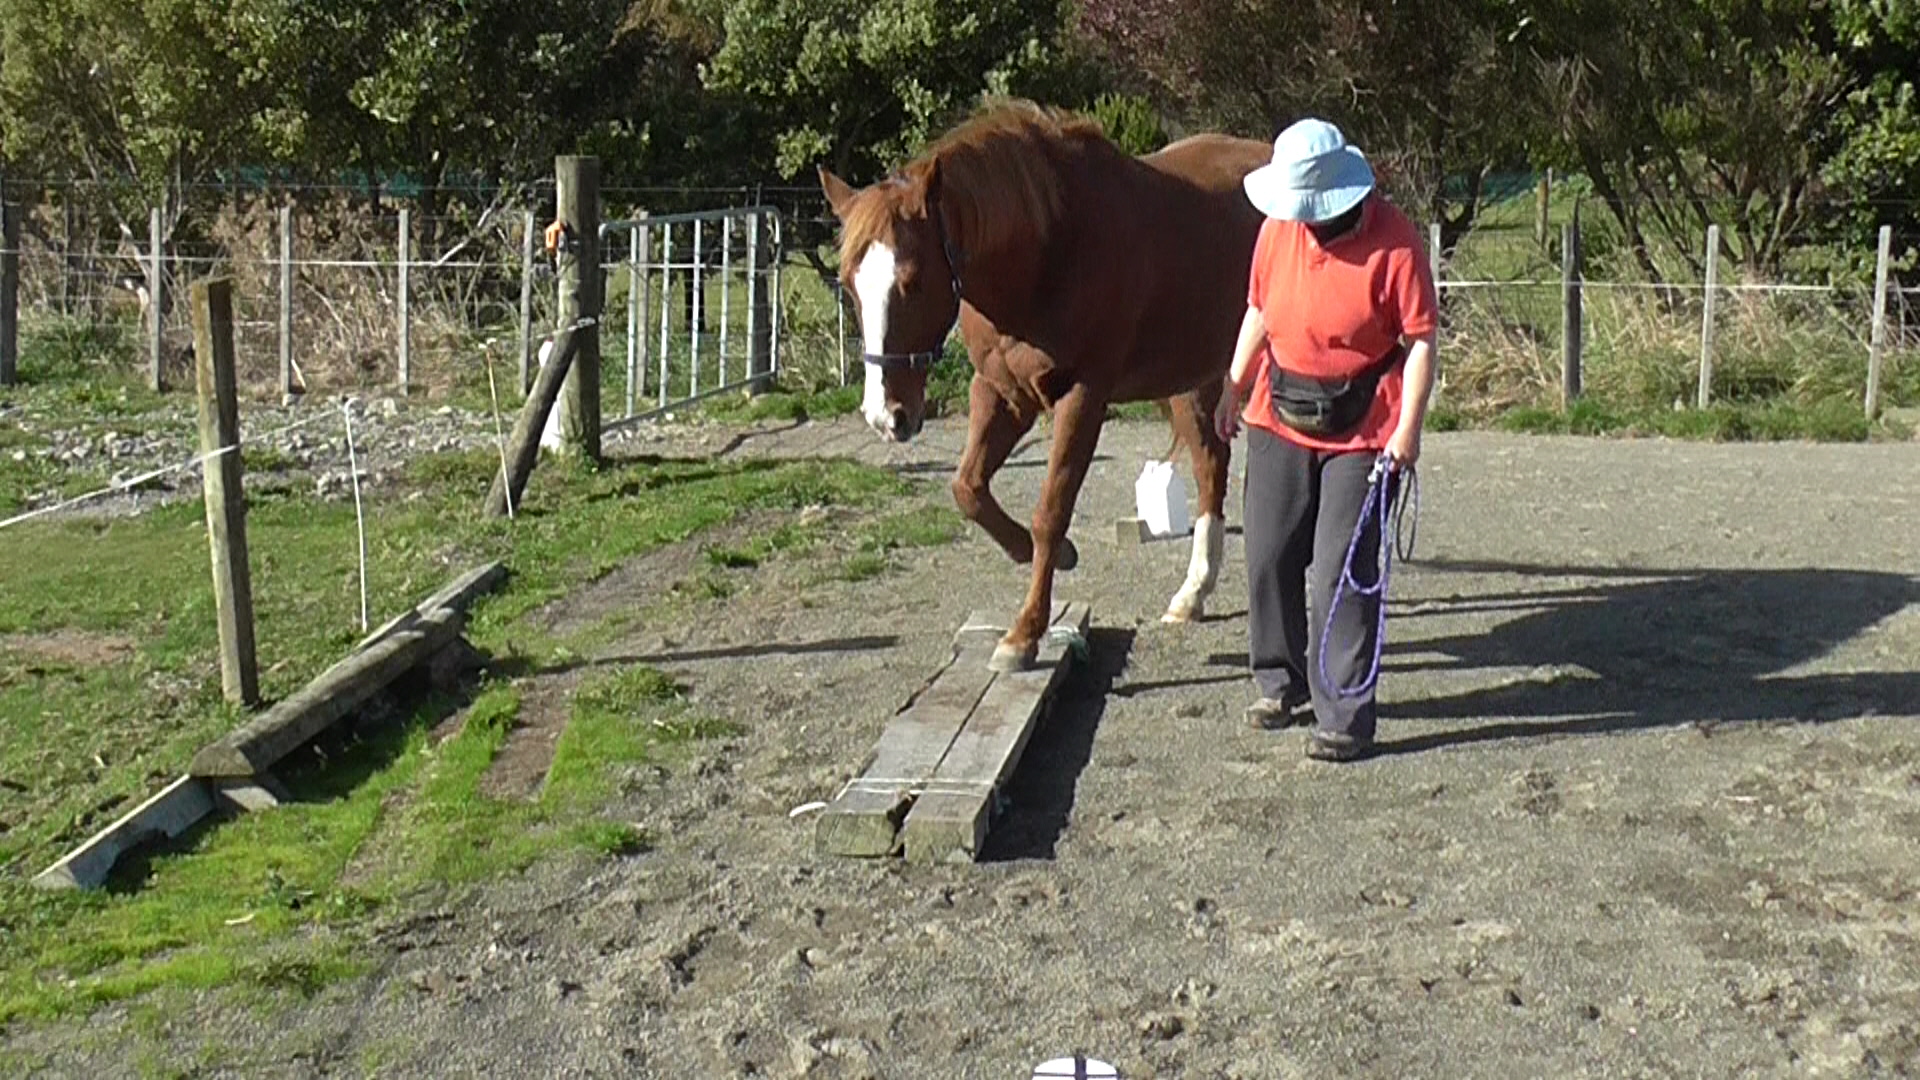
In the next clip, I free-shaped step aerobics.
It’s also a possible way to build confidence with any tight space or a trailer.
In the next clip we are doing the 20 Steps Exercise. Depending on your starting point, it could take a few or many short sessions to get 20 smooth steps with one click&treat at the end. All you need is for the horse to willingly walk one step with you, click&treat, and work forward from that.
The next clip is a very early lesson in free-shaping Boots’ confidence moving along with a bicycle.
The following clip with the bicycle is much later.
The next clip is a demo of tummy crunches.
I learned this from Alex Kurland.
1. I began with the horse behind a low barrier. I stood at neutral (zero intent = Number 10 in the Blog Contents Quick Links) and watched casually (not staring at the horse) with a relaxed stance, watching to click&treat any upward or backward shift of weight.
2. I did this IN THE SAME SPOT for a minute or two once or twice a day, mainly right before afternoon feeding time. And as a ‘last thing’ at the end of a play session. Having usual times in the same place seems to make the horse look forward to having ‘another go’.
3. Once we were getting a purposeful weight shift back because she realized that’s what earned the click&treat, I sat down to bring the horse’s head a bit lower. Previously we had ignored head position as the horse was experimenting with different possibilities. When I sat down, she lowered her head position because the treats were offered lower. This developed over months and months.
4. At some point, the crunches became a part of her personal repertoire because she would offer them if she wanted to initiate an interaction. At this point I added a verbal signal/cue.
5. I’d never do more than about what is on this clip at one time.
6. Eventually I could ask for the crunches standing her shoulder, her butt and behind her, using the verbal signal (zzzip) plus my body language of leaning backwards. We had such a long and strong history of reinforcement that she readily adjusted to my different positions. She happily did it with a rider aboard as well.
Free-ShapingBoots doing a STRETCH:
Once Boots realized that her ‘downward dog’ stretch earned a click&treat every time she did it, she offered it frequently. I initially free-shaped it by noticing that she often stretched like this after getting up from a nap. I managed to ‘capture’ the behavior two days in a row, and she then began to offer it often enough so I could put a verbal cue to it – ‘Stretch’.
When the horse is comfortable picking up the front feet on request, we can proceed in a similar way with the hind feet. We start as usual with the horse willingly targeting a familiar mat and able to stay parked on it.
Then we make sure the horse is comfortable being rubbed all over with a body extension, paying special attention to the belly and hind legs.
If the horse expresses concern about being touched with a body extension or with having a rope swung lightly around his hind legs, we’ve found a big training hole. It’s essential to go back and build the horse’s confidence about standing still while we do things around him.
Before we proceed with picking up feet, we need the horse calm and relaxed having his legs brushed with a soft brush right down to his feet. We want him to remain calm and relaxed when we rub and massage his legs all the way down.
To develop the idea of lifting a hind leg on signal, we can touch the hock gently with a target such as a pool noodle or a tomato stake with bubble wrap taped around it. Click&treat as we touch the hock. Repeat until we can hold the target a little above the hock and the horse lifts his leg to touch the target because he’s figured out that’s what causes the click&treat. Be careful to click as the leg is coming up, not on its way down.
The hock is a convenient point at which to teach a touch signal for lifting the hind feet.Bridget has asked Boots to target her hock to the body extension which is bubble wrap taped to a tomato stake.
Eventually we just have to point to the hind leg we want lifted.
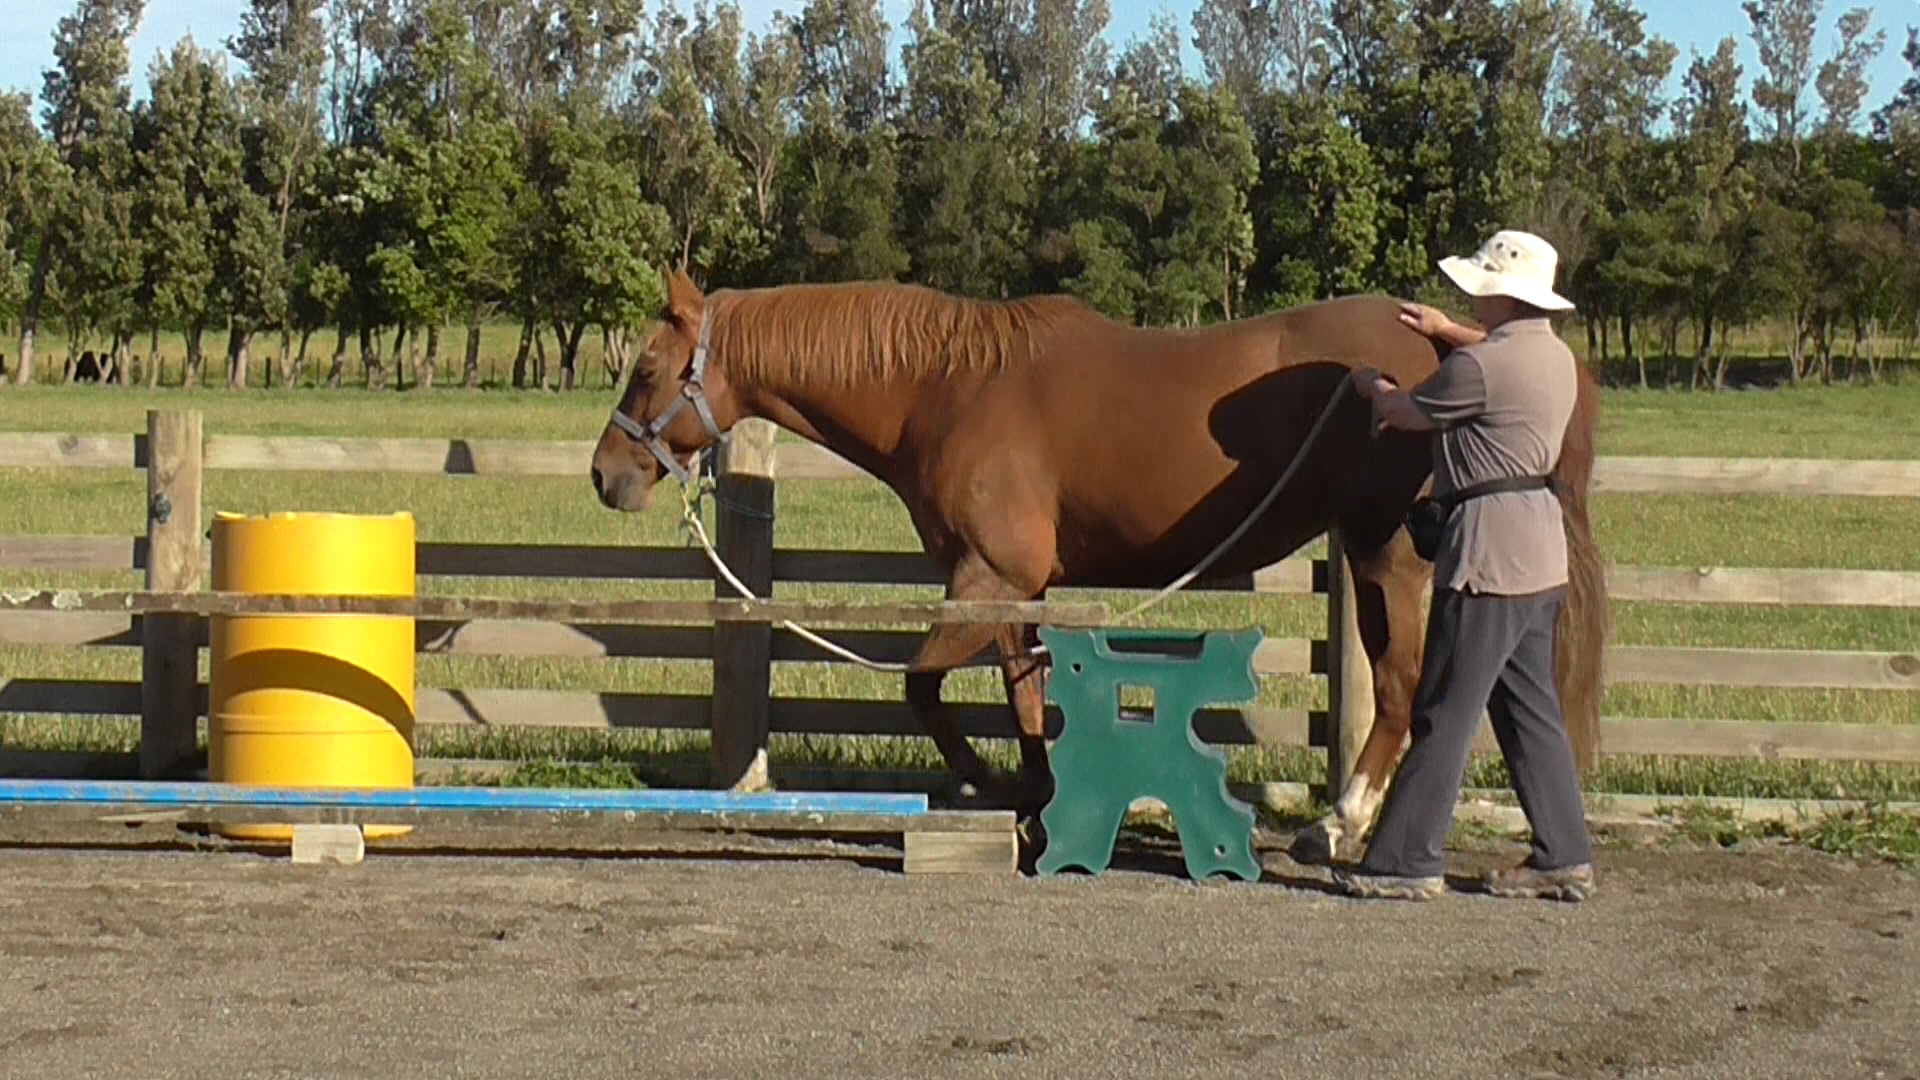
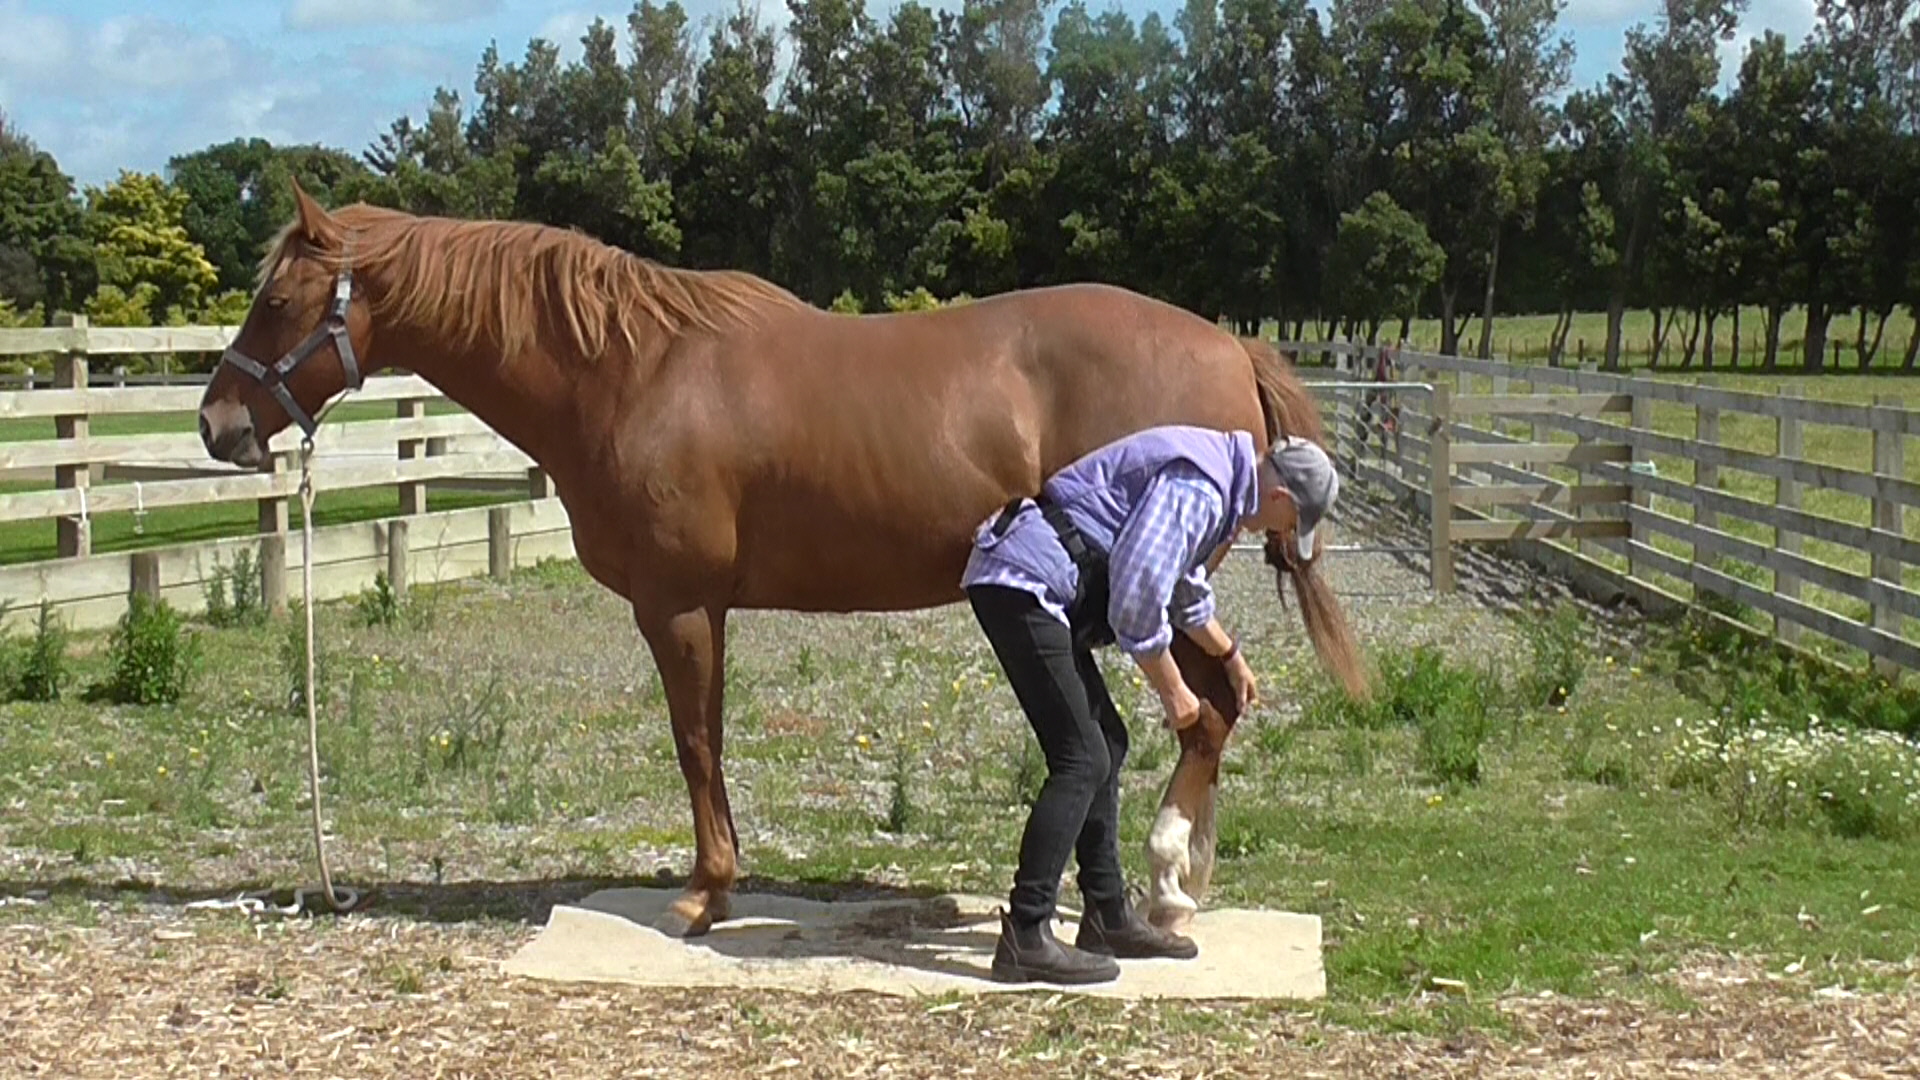
Once leg lifting is well established, we generally use touch when we want to do foot care, like a farrier or hoof trimmer would expect. We always start with our hand at the withers, and run it across the horse’s back and down to his hock. This gives the horse time to shift his weight so he CAN pick up the leg on that side.
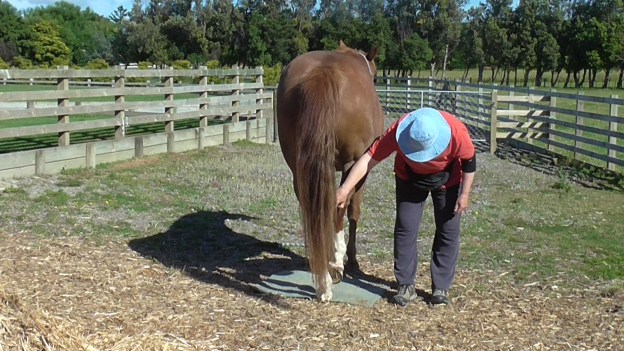
Bridget is running her hand down to the hock. Touching the hock is our signal to ask for a foot lift.
By the time Bridget reaches the hock, Boots has already taken her weight off that leg so she can pick it up and stay balanced.
Lifting feet is all about weight shifts. It needs to be taught carefully and systematically, making sure that the horse understands each slice of the process. By teaching targeting a body extension first, the horse figures out how to shift his weight and balance on three legs without other complications thrown in – like the foot being held, cleaned, trimmed.
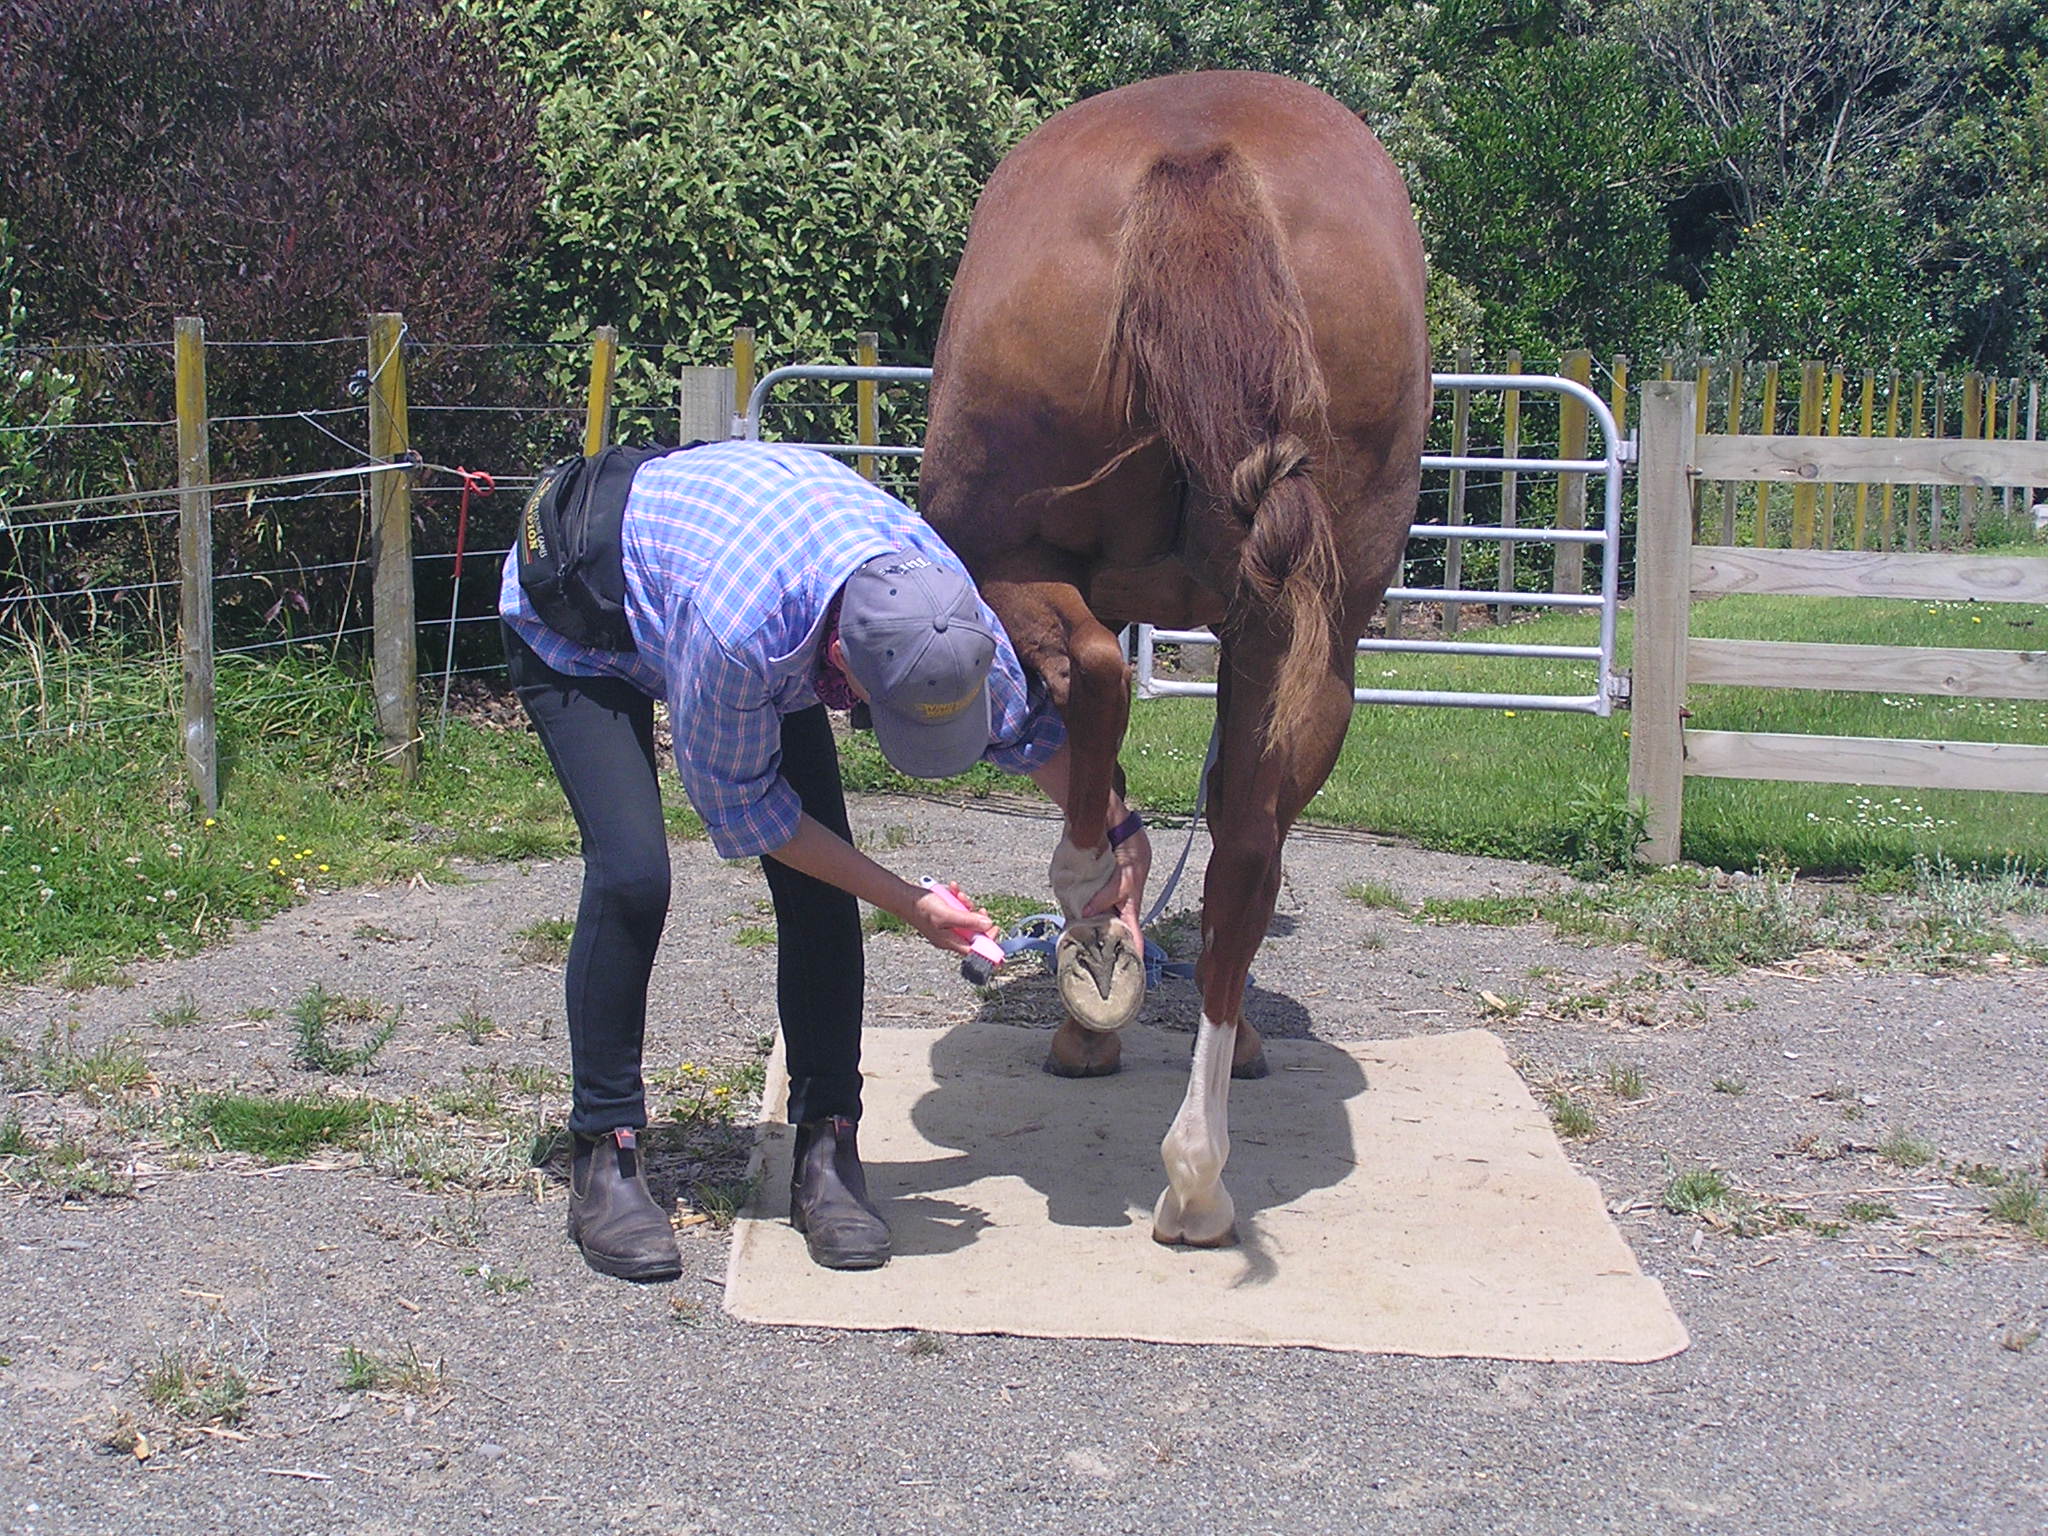
Bridget has a willing hind leg lift and the horse looks balanced. Gradually, one second at a time, we built duration of keeping the foot up so we can clean, inspect, rasp, spray it.
Teaching relaxation with a hoof stand is the next set of slices. It can be helpful to have a calm helper to deliver the treats when you click.
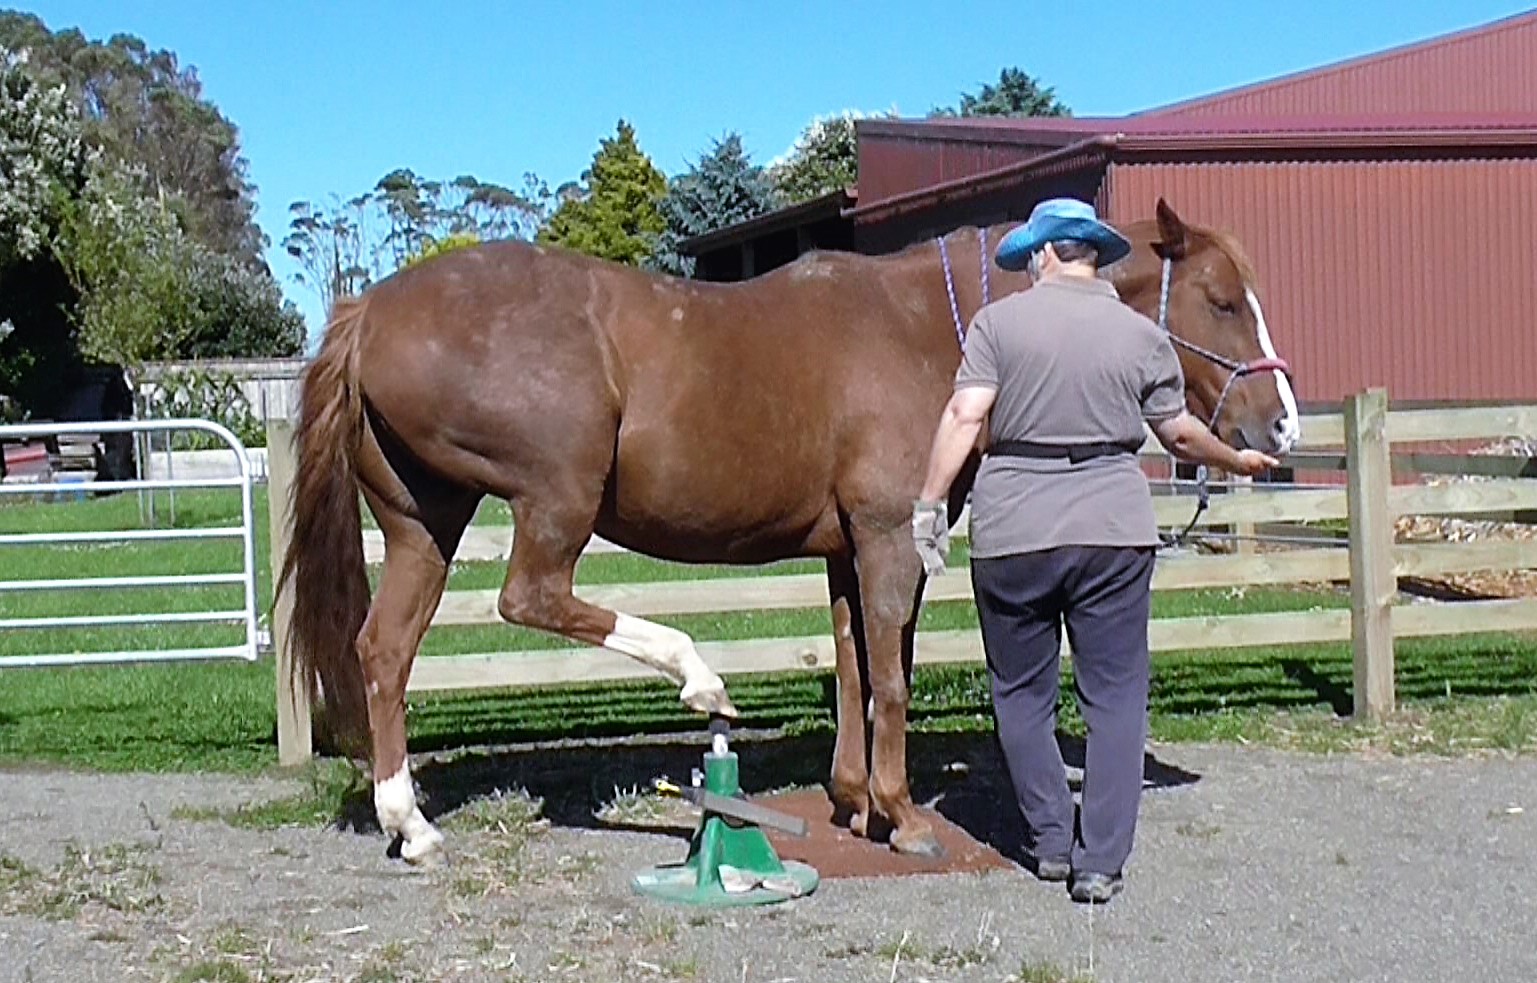
Here I’m working on duration having the foot up and forward.For hoof officianados, you might notice how much better Boots’ heel buttresses are compared to earlier pictures.
Teaching the foot to lie backwards on the hoofjack. Note she is not standing squarely in front, which makes it harder for her.
It can be helpful, timewise, to be able to clean all the feet from one side. We draw the far foot, once offered, across behind the near leg.
Lift knee to target an object: click for foot rising
2
Lifts knee to hand
3
Add in consistent voice signal
4
Handler faces tail to ask for knee to target hand
5
Catch & hold foot briefly: click before releasing
6
Hold foot for one second
7
Hold foot for two seconds
8
Gradually hold foot longer, one second at a time
9
Clean foot with stiff brush
10
Clean foot with hoof pick
11
Teach spray bottle confidence
12
Set foot in sling (or on knee)
13
Build duration of foot in sling or on knee
14
Bring foot forward onto a hoof stand or stump
15
Build duration of hoof brought forward
16
Back foot off hoof stand (no click&treat, just praise)
Major Slices for Building Hind Foot Behaviors
1
Confident with body extension rubbed over legs
2
Confident with brush and hands rubbing legs
3
Touch cap of hock with body extension for lift
4
Add voice signal
5
Lift hind foot with pointing
6
Run hand from withers to cap of hock – relaxed
7
Lifts foot with tap on hock & voice signal
8
Hold foot briefly; click; go to head to give treat
9
Hold foot one second; click; go to head to treat
10
Hold foot two seconds; click; go to head to treat
11
Gradually hold foot longer one second at a time
12
Clean hoof with brush
13
Clean hoof with hoof pick
14
Spray hoof
15
Clean both hind feet from one side
16
Rest hind foot in a sling
17
Bring hind foot forward onto a hoof stand
18
Build duration on the hoof stand
19
Teach ‘back’ signal for foot off stand (no click&treat)
Generalizations
1
Familiar mat in new spots
2
Familiar spot without mat
3
New spots without mat
4
Away from home
Number 74 in the Blog Contents Quick Links (at the top of the page) takes you to the blog about ‘Counting with the Hind Feet’, which goes into detail. Here is the video from that blog, which is a quick summary of a year’s work.
Work in a space familiar to the horse, where he is usually relaxed; buddies in view but not able to interfere. Horse is not hungry.
Horse at liberty or wearing halter and lead (not tied up). Halter and lead allow us to help him stand square. If the horse can’t stand quietly without being tied, that is a skill to work on first. A familiar mat gives the horse a destination spot for standing quietly. See Number 9 in the Blog Contents Quick Links ( at top of page) if you need to establish confident parking on a mat first.
Ensure the horse is warmed up a bit so it is easier for him to stand on three legs.
Ensure the horse is in a learning frame of mind. If not, encourage activity to use up adrenalin or do relaxing activities he knows well before starting.
It pays to remember that if you are nervous about picking up a horse’s foot, your anxiety pales into insignificance compared with how worried a horse might be if he has not been introduced to foot care with thought to his feelings.
Some horses may have had a bad experience with a particular leg. Be aware that a reluctance to lift a foot, or keep it up, can be due to pain from an old injury, current sore muscles/joints and/or arthritis.
Horses know that if their feet are compromised, they are close to death. It pays to teach ‘picking up feet’ carefully and thoroughly and not leave it to other people. By going through all the steps outlined below, we can also overcome our own natural fear and anxiety about getting hurt.
Our first job is to make sure we can rub and massage the front legs down to the heel with the horse able to stand still in a relaxed manner, totally confident that we are not going to hurt him. With some horses, to keep everything safe and low key, it’s a good idea to use a body extension to rub the legs. We can keep our body erect, stay relaxed, and use a high rate of reinforcement. If we are tense, the horse will be tense.
I’m using a pool noodle to get the horse used to having things rubbed on her legs, the back and front of each leg as well as up and down.
The rate of reinforcement must allow the horse to be continually successful. At first it might be a barely touch of the body extension to a front leg. We start where the horse is, and work forward from that point. See Number 5 in the Blog Contents Quick Links (link at the top of the page) for The Four Stages of Learning.
Use advance and retreat. That means start up high and move down a leg until one of you feels uncomfortable. When you reach either you or the horse’s threshold of comfort, retreat by moving back up to the withers, relax, then advance again. This is called a re-set. You know you have reached a threshold if you feel tension in the horse’s body or you begin to feel anxious or uncomfortable.
Every time we do a re-set, we have a new opportunity to clarify our signal and our intent.
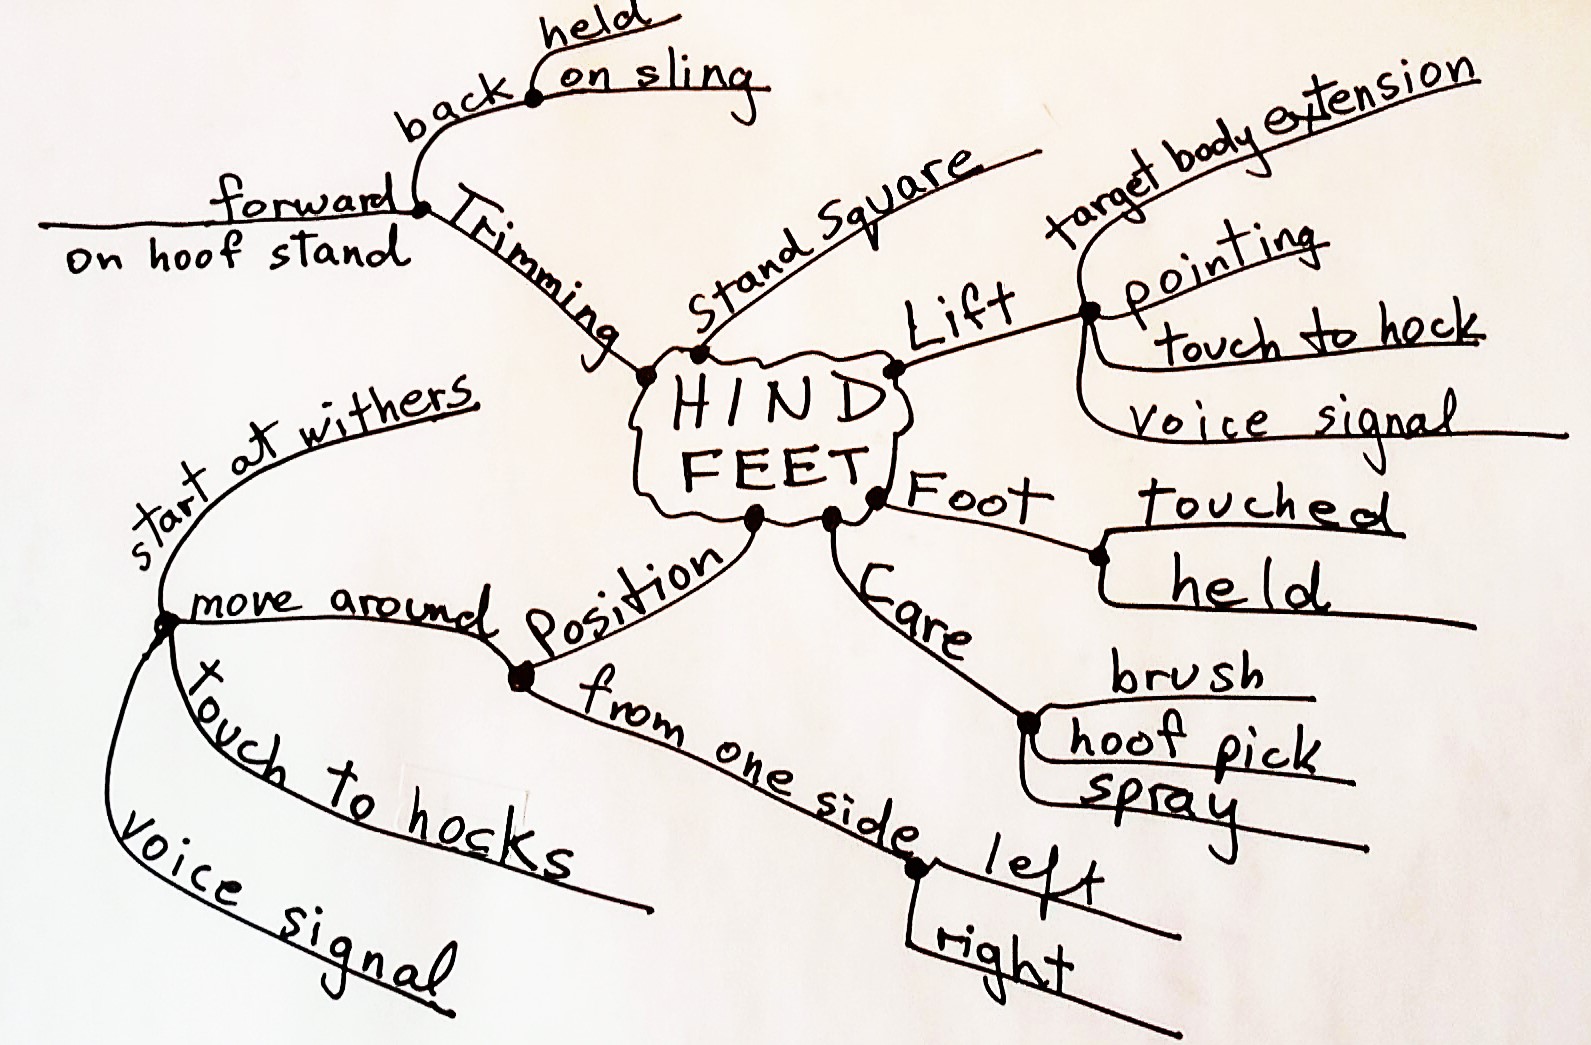
The mindmap below looks at the the tasks involved with front foot hoof care.Note that the first stage, rubbing the length of the leg, is omitted – my mistake.
Stand Square: the prerequisite task of stepping forward and backward, one step at a time, ensures that the horse understands our request to stand squarely. It helps if we routinely ask for square halts in a variety of situations. Each square or almost square halt, on request, earns a click&treat.
Using a mat makes it easier because, as the mat-savvy horse approaches the mat, he knows he will halt with his front feet on the mat. In other words, he has time to mentally and physically prepare himself and often halts squarely to earn his click&treat. Remember, he has four limbs to organize!
When asking the horse to square up, slightly tilt his head away from the front foot you want him to move. Moving his head away frees up the shoulder so he can move the leg.
Knee-Lifts to Touch a Target
Always start by asking the horse to stand squarely. This will help him remain balanced when he lifts a leg.
If we touch a target item gently to the front of the horse’s knee, accompanied by a click&treat, most clicker-savvy horses will quickly learn to raise the knee to touch the target. First, touch it to his knee, click& treat. When that is well established, hold the target a little tiny bit above the knee. He will work out that raising his knee touches the target and earns a click&treat. If he doesn’t, go back to touching the knee gently, click&treat until he makes the connection.
A pool noodle, a plastic bottle attached to a light stick (e.g. bamboo), or a light stick with bubble wrap taped around it, are the sorts of items we can use for knee targets.
#89 HorseGym with Boots demonstrates. Work with just the front feet until you are both totally solid with them. More detail about hind feet will be in the next blog.
Front Feet
If you’ve taught your horse to target his knee to your hand when you stand near him, facing him, he will have already shifted his weight so he can lift his foot, and you can catch hold of his foot while it is in the air.
Some people choose to touch the chestnut as a signal for lifting the foot. If you start with your hand at the withers each time, the horse will most likely soon learn to shift his weight and be already lifting his foot when you reach the chestnut.
It can be handy to teach a concurrent verbal signal such as, ‘Lift’. This is also helpful when we ask the horse to step cleanly over a rail, forwards and backwards.
Before we can gain the horse’s confidence about trusting his foot to our care, we must build up our own confidence. The best way is to do it in short, 3-minute segments, working through a series of thin-sliced questions that might look like the list below for the front feet.
As you play with the slices listed below, you will be collecting feedback on how you feel about each slice, and how your horse feels about each slice. You stay with each slice until the answer to the question is, ‘Yes.’
Remember, warmed up muscles will find the strain of standing on three legs and holding up a leg easier.
The rate of reinforcement must allow the horse to be continually successfulwith what you are asking.
Can I: gently & confidently rub his leg & foot all over with my body extension (stick, pool noodle)? If you can, practice on an experienced horse (or practice on a person) to get the feel for it, if this is new to you.
Will my horse: let me rub his leg and foot with my body extensions? Make sure he is already comfortable with being rubbed over the rest of his body.
Can I: confidently rub his leg & foot with my hand? Start at his withers and rub down only as far as you feel comfortable at that time. Over many tiny sessions, you will get the confidence to rub all the way down.
Will my horse: let me rub his leg and foot with my hand?
Can I: get him to stand so he is balanced before I want to pick up a foot? Have I taught him how to line up squarely to target his front feet to a mat, and/ormove forward and back one step at a time? If not, you want to teach that first.
Will my horse pick up a foot when I ask him to target my hand with his knee … OR slices 7.-9.
Will my horse: take the weight off his right front leg when I run my hand from his withers and down his leg?
Can I: confidently ask him to pick up his foot by touching his chestnut?
Will my horse: pick up his foot when I touch the the chestnut?
Can my horse: keep his balance okay standing on three legs?
Can I: let my hand and arm holding the foot swing freely with any movement the horse makes with his leg until it stops swinging, at which point I click, gently release the foot and move forward to deliver the treat? (I do this only if I’m feeling safe.) If you feel whole body tension in the horse wanting his foot back, I would release the foot and work on earlier steps. The horse has an emotional block somewhere and we need to winkle it out. (All behaviors rest on an emotional ediface.)
Will my horse: gradually let me hold the foot longer and longer (one second at a time) and stay relaxed until I click&treat?
Will my horse: hold his foot up in a relaxed way for as long as I need it up, waiting for the click&treat?
Boots is targeting her knee to my hand. For the next slice, I would change my body orientation to stand beside her shoulder so when she lifts her foot it is easy for me to ‘catch’ it in my hand.
I build duration of keeping the foot up one second at a time, before I release it gently, followed by a click&treat.
It’s also possible to build duration by reaching back to deliver the treat while holding up the foot. Some people set up a raised tub into which they can toss the treat.
To Make Your Job Much Easier…..
Check out Number 59 in the Blog Contents Quick Links (see top of page), for Counting with the Front Feet. This exercise has the added benefit of developing the horse’s skill of organising his weight to stand on three legs, to a high level.
It’s hard for us to understand how much better horses hear than we do. Our sounds or words easily become signals if we use them consistently. Sounds can also become environmental signals the horse adopts according to the routines of his captivity.
house door opening if the horse lives near the handler’s house
person’s car arriving at the paddock (with special feed, treats or anticipated adventures)
rattle of food buckets or pellets in a tin
whistle to recall for a treat or a feed
When we use Clicker Training, we refine this response to sound when we use a click or other unique sound to mark the precise response we want.
Horse ears have ten muscles each, which means they can move their ears almost 180 degrees. The shape of the ear allows horses to capture more sound, and from further away, than our ears. On top of that, horses can pick up sounds at higher and lower frequencies than we can.
The shape and mobility of the two ears allows accurate gauging of the direction of a sound. Sound and vision are obviously linked, but sound serves better when vision is restricted. Due to the horse’s ecosystem role as a prey animal, he is wired to notice any sound, especially sneaky, sudden, or unusual sounds.
Horses have strong emotional responses to sounds. Anxious type horses will find the sounds and tense atmosphere of shows and events over-stimulating and problematic. It helps to gradually habituate them to this sort of environment rather than depend on flooding (overstimulation until the horse ‘shuts down’) to get a horse more able to cope with noisy, unfamiliar surroundings.
Ears, it seems, can give us a large range of signals, ranging from curiosity, acceptance, concentration, irritation, fear, dominance and submission. All we have to do is work out which is which – and when – for each horse in our life!
It seems that horses also pick up vibrations from the ground through their feet or through their whiskers and teeth while grazing. No doubt this relates to the ‘early warning’ horses and other animals can give us about earthquakes and other catastrophes. It might also be why they are waiting at the gate before they can see our car. But that could also be a function of their hearing.
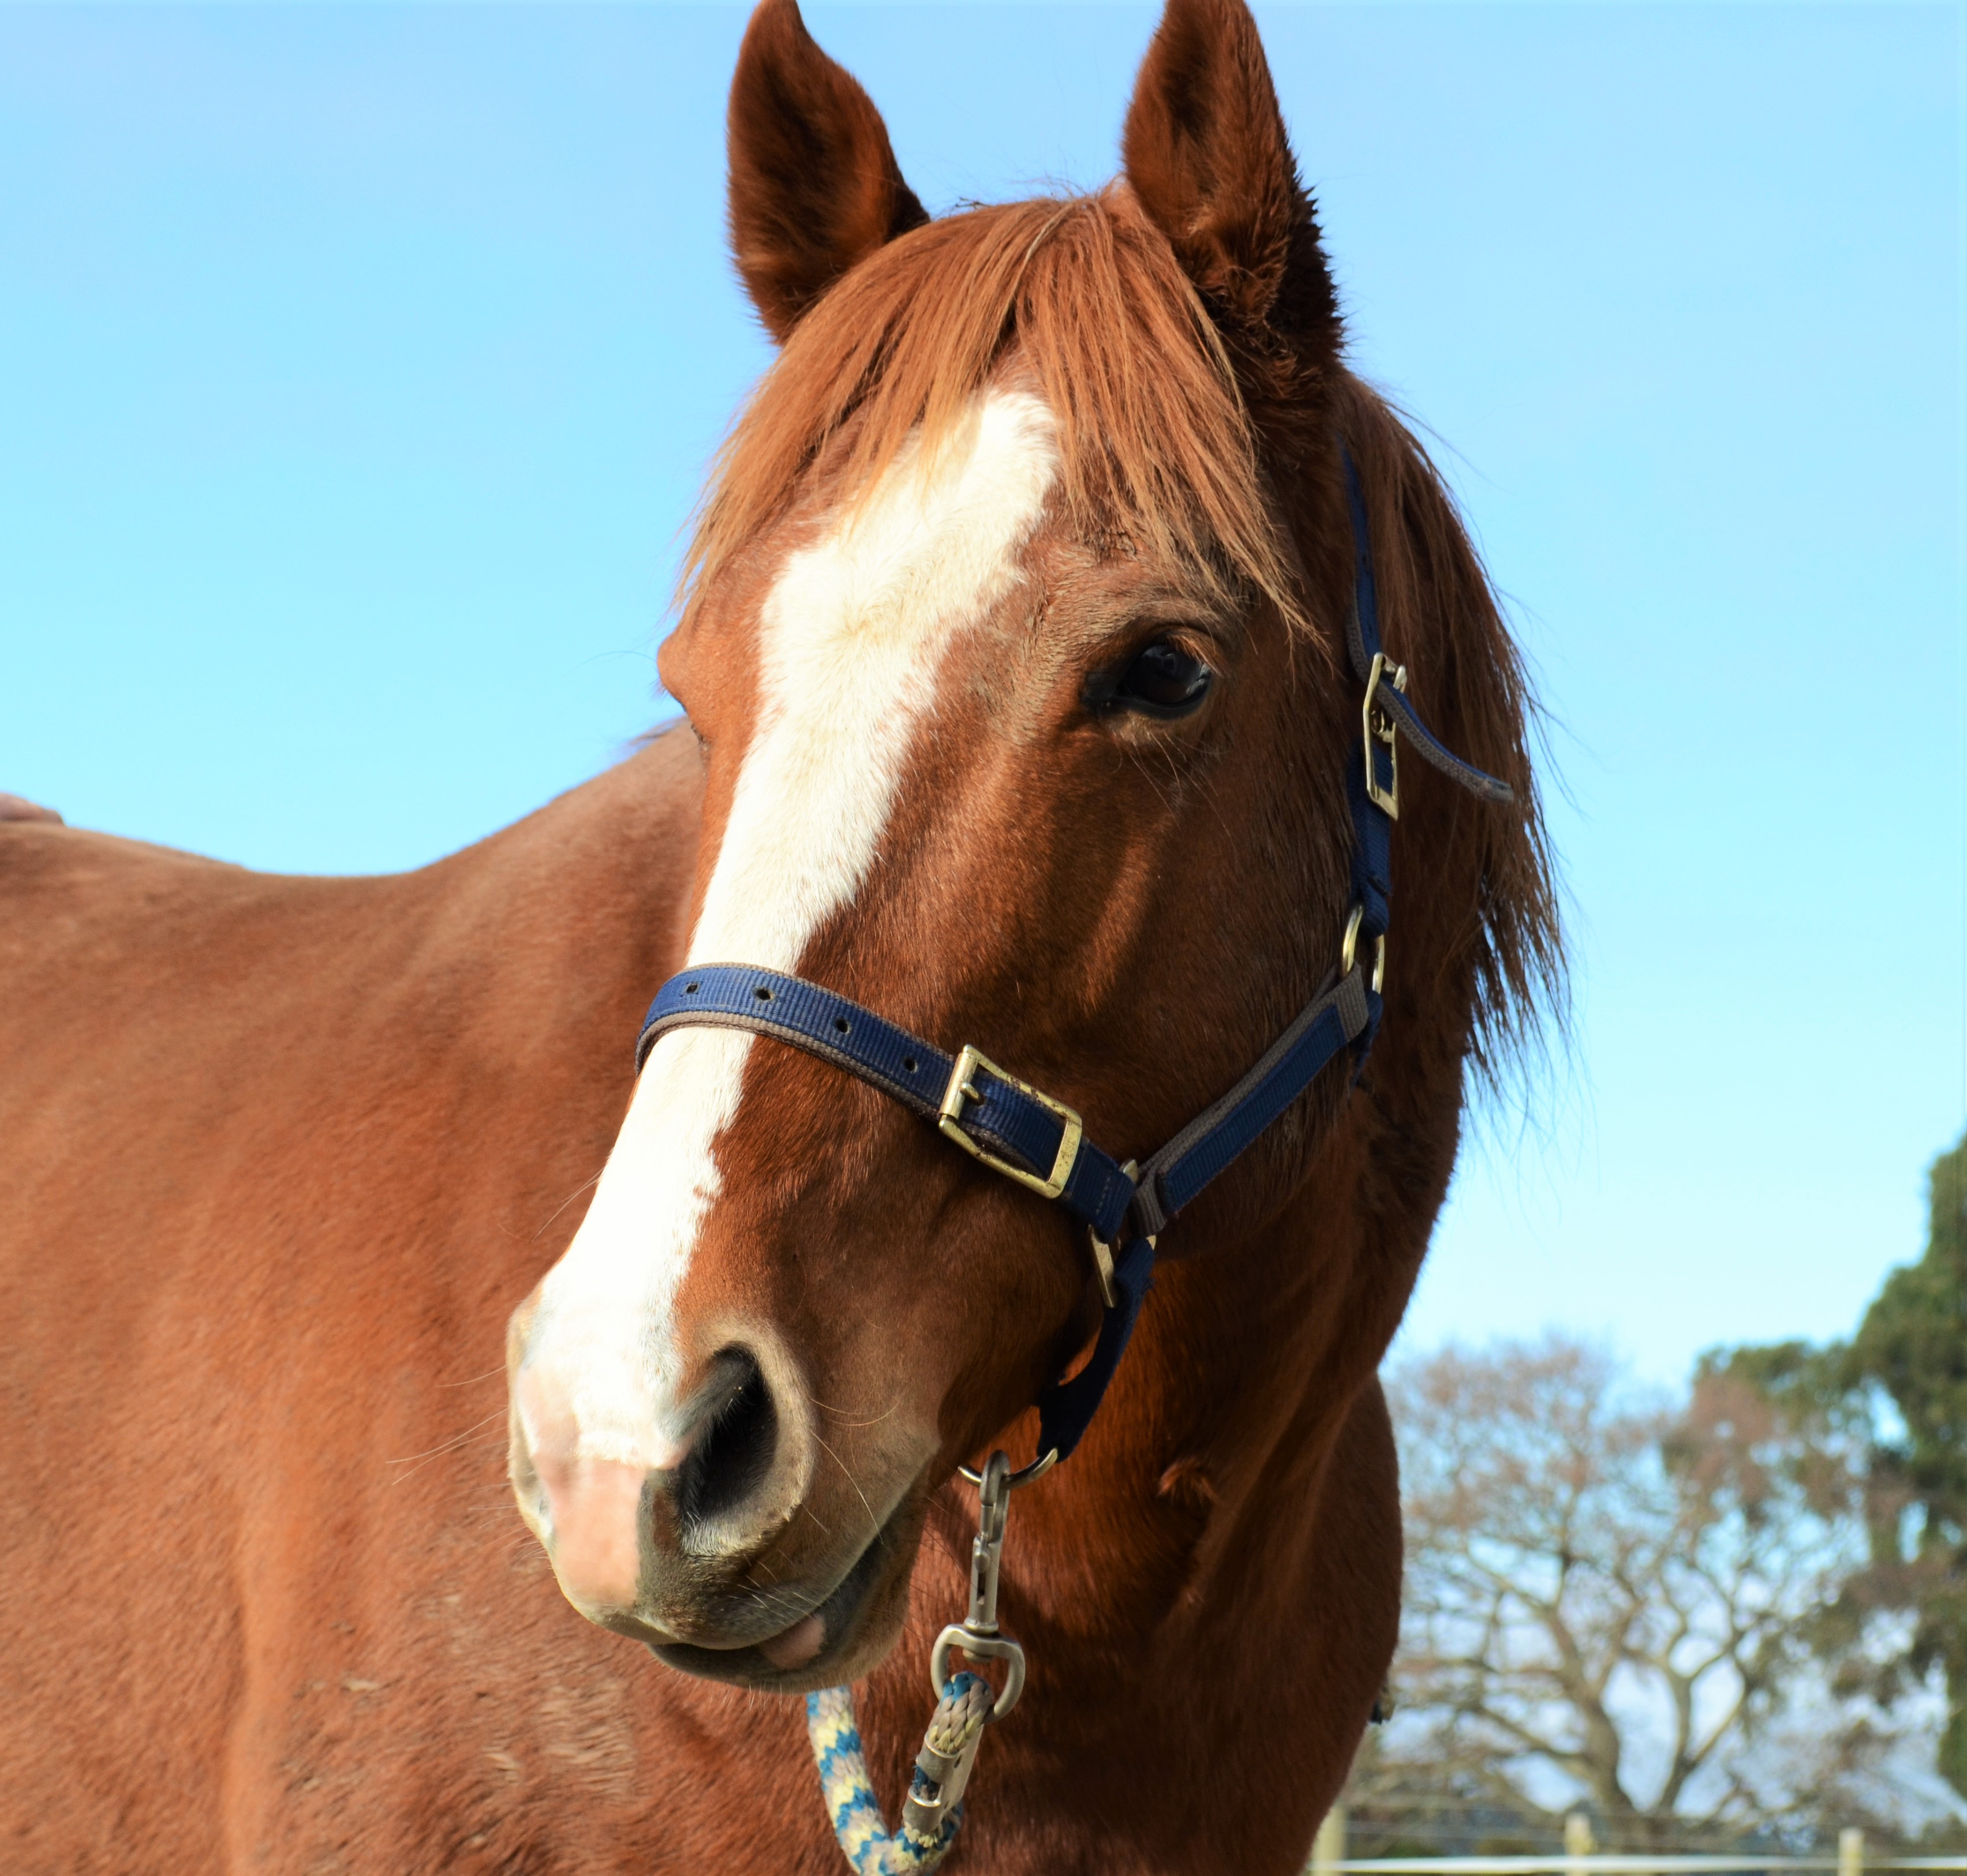
Ear postions might be categorized as:
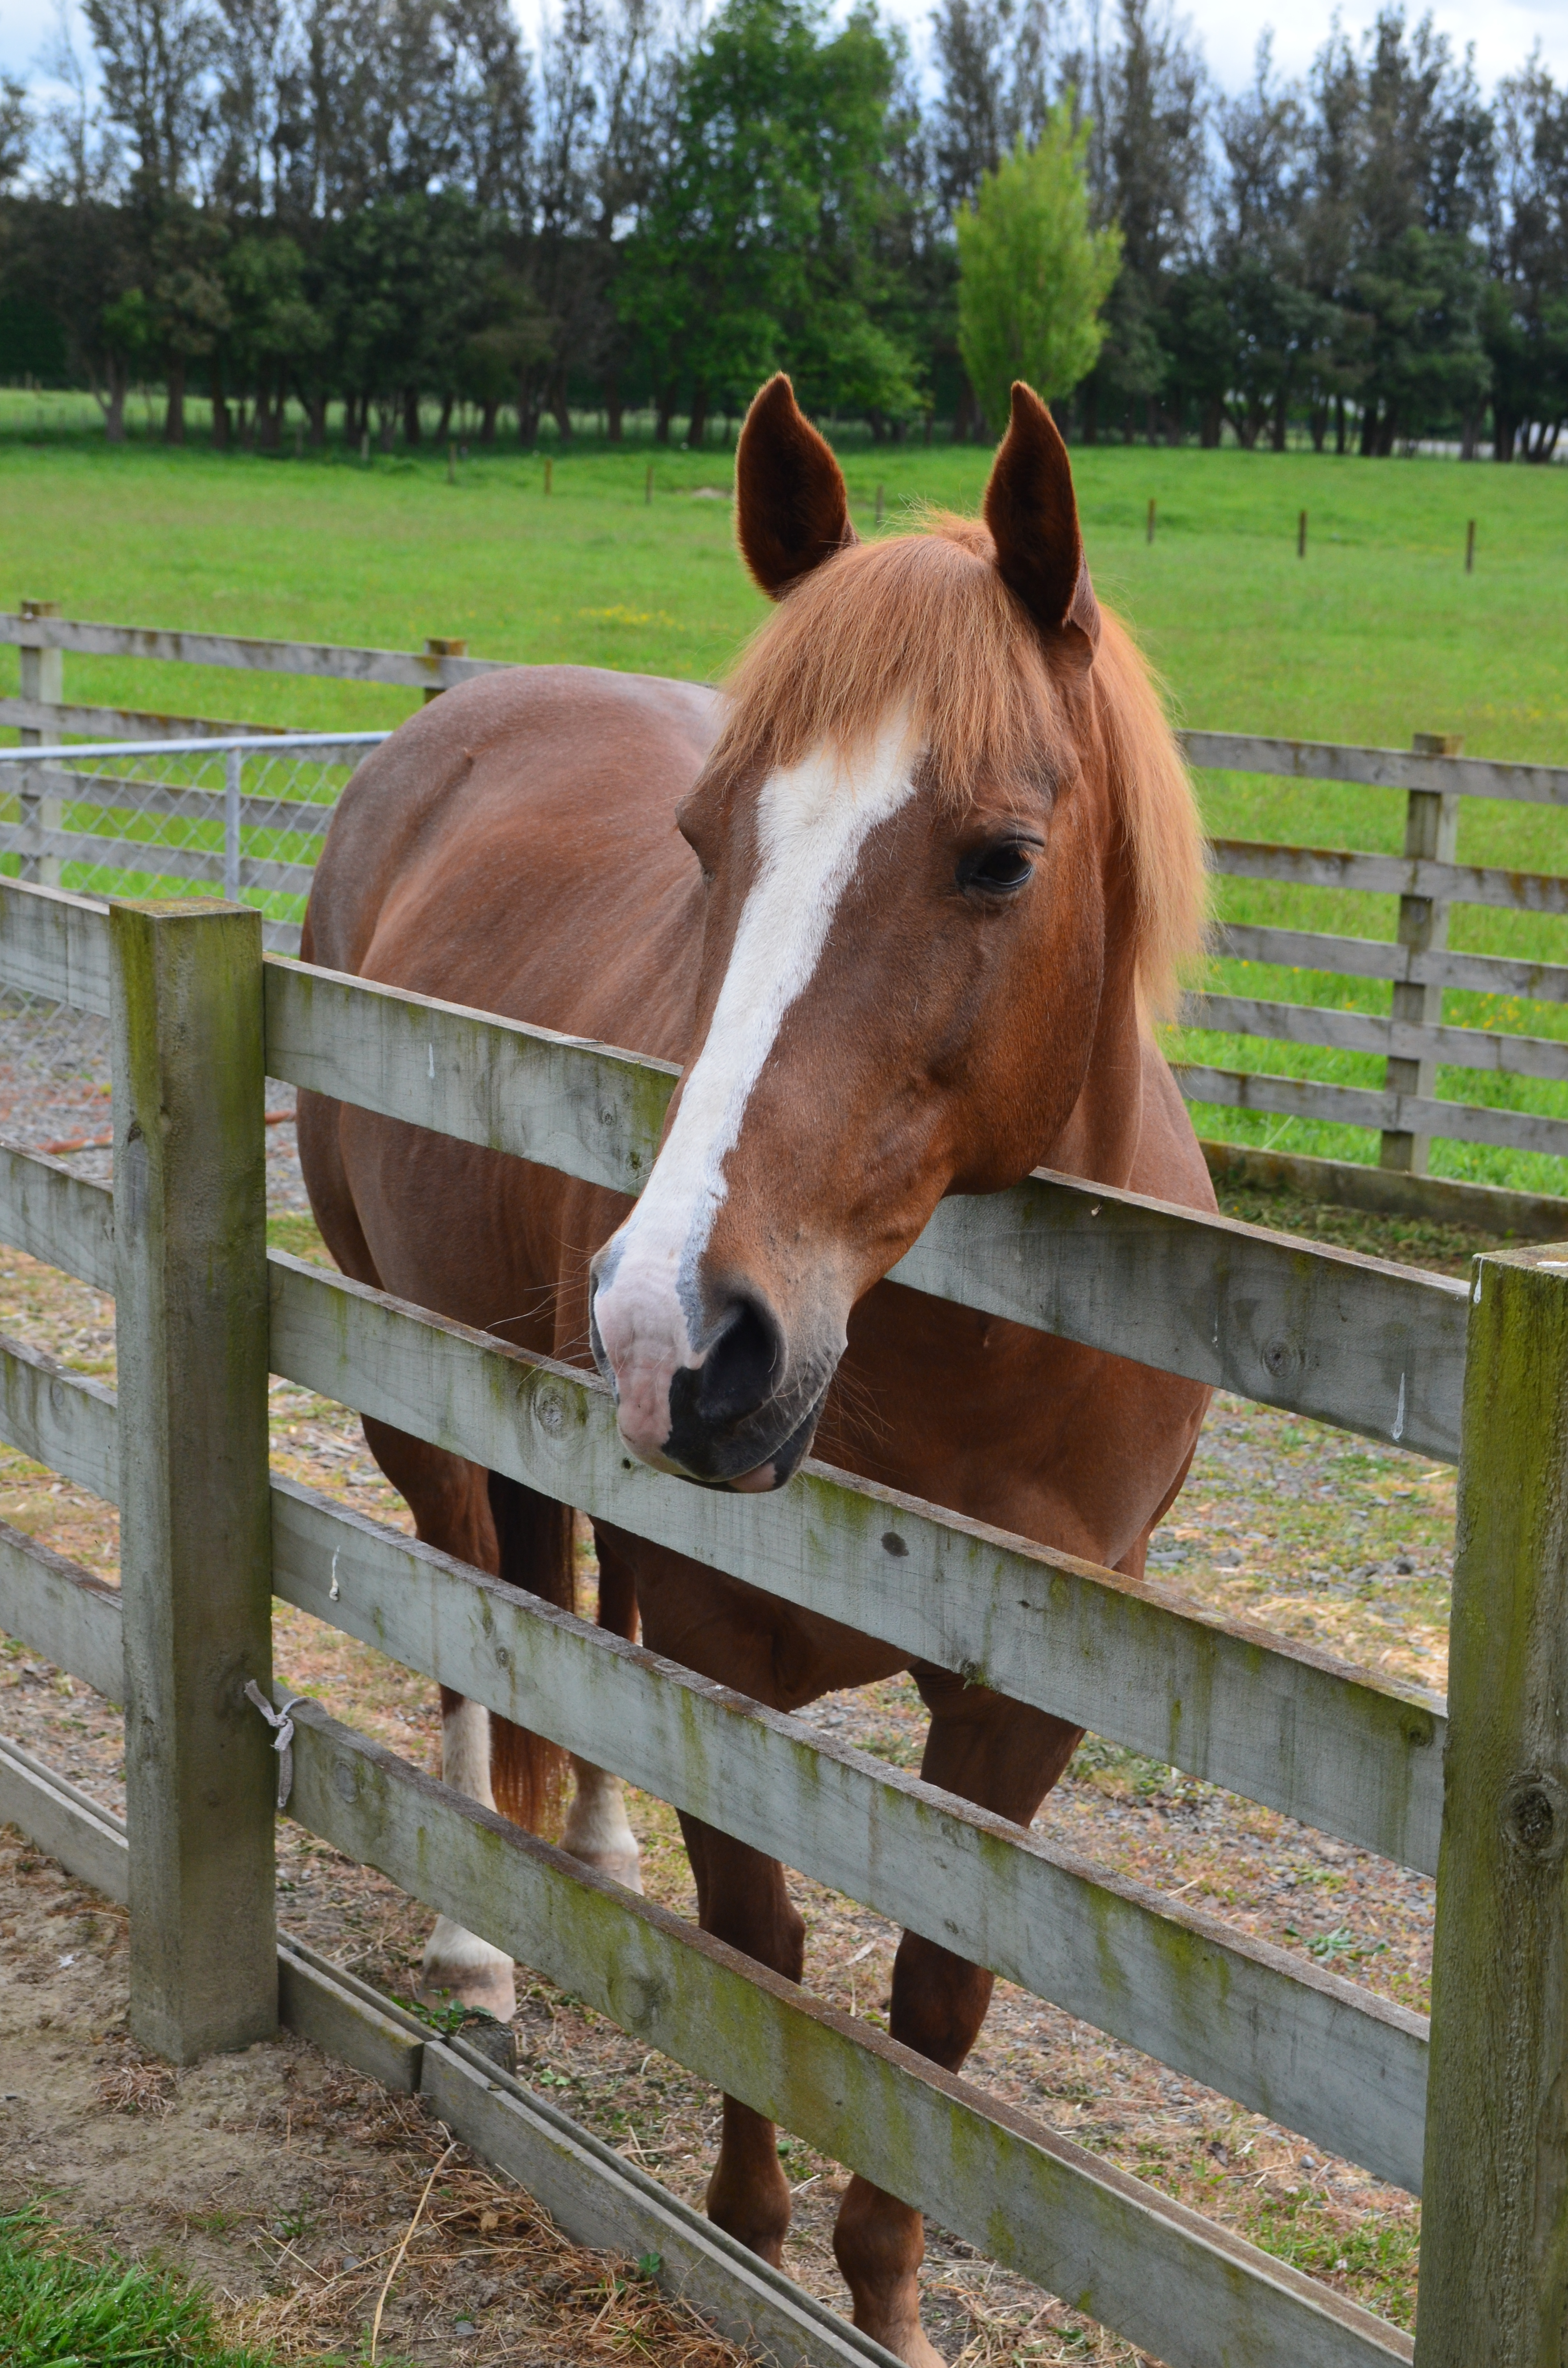
Alert — forward, scanning in observant or anxious mode.
Alert ears. Probably she is watching for someone to appear with treats to entertain her.
Curious/Interested — forward with head movement up or down to focus the eyes.
Because the lens in the horse’s eye does not adjust like ours, horses have to lower and raise their head to get a good focus on an object – like a person wearing bifocal or trifocal glasses.
Attentive — total focus on what she is doing.
She is extremely focussed on the task. It has her full attention.
Back/Sideways – Tension or Anxious — only the context of the situation and the rest of the horse’s body language can tell us if the ears are back due to anxiety (very stiff), or back/to the side because the horse is strongly focusing on a task, causing natural tension (not as stiff). See also, ‘Working Ears’ below.
Ears are sideways and lower lip is a little bit tight, so Boots is putting a lot of concentration into this task which she is just learning. There is some tension, but the rest of her body language does not, which suggests that she is in focus mode, rather than anxious.
Back/Sideways – Floppy — a chilled out, resting, or casually moseying along horse often has the ears half back in a relaxed state.
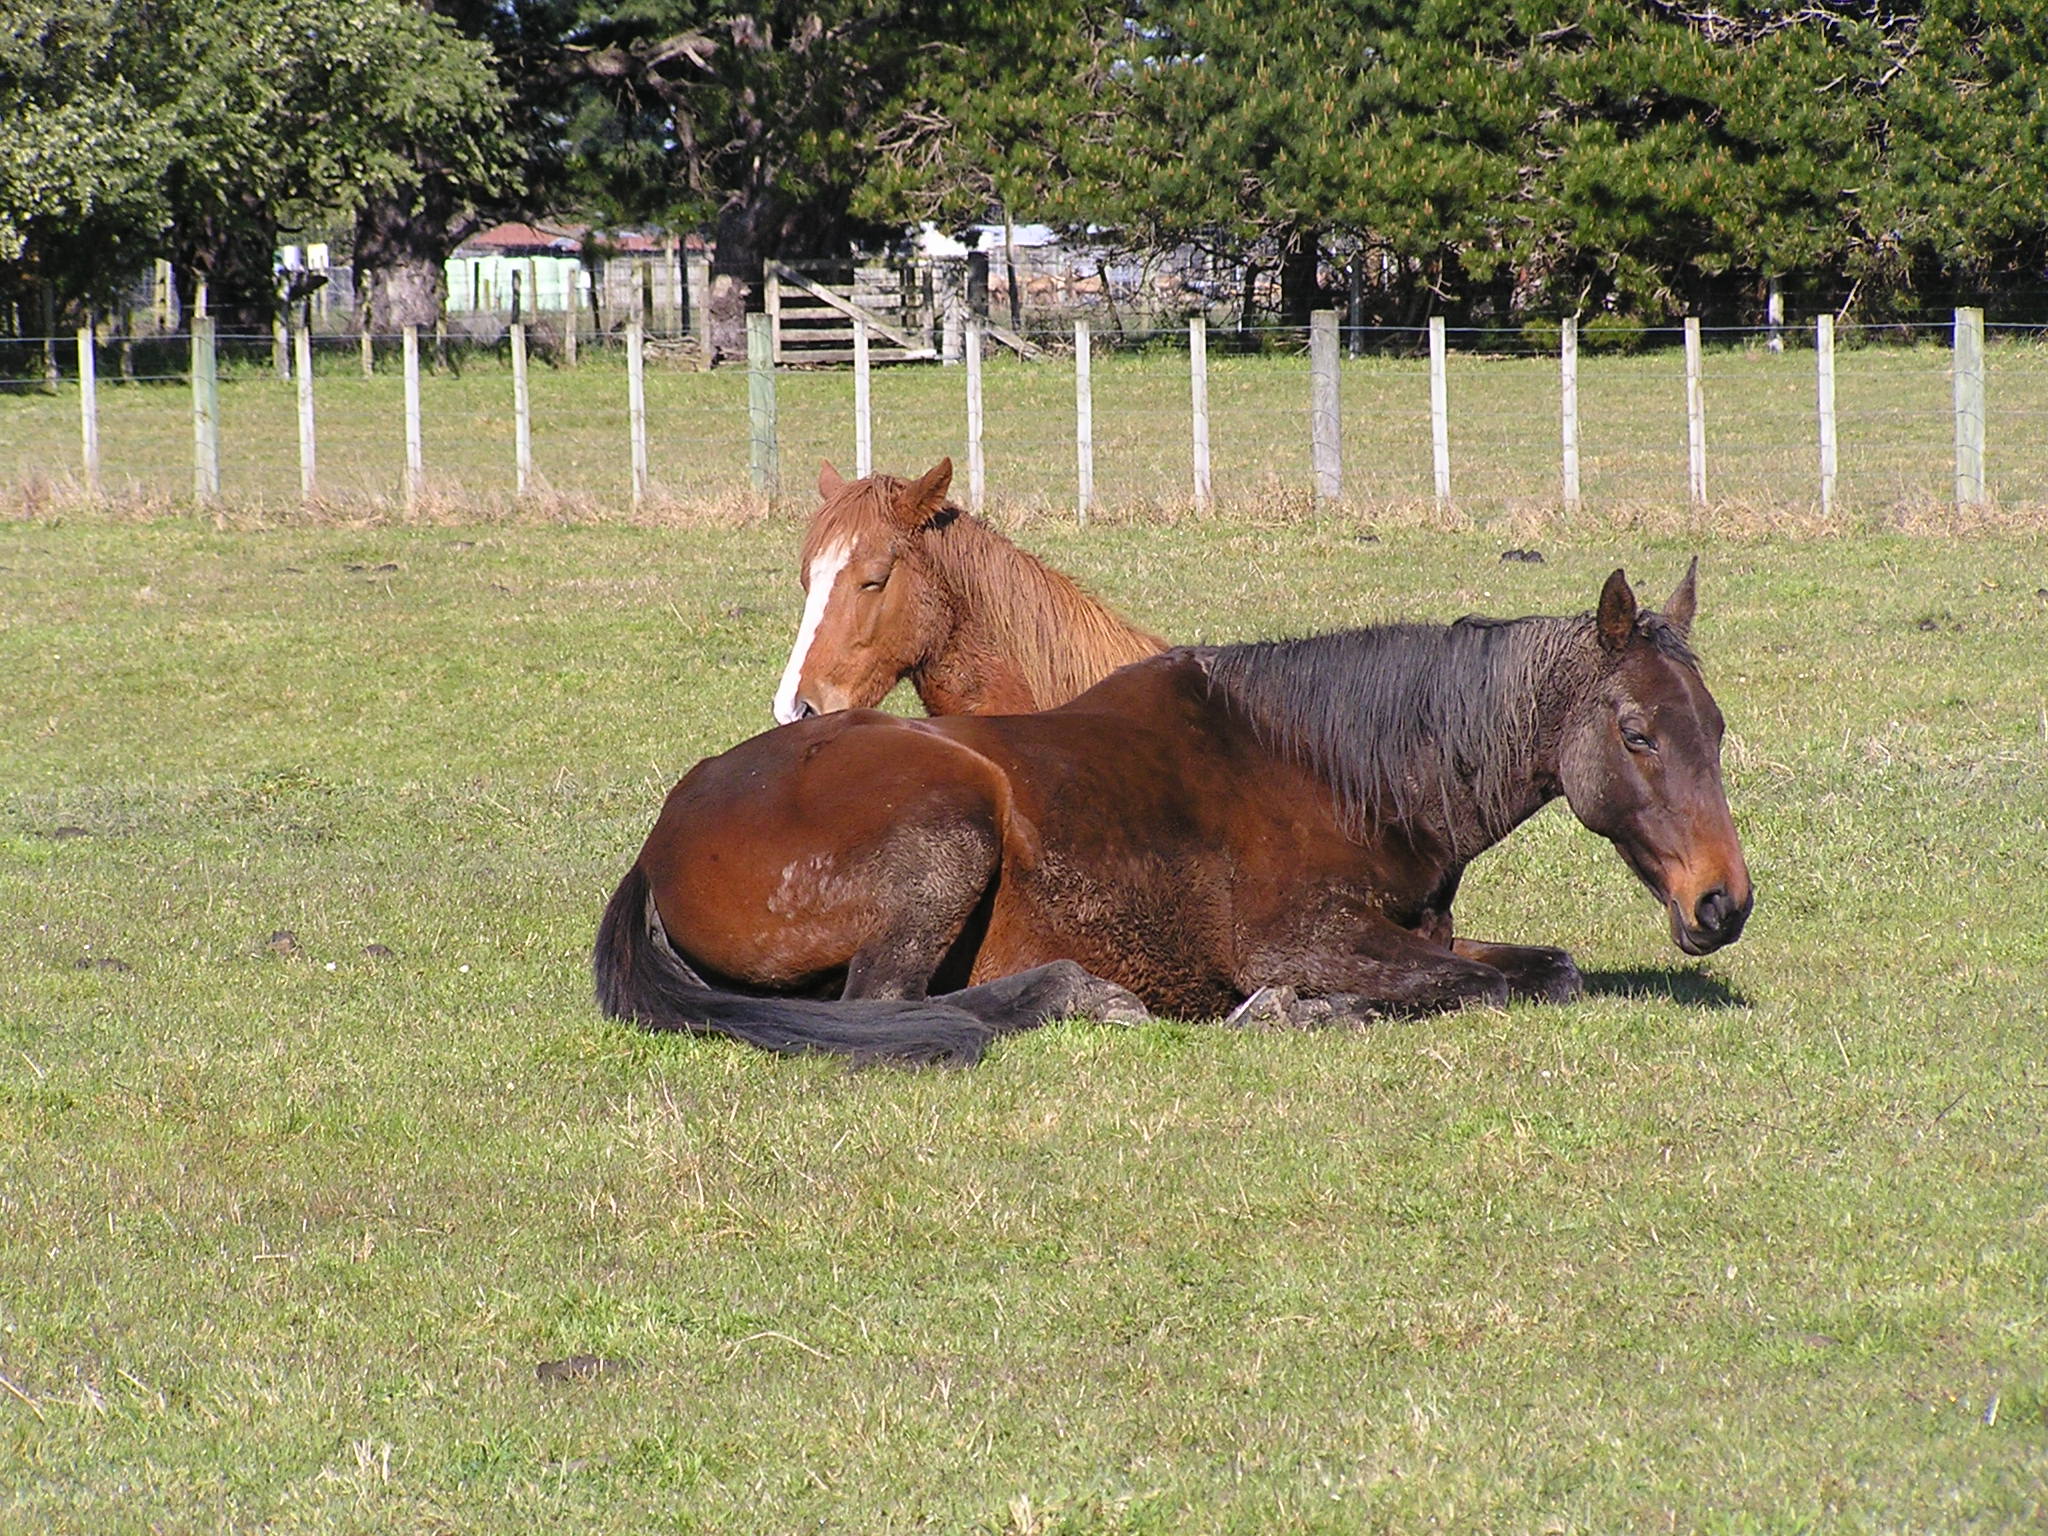
Smoky is dozing beside a favorite person. His eyes are partly closed and his lower lip is floppy. His ears would be soft for the ear-bending testdescribed below.
Pinned — truly pinned ears are a very strong signal that all is not well, and other action will follow if things don’t change immediately. Some horses lay their ears almost flat when they are strongly focusing on a complex task.This can be more like a ‘frown’ of concentration and we must be careful not to presume the ears are pinned and take evasive/inhibitory action that will confuse the horse who was just busy thinking his way through a problem.
Truly pinned ears. Boots is giving Smoky a clear message that his presence near the treats is not wanted. Her next move, if there wasn’t a fence between them, would be to lunge at him.
We should always give the horse the benefit of any doubt and read the overall situation and body language rather than just the ears. Truly pinned ears are unmistakable, once seen. They are usually accompanied by a very angry face overall and are often followed by snaky-neck movement toward the cause of annoyance, lunging at the intruder, or wheeling around ready to a kick.
Working Ears: Back or Sideways, – Focused/Thinking — horses often put their ears to the back or side when they are in ‘thinking mode’.
We often see these sorts of ear positions in horses doing their ‘job’ of the moment; e.g., cutting horses, calf-roping horses, dressage horses, horses doing an agility course or a gymnastic routine.
Because they are carrying out a learned pattern in a known environment, their mind is focused on the task at hand and the precise signals coming from their handler. Their ears often resemble the ears of a dog working sheep. Back and full of concentration on the job.
Such ears may resemble that of an irritated or disgruntled horse, but if the horse is doing his ‘job’ and his overall tension and body expression suggest that he is focused, we are probably seeing his personal ‘working’ expression.
Often, as soon as the horse has finished a part of his ‘job’, the ears pop forward before the next obstacle or cow or whatever.
It’s helpful to watch video clips focusing just on the horse’s ears. Usually they are constantly in motion and give us an insight into what may be going on in the horse’s mind. Obviously, we can never be sure, but we can get an idea.
The Ear Test:
The Ear Test: how easily we can bend the tip of the ear is a good indicator of the horse’s overall tension or relaxation.
If we can easily bend the tip of the ear, the horse is generally relaxed. If the ear is too stiff to bend easily, it tells us that the horse has tension in his whole body and lacks confidence or is anxious at the moment.
Each horse’s ear expressions will follow the same general pattern, but at the same time be unique, so we should be careful about generalizing too much between horses.
Ear Expression Summary Chart
More about ears
A. Ear differences between mares and geldings/stallions.
It’s interesting to study the ear differences between mares and geldings or stallions.
I watched YouTube clips of the Pignon brothers Frederic and Jean-Francois. Frederic and his wife, Magali Delgado, were the original stars of Cavalia (2003-2009).
Below is the link if you would like to watch Frederic playing with three of his young stallions. It is interesting to note the way they respond to Frederic’s energy levels. He uses a body extension to help communicate with the horses.
I didn’t know they were mares when I first watched, but their behavior was so different from that of Frederic’s stallions, I presumed they were mares. The message was in the ears.
The mares were constantly using their ears to maintain their individual bubbles while performing their routines which often had them very close together.
Mares in a natural herd situation determine much of the social structure of their group. Social order within a group needs a ready language with all sorts of nuances. Mare’s ears have these nuances.
Mares’ job of giving birth and caring for their foals means that they need to cultivate detailed knowledge of their environment when they live in the wild.
Best grazing spots
Safe water
The nature and habits of the local predators
Health of the herd stallion
Bachelor groups in the vicinity
Intrinsic awareness of their present rank in the group of mares
Horses give way to horses above them in rank, and they expect horses lower in rank to give way to them, just like people do in many situations. Mares need to keep track of many things.
Mares have a full complement of hormones and hormonal cycles. In wild herds, their position in the herd is closely linked with survival of themselves and their offspring during the annual hard times of summer drought and winter cold and snow.
We often like to romanticize wild horses, but there is not much romantic about a life lived in the environmental margins of the deserts, plains and mountains where they manage to survive.
Having had mares and geldings, I have found a distinct difference. All other things being equal (which they never are) mares tend to be more independent-minded, geldings more easy-going. That’s a generalization, but it’s not a coincidence that Cavalia uses only geldings and stallions for their shows.
The detail about how a specific horse uses his ears will also relate to the innate character type of the horse.
We can never put horses into labelled pigeonholes, but often it is helpful to describe what we see and create categories so we can communicate our descriptions to each other more easily.
One way of categorizing horse character types is to look at their tendency to move their feet. A strong need to move suggests an extroverted character type. Less tendency to move suggest a more introverted character.
Another way of looking at horse character types is to note whether the horse is innately bold and curious or if he tends to stay out of the limelight and easily becomes anxious.
Quite likely, an extroverted bold horse will want to know where the party is and get going with it. He’ll often show forward, inquisitive ears. If the handler is not providing fun, he is inclined to create fun for himself.
An extroverted but anxious type of horse, who tends to weigh up the cost/benefit of every situation, may have ears moving through many expressions.
An introverted bold, imaginative horse is usually most interested in the next blade of available grass. He sees little reason to move if his life is not in danger. He is strongly committed to his own ideas. He will learn things readily enough if we make it worth his while.
Such a horse tends to love food reward reinforcement and easily becomes a Clicker Training star. Once he learns something, he likes to make it his idea. He then tries hard to ‘get it right’. His focus during training may often include ears lying back or sideways as he thinks his way through a puzzle we’ve given him.
An introverted anxious type of horse may have active ears regularly checking out all points of the compass. He may appear externally ‘quiet’ but is heaving with emotions inside. Horses like this are more suddenly ‘explode’ with an inexperienced handler, so it is important to identify them and keep a close eye on where they are in relation to the edge of their comfort zone in a specific context.
These are generalizations but generalizations can help give us an overview. Ears are obviously highly personalized for each horse. In new situations horses behave differently than they do at home, just as we do.
What I want to highlight is that it is easy to simplify how ears should look on a ‘happy horse’ when we really have little idea of what is going on in the horse’s mind and being expressed in his ears.
We should always read ears in the context of the rest of the horse’s body and the specific context of the moment.
A horse in an enclosed space with little stimulation will have different ear expressions than the same horse out and about with a wide view of things going on all around him.
Horses need strong senses of smell and taste. Safe grazing requires horses to be constantly aware of poisonous plants. Horses are adept at picking the best forage out of a pasture. Unless they are starving, they stay well clear of plants like buttercup and ragwort.
By sniffing a horse dropping, a horse can identify its owner. In the wild, horse droppings mark home ranges and leave a clear message to other horses about who lives there.
When we bring out a tube of worming paste, our horse knows what it is. Vets have a distinctive smell. Since every horse, dog and person has a distinctive smell, horses recognize us or old friends after long absences.
They similarly recognize individuals they don’t like. In the wild, horses identify each predator by its distinctive smell.
If we toss a treat onto the ground, the horse must sniff it out because it will be in his visual blind spot. On our morning walks, my mare often busies herself sniffing things on the road surface. Some people teach their horses to track a scent trail.
This is a cookie ball with holes in it. It twists open to put in pellets which fall out as the horse rolls the ball along. It took her a few seconds to work it out.
To ensure safe grazing, taste is well developed. To some extent, horses can ‘spit out’ something they don’t like, but not as well as dogs or people. They are not able to vomit.
Sometimes horses are reluctant to drink water that tastes different to the water at home, so people teach them to drink water with a bit of apple cider vinegar or molasses added (before they leave home).
Horses are also very astute about knowing when their regular feed has been doctored with medications. I have to hide medicine in jam sandwiches for Boots, after first giving her undoctored jam sandwhiches for a while.
Horses can develop a lively set of acquired tastes. My mare loves tomatoes, celery, parsley, peaches (when she had access to a peach tree, she learned to elegantly spit out the stones), feijoa, mandarins, bananas, and plucks the odd lemon off the tree as she walks past but then decides it is not to her taste.
She is less keen on cucumber, cabbage, lettuce or spinach. My friend’s horse, Smoky, did not have such a refined palate and would distastefully drop anything unusual out of his mouth. By watching my mare enjoy tomatoes, he eventually tried one and decided he liked them too.
Whiskers are an important ‘early warning system’ to protect a horse’s eyes, nose and muzzle. Grazing in the dark or in tall grass requires a sensitivity that functions with touch.
Each whisker has its own nerve pathway connecting directly to the brain. There may only be two long and several short whiskers around each eye, but they are enough to keep the eyes safe in most circumstances.
It is therefore sad to see ‘show horses’ with whiskers cut or shaved off. Because people don’t have comparable ‘touch sensitivity’ organs they incorrectly presume that a horse does not need his whiskers.
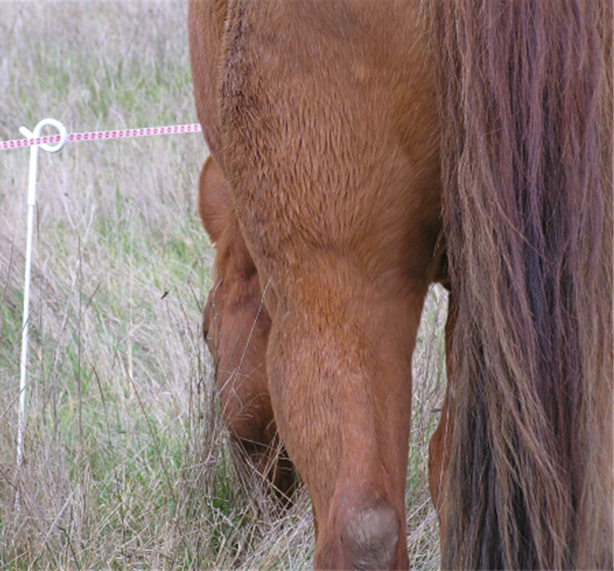
My horse uses her muzzle whiskers to check if an electric fence is on or off.
When a horse investigates something new, his first act is often to carefully put his whiskers on it, then his whole nose. The mobile part of the horse’s nose and upper lip have touch sensitivity similar to that of human fingers.
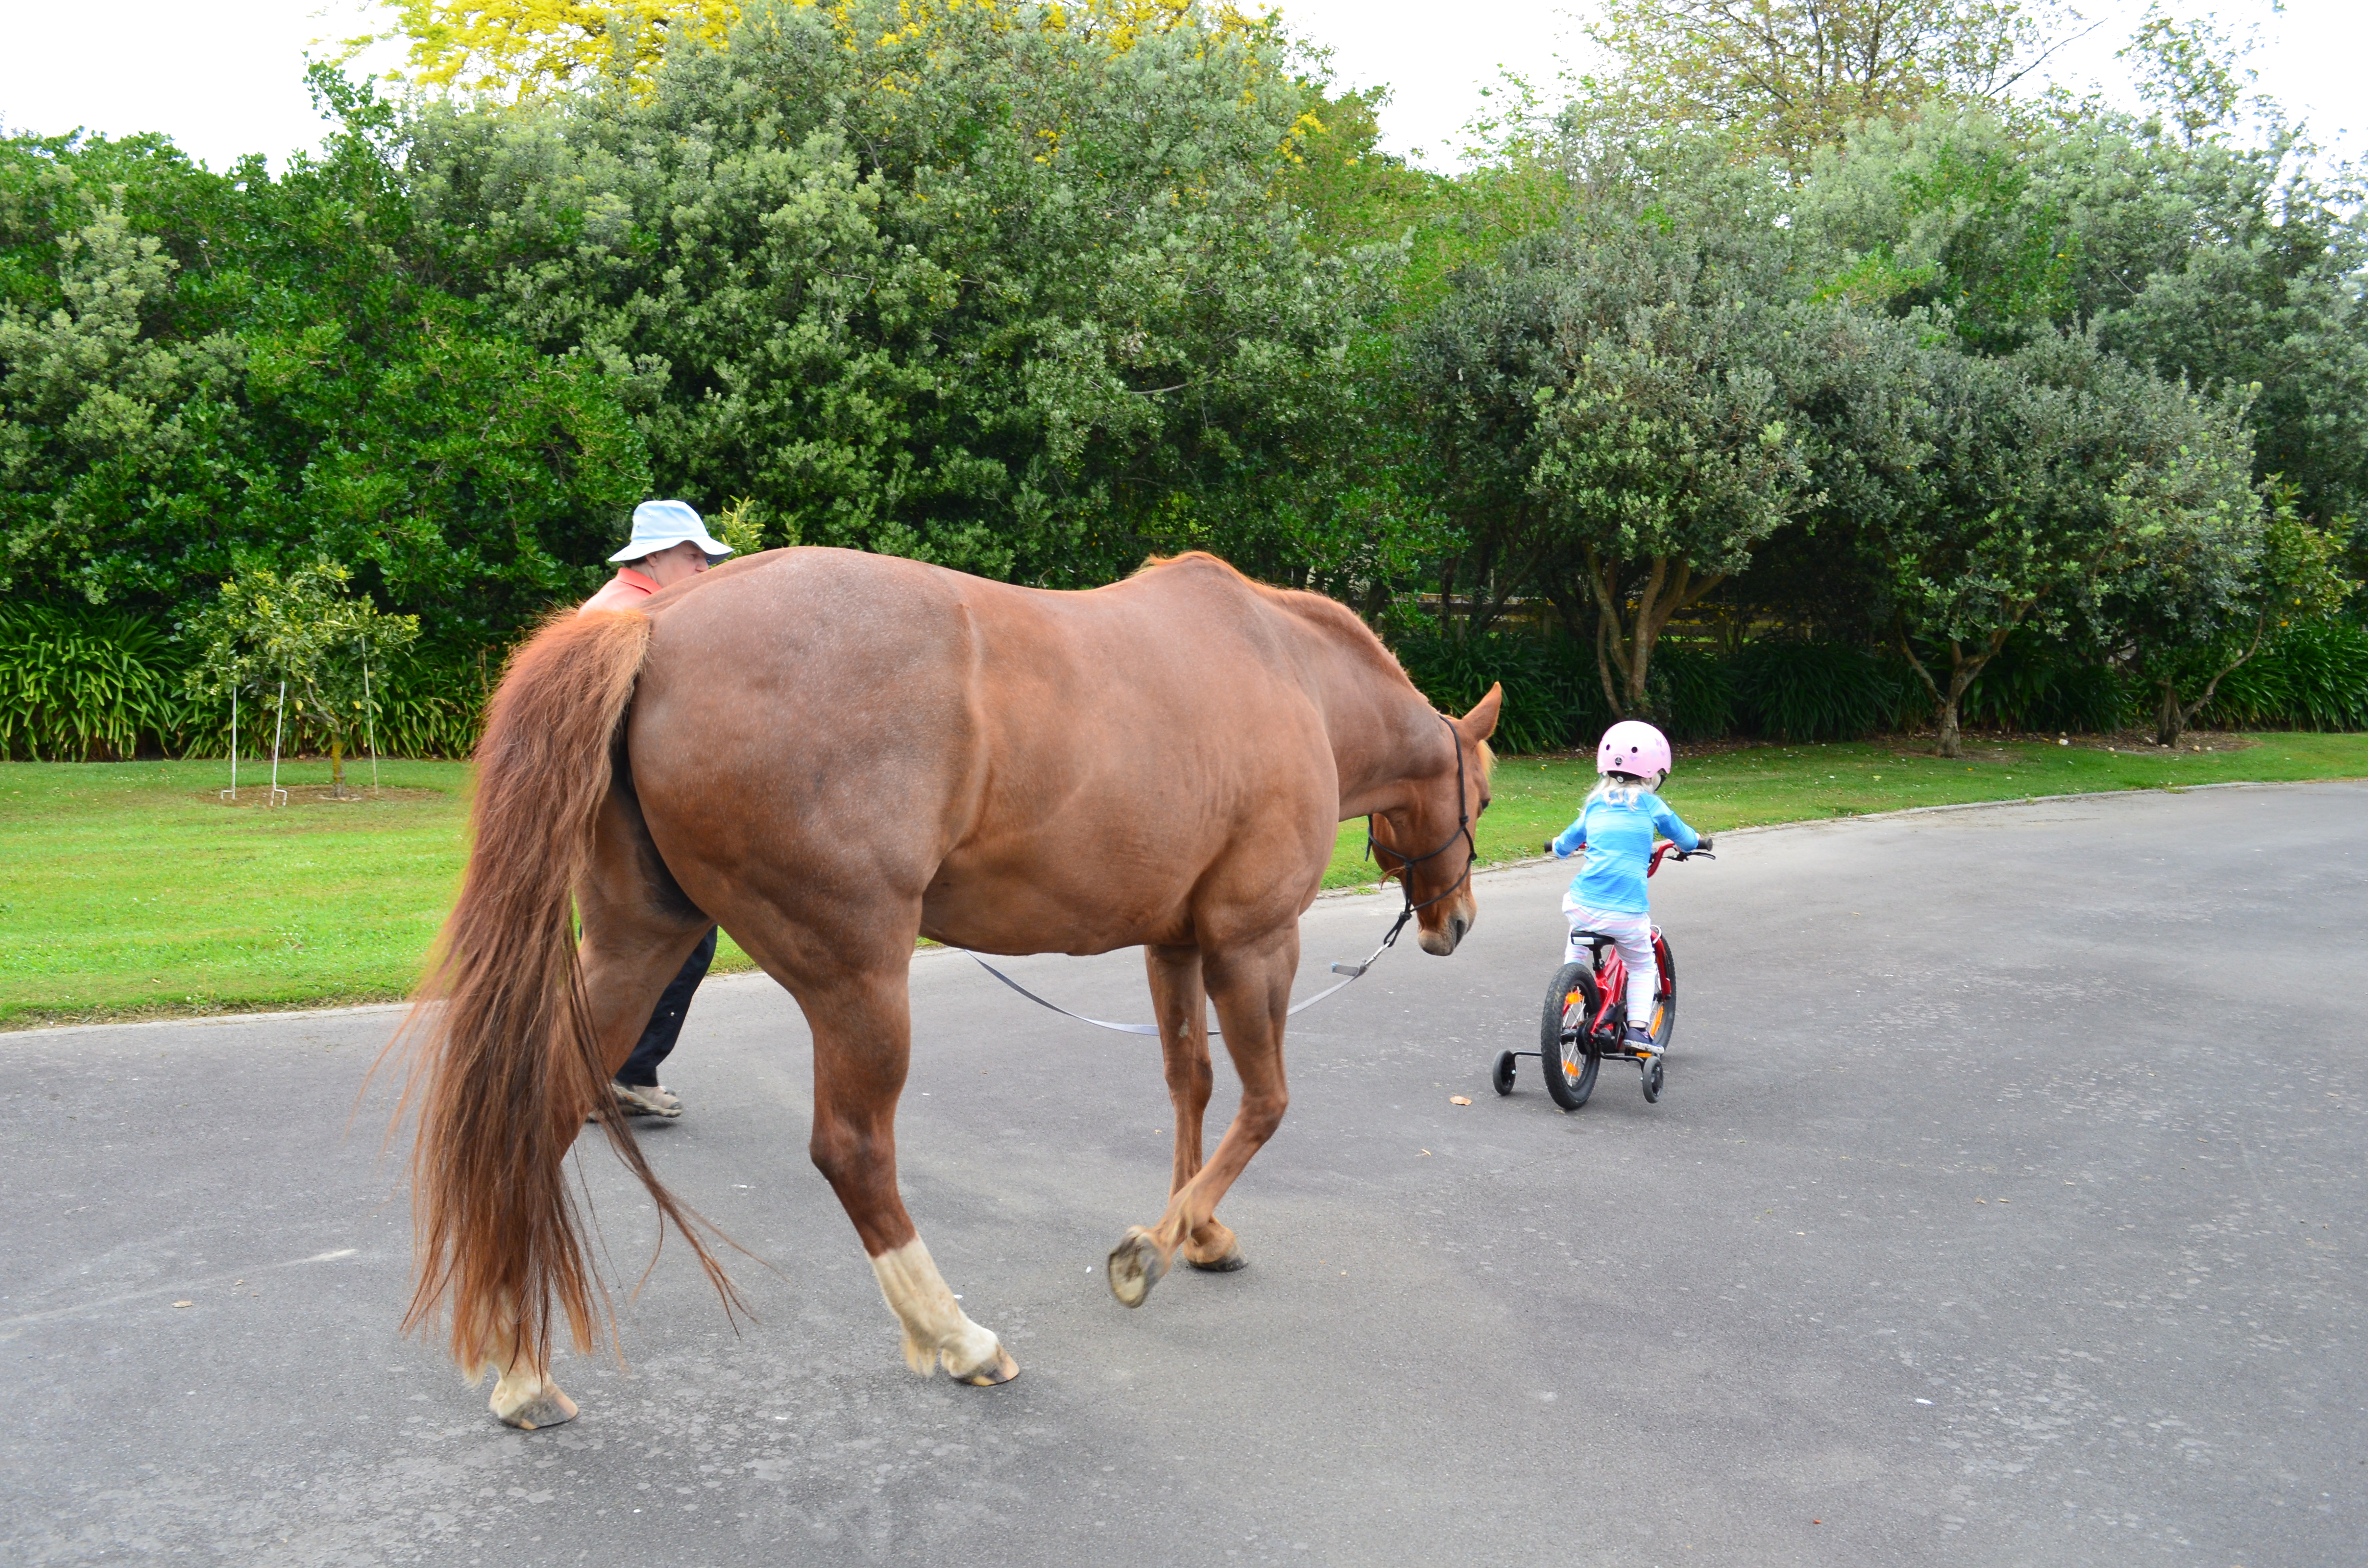
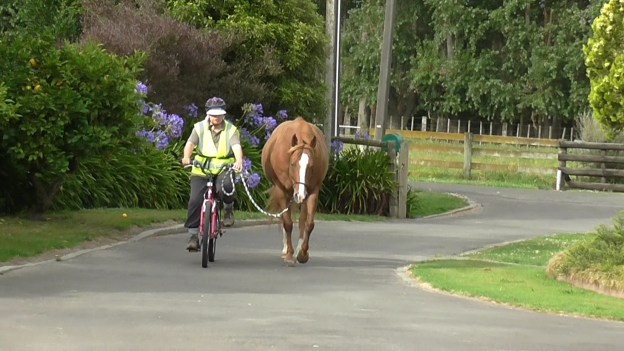
We followed the bike, being walked away, at a distance which Boots found safe. Eventually she was willing to come closer until she had the courage to sniff the stopped bike.
Horses know that if their feet are compromised, they are an easy meal for the first predator that comes along. Unshod feet, working in the way evolution intended, feel the nature of the ground, helping the horse adjust his balance moment to moment.
A horse asked to step onto an unusual surface will often sniff it first, then paw with a foot to gain more information about the nature of the surface. When we introduce a new surface, it is helpful for the horse if we let him paw away until his curiosity is fully satisfied.
When I introduced my horse, Boots, to a tarp for the first time, she pawed it into a scrunched-up ball. She did this the first five times I brought out the tarp. After that, she was comfortable walking across it or standing on it.
Above:Mat targeting (front feet and hind feet) and pedestal targeting all help to make the horse more aware of where his feet are. Placing the feet accurately helps to build proprioception – knowing where the limbs are and how to place them with precision.
Below: Boots became adept at lining all four feet up on her balance beam.
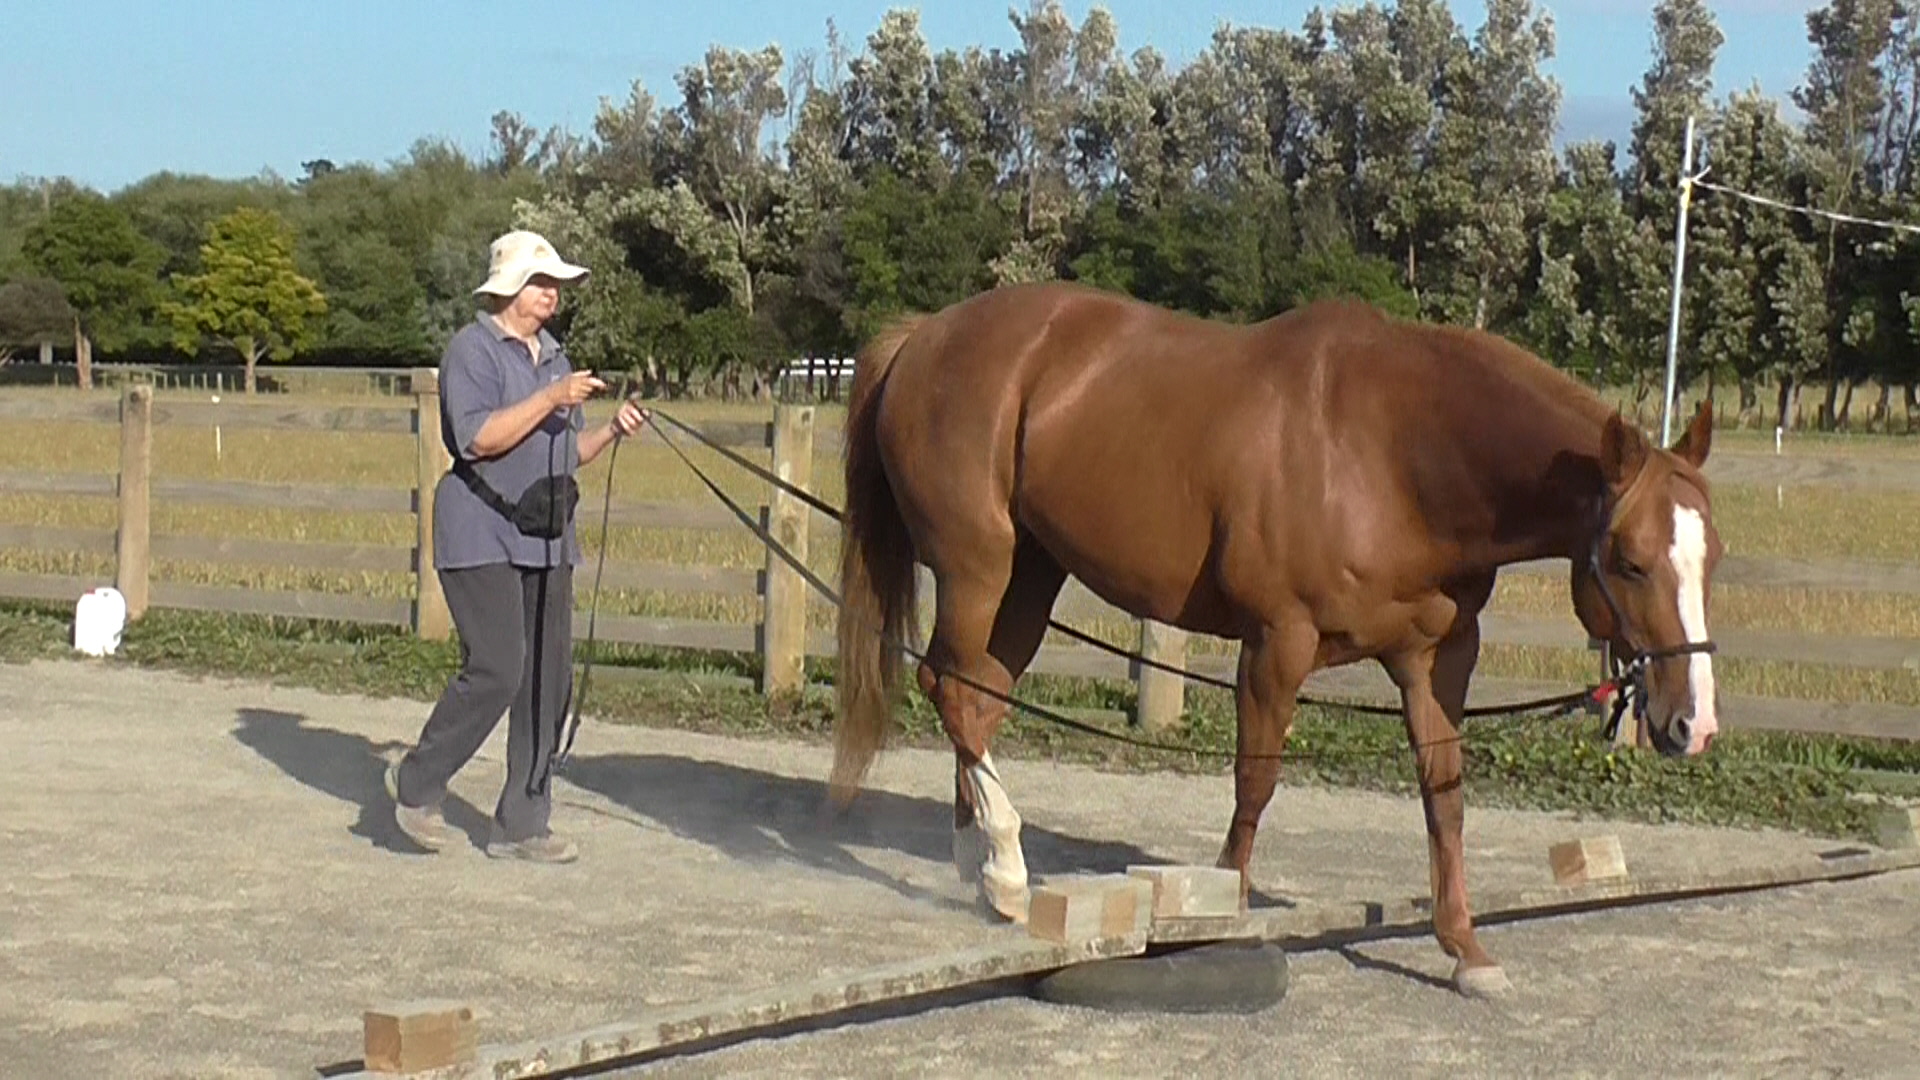
Walking across rails and hoops with click&treat for a clean passage aids proprioception. Start with one rail or hoop, and when that is stepped across cleanly 90% of the time, add a second, and so on.
Horses are very careful about where they put their feet because they depend entirely on being able to move to stay safe from predators. There are numerous ways to help a horse build foot awareness and confidence with new surfaces.
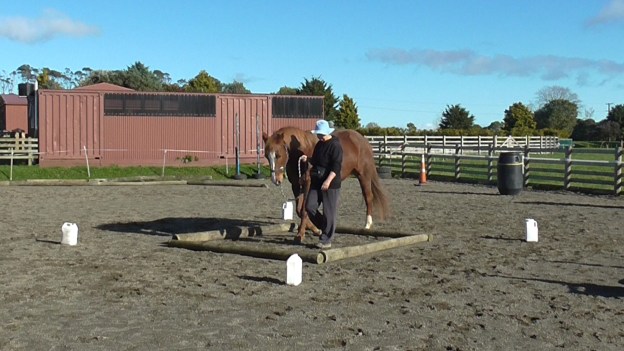
For this task we started with organising the front feet either side of the rail. When that was solid, we added the back feet.
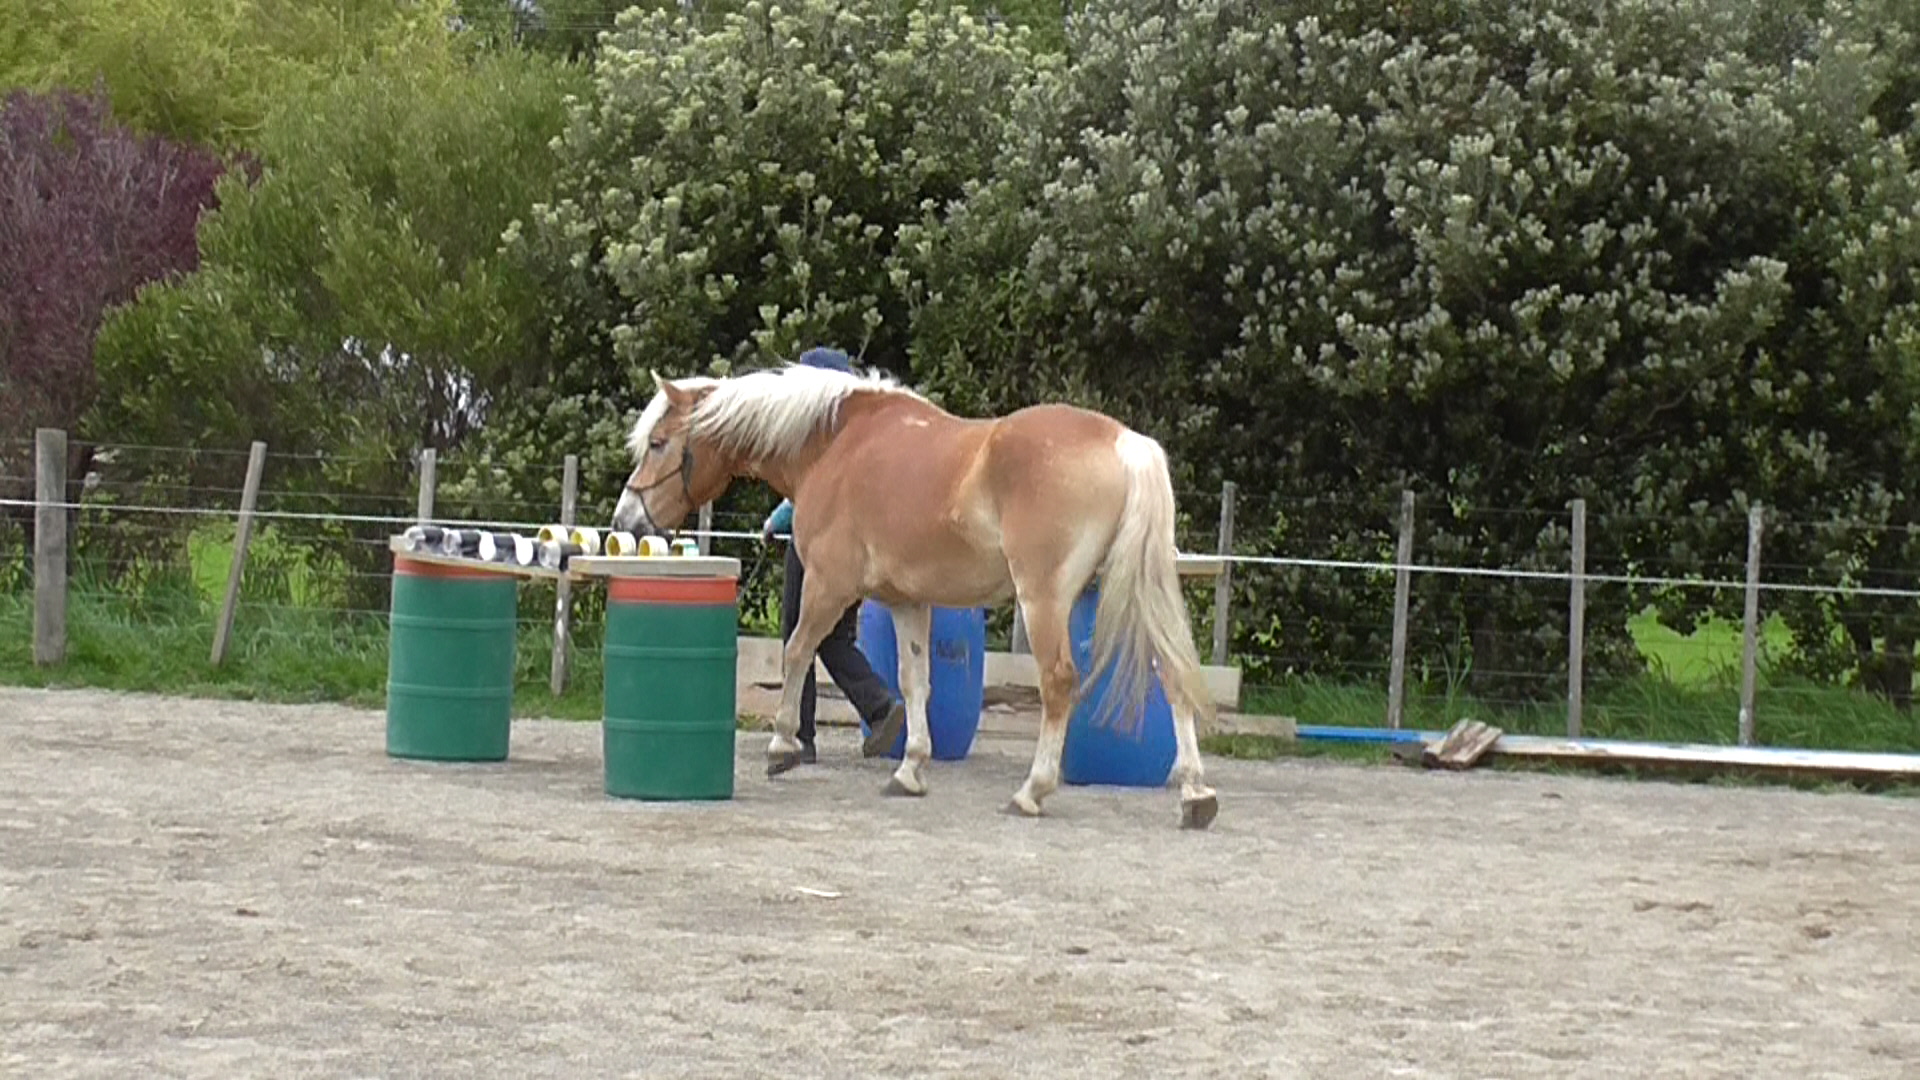
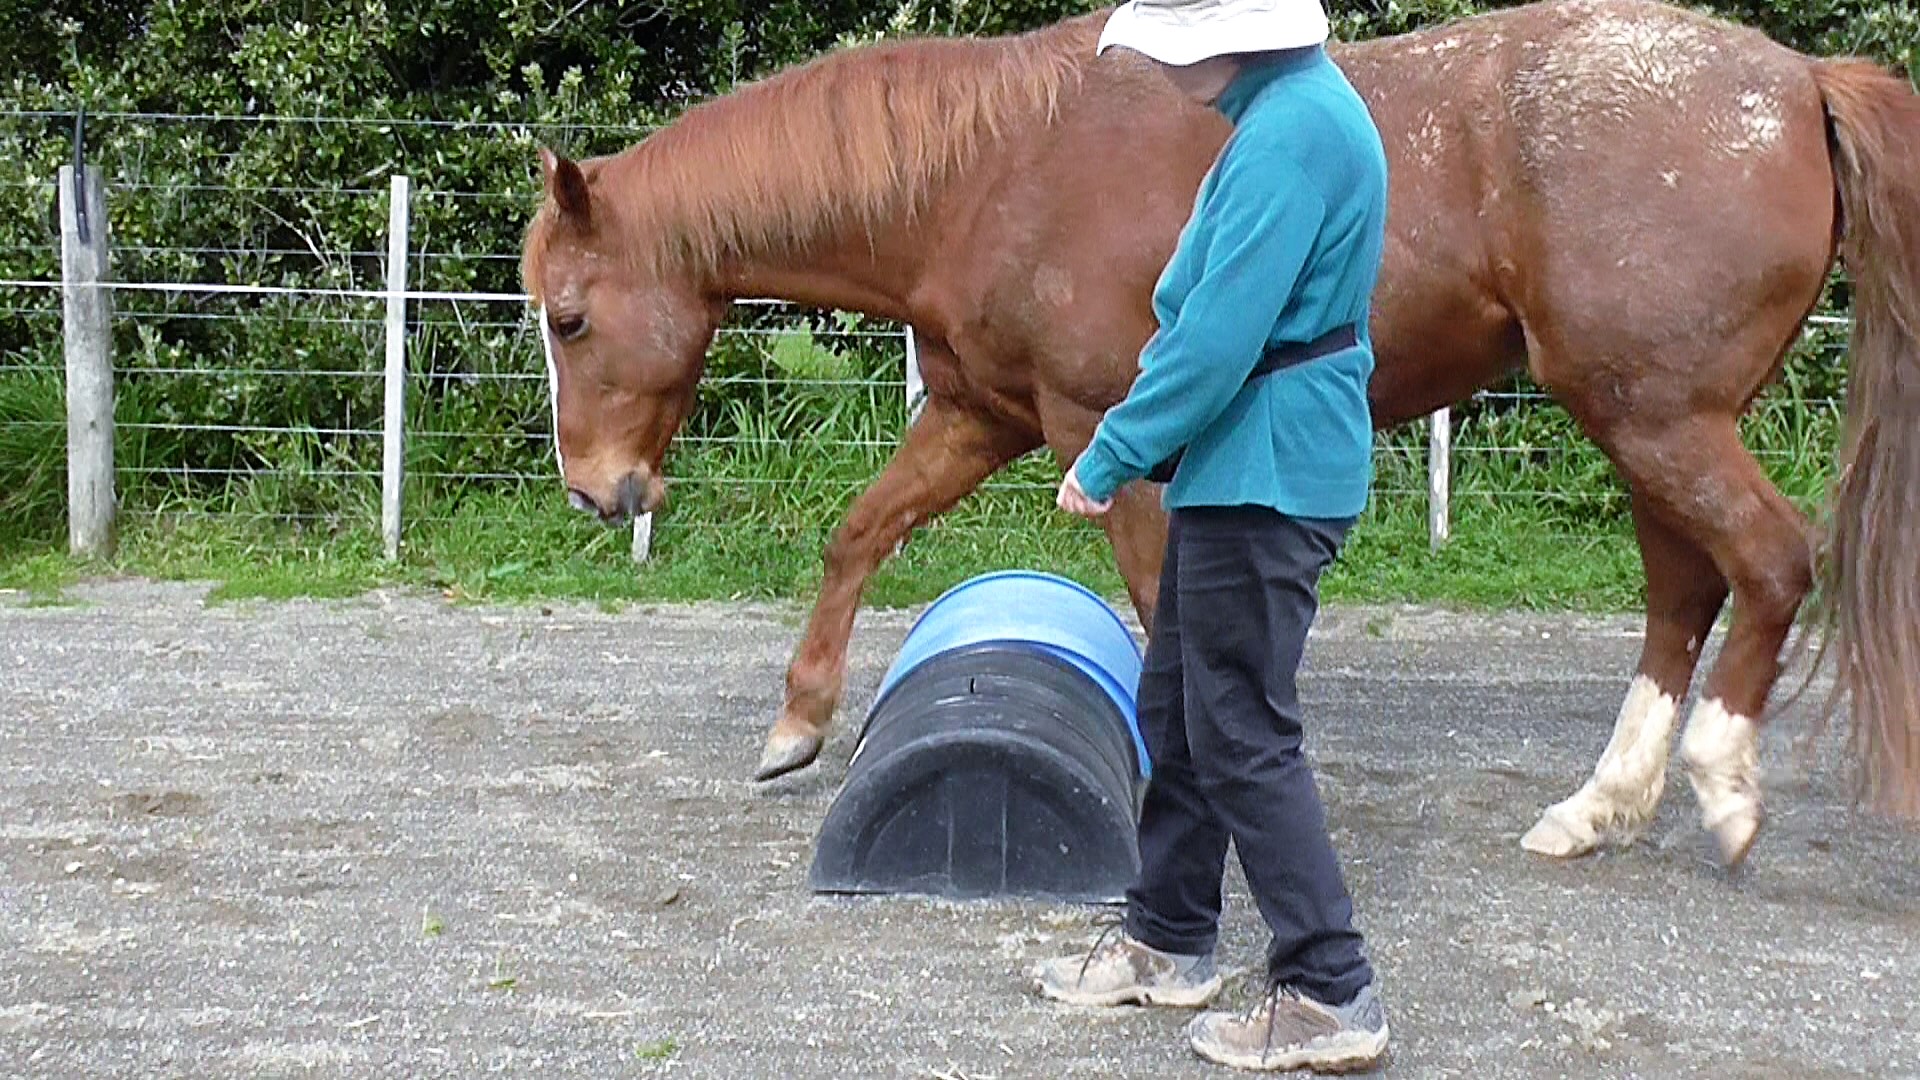
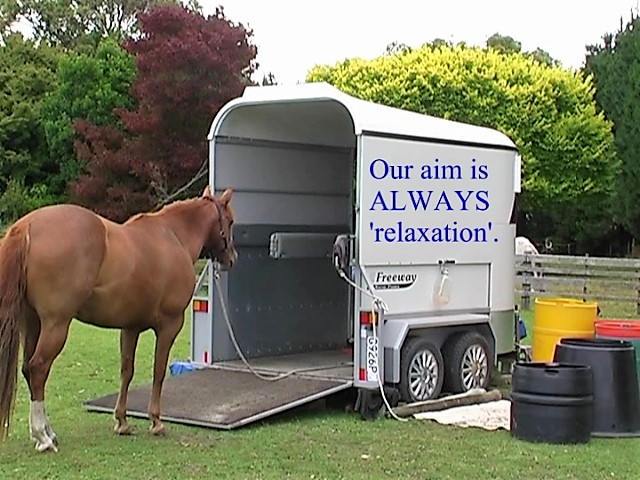
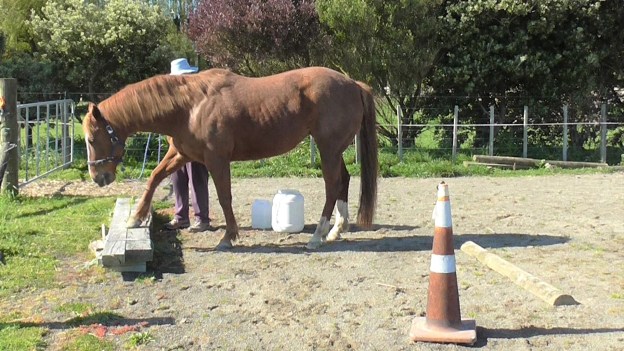
The photo above shows one of the approximations we use when teaching trailer loading. Navigating a narrow space alongside the trailer, confidently, is a major step along the way to gaining confidence to enter a trailer.
Successive approximations, simply put, mean that we start with what the horse can offer already and gradually direct and reward each tiny move in the direction of the final behavior we want.
In other words, at the beginning of teaching something new, we click&treat for the slightest approximation of what we want as our final result. Each improved approximation is one tiny slice of the overall task.
When the horse feels ready, we encourage him to do a tiny bit more to gain the click&treat. This whole process of rewarding successive approximations is called ‘shaping a behavior’.
Shaping a Behavior: This is our second session of Free-shaping Head-Lowering
Putting a behaviour on signal/cue: In the next clip, you will see me re-setting the task repeatedly as I show Boots that a click&treat will only be forthcoming if I give the signal/cue for this behaviour, which is dropping my head and shoulders forward. We don’t want the horse forever putting his head down.
Putting Head-Lowering on Signal/Cue
A human example of shaping a behavior is teaching a child to write. The child starts with holding a pencil and using it to make random marks on paper. At some point the random marks become conscious curves and straight lines.
When the time is right, we introduce writing letters of the alphabet. Eventually the child can group letters to make words. Words are then arranged into meaningful sentences. Some children go on to write coherent paragraphs, essays, stories and books.
If the child loses confidence with any of the slices of the process, an element of discomfort creeps in, along with typical avoidance behavior. Not enough practice then results in a poorly shaped skill.
When a horse loses confidence in his ability to understand what we want him to do to earn a click&treat, we get typical avoidance behavior. He shuts down, stops trying – moves away if he can. Keeping the learner’s confidence is the essential role of a teacher.
Writing is an interesting human endeavor that starts at two years old and is still being shaped many years later at high school, tertiary education and beyond. There is always room for improvement.
Another way to look at successive approximations is to think of a sculptor starting with a piece of stone. He works in careful stages until the shape in his mind is visible to the rest of us in the shape of the stone.
In the same way, we gradually tease a series of movements (or stillness) out of a horse to yield the task we want. This is a bit harder than shaping stone because horses have minds of their own!
The more quickly you click&treat, and simultaneously stop any signal/cue, when the horse complies, the faster the horse can learn to recognize just what it is you want.
Once the horse understands your intent, refine your signals/cues and be TOTALLY CONSISTENT with them.
If you keep nagging with a signal/cue by repeating it, you will desensitize the horse and make him disregard the signal. Nagging is an easy habit to get into and hard to break. If the horse does not understand the first time you use the signal/cue, back up in your teaching until he does.
The energy you use to communicate with a signal/cue will change with the situation and what you are asking the horse to do.
To teach with the free-shaping, the horse learns without a direct signal/cue from you to initiate an action because you have set up the environment to make the action you want likely to happen. The horse does the action of his own free will. You mark the action with a click and reward it with a treat. Once the horse offers the behavior reliably, add a signal/cue to it. The signal/cue is usually determined by the nature of the task. It will be unique to you and a particular horse. For the haltering task in the video clip at the end of the blog, I started with the horse’s natural curiosity about the hoop, and shaped the haltering procedure from that.
Just when everything is feeling really good is the time to STOP. Avoid at all costs the urge to do it again to see if we can. Change to something relaxing instead.
One of the key skills of horsemanship is to read the horse accurately to be able to decide on the best activity (or rest) for the moment we are in. It is part of the concept of ‘feel’.
When things go awry (which they will), always go back to where both you and the horse feel confident again, and gradually work forward from there.
When we watch a horse and his trainer perform a complex task, it is not always easy to see the steps the handler took to reach the smooth end behavior. Even if we can find out how the horse was trained, that only tells us about what worked for that horse and that handler.
Here are some questions we have to ask ourselves.
What did the horse know already before learning that task?
How experienced is the handler?
What method(s) of reinforcement does the handler use?
How long have the horse and handler worked together?
How long did it take them to reach this point?
What were the tricky bits along the way?
How often did the horse get confused?
How often did the handler have to go back a few steps and work forward again?
Seeing a horse carrying out a task that grabs our fancy is the beginning of our own adventure. It gives us the inspiration to teach our horse something new. The starting point for any Individual Education Program we set up for a horse will be unique to us.
Here is the definition of thin-slicing again.
Thin-slicing is a shorthand way of saying: split the overall task we want the horse to learn into its smallest teachable parts and teach each part in a way that makes it as easy as possible for the horse to understand.
Resetting a Task
When we teach something new, we are experimenting with our signals/cues and the horse is also experimenting to work out what it is we want him to do. It’s not unusual for things to get a bit complicated and messy.
If either you or the horse lose track of what you are doing, pretend it was perfect, relax (but no click&treat), pause. Count to ten and rotate your shoulders. Then go back to the beginning of the task and try again, starting with your visualization of how a good effort will look and feel.
The magic about pretending it went well (when it actually turned into a mess) is that it dissolves the natural frustration we feel when our communication is not getting through. Horses instantly pick up on the changes in our body when we are frustrated or angry, and will want to move away from the negativity, so any teaching/learning moment is lost.
If we can smile, breathe out and relax our body before the reset, we don’t upset the horse or make him anxious. We simply start again.
When someone tries to teach me something new on a computer or cell phone, they invariably go so fast that I have no idea what they did or what I should be doing. I think that is what often happens with horses.
The following two clips demonstrate teaching with successive approximations. Our sessions were never much longer than three minutes.
First Successive Approximations for Learning to Put on a Halter
In the next video clip, be aware that to make it shorter for easier watching, I cut out the bits where I reach into my pocket, after the click, so it is a bit jumpy. Everyone’s progress will be different.
The lens of a horse eye is not able to change shape as easily as the lens of a human eye. Horse vision more resembles looking through a trifocal lens. A trifocal lens supports distance focus in one part of the lens, mid-distance focus in another part and close-up focus in a third part.
This explains why horses need to do so much positioning of their heads to see clearly. They need to raise their head high for clearer distance vision and drop it down low to get a better view of something closer.
Horses need to lower their head to see things up close clearly. Long hair obstructing the eyes does’t help.
Forcing a horse to keep his nose vertical with the ground restricts his visual field a great deal. It is easy to try this yourself. Stand with your head up and note your field of vision. Then drop your head so your nose points to the ground. Note your field of vision now.
For a prey animal who depends on early detection of danger and a flight response for survival, restricting the field of vision by requiring (or forcing) vertical flexion can cause a lot of mental anxiety and related damaging muscle tension all over the body.
Being set either side of a large head, horse eyes work more independently than human eyes. The positioning of the eyes limits the horse’s binocular vision (being able to focus on something in front with both eyes) to a triangular area in front.
The shape of his nose causes a blind spot that extends about three feet directly in front when his head is straight, so his field of binocular vision is beyond that. So if we are standing directly in front of the horse within three feet, he is not able to see us or any signals we may give. But he can smell us and be aware of our energy level.
As well as his zone of binocular vision straight ahead, the horse can see almost 180 degrees beside and behind with each eye, similar to a person using rear-view mirrors on a car or bike.
Eyes set well into the side of the head allow rear view vision at almost 180 degrees. This peripheral vision is highly tuned to movement. A startle response due to a sudden movement from behind is an adaptation to get a head start on any predator emerging suddenly.In this view, Boots is able to see me on the right side of her body with her left eye.
This side or peripheral vision is not as exact as binocular vision, but it is excellent at picking up motion. That is why horses often jump away sideways first if something moving to the side or behind startles them, then they rapidly sprint away before turning to assess the situation. How far the horse moves depends on the intensity of the adrenalin rush.
When the horse is strongly focused forward using his binocular vision, his mind is busy with that and not linked to his peripheral vision. This helps explain why we need to be careful approaching a horse from the side or the back, as he can be genuinely startled by movement behind, if his full attention was on something in front of him.
It also seems that horses can doze with their eyes open. If you come across a horse looking very relaxed, with low head, floppy bottom lip, relaxed ears and a cocked hip, he may be too asleep to notice a quiet approach even though his eyes are open. It always pays to give a warning ‘nicker’ or say something while approaching the horse.
With their extremely large eyes, horses have excellent night vision as long as there is some environmental light. I can vouch for this, having once been caught on the far side of a hydro river, when water was unexpectedly released into the river from the dam upstream during a sunset ride. We had to ride in serious darkness on an unknown track to reach the dam and cross over to our home side.
Horse eyes take longer than our eyes to adjust from light to dark or dark to light. It’s important to remember this when we move a horse from a dark building into bright sunlight or from sunlight into a dark arena, stall, truck or trailer. We should allow him to stand with his head in the entrance while his vision adjusts.
As mentioned, horses have a triangular blind spot that reaches about a meter in front of their nose. That is why they need to lower their head as they approach an object closely to inspect it. You can simulate what it is like, to have a long nose like a horse, by putting your hands in place as in the photo below. Note how it affects your ability to see right in front of your nose.
Colette demonstrates how to place your hands to imitate a horse’s long nose to let you see why horses have a blind spot when they are looking straight ahead. If you spread your fingers wider in this position, the blind spot gets bigger.
They also have a blind spot right behind their tail if their head is straight as well as under their belly when walking across things.
Horses have a blind spot directly behind if their neck is straight.
If we are experimenting to find the best position to give our horses a visual signal, it pays to be aware of their blind spots as well as how their vision differs from ours.
A horse’s small range of close-up binocular vision makes depth perception for stepping into or onto unusual surfaces tricky. They again need to raise and lower their head to compare the object of interest with things they have seen before.
This comparison of the look of ‘new things’ with things already in the horse’s memory, helps explain why horses are so sensitive to anything which has been changed – anything added or subtracted to what was there the last time they passed by.
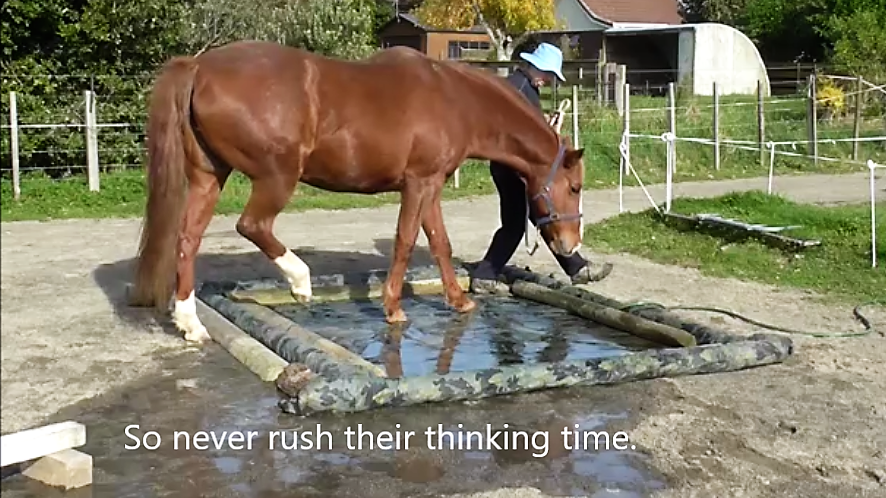
Their limited depth perception explains why horses are often reluctant to step into a puddle. The reflected light and the ‘unknown’ surface’ under the water are both problematic. Dangerous footing compromises a horse’s ability to flee if the need arises.
Horses need to lower their head to investigate unsure surfaces visually.Often they also paw to check the stability of what lies underneath.
The horse eye has a ‘visual streak’ in the retina (sensory screen at the back of the eye) which is the area of most accurate vision. As mentioned earlier, horses must move their heads in order to bring the item of interest into the range of this ‘visual streak’ to improve the depth perception and detail of the image.
If the horse’s head is restricted by tight ropes or reins, his ability to see clearly is compromised. Not surprisingly, such restrictions cause tension that affects the whole body.
Horse eyes appear to magnify objects more than our eyes (maybe up to 50%). The acuity (sharpness) of what they see is less than 20/20 human vision but seems to be better than that of dog and cat vision.
The way horse vision works helps explain why it is so important to teach everything we do on both sides of the horse. A horse that is only handled from the left side will suffer from ‘right eye neglect’. Handling procedures will be ‘strange’ to his mind on the right side because the neglect means no nerve pathways have formed to build his confidence with handling on the right side.
This links to all aspects of training and handling. Like us, horses are naturally either left or right-handed. In other words, like us, their bodies are asymmetrical.
Unless both sides of the horse’s body are coached gymnastically, it is hard for the horse to be straight in his body. Which means a saddle will always be misaligned to some extent. A symmetrical saddle on an asymmetrical horse is a perennial problem for riders and painful for horses.
When teaching a new movement, the less agile side of the body needs at least two or three times more attention than the agile side of the body. Think about how hard it is to brush your teeth with your non-dominant hand.
Horses living within sight of their owner’s house use the lights coming on during a winter morning as a signal that their morning feed is not far away. Part of the year I provided hay in the late evening. The headlamp I wore was a visual signal the horses used to meet me at the shelter.
During groundwork our body language and gestures are visual signals. If we are approaching from behind, the horse is usually able to see us by turning his head.
When my horse’s companion, a large white gelding, went to live elsewhere, her attention was often riveted on a white Charolaise cow in a distant paddock as she tried to figure out whether that was her old paddock mate.
My thoroughbred mare, Gypsy, was super conscious of anything on the distant horizon. A rabbit hunter toting a rifle, so far away that I could barely see him, caught her immediate attention.
Horses are genetically wired to pay close attention to anything which looks different to how it looked before, or if something appears that wasn’t there before.
Because their eyes are not the same as ours, it is important to be aware of the following situations.
Depending on the shape of the horse’s belly, there is also a blind spot under his hind legs and under his belly. If we ask a horse to back over a rail, he can’t actually see the rail at the time, but is working from memory or feel. Just because we can see it doesn’t mean the horse can see it.
When we approach the horse from the front, it is best to be a little bit off-centre, so we are not in his front blind spot.
If the horse is focused on something ahead in his area of binocular vision, his mind is not engaged with his peripheral vision. This means that something suddenly moving behind him can result in a startle response, often called ‘spooking’. As mentioned earlier, peripheral vision picks up movement rather than detail, so the horse will move first, then turn and inspect the cause of the spook. How far he moves before turning depends on the amount of adenalin shock he experienced.
If the horse is strongly focussed on distance vision, with a raised head and a concentrated look, his peripheral vision is ‘off’, so sudden movement from behind will cause him to spook. Spooking is a highly effective method for escaping from predators.
If we are doing groundwork behind the horse, we need to move between his right and left peripheral vision and teach him to adjust his head so he learns to confidently keep us in view as we move left and right into and out of his blind spot.
Playing the peek-a-boo game from behind. In this photo Boots can see me standing behind with her left eye.
In this photo I have moved to her right, so she is watching me out of her right eye.
I’ve moved back to the left and she tracks me with her left eye. It’s fun to play this peek-a-boo game when the horse has front feet on a pedestal.
When we begin long-reining, it’s a good idea to play a peek-a-boo game from behind, while the horse is stationed on a mat or pedestal, and make sure he is comfortable turning his head to track your movement.
When horses negotiate a jump, the jump disappears from their vision as they approach it, so they are jumping from their memory of where the jump was. If the horse was paying attention to something else on the approach to the jump, he will run right into it without realizing it is there. You see this sometimes at jumping competitions.
When jumping or stepping over rails, the obstalce disappears from the horse’s vision and they work from memory of where it was.
Riding – Visual Signals Mosty Disappear
When we move from groundwork to riding, the visual signals the horse has learned suddenly disappear. We need to teach the relevant replacement touch and verbal signals we will use during riding from the ground first. In this way, we make it easier for the horse to navigate the change to riding.
Once mounted, we need to carefully re-teach the replacement touch signals by at first pairing them with the voice and visual signals the horse already understands from his groundwork.
If touch and voice signals are clearly taught with groundwork, the switch to riding can simply be part of a systematic progression rather than a major change.
When we mount up, the visual cues and signals we use on the ground suddenly disappear. We have to carefully transfer these to voice and touch signals to make the transition smoother.
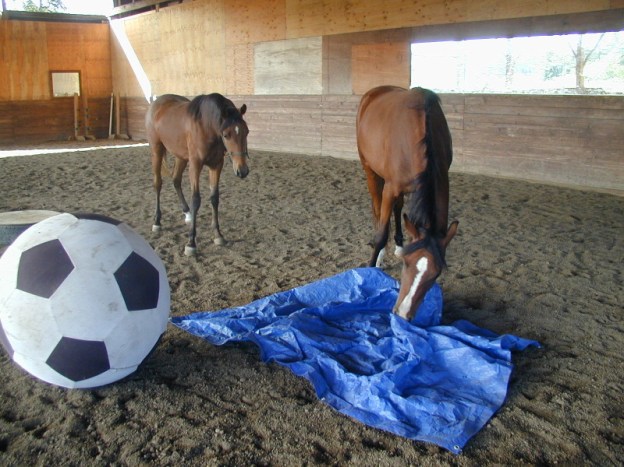
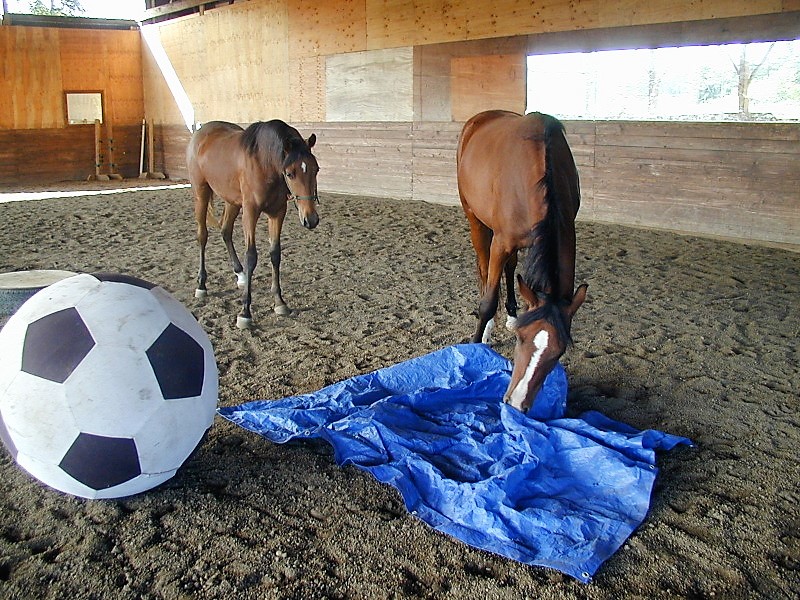
In the photo above, one horse is within his comfort zone checking out the tarp. The new horse standing behind is unsure about what is going on. In this situation, the confident horse is helping to build the new horse’s confidence, which is a great way to proceed.
Beginnings are Hard
When we begin doing new things, it takes time and effort to get the feel of what we are doing. Getting this ‘feel’ for a new activity doesn’t happen in ten minutes. Same for horses.
Doing something new takes us out of our comfort zone. We know when we are out of our comfort zone because our heart rate and breathing speed up. We may sweat more and have feelings of un-ease, often beginning in our gut or stomach. Same for horses.
It’s important to recognise how we feel when we are out of our comfort zone, as well as how we feel when we are back in our comfort zone. And we need to recognize when our horse is out of his/her comfort zone.
Only desire, effort and application can make a comfort zone larger. Learning and education are all about expanding comfort zones.
Obviously, both the handler and the horse have comfort zones. If both parties are out of their comfort zones, it may not be a good horse day. So it’s important that when the handler is out of his or her comfort zone, the horse is in his comfort zone.
When we take the horse out of his comfort zone, we ideally want to remain in our own comfort zone so we can maintain our emotional neutrality. By understanding our own and our horse’s comfort zones, we’ll have more good horse days, until every day is a good horse day. (The bold items are in the Glossary page.)
For a horse at a particular time, ‘comfort’ can mean the freedom to move and run, using up adrenalin and enlarging his personal space.
At another time, the same horse may find ‘comfort’ in a quiet, restful state.
As the handler gets to understand the edges of a horse’s comfort zone, it becomes easier and easier to thin-slice tasks to suit that particular horse.
The diagram below has six arrows that illustrate the six situations that a person or horse will come across.
The inner circle with the smooth boundary is the existing comfort zone. We can call the boundary of this circle ‘Edge One’ because it is a threshold that determines our behavior, or the horse’s behavior.
To expand our comfort zone, we have to move out toward the wiggly, broken line. Out there is the world with all kinds of thresholds that challenge us. We can call the broken line ‘Edge Two’.
The numbered arrows following the diagram refer to the six situations that will arise whenever a person or a horse is faced with expanding their comfort zone.
Comfort Zones: All of us, horse or human, have a ‘comfort zone’ within which our heart rate is normal and we can allow ourselves to relax. Expanding a comfort zone takes active intent. The six numbers are explained below.
Lacking confidence to leave the comfort zone.
Can leave the comfort zone for a bit, but then has to hurry back.
Able to leave the comfort zone for longer before going back.
No longer needs to retreat to the former comfort zone. The comfort zone has expanded.
Starting to feel comfortable well beyond the old ‘Edge One’ threshold.
I can do this now. What is the next challenge? I’m ready to set a new ‘Edge Two’. ‘Edge One’ has moved out to encompass the original ‘Edge Two’. The comfort zone has expanded.
If we push ourselves, or our horse, toward ‘Edge Two’ too quickly or too soon, we, or the horse, will feel worried, anxious or fearful.
We will ‘run away’ in our mind and make up reasons to avoid going ‘out there’ again. The horse will indicate that he’d like to leave the situation or he will ‘shut down’. Either one means he has given up trying to understand what we’d like him to do.
This avoidance response is the brain’s way of keeping us safe. It’s a useful instinct in some situations, but in today’s human world, and with horses forced to live in captivity, we have to both find ways of successfully expanding our comfort zones.
As we learn to recognize where we and the horse are in relation to our comfort zones for any given situation, we will be able to take more control of where we are, in relation to where we want to be.
Safety is always the first priority. The horse has to learn how to respond appropriately to a variety of human pressures. The handler has to know how to influence the horse to keep everyone safe when a stressful situation occurs.
A stressful situation can arise in a split second. It helps a great deal if the horse has faith in us and if we know how the horse will probably respond when his adrenalin is up, so we can take pro-active measures.
With careful positive reinforcement training, stressful situations will become less common.
Boots is temporarily distracted out of her comfort zone as Smoky gallops around the paddock next door. Bridget waited quietly until the excitement was over, then carried on with trailer-loading skills.
Thin-slicing is a shorthand way of saying: Split the overall task we want the horse to learn into its smallest teachable parts and teach each part in a way that makes it as easy as possible for the horse to understand.
As each tiny part of the task becomes ‘ho-hum’ for the horse, move on to the next part. Gradually all of the parts will come together so the overall task is seamlessly carried out with confidence and willingness.
It means starting with the most fundamental lessons and gradually adding complexity, one click&treat at a time, until we have shaped the whole behavior we want.
As each small part, called a ‘slice’, is mastered, we begin to teach the next slice, either separately or as a continuation of the first slice. If taught separately, once the second slice is learned, we link it to the first one.
Proceeding like this, we gradually chain all the slices together until the horse can do the whole task as a continuous movement with one click&treat at the end.
Some tasks, of course, like haltering, saddling or harnessing, mounting up, worming, vet inspection, grooming and foot care, require the horse to stand still.
When we teach these ‘standing still’ procedures, we begin with a release (click&treat) for relaxation during each tiny slice of the overall process. Gradually, as the horse can relax more, we do a bit more before each release (click&treat).
It’s crucial to remember that ‘standing still’ during an unusual situation is not something a horse in the wild would ever do.
Asking a horse to ‘stand still’ while we do all sorts of things to him, is a big ask.
To teach a flight animal to ‘stand still’ on request means we have to actively teach the horse to be inactive.
In other words, the horse learns to be actively inactive. His instinct will be to move his feet if he feels uncomfortable. Good training will give him the trust and confidence to keep his feet still when we ask.
This concept is explored in teaching the art of standing still, or ‘Parking’. It’s important to promptly move to the front of the horse to deliver treat so he doesn’t form the habit of turning toward you. Perhaps start by standing in front of him rather than to the side as in the video clip.
Example 1: Park & Wait
The key to good training of any kind is to keep the horse being continuously successful in his responses to our requests. If the horse understands our request and is comfortable with it, the chances are good that he will respond willingly.
Example 2: Free-shaping standing on a mat.
Example 3: to teach my horse to walk through a square of ground rails filled with squashed plastic bottles (a Horse Agility obstacle that shows up occasionally), I split the overall task into a series of tiny slices. It’s a great exercise to allow the horse to become more confident with putting his feet onto unusual surfaces like tarps, ramps, trailers, bridges, water, balance beams or mattresses.
Example 4: This clip looks at thin-slicing walking through a water obstacle. We start with things the horse is already familiar with. If walking across rails and tarps are new for your horse, that is where you would start and work with until they are ho-hum.
Example 5: This clip looks at free-shaping ringing a bell.
Thin-slicing and consistency are the holy grails of horse training. By using the mark and reward (click&treat) dynamic, we let the horse know what will earn the treat and therefore increase to probability that he will happily do that action (or inaction) again.
Horses are incredibly sensitive to body language because it is the language they use with each other. They are also highly aware of the body language of predators so they know if predators are in hunting mode or not. When our horse gets to know us well, and we are reliably clear and consistent, small changes in our body language can become a significant part of messaging with our horse.
Moving from A to B, the horse follows along or moves with us.
When riding, the rhythm of our body in tune with the gait we are in, and our rhythm changes when we ask for a change of gait.
Facing the horse in front, we can draw him toward us by stepping backwards.
Facing the horse in front, we can ask him to back up by stepping toward him.
Facing the horse’s ribs, allows us to ask him to move past us or in a circle around us.
My body orientation is a large part of the signal that lets Boots know that I’d like her to move over the rails and continue in a circle while I pivot on the spot.
Specific Orientation – the alignment of our body axis in relation to the horse is a major part of the signal when we ask for:
Turning right or left
Weave pattern
Figure 8 pattern
S-bends, L-bends, U-bends, zigzag-bends
Hindquarter yields
Forequarter yields
Backing up with counter-turns (as in backing a square)
Standing on a mounting block as a signal for the horse to line itself up for mounting.
By shifting my body axis away from the horse, she knows we are turning right and no pressure on the halter is needed.
‘Walk on’ with finger tap behind withers or on butt.
We use body orientation and touch signals for foot care. Also often a voice signal.
Body Extension Touch: This involves all the things we have in our hand, or things we put on the horse. It might include:
grooming
cleaning and trimming feet
head gear put on/off
ropes all over body
saddles or harness on/off
guiding touch with a body extension, as for long-reining.
When we start using gear on our horses, we must remember how sensitive they are to touch.
Riding Touch:
Since horses are extremely touch-sensitive they feel every shift of weight and position. As long as we don’t desensitize the horse to touch signals by nagging, inconsistency, or rudeness, the horse learns to respond to the smallest of touch and weight placement variations.
poll pressure to walk forward when leading, although this can be replaced easily by using clear body language (breathe in, gesture with arm and step off with outside leg – easier for horse to see).
light nose pressure to halt, back-up (refined with voice signals)
light nose pressure for change of direction
light nose pressure for downward transitions, halt, back up
light nosepressure to ask for bend.
halter vibration to back-up.
A very light jiggle on the rope is one of our signals for backing up.By using props such as this, it makes sense for the horse to back up, making it easy to teach. The rope touch signal can then easily be morphed into gesture, body orientation and voice signals.
When I want to park the horse with ground-tying, I have first taught verbal ‘whoa’ and ‘wait’ voice signals to a high standard.
Before we deliver the treat, we have used a click (tongue click or mechanical clicker) or a special sound/word to let the horse know what he did at that moment, is what will earn a treat.
breath in = raising body energy to prepare to ask for more movement
breath out = dropping body energy to prepare for slowing down
large sigh to encourage relaxation
relaxed posture during dwell or relaxation time between requests
This relaxed posture during ‘dwell time’ I learned from Alex Kurland. Shoulders relaxed, looking nowhere, facing away from the horse, hands quiet on belly. I’m also slowing my breathing and therefore my heart rate. Horses are incredibly tuned in to the body language of people they know well and who act consistently. They are also instantly aware of emotions. Body language is the key language between horses.
This links very closely with our breathing and body energy. Again, horses are incredibly perceptive. The more consistent our behaviour and emotional state, the more relaxed and willing the horse can be.
how we align the core of our body and our eyes
how strongly we are focused on what we want to happen
how we bring our breath and energy up in preparation for giving a signal
how firmly our inner belief backs up what our signal is requesting
In this photo I’m aligning my body axis to weave the obstacle in front of us. My energy and breathing are up. I’m strongly focussed on what I want to happen. As we round one obstacle I change my body axis alignment and my focus to weave the next obstacle. Because I’m consistent, the horse learns to read my intent and readily complies.
I hope you have fun seeing how small you can make your body language and touch requests and still be clear for your horse. They depend on us for so much.
By always starting at the withers when we want to ask for a foot to be picked up, the horse has time to shift his weight so he CAN pick up the foot we want. Here Bridget is about to ask for the left hind foot and Boots will shift her weight to make it possible – in fact, she will be lifting her foot as Bridget moves to her hindquarters, in anticipation. Just as we do, horses like to know what is going to happen next, before it happens.
ROPES: It’s hard to overemphasize the importance of educating our horses to be totally comfortable with ropes. Our main enjoyment may be to play with our horse at liberty and teach everything using targeting, voice and gesture signals. But sadly, horses in captivity are totally dependent on people for their well-being. Other people may regularly handle our horse or something may happen so that help from other people is needed. In case of fire, flood, or if you are hurt, or your horse must be moved, he will need a solid foundation of rope confidence. If he is sold, we want him to be comfortable with ropes.
If we take our horse out into public places we need him to be relaxed on a lead rope. If we tie our horse up, we have to get him comfortable with that. Rope Confidence includes ropes moving around him, ropes constricting him and ropes touching all parts of his body. The same is necessary if you want to teach your horse long-reining and maybe driving. Sooner or later we are going to drop a rope or rein and it is better if the horse does not see this as a reason to panic, which can lead to running into or over fences, or danger on a road.
#121 HorseGym with Boots in clip called Stick and Rope Confidence shows a way to begin. https://youtu.be/WIpsT4PPiXo
We don’t have to begin with a rope.
There are several elements to Rope Relaxation. #22HorseGym with Boots in a clip called Rope Relaxation shows some of the elements mentioned in the list coming up. https://youtu.be/6Y34VlUk0Iw
The last part of this clip shows building confidence with dragging ropes.
We want to gain the horse’s confidence to remain parked while we do the following activities.
Swing a second rope (not attached to the horse) near him.
Gently toss the end of a soft rope all over his body, including around behind, under the belly and around the legs. It should feel like horses standing tail to nose swishing flies off each other with their tails. Start with a second rope not attached to the horse, then graduate to using the end of a long lead rope.
When the rope is attached to the horse, make sure you keep a constant drape in the part attached to his halter while you toss the other end around his body. You want to avoid putting touch pressure on the halter.
Toss a coiled rope (not attached to the horse) in the air across him.
Randomly drop a coil of rope (not attached to the horse) onto the ground in various positions around him.
We also want to continue building his confidence with the rope when we:
drag a second rope while we walk along with the horse on a loose lead as in the second video above.
attach a second rope to the horse’s halter which he drags while we walk with him on a loose lead, including walking curves and corners where the dragging rope may touch the horse’s feet or legs, as in the second video above.
If the horse has reason to move when his rope is attached and dragging, we want him to be calm about it.
And eventually, with careful shaping, we can leave the horse ground-tied in different situations.
I’ve created a reason for Boots to walk forward dragging her rope on her own, so if she is ever in that situation, it is not unfamiliar.
Eventually we can practice ground-tying in different situations. The dropped rope and the gesture/verbal WAIT signals tell her that staying in place will eventually earn her a treat.
In the photo above, Bridget and Boots are at ‘pause and wait’ while I explain the next part of their task.
How does our horse know when we want him to stand relaxed beside us or when we want him to do something?
It is essential that we learn to manage our body langue to make it crystal clear to the horse when we are asking him to do something and when are in pause/no intent/ relaxed mode.
Horse sensitivity to the body language and intent of others is much more refined than ours because it is their primary language. In humans this ‘reading of body language’ has been dulled because we talk so much.
But we can stop talking and become aware of what our body language is saying to the horse. Body Language includes our orientation to the horse, our energy level, our breathing rate, our heart rate, our body temperature – these all communicate our level of calmness or agitation to the horse. To that we add the intent we hold in our mind.
Once we have a good awareness of our body language, we can begin to use its different aspects to communicate more clearly with our horse.
No Intent
In the photo above I am standing at ‘pause’. My orientation is not directed at the horse, my energy is down. I’m looking nowhere. My hands are quiet laid across my belly. My shoulders are relaxed. My breathing is slowed down, which also lowers my heart rate. My mind is quiet, not thinking of the next thing to do. This posture shows the horse I have no ‘intent’, allowing her to also relax into the ‘wait’ time.
Intent
In the photo above, my body language expresses clear intent that I would like Boots to step across the barrels. My focus is where I want her to go. I’m indicating ‘walk on’ with my outside arm and I’m stepping along with her.
Emotion Exercise
Find a stick and an inanimate object you can hit hard with the stick.
First, hit the object as hard as you can three times. Channel a time when you were angry or frustrated and put those feelings into thrashing the object. Your breathing, blood pressure and temperature will go up.
Second, kneel down beside the object and caress it lovingly. Channel your soft feelings for your horse or any other living creature. When you feel nicely relaxed, go back to hitting the object violently three times. Then kneel down and caress it lovingly.
Repeat a few times. Be sure to do this where it won’t upset your horse, dog, chooks, children, friends, partners, passer-byes or and other farm animal in the vicinity.
Take note of how your emotions mirror your actions. Keep this awareness. Horses need us to be calm and collected, especially when things go awry. If we are not calm and collected then the horse has no chance of being so.
No Intent
We can express ‘pause’ or ‘no intent’ sitting down.
Intent
My energy is up, I’ve asked her to walk with me and and while I maintain the increased energy and keep moving, she will move with me. When I come to a halt, I first drop my energy, release a long breath out and drop my weight down into my butt. And because I’m human, I also say, “Whoa”.
Strongly Reward the Pause or Wait Time
It makes sense to click&treat when the horse moves in the way we are asking. It makes equal sense to reward when the horse can relax into a pause/wait. We are not doing nothing. We are teaching active inaction. It can be difficult for horses to learn when most of their interactions with people caused movement or pain or restriction.
If you have already taught your horse to enjoy putting his front feet on a mat to earn a click&treat, use the mat to start building duration of the pause/wait.
Eventually we can incorporate ‘parking spots’ and have the horse WAIT while we stand in different positions around him. I am in my ‘no intent’ pose in a position where she can see me in her peripheral vision. It takes time to build up the duration. In each new spot start again with a few seconds and work forward from that.
Use a High Rate of Reinforcement
If the horse can stand still for 1 seconds, click&treat. Pay attention to your own body language. Start with whatever time the horse can offer, adding one second at a time before a prompt click&treat. Make sure the horse is not hungry and not needing to move to release pent-up energy.
Keep sessions short enough to maintain calm (you and the horse). Do some ‘pause and wait’ every time you are with the horse.
This video clip looks at using a mat to build duration. Number 9 in the Blog Contents List (link at the top of the page) has a number of detailed videos about using mats.
This video looks at staying parked while the handler moves further away.
In the photo above, we are working on building duration staying on the mat while I move around. Note her ear and eye on where I am and what I’m doing.
Creating resources to help people learn more about training horses is tricky for several reasons.
When we start out with horses we learn from the people nearest us. We tend to absorb their ideas and their way of doing things.
This morning my granddaughter, almost five, excitedly brought two library books about horses for us to read together.
They were about children learning to ride and going to shows, featuring standard British riding paraphernalia and methodology.
She has been riding Boots for over a year and shows great interest in how we clean her feet and she makes a good effort at brushing her.
It was an interesting challenge for me to explain that we don’t put things in Boots’ mouth (other than food). I explained that it is easy to teach a horse to change directions with a halter or bitless bridle using clicker training, body language and words.
She is familiar with clicker training because that is all she has seen. We play games where we pretend to be either the horse or the handler.
Her question, of course, was, “Why do these people do it this way?”
All I could say was, “This is the way they were shown how to do it, but there are other ways too.”
When it came to explaining the picture with the horse who had his mouth tied shut with a cross-over noseband, I found myself lost for words. Yet in the distant past I used one of these – what was my rationale at the time? To keep the bit in place?
Thankfully, the other book she brought outlined gymkhana games that I can adapt for her and her sister to play on their next visit.
For many horse owners, especially those involved in horse sports (sport for the rider) the concept of training with positive reinforcement is still something to be discovered.
It is common for people moving toward positive reinforcement at a traditional horse facility to be mocked, told off, ridiculed, and told not to spoil their horse.
My hope is that my work helps open the door to being with horses in a way that respects their intelligence and willingness to take part in the weird things that humans expect of them.
Writing a detailed plan and keeping track of where we are in the plan, tweaking the plan as we get feedback each session from the horse and ourself, is the way forward. Below is one way of keeping a record with a 5-point outline. It can be used with anything we want the horse to master.
At the end of this blog is a video clip on the importance of setting up the learning environment for the horse.
Spiral Learning with Linear Resources
Another difficulty with teaching and learning is that usually materials must be presented in a linear manner, such as in a book, video, or online course.
However, we don’t learn in a linear way. Learning is more a spiral process. We begin and get side-tracked. As we learn more about one aspect of training horses, other things suddenly begin to make sense.
We leave a difficult task or challenge and come back to it later. As we get better and better at reading our horse, what was once a mystery becomes obvious.
We become more aware of our body language and what it might be saying to the horse, so our signals become clearer.
Realization dawns that what we thought was a simple task for the horse actually has a whole series of mini-behaviors the horse must be comfortable with before he can confidently achieve the task we want.
We move forward with our training but learn to recognize when slowing down and consolidating are more important so we can maintain the horse’s confidence and interest.
A book forces the author to present ideas one after the other. But improving handler skills and good training come about by frequent returns to revise key concepts. We learn continuously as we gain feedback from the horse and our own actions.
Each training experience gives the text of a book, or the ideas in a video, enhanced flavor because we return with different insights.
Becoming adept with this new way of communicating is an exciting business, but it takes commitment to learning new information and letting go of information and habits that no longer fit with what we’re now striving to do. It can require a significant rearrangement of a person’s belief system.
Change is always a challenge. It is especially hard if we are trying to change against the stream of what the people around us do with their horses. It takes a fair amount of belief and stick-ability to persevere to the point of proficiency when we hear unpleasant comments from colleagues.
But we can also find kindred spirits. There are equine clicker training tribes on the Internet. Facebook groups allow us to share ideas and give support to people new to clicker training.
The science behind clicker training is straightforward. All people and other animals are motivated to do more of whatever makes them feel good or gains them a reward.
However, gaining skill with the mechanics of clicker training and understanding its layers of possibilities are not simple processes.
Once the handler is proficient and the horse is clicker-savvy*, we can use clicker training to build complex chains* of behavior*. Terms with asterisks (*) are explained in the glossary you can access at the top of this blog page.
When it is truly adopted, the click&treat dynamic infiltrates every corner of the relationship and becomes the backbone of the horse’s Individual Education Programs (IEPs)*.
In other words, clicker training becomes the mainstay of a holistic approach to educating a horse to live in captivity.
It’s tempting to think of horses as big, strong creatures – which they are. But in reality they are just giant squirrels, constantly on the lookout for danger and aware that flight is their best response to anything unusual. So building confidence with every new situation is everything.
Eternal vigilance is what keeps prey animals alive.
A Familiar Feed Dish
Using a familiar feed dish can help if we are working with a shy or timid horse, or one unused to humans. We can use free-shaping to capture the behavior of taking a treat from the feed bucket. If he is not yet interested in eating carrot or apple strips, use handfuls of soaked chaff or whatever bucket-food he is getting, or twists of good quality hay, or freshly plucked long-stemmed grass if you have access to this.
Here is the Thin-slicing for a Possible Training Plan.
Place the feed dish between you and the horse. The horse’s response will show you how close you can be without causing him to move further away.
While watching the horse, be careful not to stare directly at him, but to turn a bit sideways to him and observe him discretely with your peripheral vision.
Wait in a relaxed manner until the horse looks at the feed dish – click and quietly move to the feed dish and toss in a treat. Then immediately move twice as far away as your former position, giving the horse more than the personal bubble size he needs to feel safe enough to approach the feed dish. It’s good if the treat makes a sound when it hits the dish. If the wait time is quite long, take a chair. Sometimes a person sitting in a chair is less threatening than a standing person.
Wait for the horse to retrieve the treat. If he can’t do it yet, move further away or go do something else and come back later. He’ll usually check the dish while you are away.
Approach the feed dish until the horse moves away (if he hasn’t already). As soon as the horse stops moving away, stop as well and shift your body sideways so you are not directly facing him. Watch for him (without staring at him) to look at the feed dish – click as soon as he does and quietly move to the food dish and toss in a treat, then glide away again to a distance that respects the horse’s current personal bubble.
Repeat 10-20 times or as long as the horse shows interest. He will gradually begin to connect the click with the food treat about to be tossed into his dish.
Each horse is different. Some horses easily shrink the size of the space they need to feel safe and soon approach the dish readily. Others will find it harder to build confidence.
It’s possible to do this procedure on the other side of a fence from the horse. This is protected contact for us, but it can also make the horse feel safer from his point of view.
Gradually we can shift the ‘click point’ to wait for a step toward the food dish, then sniffing the food dish. At the same time, we may be able to gradually decrease the distance we have to move away before the horse will retrieve the treat.
Eventually we can sit in a chair with the bucket near us, then right beside us, then on our lap and the horse will come to retrieve his treat from the bucket.
From there, we can introduce our hand into the bucket and get him used to the idea that he can pick food off our hand.
Eventually we can dispense with the bucket.
It’s essential to work with each horse’s timeline, no matter how long it takes. Each horse is unique. If we give him the time it takes to make up his own mind that approaching the dish (and eventually us) results in good things, he will have a positive outlook to our presence.
The treat has been dropped into the green bowl and now the person will move away just a step or two because the horse is confident enough to come to the bucket as soon as he knows a treat has been put into it.
Unless you are using cloned pigeons or cloned rodents in controlled laboratory conditions, the study of animal behavior is an inexact science. Each animal we interact with is a unique entity derived from its genetic make-up and the environment’s effect on those genes since the meeting of the egg and sperm.
All living things are the result of constant interaction between genetic possibility and the ever-changing environment.
And of course, the nature of the egg and sperm depends on the past genetic and environmental influences on the parents, and so on – back in time.
Ongoing research shows that environment has more influence on genetic expression than previously recognized. When we are with our horse, we are part of his/her environment.
For a domestic horse, each person is a unique part of his environment.
What he eats, drinks, breathes, his access to movement and mental stimulation (or lack of same) all underpin the nature of the horse standing beside us. Does the horse live among a group of horses? Did he grow up in a mixed-age herd?
Is the horse getting enough sleep? Can he fully relax often enough? Can he freely choose a comfortable temperature – shade, sun, out of the wind, protection from strong rain or bitter cold?
Is the horse getting enough good quality sleep?
Does he have the space to move at any gait whenever he feels the need? Is he able to eat and rest in the natural horse rhythm? Horse don’t do ‘square meals’ and 8-9 hours of continuous sleep. They observe/eat/rest, observe/eat/rest in a continuous rhythm over 24 hours.
And of course, what he feels directly relates to his behavior of the moment. Alert or relaxed? Vigilant and fearful can lead to panic. Perceived threat is just as real as actual threat.
Does he feel hungry, thirsty, too hot, too cold, or need to urinate or defecate? Is he in physical pain? Is he feeling separation distress, social isolation, loneliness?
We must remain constantly aware of the horse’s bodily functions rather than treat him like a bicycle.
Is he feeling frustration at containment and restraint, which can turn into rage and desperate actions seeking escape, often leading to injury? Is maternal care thwarted due to early weaning? Is the mare in season and coping with mating urges? Is the stallion in proximity to mares in season?
Have we carefully, safely, taught all about tying up and other restraints such as staying in small spaces? Is there an outlet for the play drive?
When We Turn Up with Food Treats
The ‘environment’ is not only ‘out there’. We are part of the horse’s environment. Both the handler and the horse have an external environment and an internal environment. Horses can sense a handler’s confidence or fear, anxiety or calmness, in a nanosecond. Before we interact with our horse, we need to become aware of our emotional state. If we are not feeling calm and accepting of what the horse is able to offer us today, we are best to sit quietly and bring these up before we inflict ourselves on the horse.
Horses are innate experts at reading body language. That skill developed over the millennia as an adaptation for herd life. Group life means that all the group members need the same resources. During some seasons, scarcity leads to competition between group members.
Humans have the same awareness of the significance of body language once we put aside the ‘noise’ of our talking. We have ‘gut responses’ to people which are based on their body language and the aura which surrounds them.
Horses know the difference between assertion and aggression. They understand approach and retreat. They understand warnings and capitulation. If we have a horse, it becomes our job to learn the details of horse body language and the specific nuances of the body language of the horse(s) we handle.
Horse body language is extremely nuanced.
All living creatures tend to repeat whatever they find rewarding. The reward might be physical comfort, company or no company, a restful situation, drink, food. This is because a rewarding situation activates a fundamental ‘seeking circuit’ in the brain – the bit that works in the subconscious to keep us alive. But we the learn to consciously seek out that reward again.
Horses, being designed to eat steadily over 24 hours, find food highly rewarding unless something in the horse’s external or internal environment is critically out of balance.
We can use food rewards with a horse without a CLICK or MARKER sound of our choice, but the click marker signal is a safety feature for the handler. It also, later on, allows us to build chains of individual behaviors with a CLICK at the end of the chain. I’ll reflect a bit more on that in another blog.
Videos
The following two videos look at some basics to consider when we delve into equine clicker training.
Ideally, we consider the following points before we start.
We have thin-sliced the task into its smallest teachable parts and have an idea of where the early click points will be.
We have organized a training environment where the horse is able to relax. Ideally, he can see his herd mates, but they are not able to interfere.
We have thought about which part of the horse’s body we need to influence, and we’ve planned possible signal(s) to use (energy levels, body posture, body position, gesture, touch, words, strong intent). My book, Conversations with Horses, An In-Depth Look at Signs and Signals between Horses and their Handlers, looks at this topic in great detail.
The environment is set up to make it as easy as possible for the horse to understand what we want (use of a ‘lane’ or a corner; where we place the mat target or a nose target; use of barriers on the far side of the horse; where we position our body).
We want to make the desired behavior as east as possible for the horse to do. Setting up the training environment to achieve this means we are already halfway there.
For example, if water is challenging for the horse, we can start with walking through a box of rails on the ground, then put unusual surfaces down, like a tarp or these plastic bottles, before moving on to water.
If, instead, the horse learns evasive moves during our first fumbling with a new task, our education program has suddenly become more complex and longer. A bit of thoughtful planning can make things much easier for us and for the horse.
Ideally, we first try out our ideas with another person standing in as the horse. Or we can trial our process on a more experienced, forgiving horse. That allows us to eliminate some of the early trial and error in relation to our positioning and body language.
By practicing with a person standing in for the horse, our horse does not have to put up our first fumbling as we learn new motor skills.
It allows us to be clearer for the horse when we first introduce something new, rather than confuse him because we have not yet worked out a smooth way to proceed.
The first step is always to make sure the horse is relaxed and in a learning frame of mind. If something has brought up his adrenalin, we do calming procedures or something active until he’s used up the adrenalin and can return to relaxation. If he is uninterested, we need to make ourselves and our treats more interesting. Or stop and just hang out. Maybe the horse is tired due to the weather or other activities.
Or we wait to start the new thing in a later session. If the horse gets tense during a training session, we must first look closely at our own emotional state and the energy we are communicating to the horse, often unconsciously. Both handler and horse need to return to relaxation before continuing.
We start teaching each slice of the whole task with click points determined by what the horse is able to offer already. As both horse and handler get smooth with each tiny additional slice leading toward the whole task, we gradually chain the slices together and shift the click point until the whole task can be achieved with one click point at the end.
When we begin teaching something new, we start by finding a beginning click point. For some things, this may be a very rough approximation of the final goal behavior, e.g. just a tiny drop of the head when we begin to teach head lowering right to the ground.
This is illustrated in the first of two Head Lowering video clips in my Free-ShapingExamples playlist. Click here.
We gradually shift the click point toward closer and closer approximations of what we want until we achieve the goal behavior.
Good timing of the click allows the horse to become more and more accurate. Once the horse understands a task that we are free-shaping, like the head-lowering example, we add a signal (cue) so we can ask for the task and also put in ON CUE so that the horse learns that a click&treat will only follow if we have asked for the task to be done.
When teaching something new, the focus of click&treat is on the new learning, but we can still click&treat good execution of things the horse already knows.
Short clip about introducing water as an unusual surface.
Consolidation of New Learning & Developing Fluidity
The Consolidation Phase begins when the horse generally understands our intent, our signals and usually responds willingly with the move we want.
At this point, we can keep up interest and enthusiasm by providing an extra click&treat whenever any part of the task is done really well.
To put a new task into long-term memory (for horses and for people) it needs to be practiced at least 9 or 10 sessions in a row; ideally over 9 or 10 days in a row. Some tasks will take longer, depending on their complexity. If we can’t have a session every day, we need to accept that it will take longer to build a new behavior solidly. Keeping a written record becomes essential.
How many ‘repeats’ we should do during one session is hard to pin down because it depends so much on:
What we are teaching.
The character type, age and history of the horse.
The skill of the handler.
The nature of the handler-horse relationship.
For some tasks, a rule of thumb might be three practice repeats in a row, unless the first one is perfect and calls for a major celebration. Clicker-savvy horses are usually keen to work until you decide to stop, but even a keen horse can use a short break after 10 repeats of learning something new.
If the horse is in the initial learning stage, a tiny improvement over last time is a valid click point, followed by celebration and doing something relaxing. During the whole training session, we could return to the ‘new learning’ task three times, in-between doing other things.
Proprioception is the awareness of where our body parts are in space, what each is doing, and how much energy the movement is using.
Here is a definition from the Internet:
Proprioception enables us to judge limb movements and positions, force, heaviness, stiffness, and viscosity. It combines with other senses to locate external objects relative to the body and contributes to body image. Proprioception is closely tied to the control of movement.
I’ve collected together an assortment of video clips I’ve made over the years that include ideas we can use to encourage the horse to be aware of where his feet are and what they are doing.
Quite a few of the clips are part of a training series and I’ve chosen just one of the series to illustrate the overall task. By going to my YouTube channel – herthamuddyhorse – you can find my assortment of playlists containing series of numbered clips to show the thin-slicing I used to achieve the final task. Message me if you need help to find a particular series.
Good proprioception relates to all sorts of things, but mainly to overall balance and suppleness.
Horses that grow up in rough hill country develop good proprioception as a necessity for survival. Horses raised in confined areas without needing to move much to find enough food don’t have the opportunity to develop excellent proprioception.
In the same way, athletes become good at their sport by developing the aspects of proprioception that especially relate to that sport. If our lifestyle lacks regular movement, our body suffers the same way as that of a stabled horse.
This is an extract from my book, Conversations with Horses: an in-depth look at signals and cues between horses and their handlers. Please see the BOOKS tab above to easily preview any of my books.
Defining a Signal
In the horse world, there are several terms used for the signals we give horses. One is ‘aids’ which is commonly used when riding. The term ‘cue’ seems to have become popular with clicker trainers.
Much more about Clicker Training is available in my book, How to Begin Equine Clicker Training. The term ‘stimulus’ comes from animal behavior laboratories.
I prefer the term ‘signal’ because it suggests that a message is sent and the ‘correct’ or intended message is received by the other party.
If a Morse code sender carefully sends his message, but the person at the other end does not know Morse code well enough to decode the message accurately, then the signal has failed. The garbled message may well lead to troubled times.
In other words, if a signal does not relay the desired message, then whatever we have used as a signal is not acting as a signal. By definition, a signal must communicate the person’s message and be received as such by the other party, in this case, the horse.
If it is not working as intended, the signal needs to be adjusted or changed so the message sent equals the message received.
When we are with the horse, he is busy sending us signals about his emotional, mental and physical well-being. If we can’t pick up these signals accurately, then the horse becomes frustrated and misunderstood and often retreats from willing interaction by trying to leave or ‘shutting down’. He becomes reactive rather than responsive.
Cues and stimuli are constantly bombarding all of us. A signal is something we want to stand out from everything else the horse is noticing and everything else we are noticing. We want the horse to easily separate our signal from all the other many cues that are constantly flowing in.
At the same time as we are communicating our intent with our signals, the horse is trying hard to communicate his intent and his feelings with his body language. The more ‘in tune’ we can get with the signals our horse sends us, the better our two-way communication can become.
In this work, I will use the term ‘signal’ rather than ‘aid’, ‘cue’ or ‘stimulus’. I’ll also refer to all horses as ‘he’ for ease of reading, unless I’m talking about a specific mare or filly.
Like the rest of us, horses thrive on clarity and consistency of communication.
Building a relationship with a horse is like locating a set of keys to unlock a door so the horse’s true nature can come out.
The horse’s total well-being depends on how well we can help him adapt to the peculiar life a horse must live in a human-centered world.
While we are trying to get to know our horse better and understand his emotional, mental and physical boundaries, the horse is doing exactly the same with us.
He is trying to read our intentions so he can be ready to react or respond, according to his perceptions. The more we understand about the signals we are giving the horse, the more we can develop a mutual language.
Boots is reading my body language and gesture signals for stepping onto the balance beam.
The more we realize that much of what we are communicating to the horse is in our unconscious body language, the more we can ‘still’ our body between meaningful signals.
‘No Intent’ body language tell the horse that all we are doing is standing together quietly.
We would like the horse to respond confidently to our requests rather than become anxious, reactive and bracing against the pressure of our signals.
The horse would also prefer to respond rather than become anxious, adrenalized and feeling the need to react by trying to escape, push through pressure or mentally and physically ‘shut down’ – hiding inside himself.
A horse needs a sound foundation of knowledge to enable him to cope with the very strange things people expect of their captive horses.
To do this we need to:
Take the horse through a careful education program
Set up a teaching schedule suited to the individual horse’s background and ability and adapted continually to the feedback the horse gives us
Give him every opportunity to master each small step of a large task, before asking him to string all the parts of a big task together.
This cutting of a whole task into its smallest teachable parts can be referred to as ‘thin-slicing the task’.
My book, How to Create Good Horse Training Plans, looks in detail at thin-slicing and writing Individual Education Programs (IEPs).
For each step of the teaching process, we must make sure we are sending a clear message rather than a confusing mumble. Therefore, a key element for the success of any teaching and learning program is ensuring that our signals are consistent and clear.
Horses are so sensitive that if we alter a signal even a little bit, they often think it means something else. The more things we teach our horse, the more carefully we need to think about the signals we use.
We can give our horse the best deal by becoming more aware about:
The specific types of signals we can use
How we are orientating our body
How we can refine our signals as the horse becomes confident
How to use a ‘signal bundle’ or ‘multi-signal’
When we are ‘nagging’ rather than communicating.
As mentioned earlier, it is the most natural thing in the world to expect the horse to change so it does what we want. However, in reality, it is by changing what we do that yields the results we want.
There will be variations in horse behavior based on each horse’s innate character type, his personal history, his relationship with the handler and the situation of the moment.
Horses will always be horses and will respond in the way that horses respond. Being prey animals, their main concern is safety.
Before we can cause change in the horse, we must become hyper aware of what we are doing while the horse is watching.
Whenever we are in our horse’s view, he is picking up all sorts of signals from us – our posture, our energy level, our intent, what we usually do that time of day, any specific signal we may be giving and so on.
Once we learn to pay close attention to the horse’s body language, we get better at understanding the signals the horse is sending us.
A signal is a direct, purposeful communication between horse and handler. If we’ve carefully taught a signal for backing up, then the horse will back up when we give that signal.
Boots understand the ‘raised fingers’ signal to mean ‘please back up’. I may be using a “Back” voice signal at the same time, which means I’m using a multi-signal to be especially clear.
If the horse raises his head and points his ears with strong concentration, we pick up his signal that something in the environment has his full attention.
The horse’s body language of raised head and ears focused strongly forward tells us that some cue or stimulus in the distance has captured his whole attention.
First, we learn the horse’s language – his signals. Then it is up to us to teach the horse the language he needs to remain safe and comfortable in the human world – our signals.
Since we have taken the horse away from his natural lifestyle and made him our captive, it is up to us to become fluent in Universal Horse Language and learn to use it effectively. To be effective we need:
An understanding of different horse character types.
An understanding of our particular horse’s character type.
Awareness of our body language and the different ways we use signals.
Knowledge about horse senses and sensitivity.
As much knowledge as possible about a particular horse’s background experiences.
To write good training plans which can be turned into individual education programs (IEPS) designed for a specific horse.
Adept use of body language, body extensions, ropes, reins.
Timely application of release reinforcement.
Adept use of reward reinforcement along with release reinforcement.
There is detailed information about using reward reinforce-ment in my book, How to Begin Equine Clicker Training.
The more fluent we are about understanding horse body language and the mechanics of both release (negative) and reward (positive) reinforcement, the better a teacher we can be for our horse.
It is hard for the horse to learn from someone who doesn’t have a good understanding of who and what they are teaching.
Before we head into an overview of the signals we use with horses, followed by a detailed look at each signal type, we need to look in detail at how horses sense and perceive their environment. (The next part of the book delves into this.)
Once we are conscious of the biological differences between horse and human perception, it is easier to allow horses the leeway they need to feel safer in our company.
People are often confused with the scientific/mathematical terms: Positive Reinforcement and Negative Reinforcement used in the study of behavior.
‘Negative’ means ‘bad’ in much of everyday language, but used in the mathematical sense, as it is here, it simply means removing (subtracting) something from a situation.
We touch the horse’s chest to ask him to step back and when he does, we remove our hand from his chest and drop our energy (-R).
‘Positive’ in everyday language means something ‘good’. But used in the mathematical sense, as it is here, it simply means adding something to a situation.
The horse comes to us and we give him a strip of carrot. We have added the carrot to the situation (+R).
Horses (as do we) behave in ways that stop/lessen the pressure of directional touch, gesture, voice, or energy sent toward them. This is negative reinforcement (-R): we remove the pressure of the signal when the horse complies.
Of course, horses may also seek touch if they love to be groomed, scratched or massaged, so some forms of touch may be positive reinforcement (+R). Young foals often find scratching very reinforcing. They quickly learn to repeat behaviors that result in a good scratch.
Horses (as do we) behave in ways that ensure they get more of something they like. When we train horses, we usually use a small food treat to reward a behavior that we want. This is positive reinforcement (+R): i.e., we add the treat to the situation.
We build up complex behaviors by marking each tiny step of the learning process with the marker sound we’ve chosen (click or word) and delivering a treat. Eventually the horse will be able do the whole task smoothly with one click&treat at the end.
How often we click&treat (rate of reinforcement) depends on the complexity of the behavior we are working with. We have to click&treat often enough to keep the horse being continually successful with working out what will earn his next click&treat.
Combined Reinforcement
We can use a touch on the chest, remove our touch as the horse steps back (-R), plus mark the stepping back behavior with our special sound, then deliver a treat (+R). This is ‘combined reinforcement’ because we have used -R and +R together to help the horse understand just what he needs to do to earn another click&treat.
It could be that if -R is reinforcing and +R is reinforcing, using both together in the name of clarity is more than twice as reinforcing for the horse.
Because we are essentially asking the horse to learn a foreign language, striving for clarity is essential. If a horse can only perceive a vague mumble, he will be inclined to zone out, either with his feet, or mentally if he is held by ropes or fences.
When we are riding, we use the energy and inclination of our body as signals for the horse. We use reins or a neck rope to give touch signals. When we train with touch, gesture, voice, body language and our body’s energy, we are using negative reinforcement. When the horse responds, we remove the signal. If we add click&treat to develop the response we want, we are using combined reinforcement.
Combined Reinforcement: Boots learned to ‘smile’ when she reached up to my hand held aloft and I tickled her Upper lip. When she moved her lips, I clicked and gave her a treat. Soon she was offering the smile, and now uses it as one of her ‘consent signals’*
Video Clip: Target & Tickle
Capturing
Some equine clicker trainers try hard to teach everything using only what they see as being +R (positive reinforcement). This has led to a burst of creativity to work out how we can teach horses by giving them a choice about taking part in what we want to do.
Capturing a complete behavior with a click&treat is possible for some behaviors. Things that horses do naturally can be captured. For example:
Touching the nose to a target.
Downward dog stretching.
Lying down.
Staying in the ‘sit’ position which is part of a horse getting up from lying down.
Backing up – if we are patient enough to wait until it happens naturally.
There are probably others, but for more most things we want to teach we use free-shaping* and guided shaping*. Items with an asterisk (*) are defined in the Glossary section.
Capturing a behavior: A horse’s natural curiosity will cause him to investigate something new with his nose. We can capture this moment with a click&treat. Once targeting is established with a strong history of positive reinforcement, we can use the willingness to touch or follow a target to train a variety of more complex behaviors. In other words, we can use the target for ‘guided shaping’*.
Capturing a behavior: Boots has learned that this stretch always earns a click&treat. I noticed she usually stretched like this after a nap and managed to ‘capture’ it three days in a row with click&treat. Then she began offering it often.
Capturing a behavior: If the horse will walk one step beside us, we click&treat after one step. Gradually we build up the ‘walking together’ by click&treat for two steps, then three steps, and so on, staying within the horse’s comfort zone and understanding. If we lose the behavior, we’ve gone too fast.
Free-Shaping
For free-shaping we click successive approximations of what we eventually want. For example: look at tarp, walk toward tarp, sniff tarp, put one foot on tarp, walk onto tarp, trot across tarp. We stay with each approximation until the horse is ho-hum with it, then move our click point along the continuum.
Free-shaping allows us more of an agenda than capturing a finished behavior.
Here are a few examples of free-shaping:
Approaching a mat or a tarp. We click&treat each tiny step toward the horse confidently standing on these. Click here.
Putting on a halter. We start with a horse willingly targeting a halter, then proceed from there. Click here.
Picking something up. Ideally we don’t want the horse tied up as in this clip, but in some situations we don’t have a choice. Click here.
Free-shaping: We are playing with picking up a cone and bringing it to me.
Luring
Luring can be useful in some situations. If the horse is anxious about approaching a tarp, we can put a treat near the tarp and eventually on the tarp, then let the horse make up his mind about stepping on the tarp in his own time.
We can teach a horse to self-load into a trailer using luring by feeding first near the trailer, then on the ramp, then progressively more in the trailer until the horse is right in and the bucket of feed and hay are at the front of the trailer.
Using this system means the horse has time to overcome his anxiety about entering and exiting a small space. It takes careful planning, but the result can be a horse totally calm about entering and backing out of a trailer.
When I used this method, the horses managed their daily trailer loading sessions independently while I did the chores. By allowing horses the time to make up their own minds about a situation, we give them back some of the control we take from them by having them in captivity.
Luring: We can add a treat to a new situation and let the horse build his confidence in his own time.
Modelling
Horses are experts at reading the body language of their herd members. After all, a foal raised with his mother and other herd members learns what to do and what not to do by observation and modelling their behaviors.
A handler that the horse knows and trusts can tap into this by modelling the behavior she’d like the horse to copy. When a click&treat follows the horse’s first attempt to model a behavior, he often picks up the new move with enthusiasm.
Examples include:
Putting the feet on an obstacle.
Standing quietly with no intent.
Walk/jog when we walk/jog.
Halt when we halt.
Turn when we turn.
Beginnings of jambette.
Modelling: Boots was keen to follow my suggestion when I put my foot up on the object.
Modelling: If we click&treat the first effort at matching leg-lifts, the horse often becomes keen to do it again to earn another click&treat.
Guided Shaping
For guided shaping, we use a target, gesture, hand touch, touch on a halter via a lead rope, and energy changes in our body to give the horse information about what will earn him his next click&treat.
We click&treat each small step toward the finished behavior. Then we gradually link the small steps together until the horse can carry out the whole behavior with one click&treat at the end.
These cues we start with, once refined and once the horse understands and accepts them, become signals for requesting the specific behavior. We must be careful to put each behavior ‘on cue’ so the horse understands that a click&treat only happen if the task has been requested.
Guided Shaping with Targets
Using targets is a great way to motivate horses. This is +R where we add two things. The target to gain the horse’s interest, then the click&treat when the horse meets our objective. In a way, using targets is a specific type of luring.
We can use hand-held targets, stationary targets set at nose height, and foot targets.
Here are some examples:
Follow a hand-held target.
Walk/trot between stationary targets.
Follow target onto a trailer, wash-bay or stall.
Introduce movement around a reverse pen. Click here.
Voluntary stretches to reach a target. Click here.
We ask the horse to target gear we want to use before we use it, e.g., halters, ropes, covers, saddle blankets, saddles, harness parts, balls, wheelbarrows, vets, worming syringes. When I put gear on my horse, I always ask her to target each piece of it (click&treat) before we use it.
Come to a mounting block.
Once the horse has a strong history of positive reinforcement for touching his nose to a target, we can use it to encourage him to explore new situations.
Using a target for stationary flexion of parts of the body. Note that we are using a mat target to build the idea of keeping the feet still to do the stretching.
Our Hand as a Target
Although targets are super useful to teach the horse a variety of movements, they are an intermediate stage of training. We don’t want to have to carry a target with us forever.
We can begin to teach the horse to walk with us by presenting a target, click after a pre-decided number of steps, remove the target out of play behind us and deliver a treat.
As we present the target, we also use body language, breathing, voice, energy level changes. Once these are well established using the target, the target is easily replaced by an arm gesture to accompany the body language, breathing and energy change (energy up for ‘walk on’ and energy down for ‘halt’).
We can use our extended hand as a recall target. And we can use our hand to teach the horse to target various of his body parts to our hand. These include chin to hand, ear to hand, cheek to hand, knee to hand, shoulder to hand, hip to hand. Click here.
Hand as Target: Boots has moved her head to target her ear to my hand. I click, then feed the treat in a position that has her straighten her head again.
Guided Shaping with Touch and Gesture
When we use touch and gesture to explain to the horse what will result in a click&treat, we use ‘combined reinforcement’. We add the touch or gesture energy, remove it as the horse complies and simultaneously click&treat.
At first the horse often gives us just an approximation of what we want as the finished behavior. We click&treat all of these approximations. This is often called ‘rewarding the smallest try’. The horse is then usually keen to repeat the behavior and over time the click&treat point moves closer and closer to the ‘finished’ behavior.
When the touch and/or gesture signals (-R) are intricately linked with marking & rewarding (+R), the touch and gesture are information for the horse about how to earn his next click&treat.
Used thoughtfully in this way, negative reinforcement gives clarity to our teaching. The energy of our touch/gesture signals is minimal.
We can often teach a task or behavior using Capturing, Free-Shaping, Luring, Modelling, and Shaping with a Target. Once the horse understands the task, we add distinct, consistent voice, touch, and gesture signals.
Gesture Signal: I’m using my focus, arm gesture and energy to ask Boots to move her hind end across. This was one of the steps in the process of teaching her to sidestep along a rail.
Touch signal: Asking the horse to back up using touch on the halter via a lead rope. She is about to step back with her left front and right hind legs. We should teach our horse a variety of signals for backing up, both at liberty and with rope or reins.
Summary
It is an interesting learning experience to work out how we can use just positive reinforcement (+R) to teach our horse many of the things he needs to know. Once he understands the task, we add consistent voice, touch, gesture, breathing, body language signals so that we can put the task ‘on cue’ or ‘on signal only’ or under ‘stimulus control’.
When we begin using positive reinforcement, many horses become very keen and begin to throw behaviors at their handler in the hope of scoring a click&treat. This has to be handled carefully by only clicking&treating when an action has been requested. If we randomly hand feed at other times, the horse will of course be confused.
Some horses find this process of ‘putting a task on cue’ very frustrating so we have to plan our training carefully. We need to work in small bursts, develop ‘end of this session’ signals and ensure that the horse is never hungry before we begin a clicker training session. Click here.
Once the horse knows several tasks, we can switch between tasks to avoid this sort of frustration.
Equine clicker training is fun and built on a simple scientific principle, but it is never easy. Horses are complex beings and each horse brings his own twist to the table, as does each handler.
On top of all this, we have to be realistic about the situations most horses face sooner or later. We have to carefully prepare them to understand how to respond to various forms of negative reinforcement. We need to do this at home so when a tricky situation arises away from home, we have a full toolbox to deal with it.
The concept of giving our horse a choice about whether or not he wants to do things with us is a novel idea at first. Until we delve into training with positive reinforcement, it is the norm to expect the horse to put up and shut up when we want to ride him or do anything else with him.
Horses are recreation or sport for us, but often we are not recreation or enrichment in their lives. In many situations, horses generally either learn to put up with human demands, no matter how painful or stressful for them, or they are passed over for a more ‘willing’ horse.
By learning about ‘consent signals’ and learning to wait for them, we can enhance a horse’s well-being by giving him back a little bit of the choice we remove from him when we keep him captive, away from the natural dynamics of life in the wild.
Aims
To develop the handler’s ability to switch into neutral (to show the horse zero intent) by taking up a distinct body position, removing attention from the horse and draining energy out of the body.
Improving how well we tune in to a horse’s consent signals and noticing more quickly when he shows us that he is not ready or able to proceed.
Prerequisites
Horse and handler are clicker savvy.
Horse has learned to ‘wait’ until handler gives a new signal or clicks&treats. Number 9 in my Blog Contents List: Mats: Parking or Stationing and Much More. Mainly this clip: #8 HorseGym with Boots: Duration on the Mat. Click here.
Handler has developed a clear ‘Zero Intent’ signal so the horse knows when standing quietly is what is wanted. Number 10 in my Blog Contents List: ‘Zero Intent’ and ‘Intent’. Click here. This clip is also the second clip below.
Horse and handler agree on signals the horse gives when he is ready to do something again. Number 11 in my Blog Contents List: Seeking the Horse’s Consent Signals. Click here.
Handler understands ‘Trigger Stacking’: This is a situation faced by people and horses. If we are in a calm mood, we usually handle a first stress event easily. If soon after, a second stress happens, then maybe a third and fourth (as easily can happen with horses in captivity), the limit of stress tolerance for that individual is eventually reached and the person or animal reacts. The reaction can be violent outward expression of anger and frustration (tantrum). The reaction can also be retreat from interaction with the external world, as seen in horses who have ‘shut down’. Each of the stress-causing events or items is called a ‘trigger’, hence the term, ‘trigger-stacking’.
Walking shoulder-to-shoulder. Number 16 in my Blog Contents List: Smooth ‘walk on’ and ‘halt’ transitions.Click here.
Triple Treat to celebrate a good effort: #16 HorseGym with Boots: Triple Treat. Click here.
Number 46 in my Blog Contents List: Rule of Three. Click here.
Videos
#243 HorseGym with Boots: Zero Intent in Action
#153 HorseGym with Boots: “Zero Intent” and “Intent”
Materials and Environment
A venue where the horse is able to relax. Ideally he can see his buddies but they can’t interfere.
Horse is not hungry.
Hand-held target to start with.
Barrier between person and horse to start with.
Once mastered, we can apply these skills to any activity.
Notes
The horse may communicate with more than one consent signal. The nature of the consent signal might depend on the nature of the activity you are doing.
The two AIMS above work together. Once the horse understands that you will wait until he is ready, he will become more and more adept at using his ‘Green Light’ go-ahead signal or telling you that he is not ready to proceed. You may pick up his earlier signals that he prefers to exit the activity (either mentally or physically).
If the horse feels he gains something from an interaction, he will tend to want to stay and play. At first we use rewards (usually treats) that he finds reinforcing. Once a horse learns a few tasks and routines, doing them also has a reinforcing effect, but we have to keep using the primary reinforcer (usually food) judiciously. This means that we have to click&treat often enough to keep the horse successfully doing what we are asking.
Video clip #243 uses an extremely specific behavior as an example. But we can develop and recognize a variety of consent signals.
Consent might be turning the nose toward the handler to indicate that chewing is finished and the horse is ready to repeat whatever we are doing. Boots demonstrates this on the video clip. Important not to confuse this with the horse mugging for treats. You’ll notice that after turning to me she turns her head away again.
Consent might be willingly staying ‘parked’ in a relaxed manner while we groom, tend feet, gear on and off, mount and dismount, ask for a ‘wait’, ground tie, stand tied up, travel or do a parked mobility task like ‘counting’ as in my clip.
Consent might be willingly walking or trotting with us on the ground, with or without halter and lead.
Consent might be willingly coming to a mounting block, lining up and standing so the handler can mount.
Consent might be putting the head down so that we can rub inside the ear or put head gear on more easily.
Consent might be dropping the nose into a halter.
Consent might be a quirky behavior like a smile or lowering the head.
Slices Part A: The Handler’s Red Light and Green Light
1. When we begin clicker training, our first task is to establish politeness about receiving treats. Even when clicker training is well established, it is useful to review this exercise regularly.
Standing on the other side of a safe barrier, we ask the horse to do something simple he does naturally, like touch his nose to a target. We click for the action and remove the target out of play (out of sight behind us) as we deliver the treat with a firm, flat outstretched hand that causes the horse to keep his head straight and away from us. Repeat over many short sessions (about 10 treats-worth).If the horse is first learning this, we promptly present the target again, until the horse clearly understands that when he touches the target and keeps his head facing forward, he will hear our marker sound and we will deliver the treat to him – i.e. he doesn’t reach toward us searching for the treat.
2. When 2 is smooth, we begin to take up a ‘zero intent’ body position for a second or two after we’ve delivered the treat and before we present the target again.
3. ‘Zero intent’ is the handler’s Red Light (relax). It means that what we want is to stand quietly together. When the horse remains standing with his head straight we present the target again as our Green Light (action) that lets the horse know we are asking him to repeat touching the target to earn another click&treat. Gradually, one second at a time, lengthen the time you stay at ‘zero intent’ (Red Light) until 5 seconds is easy.
4. We do a little bit of ‘stand together with click&treat for keeping your head straight‘ every time we are with the horse.
5. When the slices above are smooth, we can apply ‘zero intent’ to walking along together (Prerequisite 4). Walk on, halt, click&treat for the halt, take up ‘zero intent’ posture for X number of seconds. Start with one second again and lengthen time gradually. Then walk on to another pre-set destination.
6. Walking between mats is a good way to start this exercise, but soon your voice and body language will be enough, as long as you are consistent. See Number 68 in my Blog Contents List: 20 Steps Exercise. Click here.If you are not consistent with your voice, gesture, breathing and body language signals, the horse will hear you like a ‘mumble’. And we know how frustrating it is to listen to someone who is mumbling so we can’t make out the message.
7. As you get adept with dropping into ‘zero intent’ body language, you will notice more and more places you can apply it.
8. In summary, standing or walking with zero intent is our Red Light (relax). The horse knows he is not being asked to do anything except stand or walk quietly beside us. We change to Green Light (action) whenever we signal the horse to do a specific behavior or chain of behaviors that will result in a click&treat.
Slices Part B: The Horse’s Red Light and Green Light
The horse’s Red Light is different from the handler ‘zero intent’ Red Light. The horse’s Red Light is either inactivity or excessive activity due to distraction, changes, hunger, confusion, pain, boredom, exhaustion, trigger stacking. It is a caution/stop signal from the horse to us.
In the video clip, Boots’ Red Light was the distraction caused by interesting activity on the road while she was safely at home. It caused her full attention to drift to the road activity.
2. Out in other environments, a horse’s Red Light could be stopping for observation, or running the Red Light if the situation causes him to move suddenly.
3. The horse’s Red Light tells us that he is either momentarily distracted or he is out of his comfort zone. We can either wait out the distraction, as I do on video clip #243, or we can change what we are doing until the horse can return to his comfort zone.
A distracted horse is not in learning mode (responsive). He is concerned for his safety (reactive). We must organize things so he can change from reactive to responsive as best as we can in any given situation.
4. The horse’s Green Light is when he can bring his attention back to the handler and can respond to handler signals, rather than react to other things in the environment.
5. If we want to get along with our horse by listening to him, we acknowledge what is causing his distraction with our attention and body language. Then we wait (wait = our Red Light), taking up as close to zero intent body language as we can in the situation.
6. As we wait, we watch for the horse’s Green Light to tell us that he is ready to carry on with what we were doing. At that point, we can activate our Green Light – our signal to the horse for whatever activity or task we are doing which will yield a click&treat.
7. We can sometimes help the horse switch from his Red-Light alert to Green- Light readiness if we click&treat the moment his attention comes back to us. I didn’t do it in the video clip, but I often do this when we are out on the road.
SUMMARY
Handler
Red Light = standing or walking together quietly, relaxation – nothing else required.
Green Light = signal/cue asking the horse to do something else.
Horse
Red Light = I’m distracted, unable, anxious, fearful – please give me time. It might also be a question: we don’t usually do this, do we? We always stop here, don’t we?
Green Light = I’m ready to listen and respond to your signals.
Orange/amber light = first signs of the horse’s unease.
Illustrations
‘No Intent’ body posture: hands quiet on belly, attention off horse, cocked knee, energy drained from body, looking nowhere.Intent: very beginning of asking her to move her shoulder away – hands moving in a gesture signal, body upright, focus on horse’s neck, breathing in.Zero intent sitting down while teaching lip-lifting to check teeth. Note her ‘lip wiggle’ consent signal telling me she is ready to repeat.We gradually moved from touching her muzzle, putting both hands around her muzzle, momentarily lifting a lip, to holding her lips apart for longer and longer, adding one second at a time.Staying parked on a mat despite distractions can be a consent signal.This is a Red Light moment with Boots. Jogging along calmly with the bike changed into excessive energy.When I got off the bike and walked, she was able to relax and give me her ‘smile’ consent signal – her Green Light to carry on. This earned a click&treat.We were then able to finish the session with her walking calmly alongside the bike.Practice at home allowed us to eventually bike safely on the road.
Generalizations
As mentioned already, the more you practice your ‘no intent’ body language, the clarity of your signals, and the more accurate you get listening to the horse’s body language. You will notice the horse’s Orange/Amber light before it turns into Red Light. It becomes easier to apply the Red Light/Green Light concept to any activity.
The format below has the benefit of being quick to fill in. Most of us have busy lives into which we must fit our horse time. Once our mind switches over to other parts of our life, it is easy to forget the detail of what we specifically did with our horse and how the session felt. The horse and the handler each get a ‘score’ which is just a shorthand way of recording a ‘session assessment’.
We can use symbols or emoticons to indicate how we felt, how we thought the horse felt and weather details (make sure you create a key for your symbols). Hot, cold, wind, wet all affect how a session goes. If we train in various places, we can have a symbol for each place. If there is a time-break in our training due to life and/or weather interfering, we can note this as well.
The sort of detail mentioned above is priceless when we look back on it. We can see how many sessions we did to get from introduction of a new task to having it fluent and generalized to different situations.
If we keep charts like this in our tack room or car there is an increased chance that we will fill it in right away while the session is still fresh in our mind.
The second chart below is an outline showing one possible way to score each session’s progress. Some people may prefer a ten-point scale so more nuances can be recorded.
It probably works best for each person to make up a scoring details page that best suits their environment and their horse and how they like to record things.
Note that the ‘score’ is just a quick way to define our assessment of a session. It helps indicate where we are while working through a process.
We first played with this task at liberty andBoots scared herself when her leg touched the pipe on her left as she backed into the space.She jumped forward.She jumped forward a step or two and then stopped. I was standing well back (you can just see the toe of my shoe) in case this happened.We quietly reset the task with the help of halter and lead, with click&treat for each step back and she quickly regained her confidence. I’m standing to the side in case she feels the need to suddenly come forward.
The task above is a good one to prepare a horse for being restricted behind, as in a horse trailer. It is also a task for preparing a horse to back between cart shafts.
Rather than correct something that did not go well, we learn to reset* a task without placing a negative value judgement on what the horse just did. This makes a huge difference to how horses perceive their training.
Clicker-savvy* horses often don’t want their sessions to end. The positive vibrations that go with good clicker training make it fun rather than a chore.
Clicker training gives us a way to let the horse know instantly, by the sound of the marker signal* (click), when he is right. It takes away much of the guessing horses must do as they strive to read our intent* (which is often fuzzy to them).
A horse’s perceptions and world view are quite different from human perception and world view. While we are with our horse, the more closely we can align our world view with that of the horse, the easier it is for him to understand us and comply with our requests.
There is much more about this in my book: Conversations with Horses: An In-depth look at the Signals & Cues between Horses and their Handlers available as an e-book or a paperback.
Clicker training is not a quick fix for problems. It is a carefully crafted language between horse and handler used during every interaction. People often have to let go of what they have always done in order to make room for a new way of interacting with their horse(s).
If frustration becomes part of the equation, for the horse or the handler or both, it is usually a sign of going too fast and expecting too much too soon.
The solution is usually to slow down, think things through, decide on the exact behavior required and write a careful shaping plan to achieve that behavior.
Keeping emotions (horse and person) on the calm/relaxed/joyful side of the emotional continuum is a major part of effective clicker training.
Many people know the structure of the horse’s skull, but some people don’t. It’s possible to unknowingly inflict discomfort and pain, sometimes causing severe physical trauma to the soft tissues and nerves that lasts the horse’s lifetime.
We can see that the solid bone on the front of the horse’s nose does not go all the way down. The bone down from where the molars start is thin and precarious. It is surrounded by cartilage carrying the many nerves from the horse’s lips and whiskers.
These nerves of touch, smell and taste enable the horse to graze safely – both the horse’s physical safety in terms of touch and relaying information about smell and taste.
Even if we prefer to play with our horse(s) at liberty, it is essential for their life in captivity that we take the time and make the effort to ensure that they are comfortable having head gear put on and taken off. And be confident with ropes and leading.
It is traumatic to see a young horse who was haltered and the halter left on until it deformed the growing skull. The pain involved is unthinkable.
There are numerous risks involved with leaving halters on. Breakaway attachments can be an option if leaving a halter on can’t be totally avoided.
The following video takes a quick look at making sure that our head gear fits well with minimum discomfort.
It is hard to overstate the sensitivity of the horse’s mouth and muzzle area. While bits cause mouth trauma (physical, mental and emotional), headgear like knotted rope halters, cross-over nosebands or regular nosebands fitted too low also cause discomfort and pain.
It pays to remember that a horse with his mouth tied shut can’t ‘blow out’ freely, or cough to clear his trachea. Rope halters with knots need to be treated with gentle hands. Side-pull halters or bridles pull the inside of the cheek against the horse’s teeth, so must also be used with gentle hands. We all know what an ulcer inside our mouth feels like.
It is the nature of horses to suffer silently. Perhaps if they squealed like pigs it would be easier for us to refine our way of being with horses.
Photo above. Boots in a moment of worry when her hind end touched the pipe. We were practicing backing into a dead-end space.
A momentary disconnect as Boots checks out the lovely smell of chaff in the barrel.
Horse-Human disfunction
Most horse-human dysfunction is due to lack of clarity from the human side of the relationship due to one or more of the following reasons.
Our behavior around the horse is inconsistent.
We are not able to read the horse’s body language well enough to understand what he is communicating to us about his physical, emotional and mental state.
We have not set up the environment to make it easy for the horse to understand what we want him to do.
Our signals to ask the horse to do something are inconsistent, poorly thought out or poorly taught.
The task is not thin-sliced enough.
Prerequisites are missing.
We expect too much too soon.
Human emotions get in the way.
Most horses are happy to comply with our requests if:
We teach what we want thoughtfully and carefully in a way that the horse can understand.
We ensure our signals are clear and consistent.
We have well-timed release of signal pressure/click followed by the treat.
We teach at a pace that the horse can absorb; not too fast.
We teach at a pace that maintains the horse’s interest; not too slowly.
As the handler gets better and better at thin-slicing* a large task into its smallest teachable parts, it becomes easier and easier for the horse to learn by being continually successful. It’s this aspect of learning that makes a horse look forward to his sessions.
Timing of the click and smooth, prompt treat delivery are harder than it looks at first glance.
Practice with a Person
It’s ideal (perhaps even essential) to learn the process of when/how to click and how to deliver the treat with a person standing in for the horse. The more adept we are with the mechanics of treat delivery before heading out to the horse, the more our horse will buy into our confidence that we know what we are doing.
We want to practice with another person until we have the mechanics of click timing and treat delivery in our muscle memory. Then, when we start with the horse, we can focus more clearly on the horse and the consistency of our actions.
Simulation with a Person
The first step to becoming a clicker trainer with good timing skills is to get our head around how to carry out the click&treat routine smoothly.
We need to practice enough to put the sequence of events into our muscle memory. If we are familiar and confident with what we are doing, the horse will buy into our confidence.
Neither person is allowed to speak.
You can put the clicker on a string around your neck or on a string around your wrist so you can let go of it to use your hand. However it takes lots of practice to smoothly slip the clicker back into position so that ‘letting go’ doesn’t interfere with good timing* of your next click.
Slices:
Have your hand ready on the clicker (if using a clicker).
Present the target a little bit away from the person, so he or she must reach toward it slightly, to touch it.
Wait for the person to touch the target with their hand (be patient).
The instant they touch it, click or say your chosen word or sound.
Lower the target down and behind your body to take it out of play.
Reach into your pocket/pouch for the treat (maybe use coins or bits of cardboard or mini chocolates).
Extend your arm fully to deliver the treat.
Stretch your treat hand out flat so it is like a dinner plate with the treat on it.
Keep your arm and flat hand firm, so your pretend horse can’t push it down as he takes the treat.
When your pretend horse has taken the treat, relax and pause briefly, then begin again with slices one and two (hand on clicker, present target).
Ignore any unwanted behavior as much as possible.
Turn a shoulder or move your body/pouch out of reach if the person pretending to be your horse tries to mug you for a treat (in case you are using chocolate). Your pretend horse must learn that he or she earns the click&treat only by touching the target. If your ‘pretend horse’ is strongly invasive, put a barrier between you.
Multiple short sessions (up to three minutes long) at different times during the day allow your brain and your muscle memory to absorb the technique, especially the finer points of timing.
If your helper is willing, let him/her be the teacher and you take a turn being the horse. Playing with ‘being the horse’ is often a huge eye-opener. The ‘horse’ is not allowed to ask questions or make comments but he can use body language to express his opinions.
Playing with different people will be as different as playing with different horses.