Thin-slicing is a shorthand way of saying: Split the overall task we want the horse to learn into its smallest teachable parts and teach each part in a way that makes it as easy as possible for the horse to understand.
As each tiny part of the task becomes ‘ho-hum’ for the horse, move on to the next part. Gradually all of the parts will come together so the overall task is seamlessly carried out with confidence and willingness.
It means starting with the most fundamental lessons and gradually adding complexity, one click&treat at a time, until we have shaped the whole behavior we want.
As each small part, called a ‘slice’, is mastered, we begin to teach the next slice, either separately or as a continuation of the first slice. If taught separately, once the second slice is learned, we link it to the first one.
Proceeding like this, we gradually chain all the slices together until the horse can do the whole task as a continuous movement with one click&treat at the end.
Some tasks, of course, like haltering, saddling or harnessing, mounting up, worming, vet inspection, grooming and foot care, require the horse to stand still.
When we teach these ‘standing still’ procedures, we begin with a release (click&treat) for relaxation during each tiny slice of the overall process. Gradually, as the horse can relax more, we do a bit more before each release (click&treat).
It’s crucial to remember that ‘standing still’ during an unusual situation is not something a horse in the wild would ever do.
Asking a horse to ‘stand still’ while we do all sorts of things to him, is a big ask.
To teach a flight animal to ‘stand still’ on request means we have to actively teach the horse to be inactive.
In other words, the horse learns to be actively inactive. His instinct will be to move his feet if he feels uncomfortable. Good training will give him the trust and confidence to keep his feet still when we ask.
This concept is explored in teaching the art of standing still, or ‘Parking’. It’s important to promptly move to the front of the horse to deliver treat so he doesn’t form the habit of turning toward you. Perhaps start by standing in front of him rather than to the side as in the video clip.
Example 1: Park & Wait
The key to good training of any kind is to keep the horse being continuously successful in his responses to our requests. If the horse understands our request and is comfortable with it, the chances are good that he will respond willingly.
Example 2: Free-shaping standing on a mat.
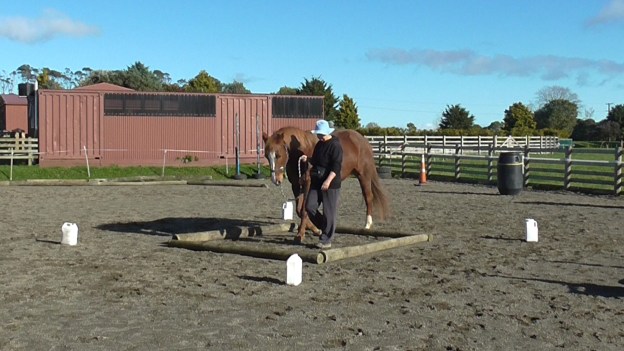
Example 3: to teach my horse to walk through a square of ground rails filled with squashed plastic bottles (a Horse Agility obstacle that shows up occasionally), I split the overall task into a series of tiny slices. It’s a great exercise to allow the horse to become more confident with putting his feet onto unusual surfaces like tarps, ramps, trailers, bridges, water, balance beams or mattresses.
Example 4: This clip looks at thin-slicing walking through a water obstacle. We start with things the horse is already familiar with. If walking across rails and tarps are new for your horse, that is where you would start and work with until they are ho-hum.
Example 5: This clip looks at free-shaping ringing a bell.
Thin-slicing and consistency are the holy grails of horse training. By using the mark and reward (click&treat) dynamic, we let the horse know what will earn the treat and therefore increase to probability that he will happily do that action (or inaction) again.
