INTRODUCTION:
A horse training area without obstacles is like a playroom without toys. When we have a collection of obstacles, each one allows us to have a conversation with our horse.
It’s much easier if our horse lives with us and we can set up and change obstacles as convenient, as opposed to having to book time to use a training area.
However, we can amass a collection that is relatively easy to set out, pick up, transport and store. Rags make excellent markers and can be set out to weave or act as a rail or delineate a lane. Smaller cones are easy to set out, collect and store.
Tarps can be folded to different sizes or rolled up to stand in for a rail. If you have use of an indoor arena or it is not a windy day, a collection of cardboard boxes that can be nested for easy storage are useful to act as destinations, create novel gaps, outline lanes or act as rails.
Ropes can take the place of rails to create lanes. Hoops are light and easy to move and store. I prefer hoops made of hose and joined with doweling (or a twig the correct size).
If your horse is boarded, there may be available gear that is not too heavy to move to create a circuit. If you have a grazed area for training, tread-in posts have many uses and can be paired with tape to create reverse round pens or high-sided lanes. Some people may have trees, banks, ditches, bridges, stumps, slopes and/or natural water to incorporate into circuits.
Circuit activities like this are great as warm-up or cool-down exercises, or just to give our horse a stretch of continuous movement and a bit of mental stimulation.
PREREQUISITES:
- Horse and handler are clicker savvy.
- Horse responds willingly to ‘walk on’ and ‘halt’ signals when the handler is beside his neck/shoulder, on both sides of the horse. (See LINKED RESOURCE 1. at the end of the post.)
ENVIRONMENT & MATERIALS:
- A work area where the horse is relaxed and confident.
- Ideally, the horse can see his buddies, but they can’t interfere.
- The horse is not hungry.
- Halter and lead (kept loose as much as possible, as we want to use body language for communication, not rope pressure).
- A circuit of objects and obstacles. Ideally some to step over for hock flexion, lanes to walk through, gaps to negotiate, unusual surfaces to walk across, slopes if possible, hoops to step into, markers to weave, pedestals to put one or two front feet on, and so on. If your horse likes to pick things up, add that as an element of your circuit.
AIMS:
- To have the horse and handler and horse fluidly navigate a circuit of objects and obstacles at the walk with the handler on the LEFT side of the horse.
- To have the horse and handler and horse fluidly navigate a circuit of objects and obstacles at the walk with the handler on the RIGHT side of the horse.
VIDEO CLIP:
NOTES:
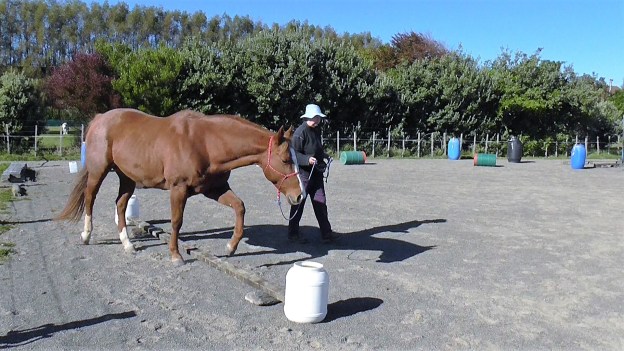
- The horse in the video clip is an old hand at negotiating circuits and the circuit in the clip is a basic one.
- This activity refines ‘walking together shoulder-to-shoulder’ with a draped lead rope or no lead rope. A key is to first establish solid, mutually understood, ‘walk on’ signals that ensure you step off together. It is a common habit for the handler to begin walking without ensuring that the horse is stepping off at the same time. (See LINKED RESOURCE 1. at the end of the post.)
SLICES:
- Make a list of obstacles available and draw a diagram of where you might put them in your training area.
- Experiment gently to find your horse’s response to each obstacle: Either one a day or a couple each session, whatever suits your time and facility.
- For horses new to this sort of activity, introduce one obstacle at a time and add a new one when he his totally confident with the previous ones.
- If the horse is an old hand at this sort of activity, set up your designed circuit. Move on to generalizations once walking around the basic circuit is fluid on both sides of the horse.
- Sometimes I use three, four or five obstacles and do various things with each one, or sometimes I set up a longer circuit like the one in the clip which has twelve obstacles.
- If new to the activity, stay with each new obstacle until the horse is ho-hum with it. For example, if it takes one session for the horse to be comfortable with a new object or obstacle, and you add a new one each session, you can have a circuit of twelve obstacles after twelve sessions. Or you can do two different things with six obstacles.
- But: some obstacles will be harder and take longer than one session to establish comfort and willingness. As long as we always start where the horse shows confidence, and we proceed in small slices when he shows he is ready to do more, things usually progress well.
- Success breeds success. Over-facing and going too fast destroy confidence and the willingness to try again. If you notice you’ve done this, simply relax and go back however far you need to go to where the horse is confident and slowly work forward again.
- When it all flows smoothly while you are on the horse’s left side, start again on his right side.
GENERALIZATIONS:
- Add in the occasional halt, either between obstacles, in a lane, across a rail, on a pedestal, in front of a rail, just after stepping across a rail, between uprights, with front or back feet in a hoop. Decide beforehand how long your halts will be. Start with one second and work up gradually to five or ten seconds. Once you have duration, ask the horse to ‘wait’ while you move away and/or around him. (See LINKED RESOURCE 4. at the end of the post.)
- Add in the occasional back-up between uprights, through a lane, before reaching the next obstacle, backing front feet over a rail, backing all four feet over a rail. (See the LINKED RESOURCES 5. and 6. at the end of this post for training plans relating to backing up.)
- Ask for sidestepping away from you or toward you along a rail. (See LINKED RESOURCE 1. at the end of the post.)
- Walk a small circle to do the same obstacle twice.
- Change your leading position so you are in front of the horse and he walks behind you. See the LINKED RESOURCES 8. at the end of this post
- Add the occasional trot between or over selected obstacles.
- Long-rein the circuit. (See my Long-Reining book on the ‘Books’ page.)
- If you lunge, ask for continuous trot through a series of obstacles set up so your rope doesn’t catch on them. I like to trot an obstacle, then have horse trot a circle around me while I move into position for trotting over or through the next obstacle. This is an exercise that allows continuous sustained movement without being dead boring or stressing the horse’s joints and dulling his brain with continuous small circles.
LINKED RESOURCES:
- Blog: Smooth ‘Walk On’ and ‘Halt’ Transitions. https://wp.me/p4VYHH-5TT
- Blog: Sidestepping: https://wp.me/p4VYHH-5RL
- Blog: Step Aerobics: https://wp.me/p4VYHH-5Sf
- Video Clip: Park & Wait: https://youtu.be/UvjKr9_U0ys
- Video Clip: Backing Up Clip 1: https://youtu.be/6YYwoGgd_0Y
- Video Clip: Backing Up Clip 2: https://youtu.be/safxxu90lkA
- Video Clips: This is the first clip in a playlist series about using hoops. https://youtu.be/AfDIAQSOmE0
- Video Clip: first of two clips to teach walking in front of the horse. https://youtu.be/n8uZOtO5hEc
