Add a new aspect to a task, e.g. different handler position.
Do tasks in a different order.
Introduce new tasks.
Add trot to some of the tasks.
AIM
This routine links together a finesse back-up, targeting shoulder to hand, sidestepping, counterturn circle, ‘wait’ while the handler walks around the horse plus signaling a back-up from behind the horse.
PREREQUISITES
Smooth ‘Walk on’ and ‘Halt’ Transitions (staying shoulder-to-shoulder). https://wp.me/p4VYHH-5TT
A work area where the horse is relaxed and confident.
Ideally, the horse can see his buddies, but they can’t interfere.
The horse is not hungry.
Halter and 12′ (4m) or longer lead if not working at liberty.
A safe fence line to work alongside.
VIDEO CLIP
Movement Routine 11: Fence as Focus (filmed at liberty)
NOTES
Be sure that you have mastered each task before chaining them together.
Chain pairs of tasks to begin with, then gradually join the pairs together.
Click&treat at a rate that keeps your horse being continually successful. As he learns the routine, ask for a bit more before each click&treat.
TASKS
Walk shoulder-to-shoulder with the horse nearest the fence.
Smoothly turn to face the horse and ask for a Finesse Back-up. Eventually work up to ten steps back.
Ask the horse to target your hand with his shoulder to turn him 90 degrees so his butt is against the fence.
Ask the horse to sidestep one direction, then in the other direction. You could be facing the horse, at his side asking him to yield away or at his side asking him to step toward you.
Take position alongside the horse’s head/neck so you can ask him to walk a counterturn half-circle with you, then halt. A counterturn has the handler on the outside of the turn.
Put the rope over the horse’s back, take if off, or ground-tie if your horse knows that. Ask the horse to ‘wait’. Walk forward and right around the horse. Click&treat when you return.
Complete the counterturn circle so you are both once again parallel to the fence; the handler will be nearest the fence.
Ask the horse to ‘wait’ with clear voice and gesture signals. Walk backwards and around behind the horse to end up standing beside his hip furthest from the fence.
Ask the horse to back up while you move to remain beside his hip. Alternately, you could keep your feet still and ask the horse to back up until his head is at your shoulder.
Use your ‘end of routine’ routine to let the horse know the routine is finished for now.
If you started walking on the horse’s left side, teach it again walking on his right side. One side may feel harder.
GENERALIZATIONS
Work alongside as many different safe fences as you can find.
When it is super smooth with halter and lead, play at liberty.
Use a line of ground rails instead of a fence.
Do the routine in an open area with no fence or ground rails.
Targeting body parts is fun to do when we are short on time or it’s too hot, wet, cold, or muddy to be out and about, which is often the case in January.
I’ve started with targeting chin to hand, because it is probably the easiest one to establish the IDEA of targeting a body part to our hand. It gives us a simple task to practice good timing of the click, plus consistent treat-delivery that keeps or returns the horse’s head to facing forward.
PREREQUISITES:
Horse confidently touches his nose to a variety of different targets held in a variety of positions. In other words, he seeks out the target.
Horse confidently touches his nose to our outstretched fist in a variety of positions and with us standing beside him or in front of him.
Handler has developed a clear ‘zero intent’ body language stance. (See Related Resources 1.)
Horse understands the handler’s ‘zero intent’ position, by remaining calmly facing forward for several seconds, rather than turning toward the treat pouch or pocket when the handler stands beside the horse’s neck. There are training plans for these prerequisite skills in my book: “How to Begin Equine Clicker Training” (See the link to BOOKS at the top of the screen).
I have to presume that everyone is already familiar with the basics of clicker training, since the new shaping plans I share here build on those basics. If you are not familiar, the information in the book is a great place to start.
ENVIRONMENT:
Horse is not hungry, so he can focus on what we are teaching, rather than the treats.
Horse at liberty in an area he finds comfortable.
Ideally, herd mates in view but not able to interfere.
AIMS:
The horse willingly moves his chin to touch our hand held toward his chest from his chin.
The handler becomes more confident with slipping into and out of a ‘zero intent’ posture. (See Related Resources 1 at the end of this post.)
NOTES:
Play with this in very short sessions. Stop when it feels good. Sessions can be before or between other things that you are doing.
Have the short sessions as frequent as possible. Every day is good, twice a day is even better.
Stick with one body part until you and horse are totally ho-hum with it.
When you are ready to introduce a second body part, the PROCESS is exactly the same as the one outlined below for the chin.
To introduce another body part, begin each session with the one(s) you have already taught, then suggest the new spot by touching it: click&treat, and progress through the same thin-sliced process.
VIDEO CLIP:
SLICES:
Touch the flat palm of your hand to the horse’s chin; click&treat.
Repeat several times so the horse can make the connection between the ‘touch’ and the click&treat.
Hold your hand a tiny distance back from the chin (toward the horse’s chest) and wait for the horse to close the distance so he touches your hand: click the instant you feel the touch & treat plus celebrate largely (happy praise and a triple treat or jackpot).
If you do slice 3 above, and the horse does not make the connection, resume with slice 2.
Once the horse is making the connection over a tiny distance, gradually increase the distance one millimeter at a time.
Early on in your teaching program, start each new session with a touch to the chin, to remind the horse about which task you are doing.
Once the horse clearly understands the task, take up the ‘zero intent’ position between repeats, to build a bit of ‘wait duration’ between your requests. Build up the ‘wait time’ in one second increments.
Some horses will develop a little signal to tell you when they have finished chewing and are ready for a repeat. (See Related Resource 6.) Watch out for these and value them by doing a repeat. Boots illustrates this in the video clip.
GENERALIZATION:
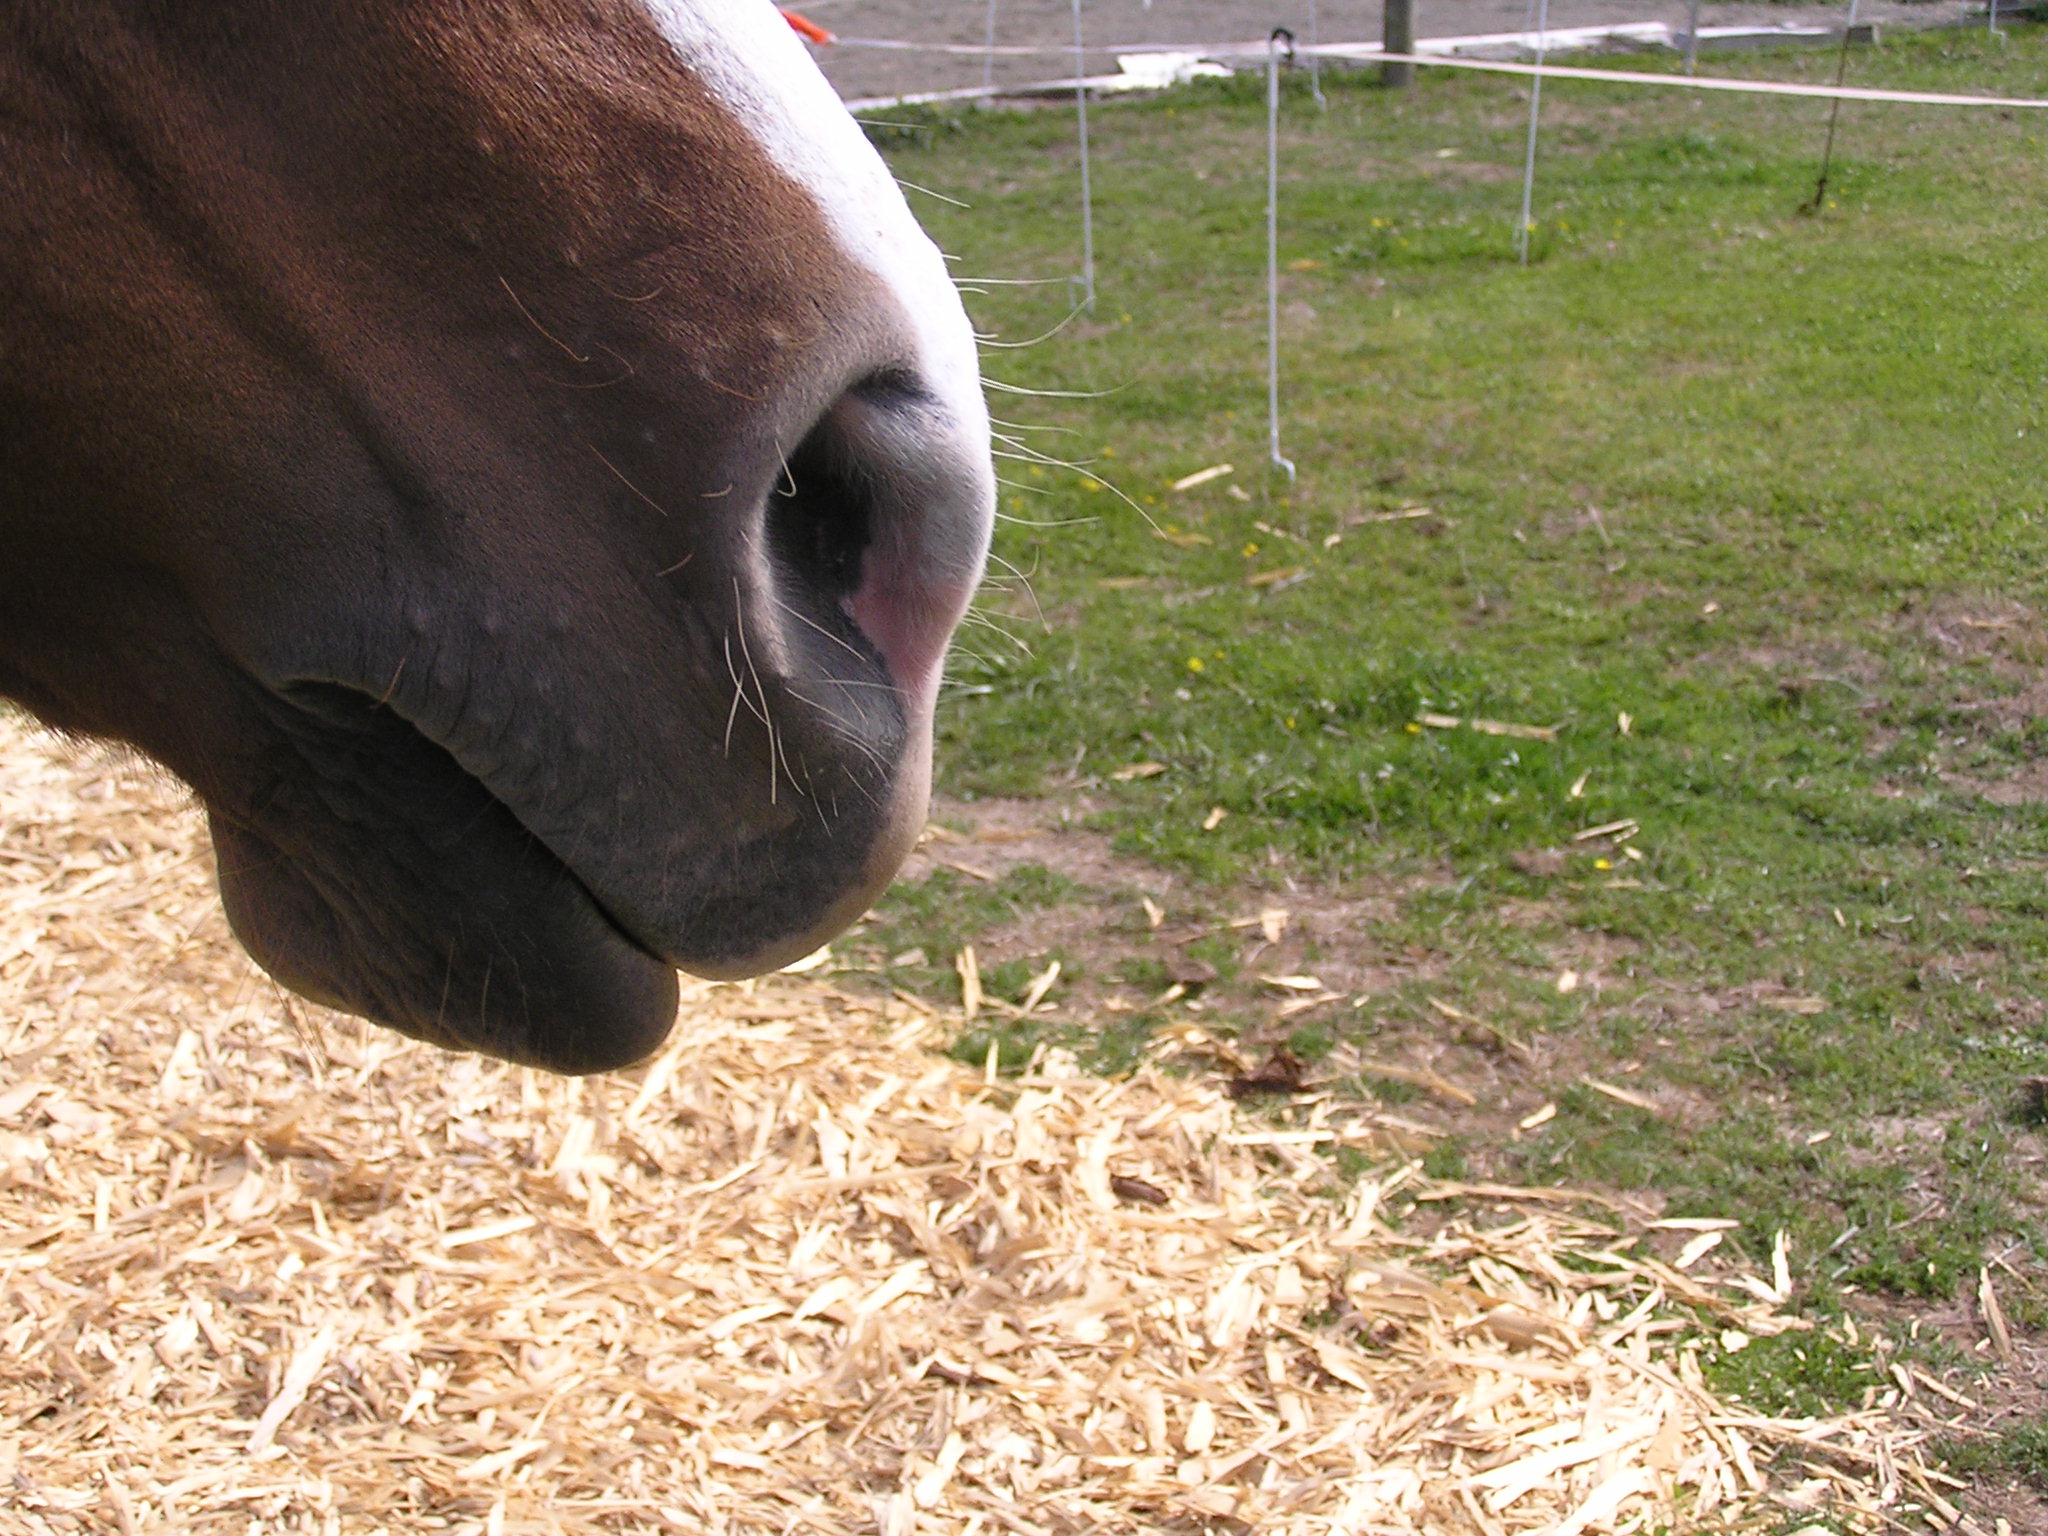
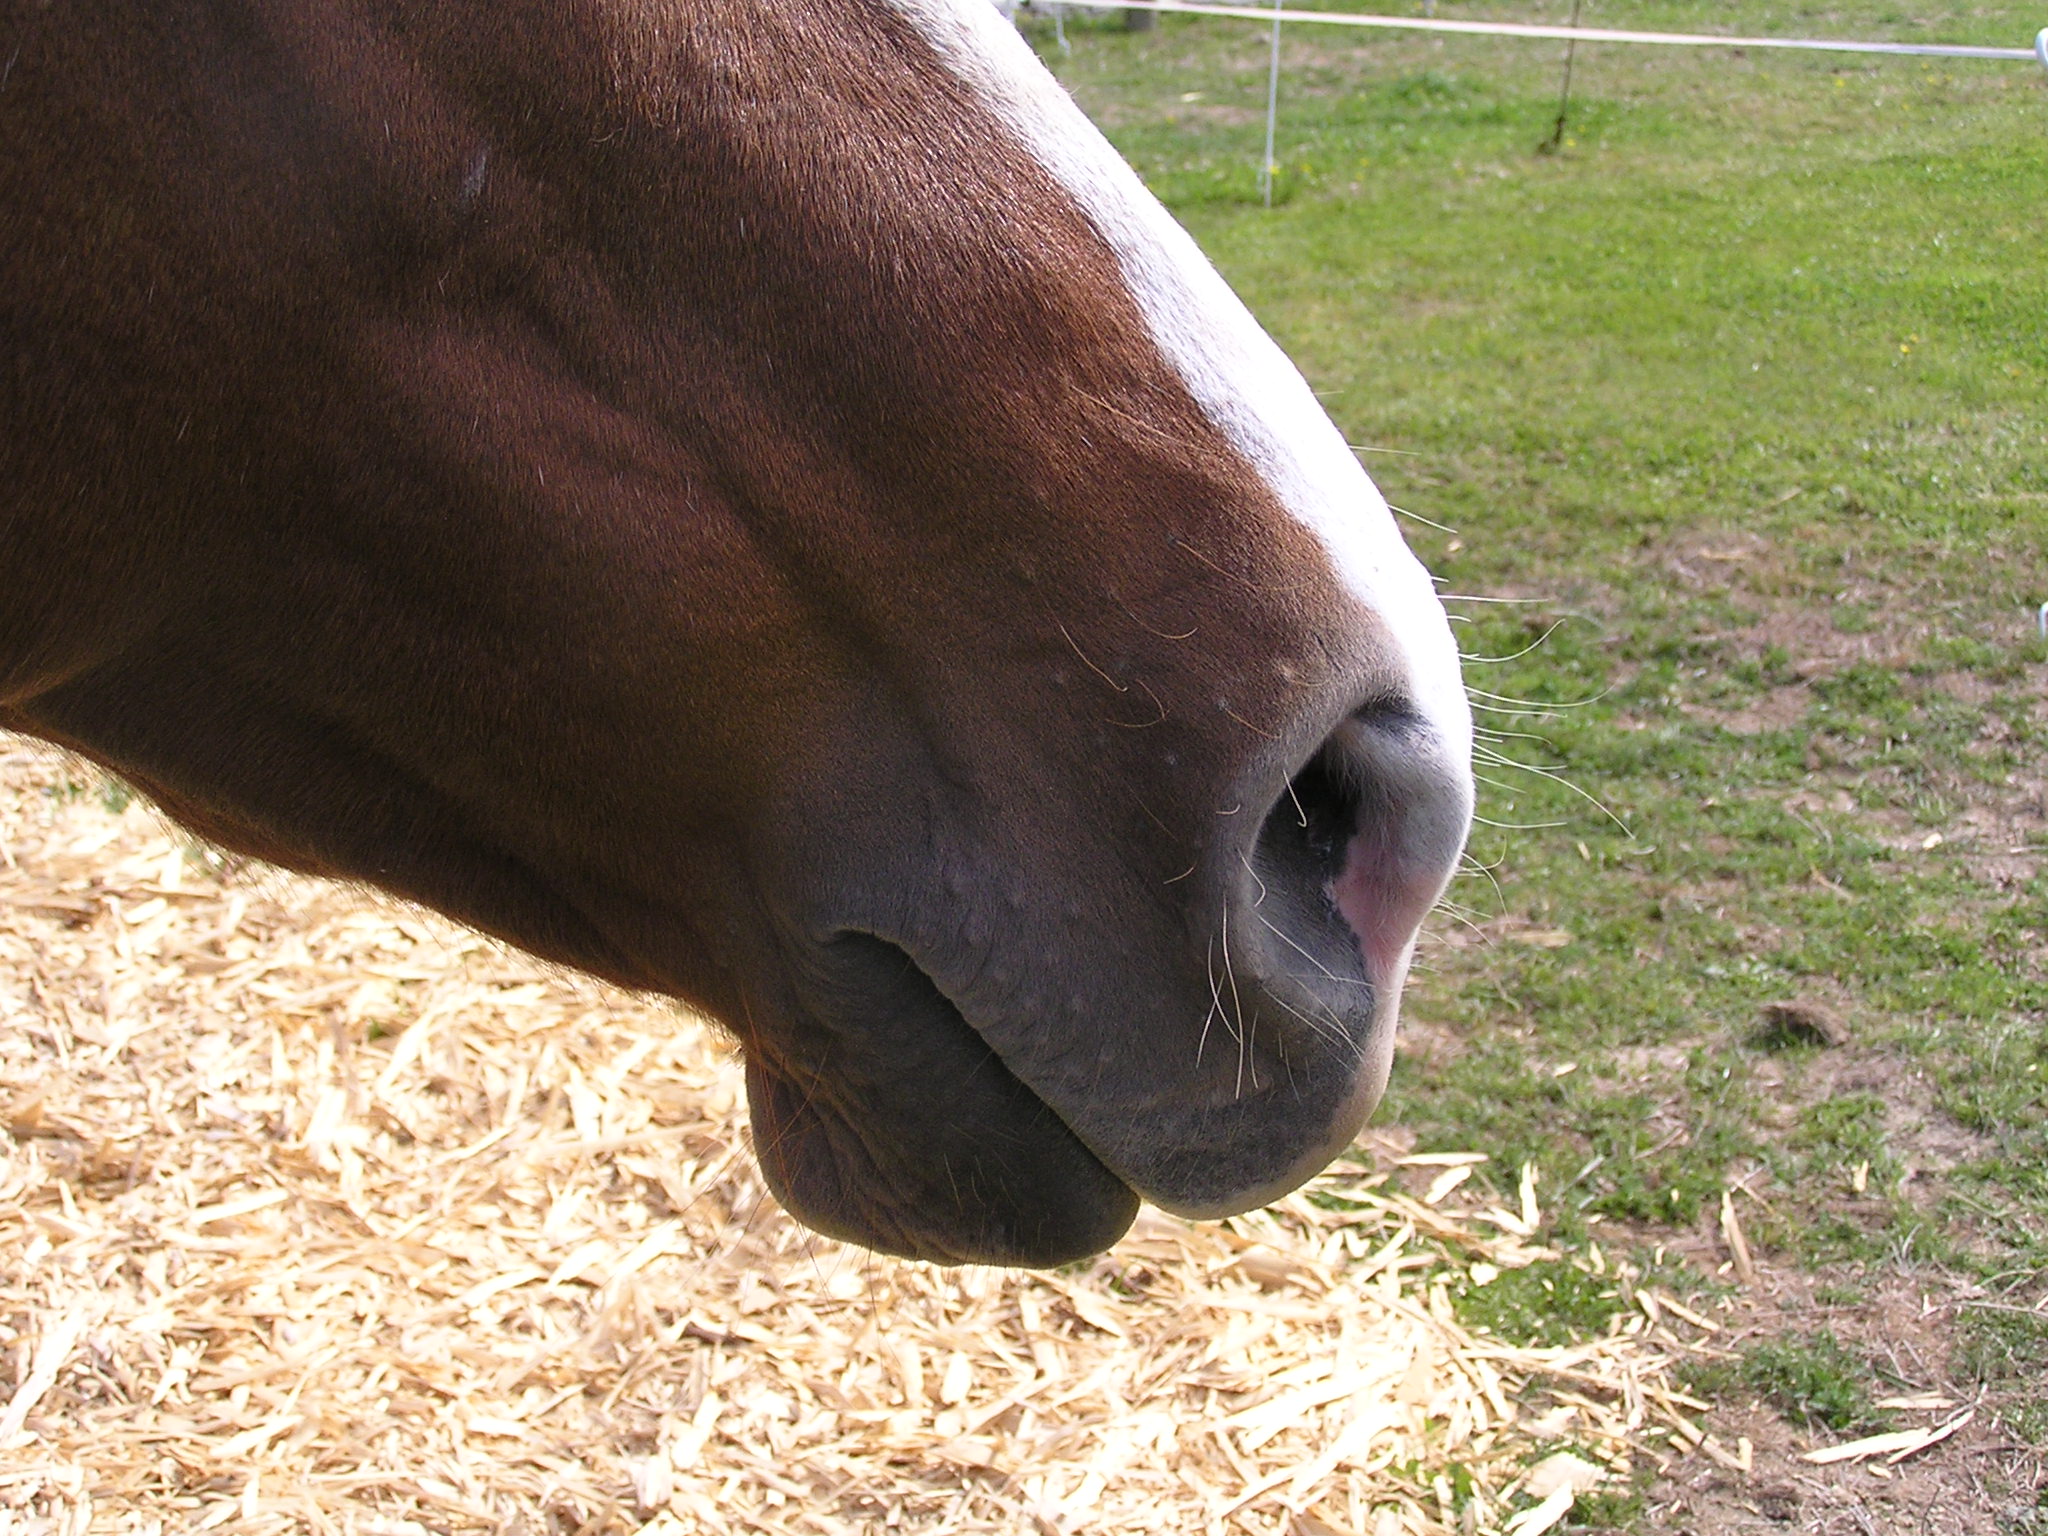
We can use how the chin (lower lip) feels to our touch to estimate the horse’s relaxation level. It’s easier to feel the chin (lower lip) tension than to see it when we are actively doing things with the horse.
While interacting with the horse, occasionally pause and feel his chin (lower lip). A soft, floppy lower lip suggests a horse relaxed about what is going on.
With increasing anxiety, the lip tightens, so it might be:
Very Loose
Moderately loose
A little bit tight
Quite tight
Very hard indeed.
Likewise, as anxiety reduces and relaxation returns, a tight lip will loosen up.
Add Pics of chin
A very relaxed, loose chin/lower lip.
A tighter chin/lower lip. When with the horse, it is easier to feel the difference than to see it.
Once the horse understands targeting his shoulder to our hand, we might like to teach targeting his hindquarters to our hand. If we can ask for ‘shoulder to hand’ and ‘hip to hand’ we have a way of asking the horse to bring his whole body toward us.
It’s a useful maneuver when we would like him to line up at a mounting block, fence or bank and he’s not quite close enough. It is also a gymnastic exercise and one that encourages handlers to develop their timing plus clear, consistent body language.
PREREQUISITES:
Horse and handler are clicker savvy.
Horse is comfortable standing ‘parked’ with the handler standing alongside facing behind the horse.
Handler has developed his/her ‘zero intent’ and ‘intent’ body language. To review, see the clip or blog link at the end of this post.
Signals for moving the hip away from the handler are well established. There are various ways to teaching this. A clip demonstrating one way is also added at the end of this post.
ENVIRONMENT & MATERIALS:
A work area where the horse is relaxed and confident.
Ideally, the horse can see his buddies, but they can’t interfere.
The horse is not hungry.
A safe, enclosed area for working at liberty, if possible. Otherwise, halter and lead (kept loose or the rope safely draped over the horse’s neck).
A hand-held target on a long stick, a mid-length target and a short target.
For generalizations, pedestal, mounting block or similar, hoop.
My current collection of targets. In the video below, I used the three on the right-hand side of the photo. The others come in handy in various contexts.
AIM:
Horse confidently moves his hindquarters toward the handler’s ‘outstretched hand’ signal.
Note: When we request the horse to yield his hip away from us, we project energy toward the horse’s hindquarters from our body’s core at the belly-button, which causes our posture to be upright.
When we request the horse to move toward us, it’s important to pull our belly-button back so that we shrink back and create a ‘draw toward me’ energy with our whole body.
Horses are so sensitive to advancing and receding energy from another body, that they easily read the intent of our posture as long as we are consistent and not sloppy.
SLICES:
Stay with each slice until it feels ho-hum and smooth for both of you.
Make each session extremely short, a few minutes. The magic is not in the final result as much as it is in the process of helping the horse figure it out.
Choose a spot where you can easily stand the horse alongside a safe fence, wall, or similar with the barrier on the horse’s far side. The barrier discourages the option of moving the hindquarters away, which is something you have hopefully taught previously.
Ask the horse to stand squarely beside the fence; click&treat.
Take up a ‘zero intent’ position standing beside the horse’s neck, facing behind the horse, holding the target down by your side ‘out of play’ and relax; click&treat. Work up to standing together quietly like this for three or four seconds before the click&treat, on either side of the horse. Have the space between you and the horse’s neck at a distance comfortable for both of you. Close is usually safer than standing away, but it depends.
Stretch your arm to gently touch the long-handled target to the side of the horse’s hindquarters. Click just as the target makes contact; deliver the treat.
Move the target down behind your leg to take it ‘out of play’ and resume the ‘zero intent’ body position. Observe to see if the horse is okay for you to carry on. If he continues to stand in a relaxed manner, he is probably okay to carry on, or you may have sorted out one or more ‘okay to proceed’ signals. A link to information about these is at the end of this post.
Repeat 4 and 5 above, watching for any weight shift the horse might make toward the target as you move it toward his hindquarters. If he does, celebrate hugely with happy words and a jackpot or triple treat. Maybe ask for one or two repeats, then wait until your next session to do more.
When you feel the time is right, hold the target a tiny distance away from touching the hindquarters and WAIT for the horse to shift his weight to make the contact; click&treat. Some horses may step over to make the contact right away. For either a weight shift or a whole step toward the target, celebrate hugely again. Maybe repeat the request once or twice more to consolidate the idea. If you have waited 3-4 seconds and nothing happens, simply return to slices 4, 5, 6 above.
It took Boots a good number of daily mini-sessions before she a) consistently leaned toward the target and b) consistently moved a tiny distance toward the target to make the contact. Then it took more days before she confidently stepped toward the target when I held it further away.
Decide whether you want to continue teaching on the side you started with, or if you want to teach slices 1-7 on the other side of the horse before proceeding.
When 7 is ho-hum, gradually hold your target a little bit further away so the horse must take a full step to contact the target; click&treat.
Whenever the response seems slow or unsure (or is missing), go back to touch the target to the hindquarters; click&treat. Then work forward again at a rate that keeps the horse being continually successful as much as possible.
This willingness to back up in the teaching is sometimes hard, but we always must go where the horse tell us he is, not where we want him to be.
When starting a new session, always introduce the task with a touch of the target (and eventually your hand) to the hindquarters; click&treat, to let the horse know which game you are playing.
Work to having the response equally smooth on either side of the horse.
You may want to introduce a voice signal to go along with your body language and orientation signals.
When all is smooth using your long-handled hand-held target, repeat the slices using a shorter target. The one I use in the clip is a soft plastic toy sword.
When all is smooth with the mid-length target, reach out with an even shorter target. You may have to move from beside his neck to beside his shoulder or ribs, depending on the size of the horse.
When 16 and 17 are smooth on either side of the horse, ask for the hindquarters over using just your arm lifted up in the same way you did when holding a target. Most horses will respond readily to the arm movement. I personally hold my hand open with my palm facing the horse. Handler body position is upright. By pulling back our belly-button area we create a ‘draw toward me’ energy.
When we ask for hindquarters to yield away, we send energy toward the horse and look down and gesture toward his hocks, so it is a very different body orientation and energy. Plus, we may have added distinct and different voice signals for each one.
It’s good to frequently practice ‘hip away’ and ‘hip toward’ as a little sequence to make sure our signals stay true and the horse easily responds to either one without confusion.
Left photo: ‘hip toward me’ signal and body language. Right photo: ‘hip away please’ signal and body language.
GENERALIZATIONS:
Clip: #165 HorseGym with Boots TARGET BUTT TO HAND:
Generalizations:
Stand the horse so his shoulder is near a mounting block, but his hindquarters are angled away. Ask him to bring his butt (hip) toward your hand. If he gets confused, return to using your long, medium and short targets, fading out each one as his confidence returns, until your outstretched arm and hand are sufficient.
Generalize the ‘bring your hip over’ skill to different venues and different mounting situations, e.g. fences, gates, stumps, banks – especially if you ride out in wider and varied environments. Before my hips gave up riding, I would often have been totally grounded after dismounting if Boots wasn’t 100% confident about lining up quietly alongside a gate or any other raised surface in the vicinity.
If you have a pedestal on which the horse puts his front feet, you can ask him to bring his hindquarters toward you in a circle while his front feet stay on the pedestal.
Alternately, if you have a soft rubber tub, ask the horse to put his front feet into the tub and repeat 3 above.
To increase the expertise required (by horse and handler) ask the horse to place his front feet into a hoop and keep them in the hoop while moving his butt to target the handler’s arm (or a target) moving in a circular pattern, both clockwise and anti-clockwise. Start with one step and a high rate of reinforcement.
Be careful not to ask too much at first. A frequent minute or two of exercises such as these is enough to have a worthwhile gymnastic effect.
Whenever you do ‘hip toward me’, balance it with ‘hip away please’.
BACKGROUND CLIPS FOR QUICK REVIEW:
Clip: #153 HorseGym with Boots: ZERO INTENT AND INTENT