Tag Archives: parking

Picking Things Up

Introduction

Some horses show a natural inclination to pick things up, in which case we can ‘capture’ the behavior with well-timed click&treat. The challenge with such horses is to quickly put the task ‘on signal’ or ‘on cue’ to counteract a tendency to pick up anything and everything in the hope of earning a treat.

Others, like my horse Boots, learn to pick things up because it earns a click&treat. For such horses, we can thin-slice the whole process, starting with sniffing an item, taking an item out of our hand, and so on. Such thin slices might also help to put the task ‘on signal’ for the keen horse.

Aim

On request, the horse picks up items , holds them, and presents them to our hand.

Prerequisites

  1. Horse has a strong history of positive reinforcement for standing with front feet on a mat. #8 HorseGym with Boots: Duration on the Mat. Click here.
  2. Horse and Handler have developed good table manners standing quietly together. Number 10 in my Blog Contents List: ‘Zero Intent’ and ‘Intent’. Click here.
  3. Horse and handler agree on signals the horse gives when he is ready to do something again. Seeking the Horse’s Consent Signals: Click here.
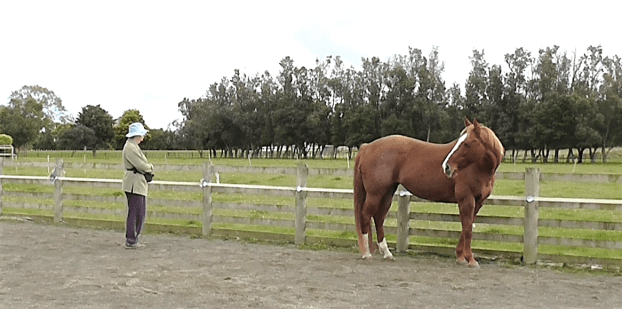
  4. For Generalization with the bell as in the second video clip, handler and horse agree on a clear ‘recall’ signal. February 2018 Obstacle Challenge: Simple Recall Pt. 1. Click here.

Videos

#224 HorseGym with Boots: Picking Things Up.

#231 HorseGym with Boots: Picking Up a Bell.

Materials and Environment

  • A venue where the horse can relax. Ideally he can see his buddies but they can’t interfere.
  • Horse is not hungry.
  • A variety of items safe and easy for a horse to pick up.
  • One or two objects that can serve as platforms so we can gradually put the items closer and closer to the ground. E.g. chair or a tub turned over.
  • Horse at liberty if possible.
  • For some horses, rubbing something that smells nice to the horse on the item can gain initial interest, but make sure it does not encourage the horse to eat your item, especially if it is something like a cloth.

Notes

  1. Three repeats of the slice you are currently working with is usually plenty. A tiny bit often is the key. The horse will think about it and be willing to try again next time. If we turn it into a drill, we usually lose willingness to engage again.
  2. Each time you click, remove the item behind you to take it ‘out of play’. This will give the horse time to enjoy his treat and let you know with a consent signal (Prerequisite 3) when he is ready to do a repeat. Also, it will be obvious to him when you preset the item into view again.
  3. Some horses quickly progress through the early slices as soon as you start. Others need a great deal of patience over may days of mini-sessions.
  4. Any time the horse loses confidence, go back to what he can do confidently and gradually work forward again. Horses instantly pick up any emotion of frustration or annoyance or anger, so be sure to practice emotional neutrality except for gleeful celebration when things go well.
  5. A horse can’t be ‘wrong’ until we have carefully taught him what we want in a way that he can understand and does not make him anxious.
  6. We are building a little chain of behaviors: pick up – hold – move item to my hand – release item to my hand.

Slices

  1. With the horse parked confidently on a mat so he knows you want him to stand still, offer your item: click&treat any willingness to sniff the item.
  2. Look for and click&treat any tendency to move his lips around the item. As always, take the item ‘out of play’ as you click&treat
  3. Look for and click&treat any tendency to open the mouth and use the teeth to investigate the item.
  4. Look for and click&treat any instance that you can momentarily remove your hand and the horse doesn’t drop the item. If he drops it, have zero reaction, pick it up, and go back to click&treat a couple of times for the previous slice the horse IS able to do, before finishing the session.
  5. Once you can remove your hand momentarily, gradually build duration of him holding the item one second at a time. We want the horse to eventually hold the item until we put our hand out to receive it. Three seconds is good. Five seconds is great. Also praise and click&treat any indication that the horse is moving his head toward your hand to deliver the item to you.
  6. At this point, we can introduce a voice signal for picking up an item. I use the word, “Pick”. I also eventually introduce the voice signal, “Hold”, once the horse can hold the item for three or more seconds without dropping it.
  7. Once 5 above is smooth and reliable over several mini-sessions, introduce something that can act as a platform about halfway to the ground and put the item on it. At first you may need to keep your hand on it or near it by pointing to it and using your voice signal. Gradually move your hand further away. Pointing to the object along with the voice signal makes a useful multi-signal.
  8. We’d like the horse to move his head toward our hand to ‘deliver’ the item to us. Gradually move your receiving hand a bit further away so the horse raises/turns his head a bit more to ‘deliver’ the item to you. If he drops it, have zero reaction, pick it up and return to the slice where he can be successful.
  9. When 7 and 8 above are smooth, organize a platform a bit closer to the ground and repeat.
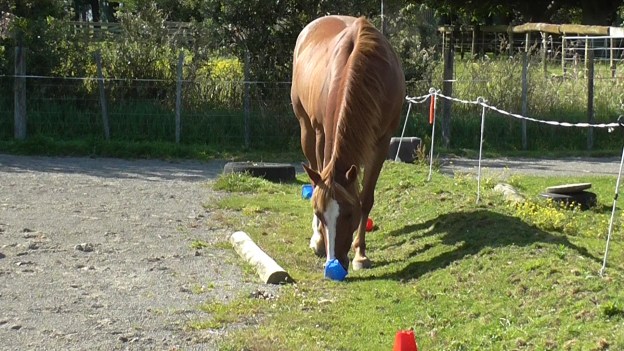
  10. When 9 above is smooth, put the item on the ground and ask him to pick it up and hand it to you.

Generalizations

  1. Set out a series of items and move along to to pick each one up.
  2. Ask the horse to pick objects like ropes or rags off a fence or similar. Some people have fun setting up a ‘clothes line’ with cloths for the horse to take off.
  3. Ask the horse to walk a step or two holding the object. Boots had great difficulty with this. She happily picked things up and gave them to me, but the idea of moving holding something in her mouth was totally foreign to her, maybe because we never used a bit when riding. I started out asking her to walk-on after giving her a willow twig which she ate as she walked. Then we progressed to one step holding an old riding crop; click&treat. When one step was solid we added steps one at a time. It took us all winter of playing with this during our morning walks before she felt comfortable carrying an object for about 15 steps.
  4. Ask the horse to recall a few steps, to ‘deliver’ the object to you. This is the beginning of teaching ‘fetch’.

Treasure Hunt

Introduction

This is a fun activity when we don’t have a lot of time with our horse. Or we can use it to begin or finish a longer training session.

We can expand the task as much as we like, depending on the space we have available to lay out the ‘treasures’.

Aim

Horse confidently follows a trail of markers to find a treat under or alongside each marker.

Prerequisites

  1. Horse is relaxed enough in the venue for his curiosity to be engaged.
  2. Horse readily targets the ‘markers’ you will use when you hold them in your hand. In the clip I used small plastic plant pots that are easy for the horse to push aside and easy to see.
  3. Horse is used to picking treats off the ground (not sand or open soil).
  4. Horse understands a signal to move away from the handler so we can ask him to explore markers on the ground. This clip demonstrates touch and voice signals to ask the horse to move forward away from me. Instead of a halt signal, the horse moves on to seek out the circuit of treasures. Click here.
  5. A strong WAIT with duration is helpful if we want to set up a treasure trail without having to contain the horse physically. See The Wait Game: Click here. Alternately, we can teach ground-tying to a high standard: Click here.

Videos

#227 HorseGym with Boots: TREASURE HUNT

#236 HorseGym with Boots: TREASURE HUNT GENERALIZATIONS

Materials and Environment

  • A venue where the horse is able to relax. Ideally he can see his buddies but they can’t interfere.
  • Horse is not hungry.
  • Ideally the horse is at liberty, but if that’s not possible, the horse can be on a long light lead and encouraged to do the exploring for each treasure while we tag along behind keeping the lead out of his way.
  • Targets we can place or hang around our training area, e.g. rags or plastic drink bottles if we need to teach the horse to move out ahead of us.
  • A surface from which the horse can safely pick up treats, e.g. grazed paddock, solid footing areas (not sand). If only a sand or soft soil area is available, we can lay out mats or similar to put under each marker.
  • Markers to put over each treat. The purpose of the markers is to have the horse use his initiative to move the marker to find the treat. In the video clips I use small plastic plant pots. Any small pot or pottle will do – margarine containers, even something as large as one-liter ice cream containers or cut down milk containers. Make sure that it is safe and easy for the horse to move the container aside with his nose to reach the treat, especially when first introducing the task.
  • Treats to put with each marker. These can be carrot/apple strips, pieces of celery, an unshelled peanut, horse pellets.
  • Halter and long, light lead if you can’t have the horse at liberty.
  • Halter and short lead if you want to ask the horse to wait while ground-tied.
  • Mat, pedestal, or balance beam if you want to use a WAIT spot while you set out the treasure trail.
  • For generalization, stones or pieces of wood to set out as marking points.

Notes

  1. At first, use single obvious treats such as a large strip of carrot or any vegetable or fruit your horse likes. Once the horse understands the game, it is easy to switch to a few horse pellets or an unshelled peanut under each marker.
  2. Ensure the horse can easily move the marker with his nose.

Slices

  1. As a first task, we have to teach the horse (or refresh) a signal indicating to ‘seek’ by moving away from us toward a target. Begin by hanging targets at nose level around your training area and have the horse walk with you between the targets, with a click&treat for putting his nose on each one. Rags or plastic drink bottles make good targets.
  2. Once 1 above is ho-hum, stay back a little bit as you approach each target and develop a hand gesture paired with a voice signal to let the horse know you would like him to move ahead of you to ‘seek’ the target. I use a light tap behind the withers as a touch signal, as well as an arm/hand gesture. Click when he touches the target and walk forward to his head to deliver the treat. This builds up Prerequisite 4 – horse confidently moves forward away from you.
  3. Play with having the horse target the type of marker you will use on the ground, while you hold it in your hand.
  4. With the horse nearby and watching (behind a gate or tied or held by a helper), be obvious about putting a treat on the ground nearby and cover it with the marker the horse has been targeting in your hand.
  5. Encourage the horse to move forward away from you to ‘seek’ and explore the marker to discover the treat under it. Some horses may need you to ‘help’ move the marker during the first one or two trials. As the horse begins to understand the game, gradually hang back until he can do it on his own.
  6. Begin to create a trail of multiple markers. Put them close together at first, then gradually further and further apart. If your horse lives on a track, you might lay the trail around corners.

Generalizations

  1. Lay out the treasure hunt in different venues.
  2. We can use rocks or pieces of firewood to mark the site of each ‘treasure’ and occasionally move these around to change the puzzle. We may need to guide the horse from marker to marker the first few times. Start with them close together and gradually put them further apart. This system means we don’t have to pick up the markers each time.
  3. We can add complexity by using a variety of markers as long as we teach each one separately at first.
  4. We can add interest by putting a variety of treats or fresh herbs/willow twigs into a series of cardboard boxes scattered around in different places each time. These are more visible and work well if we set them up before releasing the horse(s) into the space. However, be careful not to use boxes with staples and the glue in the carboard is not safe to eat. Some boxes will also have been sprayed.
  5. When the horse finishes seeking out a line of treasures, we can add a recall back to us, which earns a click&treat celebration.
  6. When trailering a horse to a venue, have him wait in the trailer while you set out a circuit of treats with familiar markers. Then as soon as he exits the trailer, encourage him to come with you to do the treasure hunt. By having something familiar to do right away, the idea of a new/different place can be less worrying for the horse. I used to do this without markers and found it hard to remember exactly where I’d put the strips of carrot, so markers are helpful.
  7. We can ground-tie the horse or ask him to stand on a mat, pedestal, or beam for the ‘WAIT’ while we set out the treasure hunt. This gives him a definite place to be. Of course, we’d have to spend time teaching ground-tying or WAIT duration first.
  8. We can set out rails between the markers to encourage more varied movement. The horse will usually step across them if they are in direct line to reach the next marker.

The WAIT Game

Introduction

Once we have taught our horse to park on a mat, we can begin to teach WAIT. WAIT is parking with duration. Along with duration, we can teach WAIT while we go further and further away from the horse.

We can then generalize by asking the horse to:

  • Wait in unusual places including over, between or on obstacles.
  • Wait to be invited through gates, into and out of wash-bays and stalls.
  • Wait as a way to explain ‘being tied up’ to the horse.
  • Wait for mounting/dismounting or harnessing/unharnessing.
  • Wait while we go out of sight.
  • Wait to enter a trailer/truck and wait to be asked to exit a trailer/truck.
  • Wait during husbandry care – grooming, tending feet, vet procedures.
  • Wait while we adjust our camera position.
  • Wait while we move around obstacles we are using for training.
  • Wait anytime and anywhere. Maybe paired with ground-tying.
  • Wait while we talk to another person.
  • Wait for our turn at a competition.

AIM

Horse and handler agree on WAIT signals and horse is able to WAIT in a variety of situations.

PREREQUISITES

Horse understands that going to a mat yields a click&treat. https://youtu.be/xMaZWt5gK2o

Horse is keen to target feet to a variety of mats in a variety of venues. https://youtu.be/GotLjG8931I

Generalizing mats to different places.

https://youtu.be/wdptBQ0EtK4

VIDEOS

Park and Wait: https://youtu.be/UvjKr9_U0ys

The horse can’t be wrong when he is learning something new. We have simply not YET explained what we want clearly enough in a way that he can understand. Never make him feel wrong if he needs to move.

Wait: https://youtu.be/ktwTUGvXNwM

Once it is solid with halter and lead, it is fun to generalize to liberty.
An older clip from when Boots was first learning this.

Parking out of Sight: https://youtu.be/X4rmbVvE6nw

You can see that Boots is not yet comfortable with me staying out of sight for long. We are in her paddock, not somewhere strange and new.

Movement Routine 11: Fence for Focus

INTRODUCTION

As we build up a collection of routines, we can:

  • Improve on tasks we’ve done before.
  • Add a new aspect to a task, e.g. different handler position.
  • Do tasks in a different order.
  • Introduce new tasks.
  • Add trot to some of the tasks.

AIM

This routine links together a finesse back-up, targeting shoulder to hand, sidestepping, counterturn circle, ‘wait’ while the handler walks around the horse plus signaling a back-up from behind the horse.

PREREQUISITES

  1. Smooth ‘Walk on’ and ‘Halt’ Transitions (staying shoulder-to-shoulder). https://wp.me/p4VYHH-5TT
  2. Finesse Back-Up. https://wp.me/p4VYHH-5XL
  3. Target Shoulder to Hand. https://wp.me/p4VYHH-5SH
  4. Smooth Counterturns. https://wp.me/p4VYHH-5WK
  5. Horse has learned to ‘wait’ until handler gives a new signal or clicks&treats. Mats: Parking or Stationing and Much More. https://wp.me/p4VYHH-5S9
  6. Horse and handler agree on clear ‘stay’ signals. https://youtu.be/UvjKr9_U0ys
  7. Horse understands a back-up signal when the handler is behind the horse. https://youtu.be/501PSnAA-po
  8. Triple Treat. https://youtu.be/FaIajCMKDDU

ENVIRONMENT AND MATERIALS

  • A work area where the horse is relaxed and confident.
  • Ideally, the horse can see his buddies, but they can’t interfere.
  • The horse is not hungry.
  • Halter and 12′ (4m) or longer lead if not working at liberty.
  • A safe fence line to work alongside.

VIDEO CLIP

Movement Routine 11: Fence as Focus (filmed at liberty)

NOTES

  • Be sure that you have mastered each task before chaining them together.
  • Chain pairs of tasks to begin with, then gradually join the pairs together.
  • Click&treat at a rate that keeps your horse being continually successful. As he learns the routine, ask for a bit more before each click&treat.

TASKS

  1. Walk shoulder-to-shoulder with the horse nearest the fence.
  2. Smoothly turn to face the horse and ask for a Finesse Back-up. Eventually work up to ten steps back.
  3. Ask the horse to target your hand with his shoulder to turn him 90 degrees so his butt is against the fence.
  4. Ask the horse to sidestep one direction, then in the other direction. You could be facing the horse, at his side asking him to yield away or at his side asking him to step toward you.
  5. Take position alongside the horse’s head/neck so you can ask him to walk a counterturn half-circle with you, then halt. A counterturn has the handler on the outside of the turn.
  6. Put the rope over the horse’s back, take if off, or ground-tie if your horse knows that. Ask the horse to ‘wait’. Walk forward and right around the horse. Click&treat when you return.
  7. Complete the counterturn circle so you are both once again parallel to the fence; the handler will be nearest the fence.
  8. Ask the horse to ‘wait’ with clear voice and gesture signals. Walk backwards and around behind the horse to end up standing beside his hip furthest from the fence.
  9. Ask the horse to back up while you move to remain beside his hip. Alternately, you could keep your feet still and ask the horse to back up until his head is at your shoulder.
  10. Use your ‘end of routine’ routine to let the horse know the routine is finished for now.
  11. If you started walking on the horse’s left side, teach it again walking on his right side. One side may feel harder.

GENERALIZATIONS

  • Work alongside as many different safe fences as you can find.
  • When it is super smooth with halter and lead, play at liberty.
  • Use a line of ground rails instead of a fence.
  • Do the routine in an open area with no fence or ground rails.

Movement Routine 7 – Fence as Focus

Photo: Parking for up to 10 seconds with the handler standing behind. This is the seventh task of the routine.

INTRODUCTION

This routine refines 90-degree turns, stepping sideways, parking, and backing up with the handler in two different positions.

AIMS

  1. To improve the precision of handler/horse communication by linking a series of tasks into a sequence.
  2. To do a series of gentle gymnastic moves to engage the horse’s mind and muscles.

PREREQUISITES

  1. Smooth ‘walk on’ and ‘halt’ transitions staying shoulder-to-shoulder. Smooth Walk and Halt transitions: https://wp.me/p4VYHH-5TT
  2. Smooth 90-degree Turns: https://wp.me/p4VYHH-5VM
  3. Horse understands a signal for sidestepping. Sidestepping: https://wp.me/p4VYHH-5RL
  4. Backing up with handler shoulder beside withers and beside hindquarters. https://youtu.be/501PSnAA-po and https://youtu.be/MWAH_Csr960
  5. Horse understands a ‘wait’ signal to stay parked until further notice. Mats: Parking or Stationing and Much More: https://wp.me/p4VYHH-5S9
  6. Handler has developed a clear ‘Zero Intent’ signal so the horse knows when standing quietly is what is wanted. ‘Zero Intent’ and ‘Intent’: https://wp.me/p4VYHH-5RO

ENVIRONMENT AND MATERIALS

  • A work area where the horse is relaxed and confident.
  • Ideally, the horse can see his buddies, but they can’t interfere.
  • The horse is not hungry.
  • Halter and a lead long enough so you can keep a nice drape in it but not so long it gets in the way. Or work at liberty.
  • Safe fence line or similar.

VIDEO CLIP

#201 HorseGym with Boots: Routine 7 – Fence as Focus. https://youtu.be/548G5Ektt4c


NOTES

  1. I find it easier to memorize the sequence of tasks like this by walking the pattern without the horse and then visualizing the sequence often. If you have a human friend, take turns being the horse or the handler. Usually, as handler precision improves, horse precision improves.
  2. The aim is to keep the rope with a nice drape or loop as much as possible, so the horse is getting his signals from our body language and signals rather than pressure on the halter. Then it will be easy to morph into working at liberty.
  3. Click&treat at a rate that keeps your horse being successful. As the horse learns a pattern through frequent short repetitions, we can gradually ask for a bit more before each click&treat. For this routine I began with click&treat at each halt, then gradually did a bit more before a click&treat.

TASKS

  1. Handler closest to fence, walk along shoulder-to-shoulder and make a U-turn, staying on the same side of the horse, which will put the horse closest to the fence. Walk to your starting point; halt.
  2. Standing shoulder-to-shoulder with the horse, beside or just behind his withers, ask the horse to back up several steps; halt.
  3. From halt, with the handler on the inside of the turn, make a 90-degree turn and walk 4 or 5 steps, halt. Repeat three more times so that you have walked an entire square with a halt at each corner, ending up where you started.
  4. From halt, walk the first two sides of the square as you did in 3 above, but with no halt at the corner. Halt at the end of the second side. The horse is now parallel to the fence.
  5. Move to face the horse and ask for sidesteps to the fence; halt.
  6. Ask the horse to stay parked with your ‘wait’ signal. Walk up to a couple of meters behind the horse and take up your ‘no intent’ position. Start with only a couple of seconds of ‘wait’ but try to gradually build up to ten seconds. Over multiple sessions gradually increase the distance you move away.
  7. Walk to stand beside the horse’s butt (facing the same way as the horse) and ask for several steps of back-up.
  8. Jackpot on completion of the sequence.

GENERALIZATIONS

  • Ask for a few more steps during the back-ups (tasks 2 and 7).
  • Walk a larger square (task 3).
  • Ask the horse to wait longer when he is parked (task 6).
  • Walk further away after asking the horse to ‘wait’ (task 6).
  • Start the exercise with a trot along the fence (task 1).
  • Ask for the second back-up (task 7) from further and further behind the horse.
  • Work at liberty or add halter and lead if you started at liberty.
  • Work on a slope if you have one handy.
  • Change the order of the tasks.


TARGET SHOULDER TO HAND

INTRODUCTION:

In the photo above Boots is leaning her weight toward me to connect with my hand which I held a small distance away from her shoulder.

Teaching the horse a signal to target his shoulder to our hand fits in nicely after we have taught him a signal to yield his shoulder away from us.

PREREQUISITES:

  • Horse and handler are clicker savvy.
  • Horse is mat-savvy.
  • Horse is comfortable standing ‘parked’ with the handler standing alongside. To review, check out my ‘Using Mats’ blog.
  • Handler has developed his/her ‘zero intent’ and ‘intent’ body language. To review, see the clip #153 HorseGym with Boots: Zero Intent and Intent toward the end of this blog or check out the ‘Zero Intent’ and ‘Intent’ blog.

ENVIRONMENT & MATERIALS:

  • A work area where the horse is relaxed and confident.
  • Ideally, the horse can see his buddies, but they can’t interfere.
  • The horse is not hungry.
  • Halter and lead (kept loose) and a safe, enclosed area for working at liberty, if possible.
  • Mat.
  • For generalization, a hoop, ground rail, mounting block or similar.

AIM:

Horse confidently moves his left or right shoulder toward the handler’s ‘outstretched hand’ gesture signal.

Video Clip:  #160 HorseGym with Boots: TARGET SHOULDER TO HAND


Note:

When we request the shoulder to yield away, we project energy at the horse’s shoulder from our body’s core at the belly-button which causes our posture to be upright.

When we request the shoulder to move toward us, it is important to pull our belly-button back so that we create a ‘draw toward me’ energy with our whole body. Horses are so sensitive to advancing and receding energy from another body, that they easily read the intent of our posture as long as we are totally consistent and not sloppy.

SLICES:

Stay with each slice until it feels ho-hum and smooth for both of you.

Make each session extremely short, 2-3 minutes. The magic is not in the final result as much as it is in the process of helping the horse figure it out.

  1. Ask the horse to park squarely; click&treat.
  2. Take up a position shoulder-to-shoulder with the horse and relax; click&treat. Work up to standing together quietly for five seconds before the click&treat, on each side of the horse.
  3. Reach out the flat back of your hand to lightly touch the horse’s shoulder; click&treat the moment your hand makes contact.
  4. Take up the ‘no intent’ or ‘zero intent’ body position and wait to see if the horse is okay for you to carry on. If he continues to stand in a relaxed manner, he is probably okay to carry on, or you may have sorted out one or more ‘okay to proceed’ signals.

ZERO or ‘NO’ INTENT POSITION

  1. Repeat 3 and 4 above, watching for any weight shift the horse makes toward your hand as you move it toward his shoulder. If he does, celebrate hugely with happy words and a jackpot or triple treat. Avoid the urge to see if he will do it again. Wait until your next session.
  2. When you feel the time is right, hold your hand a tiny distance away from touching the shoulder and WAIT for the horse to shift his weight to make the contact; click&treat. Some horses may step toward you to make the contact right away. For either one, celebrate hugely once again. Maybe do it once or twice more to consolidate the idea.
  3. It took Boots a couple of weeks of daily mini-sessions before she consistently leaned toward my hand to make the contact. Then it took more days before she confidently stepped toward my hand when I held it further away.
  4. Decide whether you want to continue teaching on the side you started with, or if you want to teach slices 1-6 on the other side of the horse before proceeding.
  5. When 6 is ho-hum, gradually hold your hand a little bit further away so the horse must take a sideways step to contact your hand; click&treat.
  6. Whenever the response seems slow or unsure (or is missing), go back to touch the shoulder; click&treat. Then work forward again at a rate that keeps the horse being continually successful as much as possible.
  7. When starting a new session, always introduce the task with a shoulder touch; click&treat, to let the horse know which game you are playing.
  8. Work to having the response equally smooth on either side of the horse.
  9. If the horse is mat-savvy, lay a mat beside the horse to act as a destination. Place the mat so the horse takes one step over to reach it. Gradually increase the distance to get two steps, then three steps.

GENERALIZATIONS:

  1. Turn on the haunches: ask the horse to step around to complete one/quarter of a circle (90 degrees). When that is smooth, work toward 180 degrees, and finally a full turn on the haunches (360 degrees). It can take a while to build confidence to do more than a quarter or half circle keeping the hind feet relatively in one place.
  2. Repeat 1 above on the other side of the horse. Because our bodies and the horse’s body are asymmetrical, one side is usually easier. It helps to do a bit more on the harder side until, after lots of short sessions, both sides feel smooth.
  3. Add a hoop (made so it comes apart if it catches on the horse’s leg) to the turn on the haunches exercise. This increases the level of difficulty, so start at the beginning with just one step and work up very gradually. Be careful not to make the horse feel wrong if he steps out of the hoop with a hind foot. If he does step out, quietly walk away together and return for a reset. The video clip demonstrates where I got too greedy, wanting too much, and it blew Boots’ confidence for a while.
  4. Keep each session super short and celebrate each new success hugely. This exercise enhances foot awareness.
  5. Stand the horse with his hind end nearer the mounting block than his shoulder, step on the block and ask him to bring his shoulder over so he is in the mounting position.
  6. If you want to focus on the horse moving toward you in a straight line, rather than in a circular pattern as above, stand the horse over a rail and see if he will bring his hind end along. If not, leave moving straight for now until you teach the ‘ribs toward me’ lessons.
  7. When shoulder to hand is smooth, start again at the beginning with ‘ribs to hand’. Follow the exact same procedure but start with a touch to the center of the ribs instead of the shoulder.