Tag Archives: equine body language

Greet and Go: How Horses Acknowledge Each Other

Greet & Go = Acknowledging Another Group Member

Background

The Greet & Go process is based on how horses who know each other greet upon meeting. In this exercise, the horse can choose to greet us. If he decides not to greet us, nothing happens, so this exercise shows the horse that it is okay to say, ‘No, not right now’. It helps to build trust because the horse gains a sense of control in the situation.

It seems that control over one’s actions is a primary reinforcing element in life, whether one is human or any other critter. A sense of having control is probably strongly related to routine. A sense of well-being arises if we can move, eat/drink, sleep, seek shelter, choose our company (if a gregarious species) according to our daily and seasonal rhythms and our personal preferences.

Any departure from having control about what happens next induces unpleasant stress (‘distress’, as opposed to ‘eustress’, the useful stress involved with learning new things at a rate we can easily absorb). For horses, any sort of containment causes distress because they are adapted for freedom of movement over 24 hours, strong environmental awareness and the ability to flee rapidly if a worrying situation arises.

The more we can allow our horses control over their lives, the better the probability that they will be relatively comfortable in captivity and willing to form working relationships with people.

The human-horse interaction dynamic is always problematic for the horse. By introducing the Greet & Go to every meeting with a horse, we relate to him in a way that acknowledges his reality rather than imposing only our desires.

Greet & Go is an activity done every single time we meet a horse.

The Human Tendency

When I introduce this exercise to people, they invariably want to pat the horse’s face after the horse has politely put his nose on their hand. In terms of horse etiquette, I have the feeling that horses find this distinctly impolite. Most horses dislike it, especially from a stranger.

They often try to move their head away. Some horses have learned to stop people doing this by using their teeth if a warning with the ears is ignored.

As already mentioned, new horses greeting each other often put their foreheads together, check each other’s breath and push to help get the measure of the other horse. I think putting our hand onto the horse’s face might feel to them like a dominating gesture.

The Greet & Go exercise does not include any fondling of the horse’s head or ears.

The Greet & Go Process

A brown horse standing next to a fence

Description automatically generated

We can do this across a fence or in with the horse. The key is to always let the horse close the last 2 inches of space. If he chooses not to connect, we walk away.

A boy feeding a cow through a fence

Description automatically generated

Wait with zero intent while the horse decides whether he wants to make contact or not.

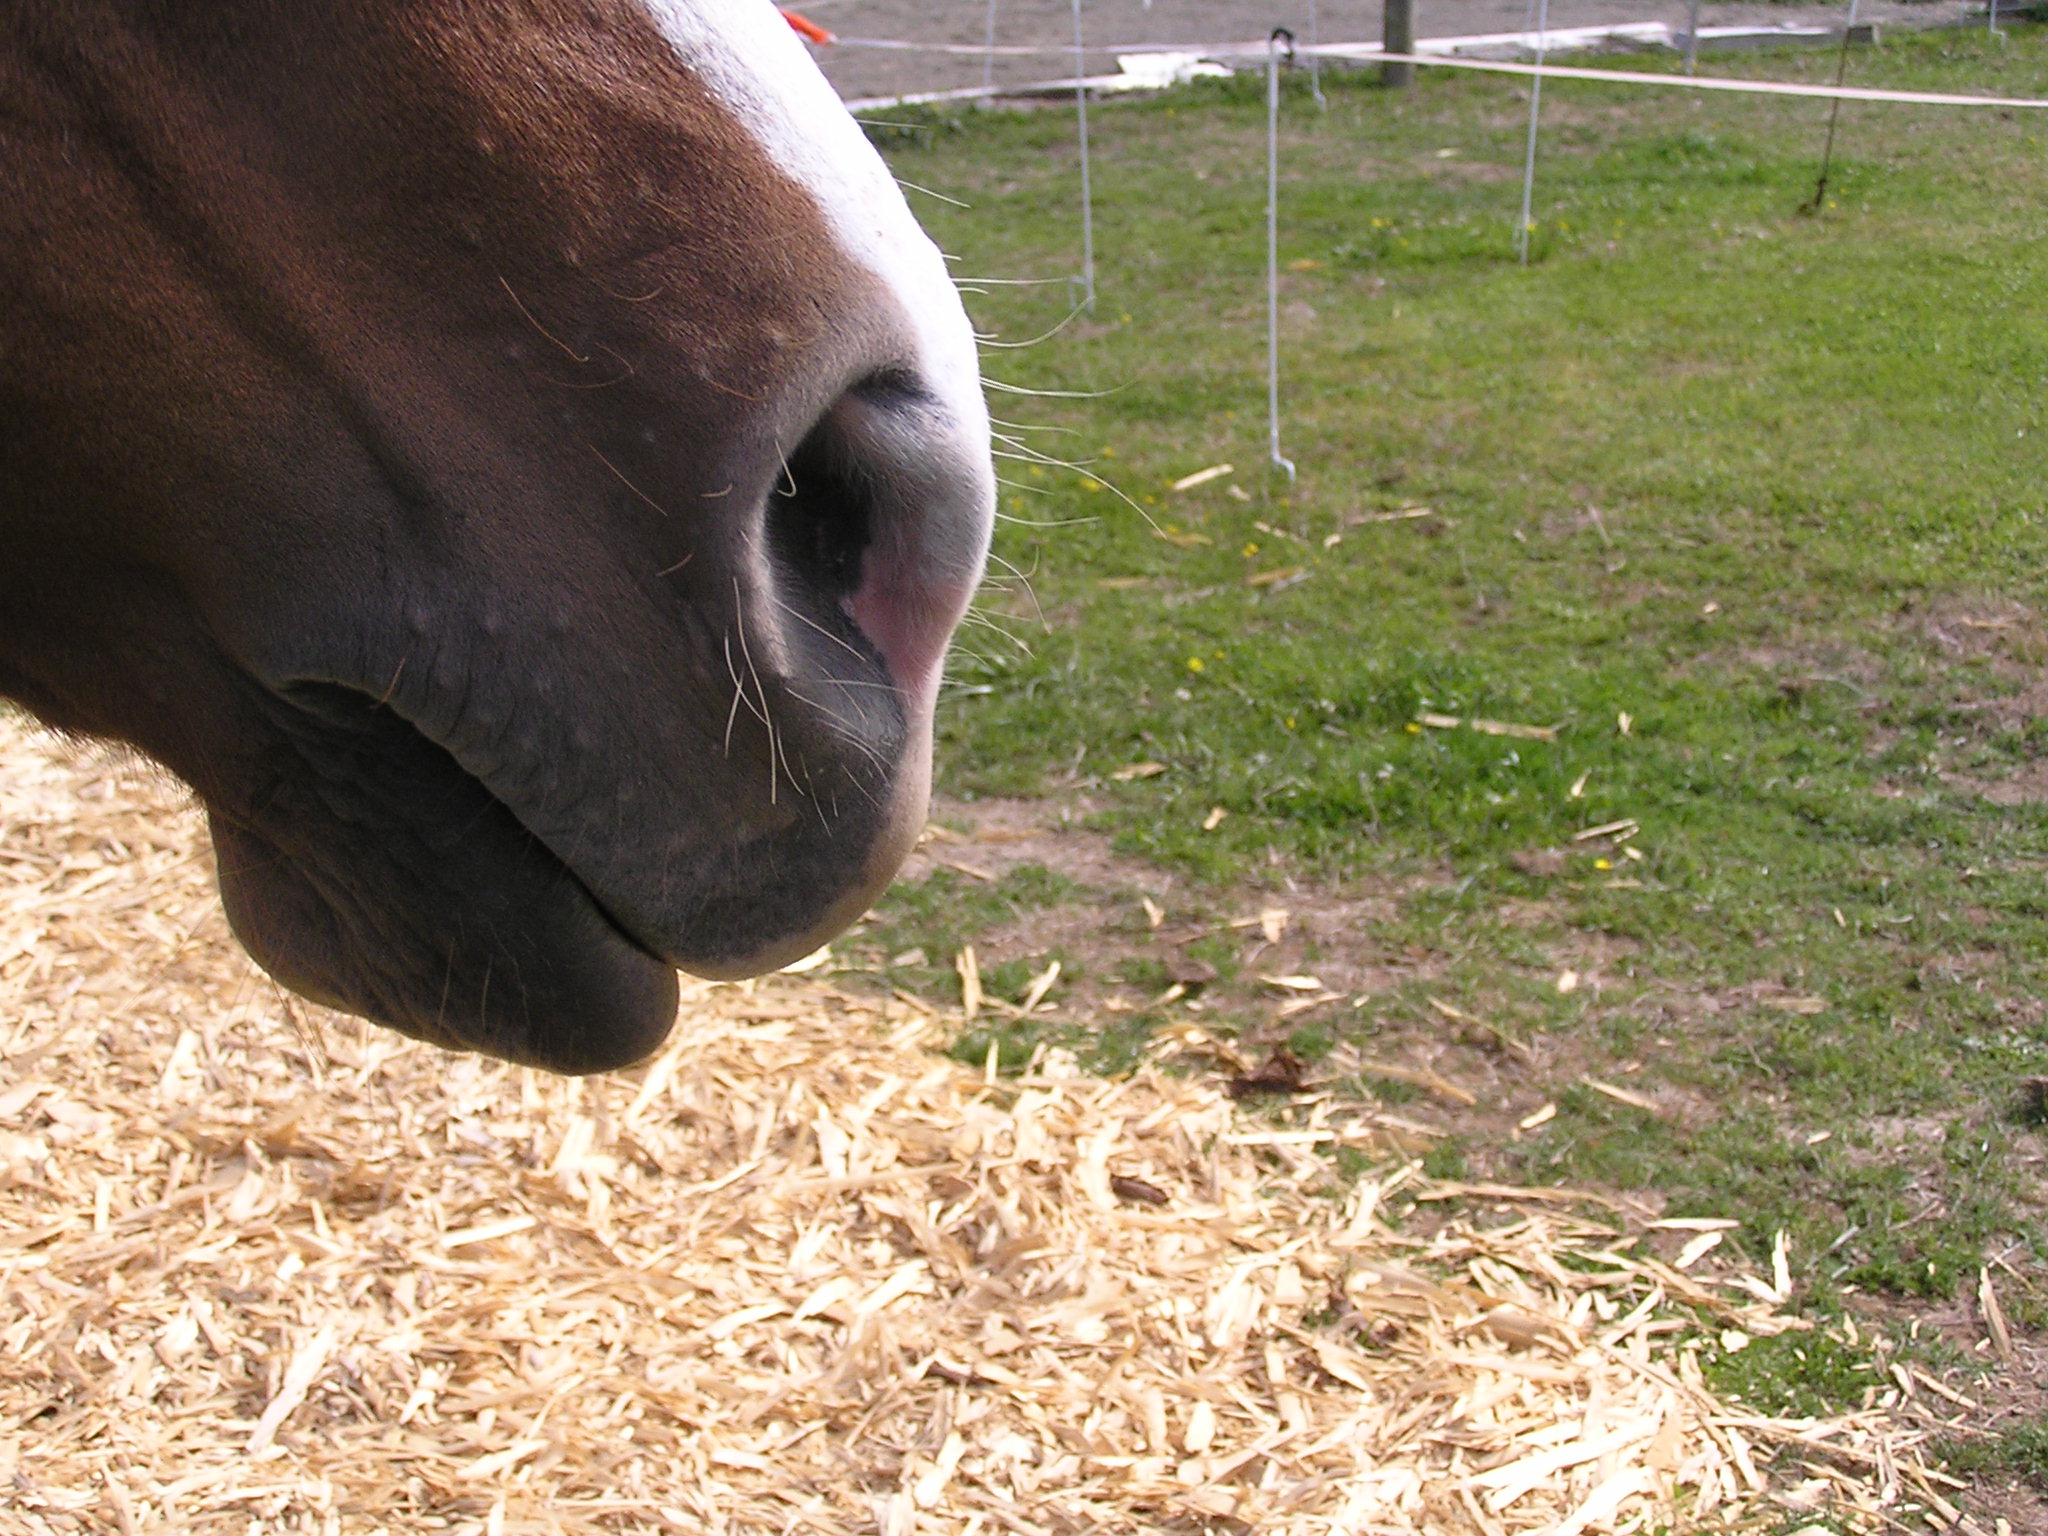
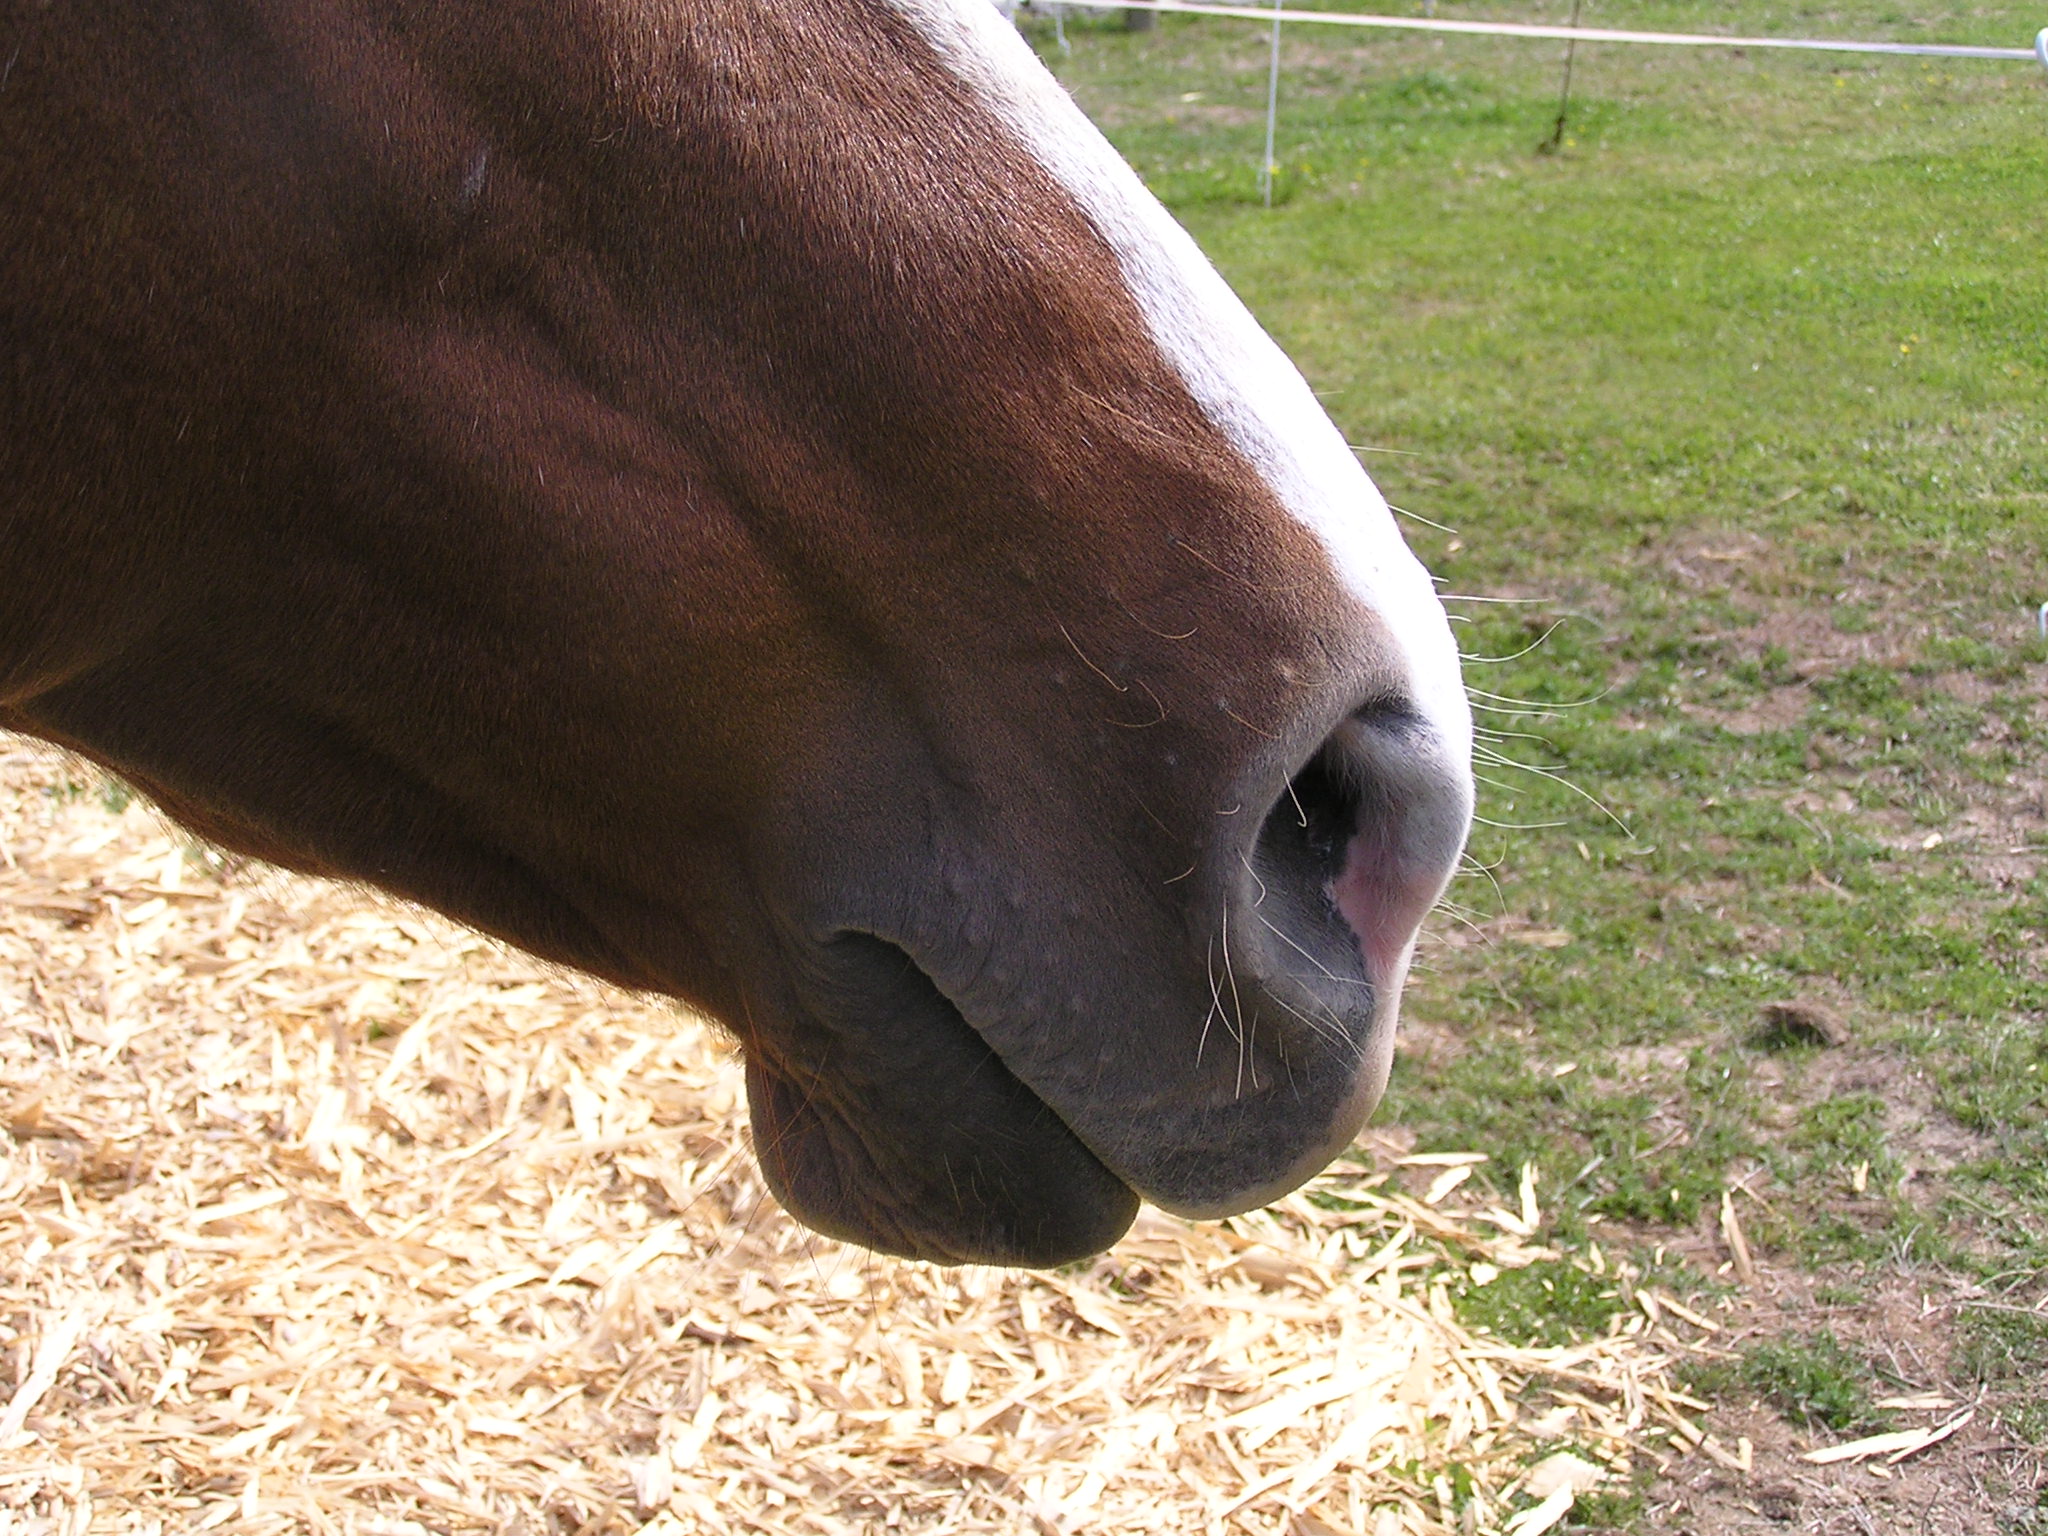
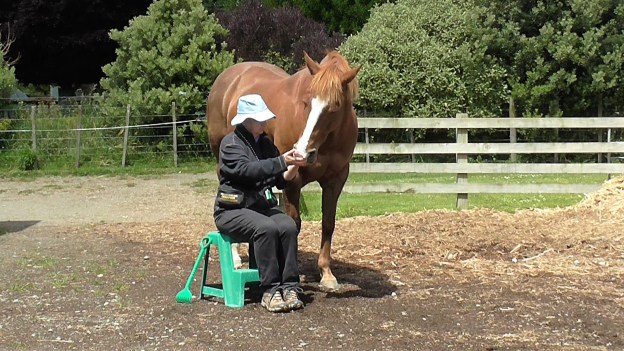
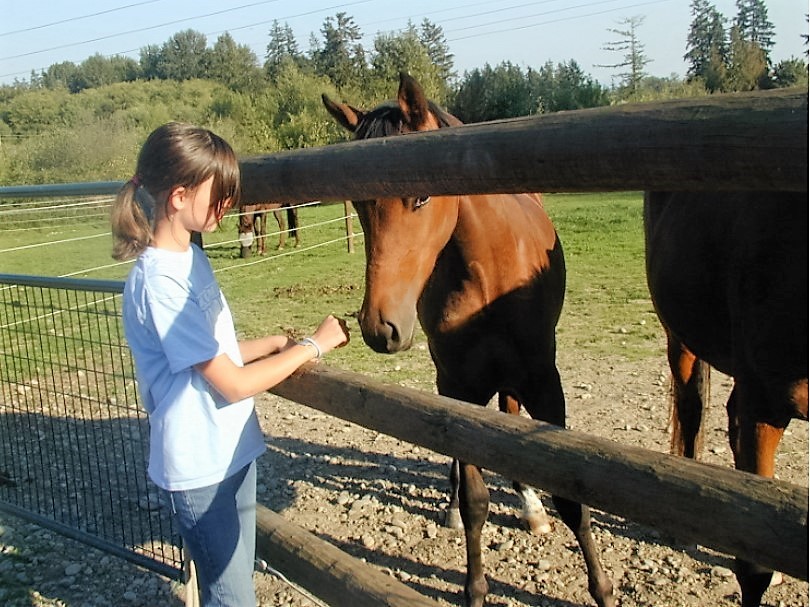
Smoky making contact with the back of Bridget’s hand. We always allow the horse to close the last two inches of space between his nose and our hand.

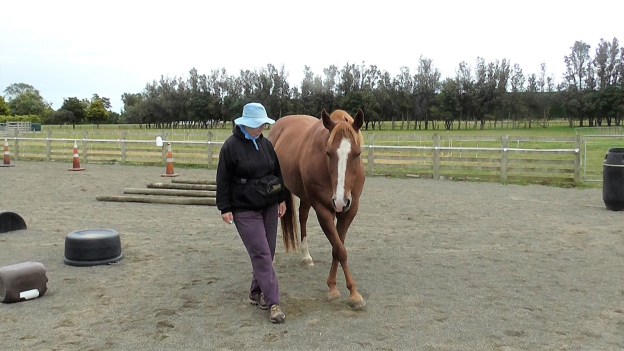
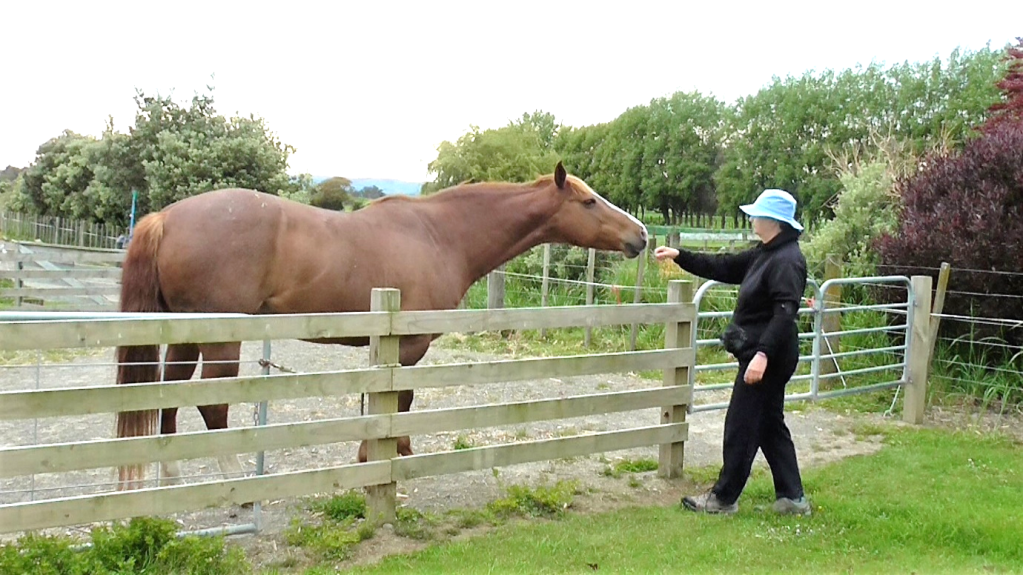
The Greet & Go exercise is simple but profound. You can do it across a fence or while in with the horse. You approach the horse from the front in a quiet, relaxed, friendly manner and before you quite reach him, you hold out your arm with a lightly curled fist, and invite the horse to touch the back of your hand.  Your hand stands in as another horse’s nose. Horses use their noses to explore like we use our hands.

As soon as the horse has touched your hand, which is the Greet, you quietly walk away. Walking away is the Go part of the process. You approach the horse, Greet, then immediately do the opposite, Go, by walking away. You are showing the horse that you respect his space and his place in the universe and in your life. You no longer approach his bubble only when you want to halter him and make him do things.

Horses appreciate the opportunity to greet us politely. The act of turning and walking away (Go) is a neutral act another horse might do, i.e. touch noses and share breath to say hello and then move away to mind his own business because he is secure in the relationship. It shows that neither party is looking for any sort of further interaction or confrontation.

The whole dynamic is like the friendly recognition we give to colleagues as we walk past them at work or when we briefly greet a neighbor out shopping.

Here is an important point that runs through all our interactions with a horse. If the horse comes into our space (our bubble) of his free will, he needs to do so politely. If he’s not polite, it’s fair for us to send him away. If we go into our horse’s space (bubble) we need to do so politely. If we intend to ask him to do something, we need to ask politely, giving the horse time to think about our signal and respond to it.

Do the Greet & Go routine as often as you can during your usual interactions with your horse. Approach the horse from the front offering your outstretched hand. A horse that wants to greet you will put his nose on your hand. As soon as he does, walk away and carry on doing what you were doing. If you clean your own paddocks every day, it is a nice way of recognizing the horse and letting him know it is not time to play clicker games.

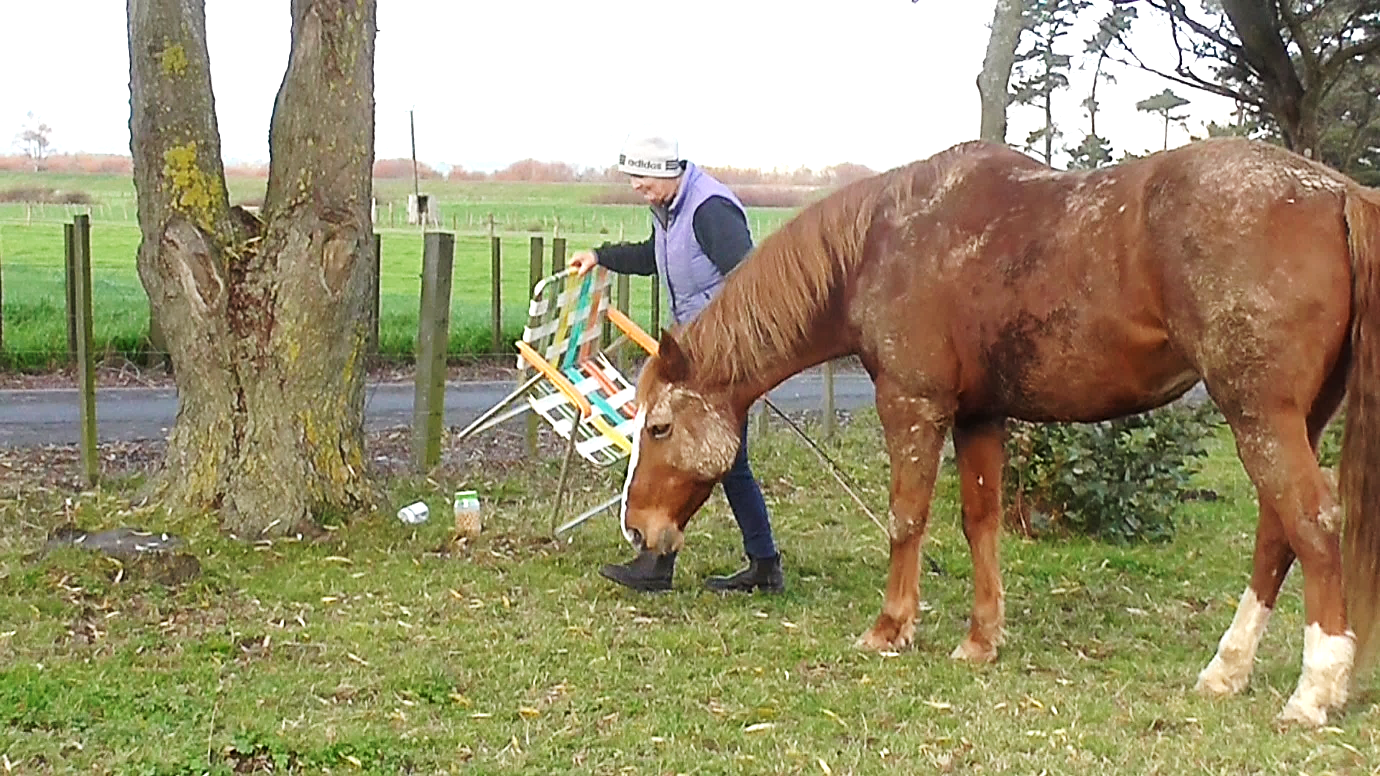
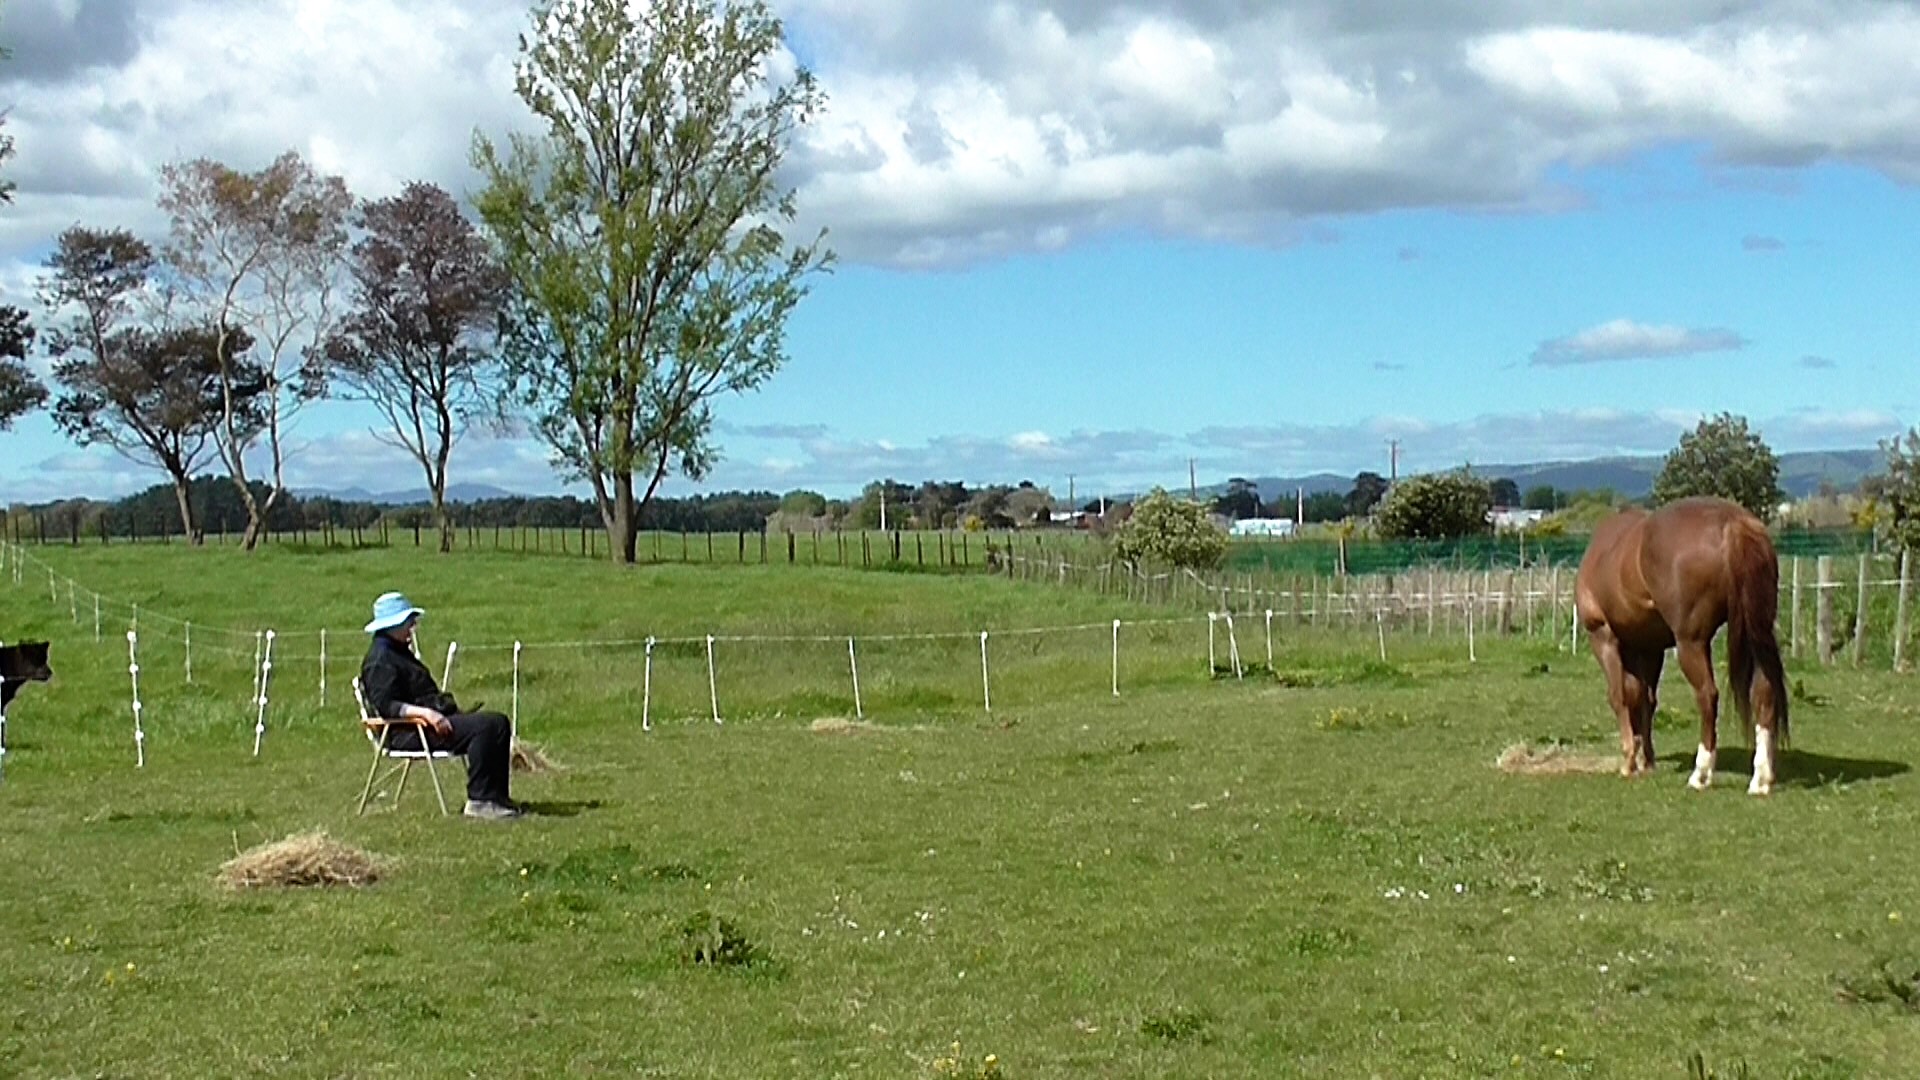
Bridget and Boots having a greeting during Quiet Sharing of Time and Space.

A brown horse standing next to a fence

Description automatically generated

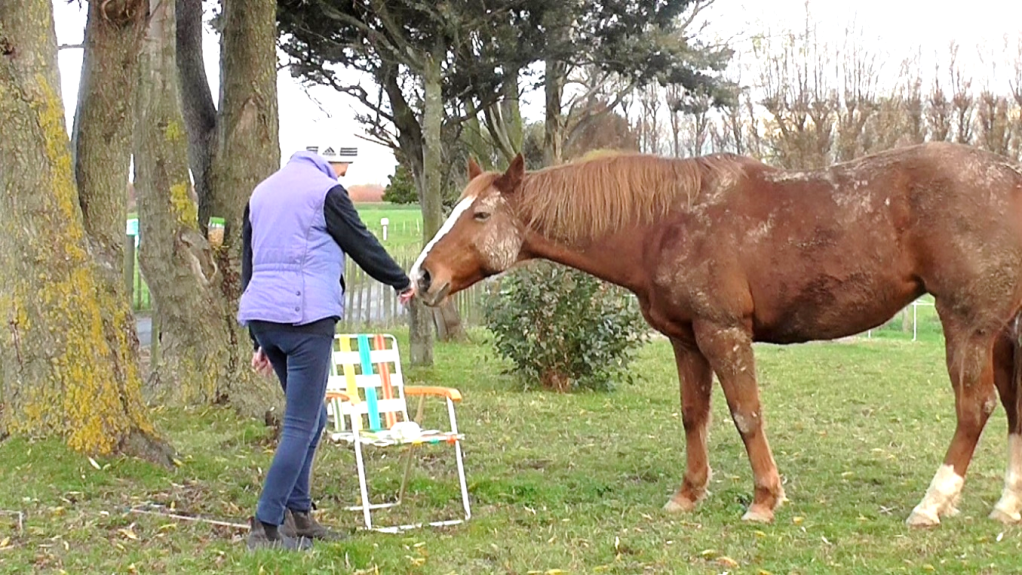
Stopping for a greeting during a filming session.

If the horse does not want to put his nose on your hand, that’s okay. Go away and carry on what you were doing or go do something else. The horse will appreciate that you understood his feelings at that moment in time.

The greeting is also a good way to begin further contact, such as clicker training, grooming or getting ready for an activity.

If your horse does not want to greet you, you have instant feedback on his mood of the moment and can adjust your plans accordingly.

If the horse does not want to greet you (ignores you or walks off) you can choose to carry on the interaction by walking a loop away from the horse and approaching him again, creating another opportunity to offer your hand. Allowing the horse to say, “No,” without consequences builds his self-confidence.

It may take just a couple of approaches before he is willing to greet you, or it may take more than ten relaxed approaches spread over one or more sessions. Eventually he will. Meanwhile, you are learning how to relax yourself out of frustration.

Relaxing Ourselves out of Frustration

  1. Pause and turn away from the horse.
  2. Breathe deeply and slowly, in and out.
  3. Roll your shoulders slowly until they can stay in a relaxed, down position.
  4. Gently bend your neck up and down, right and left.
  5. Stretch both arms straight up and down again – slowly.
  6. Smile.
  7. If the situation allows, sit for a while in the horse’s area, watching the clouds, noting your breathing, meditating.
  8. Walk around the horse’s enclosure, noting specifics. If the horse comes over to you at any point, Greet & Go.
  9. Breathe while doing all the above.
  10. Sometimes it is good to quietly finish the session and go away.

The Horse Unwilling to Greet the Human

Horses with unknown histories can have all sorts of reasons for not wanting to greet a person. If you make five or ten approaches every day and they are all rejected, keep a written log. At some point, it will happen. Celebrate quietly and Go away. If you feed hay, offer to Greet & Go before you put down the hay.

Remember, horses have all day every day. If you have the time and good humor to persist, the horse will eventually greet you. A treat offered after the greeting (put on the ground if the horse does not accept food from your hand) can amplify the importance of your offer to greet.

If you don’t have all day, you might decide to simply go away. The horse misses out on attention and treats. Maybe you can openly give your treats to another horse before you go. Horses will observe this and think on it overnight. Or you can move away and put a treat on the grass or in a feed bin well away from the horse before you leave. The horse will also think about that.

If the horse usually moves away at your approach, you probably need to go back and spend more time with Quiet Sharing of Time and Space to build the bond. Most likely he has benefited from human avoidance behavior in the past – he was able to control the interaction by moving away.

If he seems to have an “I’d rather avoid you” habit, there are ways of making yourself more interesting. If they are around, you could pay attention to other horses or pets or things. Sit down and eat an apple or a carrot. Go back to Quiet Sharing of Time and Space and ignore him.

If you’ve set up the usual environment for a one-on-one date, the horse may initiate an interaction as more interesting than ignoring you. Whenever something seems broken, go back to Quiet Sharing of Time and Space to re-forge the bond.

You can also, if your environment allows, hide behind trees, buildings, vehicles or barrels to pique your horse’s curiosity. Sitting or reclining on the ground changes our profile and may encourage curiosity. I had great fun running from tree to tree and hiding for a while behind each one. My horse couldn’t stand watching this novelty without coming over to investigate. Make yourself interesting. Seek ideas outside the square.

The point of the Greet & Go exercise is that the horse is free to choose whether he wants to greet you. If you’ve approached him several times and he’s wandered away rather than touch your outstretched hand, you are receiving a clear message.

The challenge becomes to consciously change your behavior and observe closely to see how the horse responds. How does his behavior change when you act differently? Such experimentation is fun. There is no right and wrong. At any time, your horse unbounded by ropes is free to choose what he thinks is the best thing to do at that moment.

These exercises allow you to see what works to your advantage and what doesn’t.  It’s very different from making horses do things when you decide they’ll do it because you have a rope on them, and/or they are contained in a small area.

Used every time you approach your horse; the Greet & Go exercise helps build a powerful connection. If you include a gift with the greeting (food treat or a scratch and rub and eventually putting on the halter and going for a grazing walk), it becomes even more powerful. If you do clicker training, the Greet habit can be strengthened using click&treat whenever the horse approaches you at the beginning of a clicker training session.

Greet & Go

Target Chin to Hand: Begin Targeting of Body Parts

Targeting body parts is fun to do when we are short on time or it’s too hot, wet, cold, or muddy to be out and about, which is often the case in January.

I’ve started with targeting chin to hand, because it is probably the easiest one to establish the IDEA of targeting a body part to our hand. It gives us a simple task to practice good timing of the click, plus consistent treat-delivery that keeps or returns the horse’s head to facing forward.

PREREQUISITES:

  1. Horse confidently touches his nose to a variety of different targets held in a variety of positions. In other words, he seeks out the target.
  2. Horse confidently touches his nose to our outstretched fist in a variety of positions and with us standing beside him or in front of him.
  3. Handler has developed a clear ‘zero intent’ body language stance. (See Related Resources 1.)
  4. Horse understands the handler’s ‘zero intent’ position, by remaining calmly facing forward for several seconds, rather than turning toward the treat pouch or pocket when the handler stands beside the horse’s neck. There are training plans for these prerequisite skills in my book: “How to Begin Equine Clicker Training” (See the link to BOOKS at the top of the screen).

I have to presume that everyone is already familiar with the basics of clicker training, since the new shaping plans I share here build on those basics. If you are not familiar, the information in the book is a great place to start.

ENVIRONMENT:

  • Horse is not hungry, so he can focus on what we are teaching, rather than the treats.
  • Horse at liberty in an area he finds comfortable.
  • Ideally, herd mates in view but not able to interfere.

AIMS:

  • The horse willingly moves his chin to touch our hand held toward his chest from his chin.
  • The handler becomes more confident with slipping into and out of a ‘zero intent’ posture. (See Related Resources 1 at the end of this post.)

NOTES:

  1. Play with this in very short sessions. Stop when it feels good. Sessions can be before or between other things that you are doing.
  2. Have the short sessions as frequent as possible. Every day is good, twice a day is even better.
  3. Stick with one body part until you and horse are totally ho-hum with it.
  4. When you are ready to introduce a second body part, the PROCESS is exactly the same as the one outlined below for the chin.
  5. To introduce another body part, begin each session with the one(s) you have already taught, then suggest the new spot by touching it: click&treat, and progress through the same thin-sliced process.

VIDEO CLIP:

SLICES:

  1. Touch the flat palm of your hand to the horse’s chin; click&treat.
  2. Repeat several times so the horse can make the connection between the ‘touch’ and the click&treat.
  3. Hold your hand a tiny distance back from the chin (toward the horse’s chest) and wait for the horse to close the distance so he touches your hand: click the instant you feel the touch & treat plus celebrate largely (happy praise and a triple treat or jackpot).
  4. If you do slice 3 above, and the horse does not make the connection, resume with slice 2.
  5. Once the horse is making the connection over a tiny distance, gradually increase the distance one millimeter at a time.
  6. Early on in your teaching program, start each new session with a touch to the chin, to remind the horse about which task you are doing.
  7. Once the horse clearly understands the task, take up the ‘zero intent’ position between repeats, to build a bit of ‘wait duration’ between your requests. Build up the ‘wait time’ in one second increments.
  8. Some horses will develop a little signal to tell you when they have finished chewing and are ready for a repeat. (See Related Resource 6.) Watch out for these and value them by doing a repeat. Boots illustrates this in the video clip.

GENERALIZATION:

We can use how the chin (lower lip) feels to our touch to estimate the horse’s relaxation level. It’s easier to feel the chin (lower lip) tension than to see it when we are actively doing things with the horse.

While interacting with the horse, occasionally pause and feel his chin (lower lip). A soft, floppy lower lip suggests a horse relaxed about what is going on.

With increasing anxiety, the lip tightens, so it might be:

  • Very Loose
  • Moderately loose
  • A little bit tight
  • Quite tight
  • Very hard indeed.

Likewise, as anxiety reduces and relaxation returns, a tight lip will loosen up.

Add Pics of chin

A very relaxed, loose chin/lower lip.

A tighter chin/lower lip. When with the horse, it is easier to feel the difference than to see it.

RELATED RESOURCES:

  1. Blog: ‘Zero Intent’ and ‘Intent’: https://wp.me/p4VYHH-5RO
  2. Blog: Target Shoulder to Hand: https://wp.me/p4VYHH-5SH
  3. Blog: Target Hindquarters to our Hand: https://wp.me/p4VYHH-5Tk
  4. Blog: Target Flexions: https://wp.me/p4VYHH-5Ty
  5. Blog: Seeking the Horse’s Consent Signals: https://wp.me/p4VYHH-5RV


RAINY DAY and STALL REST ACTIVITIES

INTRODUCTION:

These activities are all based on equine clicker training. Please see my book, How to Begin Equine Clicker Training: Improve Horse-Human Communication if you would like to investigate clicker training with horses. Details of my books are on the ‘BOOKS’ page link above. The books are all available via Amazon.com. Topics in the books contain free links to relevant YouTube video clips.

I keep the clips short – most are under five minutes. Each relates to a specific skill. Keeping them short makes them easier to find and review.

Each of the activities listed below has one or more accompanying video clips. Depending on the reason a horse is on stall rest, some  tasks may be a more useful than others.

  1. Nose to Target

This is fully discussed and explained in the book mentioned above. It is usually one of the first tasks when we introduce clicker training with horses.

Once the horse understands that touching his nose to a target held out by the handler earns him a click&treat, and he has a strong history of reinforcement for the task, we can use it to gradually develop flexion.

This clip shows a way to introduce the ‘nose to target’ task with the handler in protected contact (i.e. on the other side of a barrier). It’s good to use protected contact until we know how the horse responds to food being part of the training process. https://youtu.be/Rat3P1pGKjU

  1. Head Lowering (and Head Up)

This illustrates the process of free-shaping a behavior. Free-shaping means that we wait for the horse to do something it naturally does (e.g. lower the head) and ‘mark’ that behavior with a click&treat. It’s important to accurately ‘mark’ and treat each little approximation toward the final behavior we want, so timing of the click and smooth treat delivery are necessary. It’s helpful to work on these away from the horse by asking another person to stand in for the horse.

Clip One: https://youtu.be/AoqtJj2X1bU

Clip Two: https://youtu.be/Ol-BHB1QCnw

Clip Three: https://youtu.be/CYhgwlmrfps

  1. Okay to Repeat Signals and Grooming with ‘Okay to Repeat’ Signals

This post contains the background and video clip links.  https://wp.me/p4VYHH-5RV

  1. “Intent and Zero Intent”

This post contains the background and video clip links. https://wp.me/p4VYHH-5RO

  1. Target Feet to Mat and Duration on the Mat

This post with clips introduces the idea of mats. https://wp.me/p4VYHH-5S9

  1. Target Flexions

This post contains the background and video clip. https://wp.me/p4VYHH-5Ty

  1. Target Chin to Hand

Clip: https://youtu.be/Fsigp8wB0LU

  1. Target Shoulder to Hand

This post contains the background and video clip. https://wp.me/p4VYHH-5SH

  1. Targeting Body Parts Overview

This clip shows an overview. Each body part would be taught separately following the outline for targeting chin or shoulder to our hand, as in items 7 and 8 above. https://youtu.be/tFGvmRRYdHQ

  1. Bell Ringing

Clip: a thin-slicing technique to teach bell ringing: https://youtu.be/wBdJMgtHU6A

Clip: bell and horn playing: https://youtu.be/pHvgJxJsmc4

  1. Picking Things Up

This clip looks at a first lesson: https://youtu.be/EDGRpM2yLBo

This clip is with a horse a bit further into the process. https://youtu.be/FCQrlMc01RE

This clip shows the skill generalized to picking up and carrying a feed bucket. https://youtu.be/zRM8kO992EY

The two clips below demonstrate the final slices of our process for learning to retrieve a cap tossed away.

Clip 1: https://youtu.be/bvRkCk___3M

Clip 2: https://youtu.be/hMIB5mlx65E

  1. Willing Haltering

Clip showing ‘halter prep’ using a hoop.  https://youtu.be/WKeLxfpBFAo

This post contains the background and video clip. https://wp.me/p4VYHH-5Sw

  1. Relaxation with Body Extensions

Clip: https://youtu.be/nkwxYwtCP_Y

Clip: Stick and Rope Confidence: https://youtu.be/WIpsT4PPiXo

  1. Balance on Three Legs

Clip: https://youtu.be/x1WKppV3N_0

  1. Clean all Feet from One Side

Clip: https://youtu.be/UMyApCj9wBQ

  1. Hoof Stand Confidence

Clip: https://youtu.be/khsEm1YBtLs

  1. Head Rocking

Clip: https://youtu.be/-2VjmbfkfS4

  1. One Step at a Time

Clip: https://youtu.be/wStHxqNs7nk

  1. Soft Response to Rope Pressure

This post contains the background and video clips. https://wp.me/p4VYHH-5Sq

  1. In-Hand Back-Up

Clip: https://youtu.be/6YYwoGgd_0Y

  1. Step Aerobics

This post contains the background and video clip. https://wp.me/p4VYHH-5Sf

  1. Foot Awareness (Proprioception)

Some of the little tasks in this clip can be done in a restricted space. https://youtu.be/7bEkFk0w_gk

  1. Counting

This clip looks at the beginning of teaching ‘counting’: https://youtu.be/2os0DTE2SoE

  1. Kill the Tiger

This clip shows the final task. It was thin-sliced to first teach it. Be aware that some horses might generalize this bit of fun to pulling off their saddle pads unless you put it on cue or ‘on signal’. https://youtu.be/M8vzn1JsR_k

  1. Bursting Balloons

This clip shows Smoky after a few sessions when he is just beginning to get the hang of it. https://youtu.be/Md7ui1DejaI

  1. Target Hindquarters to our Hand

https://wp.me/p4VYHH-5Tk


HANGING OUT with a HORSE

Sharing Time and Space — Communicating Zero Intent

‘Zero Intent’ is being in our horse’s presence without asking him to do anything. As long as he remains polite and we feel safe, we just want to hang out with the horse in the same way that horses hang out with each other.

Building a Connection Involves Relaxing Together

Learning something new and meaningful always requires a lot of mental, physical and emotional energy, especially when first getting started. Sharing of Time and Space becomes something we can do with our horse forever, whenever we can fit in a few minutes of quiet time.

To help with the nuts and bolts of starting this exercise, I’ve created three checklists.

If this is new to you, be sure to go through the detail of all three checklists before you begin.

This clip, #75 HorseGym with Boots, gives an overview of the process.  I’ve edited the footage to show key points, leaving out the actual relaxed ‘chilling out together’ time or it would be like watching paint drying.

There are three older but quite interesting clips in the “Additional Resources” at the end of this post.


Checklist 1:  INTELLECTUAL – Getting your head ready to do this

It’s up to you to decide how much close contact you are comfortable with. As long as you don’t feel intimidated, it’s fine to let a polite horse get up close and personal. Be aware if nudging might turn into nipping, as it does with this horse.

  1. The purpose of Quiet Sharing of Time and Space is to get the person accepted as part of the horse’s in-group. Horses perceive people either as something to be wary of, or as part of their social group.
  2. Wary horses will remain poised on the edge of fear and flight. They feel unsafe around people and they will be unsafe around people.
  3. Horses that see you as part of their in-group will relate to you as they relate to other horses as long as you consistently use body language they understand and remain within the boundaries of their understanding.
  4. The purpose of all training or educating of domestic horses is obviously to enlarge their boundaries of understanding in order to make them more comfortable in their strange life captive to humans.
  5. Quiet Sharing of Time and Space allows you to become more like a horse. It puts you in the zone where time by the clock doesn’t exist, where life follows the natural rhythms of day and night, of seasons, of looking for food, of being constantly aware of danger, of interacting with group members. This can be a big stretch for some people. Other people find it hugely relaxing and life-enhancing.

Bridget is enjoying the winter sun while Boots grazes. How long we spend sitting with our horse depends on what we can fit into our lifestyle. Frequent short dates with our horse are more effective than longer dates.

  1. Quiet Sharing of Time and Space allows time for the horse to accept our relaxed presence in his space.  This can be a huge stretch for some horses who have only had demanding forced interactions with people. Other horses may be all over a person like a rash and need to be shown how to stand back politely.
  2. Be mentally prepared to move your chair if the horse gets too overbearing. There is a fine line between friendly exploration with nose and lips and seeing if you can be pushed around. Moving your chair tells your overbearing horse that you don’t want to be near him right now. It is what horses do. They just move away to give the message that they don’t want to interact right now. In this situation moving away is a neutral action. If he follows you and continues to be overbearing, you’ll use your body language and swishies to ask him to back out of your space as described shortly in items 3 – 11 of Checklist 2).
  3. When you move your chair, position it side-on to the horse, not facing him. We don’t want to stare at the horse or send energy toward him from our front. Horses are extremely sensitive to orientation.
  4. Sit outside the enclosure fence if you feel unsafe inside it.
  5. Realize you will need to experiment with understanding when your horse is investigating you, when he is pushing on you, when you should move your chair or ask him to back off.
  6. It’s by experimenting that you start to get the feeling for the whole exercise. No one can give you a recipe. Every horse-human relationship is different. You’ll begin to feel what is probably the best thing to do next.
  7. Understand the powerful effect of the swishies to expand your bubble and make the horse back off or move away any time you feel intimidated.
  8. Pushing the horse away too strongly at first is better than not being strong enough. If you are not strong enough, you are teaching the horse that he doesn’t have to pay attention. Your signals turn into nagging. If you are too strong at first, you can always get lighter next time.
  9. If the horse is being overbearing, define your personal space strongly enough so he doesn’t want to come back right away. In other words, avoid nagging him back repeatedly. Be sure in your mind show him clearly that you don’t want him around for a while. Make being near you a bit of a privilege. You could lay a rail at a distance you find comfortable and ask him to stay behind it. If you and the horse are clicker-savvy, you can reward the standing away by going to the horse to deliver a click&treat.
  10. Use assertive (not aggressive) body language. Horses higher in the group’s social order use their energy to enlarge their personal space as necessary to re-direct the behavior of others. Self-assertion is different from striking out at the horse in fear or anger. Horses understand the difference clearly as long as the handler is consistent.
  11. It may seem counter-intuitive to ask the horse to stand back in this way, but it is signal language used between horses and adds to creating mutual understanding with a horse who readily moves into a person’s space without invitation. The last section of this post looks at horses who are wary or afraid of approaching people.

Checklist Two:  PHYSICAL – Keeping you both safe and comfortable

Bridget is using her swishies to ask Boots to step back after she got a bit overbearing and intimidating. Note the energy is directed at the horse’s feet.

  1. You need a safe, secure place to hang out together, e.g. a roomy corral or a small paddock. It may be possible to separate a corner of an arena or a big paddock or a nice shady area under a tree by using electric fence tape and standards (not electrified).
  2. Allocate ‘date time’ as frequently as possible. Shorter frequent dates are better than long infrequent dates.
  3. Sort out two swishies — supple willow twigs, bamboo canes or dressage whips about 130 cm long. These let you to enlarge your personal bubble for your own safety. They allow you to disturb the air at the edge of the horse’s bubble if you want to move him away. We usually don’t need to touch the horse with the swishies.
  4. Sadly, statistics indicate that many people get hurt interacting with horses. Despite the best intent in the world, unexpected situations arise. The sheer size, power and split-second reaction rate of horses cause injury or death, with no direct fault to either horse or human. While many more horses are hurt by people than horses hurt people, it’s important to have the risk radar on all the time people and horses are in proximity.
  5. It is not surprising that horses can make us nervous. If we feel even the slightest nervous tension close to our horse, the horse will instantly be aware of our tension and read it as a reason to be wary and aware, just as they read the body language and energy field of another horse.
  6. By knowing that we can, at any time, move the horse out of our personal space, we are able to relax into the moment. If we can relax, the horse has a chance to relax.
  7. Get another person to use the swishies on your bubble. Ask them to start swishing at ground level right and left (not up and down), then move up (still swishing right to left) until they are swishing above your head. Note your physical and emotional reactions.
  8. Use the swishies on other people and get both their physical, emotional and verbal responses.
  9. Horses are so sensitive to the moving air created by this swishing motion that we seldom need to do more than direct it toward their feet and legs.
  10. Always bring up your body into an assertive posture before you activate the swishies. The horse will soon learn to recognize the significance of your posture.
  11. Use as much assertive body and swishy energy as you need to move a pushy horse, but, once he understands, don’t use more than you need to make your point that he must move out of your personal space.
  12. Have carrot strips (or treats of your choice) to reward polite behavior. For a timid horse, keep the treats under your chair to act as a draw card for him to come and see you. For a pushy horse, keep them outside the enclosure in screw top plastic containers, but you can also have them under your chair if you want the horse to push on you so you can teach him to be polite by rewarding him when he stands back and relaxes. If you use clicker training all the time, your normal treat pouch may be fine.
  13. Comfortable chair.
  14. Something to read or write with or just relax into the moment.
  15. Grazing or hay for the horse is optional at this point. Ideally you want your horse feeling well fed before your date. To learn the procedure, it’s easier to be in a grass-less or well-grazed area.
  16. With little or nothing to eat in your ‘dating’ enclosure, he will pay more attention to you, which is what you want at the beginning. It makes it easier to read his intentions and relate to him. Being in a non-grazing area allows you to either entice him with carrots (shy horse) or teach him to stand back politely to receive a treat (pushy horse).
  17. For some sessions, you could put out several piles of hay. If you don’t want hay on an arena surface you could use big tubs, carpets, tarps, sheets or blankets.
  18. Eventually, once the horse is confident and polite, it’s nice to do Sharing of Time and Space in the horse’s usual grazing environment.

Checklist Three:  EMOTIONAL – Getting your heart ready to do this

Boots is spending time with Bridget without needing to push on her. They are able to relax in each other’s company and enjoy the sunny afternoon.

  1. Let go of expectations, goals, presumptions, worry and anxiety.
  2. Just start and know it will improve each time you get out there.
  3. Nothing will be perfect; learning is a messy business.
  4. No one cares except you and your horse (and other people studying this).
  5. Others may laugh at you and think you are peculiar. That’s their privilege.
  6. Others may be really interested. It’s up to you how much (or little) you want to tell them.
  7. Observe what your horse does without staring directly at him.
  8. Observe (without making value judgements) what your horse is actually doing.
  9. For a session or two, you could record exactly what your horse is doing at regular time intervals (e.g., every two minutes or every five minutes). If this interests you, it is a great study, especially if you can also do it when the horse is in a paddock interacting with other horses. You may begin to see interesting patterns.
  10. Appreciate that everything the horse does is FEEDBACK. Feedback can be positive, negative or neutral and all of it has the same value.
  11.  For this exercise of becoming more horse-like, you need to let go of all your horsemanship aims, goals, desires and dreams. I doubt that horses dream positively of people on their backs, driving them forward over, through and into things for no reason the horse can see (other than to get it over with).
  12. You can retrieve your goals when you need them and play with making your goals your horse’s goals. But first you need to understand his goals by observing and listening to his body language.

Bridget is moving her chair because Boots became a bit too overbearing. Moving our chair resembles another horse walking away to gain more personal space. It is an alternative to asking the horse to step back using the swishies.

  1. Be prepared to move your chair if the horse gets overbearing.
  2. When you sit down, put your chair side-on to the horse. Try to not stare directly at him.
  3. Be ready to defend your bubble with your assertive (not aggressive striking out) body language and your swishies as necessary to stay safe. Being with a horse requires that our risk management radar is always on.
  4. Be ready to notice when your pushy horse is standing back politely. Casually stand up, get a treat from where you stashed them and walk over to him to give it to him, then go sit down again. He might follow you right back to your chair and give you another opportunity to ask him to stand back politely.
  5. At first expect only a few seconds of politeness, then gradually ask him to wait longer and longer before you fetch the treat (or click&treat if you are a clicker trainer). Watch for signs that he is relaxing while standing away from you (sighing, licking, chewing, head shaking, head lowering, cocked hind leg, relaxed tail, relaxed ears, soft eyes).

The Shy, Anxious, Flighty, Timid or Suspicious Horse

Sharing time and space while the horse eats hay. This distance may be too close for some horses, so we need to experiment to find the distance at which the horse can eat without anxiety. Gradually, over time, we reduce the distance. At first, we may need to sit on the far side of the fence.

  1. If you feed hay, sit (on a raised surface is safer than sitting on the ground) in the horse’s vicinity – far enough away so he is able to eat his hay without anxiety. Alternatively, if the horse is grazing, take a chair to sit at a distance he finds acceptable.
  2. Once the horse can relax while you share his space, put out a familiar feed dish at a distance that the horse seems to feel comfortable with.
  3. When you notice him glancing at you, walk to his dish and drop in a bit of something he especially likes to eat. Then return to your chair and wait for him to make the discovery in the dish. Watch him without staring at him. If you run out of time, leave the dish and food there for him to eventually find, unless, or course, another horse will gobble it up first.
  4. As the horse becomes more confident over multiple sessions, put the feed dish closer and closer to your chair. Look for signs of relaxation (sighing, licking, chewing, head shaking, head lowering, cocked hind leg, relaxed tail, relaxed ears, soft eyes) that let you know he is feeling okay with the situation.
  5. Success for both of you is when he will come and accept food out of the dish in your lap and eventually out of your hand. It could happen in a day or two or it could take a long series of short, frequent sessions.
  6. If the horse acts fearfully when his nose contacts a hand, you will need to put in extra thin slices such as hands resting on the side of the bucket, one hand in the bucket under the feed, hand full of feed raised up a bit inside the bucket, until eventually the horse becomes confident about eating from your hand.
  7. Going through the slices too fast is more of a problem than going a bit too slow. Stay with each increase in confident behavior for at least three, maybe up to ten repeated mini-sessions before asking for more.

Additional Resources:

Bridget and Smoky Hang Out. https://youtu.be/-Y8OVYInnqY

Reading with Boots. https://youtu.be/dGMz5JxCjnE

Bob and Lorraine Sharing Time & Space. https://youtu.be/XSdI0DfjZLg


Gaining Fluidity without Drilling

Questions:

  1. How do we become truly fluid with a specific task or series of tasks?
  2. How can the handler practice a clear, consistent signal or group of signals?
  3. How can we engage the horse to willingly carrying out tasks confidently at our request?

It’s natural to want to ‘practice’ to get better. It’s especially challenging when it’s the handler that needs/wants the practice in order to improve:

  • Optimum body orientation.
  • Moving easily between ‘no intent’ and ‘intent’ body language.
  • Gesture signal clarity.
  • Consistent voice signal.
  • Timing of the click to truly mark the desired behavior.
  • Prompt treat delivery.

The temptation is to get the horse to ‘do it again’ so we can practice. However, if a horse had carried out a complex task to a good standard, does it make sense to him to have to do it again right away?

Probably not. He may instead think that he didn’t get it right the first time. He may try a different variation in good faith and become confused if it does not result in a click&treat.

We acquire a complex task by teaching it via thin-slicing. The ACQUISITION STAGE is finished when our signals are relatively consistent, and the horse’s response is accurate about 90% of the time. Then we enter the STAGE OF BUILDING FLUIDITY with the task. (There is a link at the end of this post about ‘The Four Stages of Learning’.)

Gaining fluidity, with new thought processes or with new movements, means building up nerve connections. The only way to build up nerve connections is to apply our full attention to repeating the learning process.

Once we have a general idea about what we are learning, we focus our attention on the detail by reviewing the new skills often enough to put them into our long-term mental memory and our muscle memory.

This involves repetition. How we do the repetition can vary.

Not recommended – DRILLING:

Drilling involves repeating something over and over. Good point: it will become habitual. Bad point: it can kill enthusiasm for both that task and learning anything else by drilling.

For example, horses who are routinely made to move endless circles in a round pen, or constantly repeat dressage movements, often form an aversion to going into a round pen or arena.

Recommended – CHERISHING EACH MINI-OBJECTIVE:

To put a behavior into the horse’s long- term memory and have it ‘on signal’ or ‘on cue’ seems to be best done with 1-3 repeats each session over the number of days, weeks, or months that it might take, depending on the complexity of the final objective.

If the horse does a behavior to a pleasing standard the first time we ask, it is often a good idea to wait until the next session or later in the same session before asking for it again.

Helpful – Visualizing:

There is evidence (human studies) to suggest that if we focus on clearly visualizing the muscular movements needed to achieve an outcome, the brain views this as almost as good as actually doing it.

We can’t know whether horses visualize things, but my experience with teaching horses in mini-sessions (1-3 repeats) suggests that they do seem to ‘mull over’ new learning and bring a brighter response the next time we do it.

This is especially noticeable if we can have a short repeat most days. Once the horse shows a good knowledge of a task, a break of 2-3 days between requests often brings even more keenness to have ‘another go’ to earn a special high-value treat.

My horse, Boots, has a distinct little smug expression when she nails something especially well, earning approbation, applause, and a triple treat, jackpot, or special treat like a peppermint.

Helpful – SIMULATION:

To improve our expertise with the task, we can ask another person to stand in for our horse so we can practice developing clear signals and build up our mental and muscle memory for our part of the equation. The horse can only be as smooth in his responses as we are smooth and clear (fluid) with our signals.

If we are lucky enough to have an older, more experienced horse available, we can practice with him so we can be more coherent for a young or new horse.

A Possible Solution

To have a way of steadily improving the fluidity of challenging tasks, I decide on what mini-objectives I want to play with today, before we begin a session.

I pocket the exact number of higher-value treats to cover those objectives; usually one peppermint for a spot-on effort. In addition, I have unshelled peanuts or carrot strips for good attempts. This stops me from being tempted to ‘do it again’ once we have a peppermint-worthy response.

I also carry (horse pellets) for getting organized with resets and for when we do more relaxing things between the main mini-objective for that day.

In a way, it’s an example of getting more by doing less.

The video clip below shows three examples. They are either fun tricks to keep us amused, moving and supple, or they are Horse Agility tasks that are getting rather tricky because we have reached the higher-level ‘walk only’ class. Instead of increasing task difficulty with trot or canter, the tasks get more convoluted.

I’ve chosen relatively complex tasks. To reach the point shown in the video, the prerequisites for each task were taught with thin-slicing over a long time.

Example One

One peppermint for a 180-degree turn and back through a gate. Previously she learned a 360-degree turn by following the feel of a rope, then learned hand and voice signals and willingly did it at liberty during a recall. Some people teach this using a target. Boots also has had lots of practice backing up when I stand behind her, including months of long-reining training.

Example Two

A jackpot of five rapid treats for backing 8 steps in a straight line to end up in a 2.5-foot space between a barrel and me on a mounting block or between two barrels. In one session I did this once in each direction, so she could earn two peppermints. She knows ‘park and wait’ thoroughly, as well as backing up with me behind her. She also has a strong history of backing out of narrow dead-end lanes as part of trailer loading preparation, which is how we started training this task. I simply added the barrel on one side and me on a mounting block on the other side.

Example Three

Boots earns an unshelled peanut for our line-dancing move while I’m on the right side of the horse and another while I’m on her left side. We’ve been doing this for only a few months. She already understood yielding the shoulder to touch or gesture as well as targeting her shoulder to my hand before we started. She had also learned to target her knee to my hand, so I had to be careful about developing a distinctly different hand signal. For a long time, I asked for only one repeat before the click&treat. We are now gradually building in more repeats before the click&treat.

Video Clip:

#163 HorseGym with Boots: Gaining Fluidity without Drilling.

In Addition:

If our first attempt at a task is a bit sketchy, we do a quiet reset and try again, looking for improvement, click&treat for the improvement and usually we don’t repeat it again until later in the session or next day.

Instead, we go on to one of the other things we are working on, or just do activities that are well-established.

It seems that after a few weeks of repeating a complex task once daily, the horse often begins to look forward to doing it, knowing that a higher-value treat follows.

Cherishing each mini-objective set for the day’s session and rewarding it with a higher-value treat keeps alive the fresh desire to do it again tomorrow.

Extra:

If you are really keen, you can watch the whole filmed video series from which I took example two in the clip above, showing Boots backing eight steps to end up between a barrel and me on a mounting block. This is what we did for the first 30 days. During days 31-38 we practiced Boots backing up to stand between two barrels when I stood in front, facing her.

I filmed each of the first 30 training sessions. Over 38 days we trained an average of 5 minute on this task per day, so the total training time was 3 hours, 10 minutes.

She already knew about backing up when I stood behind her, so we were adding more detail to the task. She had to learn to stay straight and to target her withers to my hand.

The clips clearly show how we were both learning stuff each day. I was learning how to be clearer in my teaching and she was figuring out exactly what she had to do to earn the click&treat. Before and after each short session we did other things.

This is the first clip in the series. They all follow in a playlist called Backing Up to a Mounting Block.  Each clip is quite short.

ADDITIONAL RESOURCE:

The Four Stages of Learning: https://wp.me/p4VYHH-5SO

Willing Haltering

Willing Haltering

One horse may learn to sniff his halter (click&treat) and put his head in the halter (click&treat) in less than two minutes.  Another horse may take weeks of short sessions to just approach a halter lying on the ground or hanging on a fence.  An Individual Education Program (IEP) for such a horse might be sliced to include click&treat for each of the slices outlined below.

We stay with each slice until the horse is ho-hum with it.

One main element of teaching like this is that the handler maintains a relaxed attitude and observes the horse closely to see when he’s had enough for one session. The sessions are usually very short – maybe three minutes. Ideally three sets of two-three minutes among other things being done with or around the horse during any one visit.

A second main element is for the handler to keep a relaxed, consistent body position, orientation and way of presenting the halter (hoop) during the teaching/learning stage. Our focus is on what the horse CAN do (click&treat), not on what he can’t do YET.

We start with teaching the most basic prerequisite behavior.  When the horse clearly understands our request for that behavior (which could take a couple of minutes or up to many, many sessions), we add in the next ‘slice’ of behavior that will lead to our ultimate goal.

We can and should move on when:

  • The way we give the signal is consistent and clear (e.g., put our right arm over his neck and hold the halter open so the horse can put his nose into it).
  • The horse presents the behavior we want 99% of the time (when we hold the halter open, he puts his nose into it).
  • The horse does not add in any unwanted behavior (e.g. running away first, chewing on the halter).

If the situation becomes confused, it is usually because we have not cut the whole task into thin enough slices. Although we have an ultimate goal, the ultimate goal is not where we put our attention. Our attention is directed at each ‘slice’ or mini-skill.

Mastering these one by one and linking them together, as the horse is ready, will seamlessly bring us to our ultimate goal – the whole task that we thin-sliced at the beginning is performed smoothly with one click&treat at the end.

When confusion arises (in either the horse or the handler or both), it is essential to return to previous work until we find the ‘slice’ at which both the horse and the handler can regain their confidence. Then we simply work forward again from that point. This is Mastery Learning. Each small part is mastered before moving on to the next part.

By slicing the overall goal small enough, we can gradually create a positive association with a halter.

We want to teach the horse to be proactive about putting his nose into the halter/hoop. Something like a small hula hoop is easier to hold into position to teach the idea of dropping the nose into the hoop/halter.

#168 HorseGym with Boots illustrates an early lesson using a hoop to introduce the idea of something moving around the head, across the eyes and over the ears.

#65 HorseGym with Boots illustrates starting with a hoop and moving on to a halter.  In this clip I cut out the chewing and waiting time between trials to make the clip shorter, but didn’t really like the result as much as if I had left them all in, which would give a better overview of the pace of the session.

It’s easier to hold a small hoop when we first teach the horse to drop his head into an opening. This will eventually be the nose-piece of a halter. I also have to  build confidence about having my right arm lying across the horse’s neck.

SLICES

If the horse is wary about the look of a halter, for whatever reason, use a small hula hoop or similar made with a piece of hose.

Stay with each slice of the task until your body language and orientation are consistent and the horse is ho-hum with what you are doing.

  1. The horse looks toward the halter/hoop.
  2. The horse steps even the tiniest step toward the halter/hoop (Note that for very anxious horses, we can provide encouragement by putting the halter/hoop beside a familiar dish of feed or a pile of hay. In other words, we use complementary motivating environmental signals to help initiate a response that we can click&treat).
  3. He confidently touches his nose to the halter/hoop.
  4. As 3. when the halter/hoop is in different places.
  5. As 3. when the halter/hoop is in a person’s hand.
  6. Confidence when the halter/hoop in the hand is moved.
  7. Confidence with allowing himself to be touched on the neck with the halter/hoop.
  8. Confident with the halter/hoop touching his face.
  9. Confident with the handler putting and resting one arm up over his neck.

Eventually we can click&treat the following slices.

  1. When the horse moves his head toward the hoop.
  2. When the horse moves his head to the left and drops his nose into the hoop.
  3. When we can lift the hoop up toward his eyes and take it away again.
  4. When we can lift the hoop up over his eyes and take it away again.
  5. When we can lift the hoop past his ears and take it away again.
  6. When we can lift the hoop over his ears and lay it on his neck and take it away again.
  7. When we can do the steps above with a halter rather than a hoop.
  8. When we can slip on the halter and lay the halter strap behind his ears and take it away again.
  9. When we can hold the halter strap in position for longer.
  10. When we can do up the halter strap and undo it again and take the halter off.
  11. When we can put on the halter and leave it on for a short time.
  12. When we can put the halter on and take it off two or three times in a row.


Step Aerobics


INTRODUCTION:

This exercise developed from something my horse offered when I was in the tack room where there is a wooden platform in front of the door. While I was in the tack room getting organized, Boots would step up onto the wooden platform to see what I was doing.

I recognized the beneficial gymnastic effect when I asked her to back off the platform and step up again in a rhythmic pattern. It became one of her favorite things to do. Interestingly, she never seems to have enough of it, and I have to be the one to suggest that we should do something else.

This Step Aerobics task has become our go-too exercise when time is limited but we want a bit of a warm-up before cleaning her feet or doing other tasks. When it’s too wet or hot or windy for much else, it’s a fun way to build some movement into our time together.

Step Aerobics, just like the human version, is an exercise that requires whole-body movement and flexion of all the joints, so it is an ideal task to do often in short bursts.

Items with an asterisk (*) are training plans covered in detail in my book, Precision Horse Training with Positive Reinforcement: 12 Thin-Sliced Groundwork Plans, available as e-book or paperback via Amazon.

PREREQUISITES:

  • Horse and handler are clicker savvy.
  • Horse has a strong history of positive reinforcement for placing his front feet on a mat, so he is keen to stand on a mat whenever we put one out. #124 HorseGym with Boots: Free-Shaping Mat Targets* illustrates: https://youtu.be/xMaZWt5gK2o
  • Handler has developed his/her ‘zero intent’ and ‘intent’ body language. #153 HorseGym with Boots: Zero Intent and Intent* illustrates: https://youtu.be/3ATsdPvld4Q
  • The ‘Finesse Back-Up’ exercise is ideal to teach a reliable back-up while we are facing the horse. The description and two clips below show how we evolved it.
  1. Working across a barrier, using a hand-held target for stepping forward, and using body language, breathing, intent and voice signals for backing up.
  2. Adding a halter and rope signal to the back-up so we can use it anywhere. Once the horse knows the task, the rope pressure signal usually isn’t needed because the horse responds to the breathing, body language, voice and distinct orientation signals.
  3. Once voice, body language, intent and orientation signals are well established, we have a reliable back up at liberty while we are facing the horse.
  4. To the signals in 3 above, we add a clear ‘raised fingers’ gesture signal to the back-up while we are facing the horse, allowing us to communicate clearly from further away.

Back-Up Part 1*:  https://youtu.be/6YYwoGgd_0Y

Back-Up Part 2*:  https://youtu.be/safxxu90lkA

  • The other part of Step Aerobics is a recall signal. Teaching and consolidating a recall signal are outlined in these video clips.

Recall Clip 1: https://youtu.be/XuBo07q8g24

Recall Clip 2: https://youtu.be/5BQCB2Fe5RE

My ‘recall’ gesture signal in this context is a movement where I shrink backwards and drop my energy and make a circle with my arms.

ENVIRONMENT & MATERIALS:

  • A work area where the horse is relaxed and confident.
  • Ideally, the horse can see his buddies, but they can’t interfere.
  • The horse is not hungry.
  • Halter and lead (as minimal pressure as possible on the lead, but enough to be effective) and a safe, enclosed area for working at liberty.
  • Materials to build a simple lane (one side can be a safe fence) and to block off one end of it.
  • Different mats familiar to the horse.
  • A pedestal or a step-up situation safe for the horse. A step-up trailer is an option, or setting up the trailer ramp as a step.

AIM:

Boots has taken herself to stand on a tire-pedestal while I organize the camera.

Horse steps up onto a pedestal (or step), then steps backwards down again, in a rhythmic pattern repeated several times.

SLICES:

A simple lane made with two rails, blocked off at one end with two tall cones, and a mat in the lane, demonstrating Slice 4 of the training plan.

Video Clip: #159 HorseGym with Boots: STEP AEROBICS

  1. Set up a simple lane. My lane in the video is two ground rails. You may want to begin with a higher-sided lane to make the behavior option we want as clear as possible for the horse. One side can be a safe fence.
  2. Ensure that the horse can walk right through the lane confidently; click&treat each time he calmly passes right through the lane. Handler walks on the outside of the lane. Walk a loop with the horse to repeat.
  3. Set a target mat near the end of the lane. Walk the horse into the lane and ask him to halt with his feet on the mat; click&treat. Walk him out of the lane forward, making a circuit to repeat targeting the mat.
  4. When 3 is done reliably with confidence, block off the lane at the end nearest the mat. Ask the horse to walk into the lane and target the mat; click&treat. Position yourself facing the horse, a bit to one side.
  5. Review the ‘Finesse Back-Up procedure as outline in the prerequisites. Click&treat for one or two steps back on request.
  6. When you no longer need to run your hand up the rope because the horse responds to your body language, inward breath, intent, and voice signals, begin holding your hands up higher until eventually your gesture signal morphs into your fingers held up beside your ears waggling to suggest backward movement; click&treat and celebrate hugely when he does (triple treat or jackpot or special treat). Keep a non-influencing loop in the rope or lay the rope over the horse’s neck out of the way.
  7. We want the raised fingers to become a main ‘back up please’ gesture. But at this point we still emphasize our inward breath, posture expressing intent and voice along with the gesture.
  8. If the horse comes forward to target the mat again right away, accept this with a click&treat the first time, but ideally, we want him to wait to be asked to move forward. You may, at first, need to invite him forward again very quickly after delivering the treat for backing up. If you have taught him a ‘wait’ signal, you can use it here. The October 2017 Challenge: Park and Wait* illustrates creating duration with the ‘wait’;
  9. Use your recall signal to ask the horse to come forward onto the mat again; click&treat. My recall signal as shown in the clips is a movement where I shrink backwards and drop my energy and make a circle with my arms. I learned it from Sharon Wilsie’s book, HorseSpeak.
  10. Alternate the back-up (click&treat) with the recall (click&treat). The aim is to smoothly get a series of these one after the other.
  11. Eventually, when 10 is really solid, you can ask for a back-up and a recall before the click&treat. Or ask for a recall followed by a back-up before the click&treat, moving toward the horse to deliver the treat.
  12. Once 10 is smooth, practice with a barrier on only one side of the horse.
  13. When 12 is smooth, practice with no barriers.
  14. When 13 is smooth, practice with a variety of mats and in a variety of different places.
  15. When 14 is smooth, introduce a pedestal or step. If the ‘step up’ idea is new to your horse, it can be helpful if you place a familiar mat on the pedestal the first time you ask.
  16. For some horses, it may help to begin with a relatively low ‘step up’ situation, such as a plank or thick board before asking for a higher step.
  17. At first be careful about asking for too many repeats. For some horses it will be an unaccustomed way of using their joints. Three repeats at one time is plenty to start with. Doing a little bit often is ideal. Once you are doing it at liberty the horse will probably let you know if he’s done enough.

GENERALIZATIONS:

We can use the back or sides of a trailer ramps as our ‘step’. I have used a solid piece of timber under the end of the ramp to create a step-up situation.

  • If you’re able to move your pedestal, move it to different locations. I have three ‘tire-pedestals’ set up in different parts of our training areas.
  • A step-up trailer is another option.
  • If you have a trailer with a ramp, and there are no jagged bits on the sides of the ramp, use the sides of the ramp as a ‘step-up’ spot.
  • If you ride or walk with your horse out in the countryside, look for spots that create a natural safe step. I’ve used our concrete front door step in the past.
  • Some people fill different-sized tires giving different heights for a step or build a series of pedestals.
  • If your pedestal is large enough, or you have a spot like the one in the photo below, ask the whole horse to step up and step down again.

I’ve asked Boots to step up with all four feet, then step back down again. The wooden lip and uneven ground make it more challenging.

I look forward to hearing and seeing  how you get on if you take up this challenge.

Seeking the Horse’s Consent Signals

Photo: Slight turn of her head toward me is consent to lift her lip.

INTRODUCTION:

Most of horse training is to teach the horse our signals that he needs to know to keep ourselves and the horse as safe as possible in different situations. If we check human health insurance claims, a fair number are horse-related.

New Zealand, with a population in 2017 of 4.79 million people saw 7873 people with horse-related injuries. Of these, 2852 fell off a horse. Horse accident insurance claims for 2017 came to $9,669,964.00.

No one knows how many horses have a short life because they don’t fit in with the demands of their constrained domestic existence which is, in many cases, completely foreign to a horse’s natural lifestyle.

The health insurance figures above suggest that there is room for improvement in human-horse and horse-human communication.

Fortunately, more and more people are becoming aware that the best training fosters two-way communication between person and horse.

Writers such as Sharon Wilsie (HorseSpeak) and Rachaël Draasima (Language Signs & Calming Signals of Horses) and my book, Conversations with Horses (see my Books section), are helping horse people to appreciate just how much information horses impart to us with their body language.

A horse’s world view is dictated by the way he senses the environment. His vision, hearing, smell and sense of proximity are different and mostly superior to ours. He has evolved adaptations that allow him to survive in open grassland rife with predators and profound seasonal changes.

Humans have a different history with different selection pressures. We sense our environment differently. With us, verbal language has, on the surface, supplanted body language.

Horses use distinct body language. Sadly, many people are blind to this language or choose to ignore it. The magic is that once we begin to observe and pay attention to what horses are saying, we start to pick up the nuances and get better at tailoring our training to the sensitivities of individual horses.

While there are differences, there are also similarities. Both humans and horses are gregarious*. They live in groups with extensive social interaction between group members. Living in a group means that there is always a balance between competition for the same resources and the need to maintain peaceful relations.

When resources are plentiful, there is minimum competition and maximum peacefulness. When resources are scarce, peacefulness is interrupted by competition as the more assertive group members jockey for the best resources.

Although people don’t consider body language as important as spoken language, we still display it clearly. We also react to it subconsciously. Between spouses and close friends, it speaks volumes. People like scam artists, who prey on other people’s susceptibilities, are astute readers of body language, using it to single out their victims. Horses can definitely read our body language, despite the species barrier.

As well as reading each other’s body language, horses read the body language of their predators. They know when they are in hunting mode, just passing by, or resting in the vicinity.

Horses are also aware that their own body language sends messages to predators, who look for signs of weakness or lameness. That is why it is often so hard to know if our horse is in pain. They will hide pain and infirmity as much as they possibly can.

What are ‘Okay to Repeat’ or ‘Okay to Proceed’ Signals?

‘Okay Signals’ are initiated by the horse to let us know that they feel okay for us to repeat what we are doing or to carry on with a procedure that involves a variety of things.

When I’m walking on the road with Boots, I’ve become aware of her need to stop and assess things such as cows moving in the distance, a vehicle in an unusual place or something that has changed in the environment since we last passed by.

If I stop with her and wait, paying attention to what has caught her attention, we are ‘on the same page’. I breathe out loudly to show that I’m okay with this thing that has caught our attention and relax into ‘zero intent*’. Eventually Boots will lower her head and bring her attention back to me, which tells me that she has satisfied her need to notice and is ready to walk on. This is the most basic ‘okay’ signal for us to watch out for.

Once we learn to pause with zero intent* (items with an asterisk are defined on the GLOSSARY page – link at top of page)  long enough to allow the horse to communicate with us, we can discover ways that individual horses will let us know when they are ready to repeat whatever we are asking, so they can earn another click&treat.

I think many good trainers are already unconsciously aware of these signals, without having given the concept a name. I think that isolating and focusing on this type of horse-initiated signal can open a new vista of training.

It is not hard to recognize horses communicating loudly when they don’t want to do something. It is not always easy, however, to know whether not wanting to do something stems from:

  • Anxiety or fear.
  • Pain.
  • The horse not understanding what we would like him to do.
  • Environmental distractions taking precedence over trainer requests.

We have to observe carefully if we want to learn to recognize horses communicating when they are not shouting loudly with their body language. Unless we train ourselves to understand the finer points of their signaling, we miss most of what they are trying to tell us.

Most horse communication is visual. Horses in an established group seem harmonious because a flick of an ear, the tilt of the neck, a single swish of the tail, a certain posture of the body, are all highly meaningful to another horse.

People are usually, understandably, so focused on their own agenda that they miss most of these signals. But we can do better. Since we remove horses from their natural life and make them captive to us, the least we can do is try hard to learn their language and use it to aid two-way communication.

The concept of waiting for a horse to give permission or consent for us to carry on with a task may be a novel idea for some people.

As mentioned earlier, good trainers probably do this subconsciously. They continuously observe the horse’s body language to gauge whether the horse is comfortable about proceeding with the training or repeating a specific task. Is it best to pause for a while, do something easy or finish for the day?

Our fondest personal memories are often of things we have successfully initiated and controlled. In the same way, horses respond positively to having control and ownership of what is going to happen next in their lives.

In other words, a sense of control is as reinforcing to horses as it is to people. We steal a great deal of their personal control when we bring them into captivity.

When it becomes the horse’s idea to initiate their handler’s next action, the horse begins to share ‘ownership’ of the behavior we are working with. Such a feeling of ownership alleviates the anxiety and tension that arise if the horse is constrained and forced to accept what is being done to him.

Much of what we do with a horse requires him to stand still. Standing still when unusual things are happening is not what evolution found useful for horse survival. lt is very much a skill that must be taught and developed.

For many activities, we’ll still have to read the horse’s overall body language to know if he is okay to proceed with what we are doing. But for some specific tasks, we can incorporate an ‘okay to repeat’ or an ‘okay to proceed’ signal from the horse. There are several ways of doing this.

‘Okay to Repeat’ Using Nose Targets

If a horse has a strong history of positive reinforcement* for staying parked in a relaxed manner with his nose on or near a nose target, we can use his willingness to stay, and touch the target again, as his ‘okay to repeat’ signal.

PREREQUISITES:

  • Horse and handler are clicker savvy.
  • Horse is not hungry.
  • Horse has a strong history of positive reinforcement for touching a target .
  • Handler is aware of moving in and out of his/her ‘zero intent’ posture.

ENVIRONMENT & MATERIALS:

  • A work area where the horse is relaxed and confident.
  • Ideally, the horse can see his buddies, but they can’t interfere.
  • A familiar target tied or set at the height of the horse’s nose.
  • Start with halter and lead on, with the lead draped over the horse’s neck or back so it is easy to reach if the horse chooses to walk away. If he moves away, quietly walk a circuit that brings you both back to the target; click&treat if the horse touches his nose to the target, then finish the session.
  • If he chooses not to touch the target when you return to it, go back to a few sessions with a high rate of reinforcement for touching a series of targets hung around your training area, before returning to the task in this chapter.
  • You can also have the horse at liberty and if he chooses to walk away, the session is automatically finished.
  • Keep each session very short. Ideally always stop before the horse shows any desire to walk away, even if it means you only do one repeat. Mini-sessions where the horse is continually successful at earning his click&treat make for rapid learning and a willingness to ‘do it again’ next time.
  • You are also showing the horse that it is okay to say, “I don’t feel like doing that right now,” without any value judgement on his behavior. You are giving him the choice about whether he wants to keep on working for clicks&treats, or he’d rather go away and do his own thing.

AIMS:

  1. Horse realizes that the handler will stay at ‘zero intent’ unless he touches his nose to the target.
  2. Handler waits patiently for the horse to touch the target as a sign that the horse is ‘okay to repeat’ the task.
  3. Horse realizes that he can move away if he doesn’t feel like playing.
  4. Handler realizes that there are times when it is okay to let the horse have a ‘say’ in what will happen next.

VIDEO CLIP:

#156 HorseGym with Boots: OKAY TO REPEAT SIGNALS.

If the horse is wary about the object, walk away backwards (or have another person walk away backwards holding it while you follow with the horse at the horse’s pace) and have the horse follow; click&treat any sign of willingness to approach the object more closely until he is able to put his nose on it to earn a click&treat.

Horses tend to follow things moving away from them and move away from things coming toward them. Yet most horse handlers expect a horse to stand still while they approach with an unusual object.

If we allow the horse the time to make up his own mind that an object is harmless, he will accept it as so. Horses naturally use approach and retreat whenever they come across something new. Life is much easier if we use their world view to facilitate our training, rather than restrict their movement and force them to accept something.

SLICES:

  1. Horse touches nose to target: click&treat in a position that has the horse take his nose slightly away from the nose target.
  2. Handler allows horse to investigate any gear he is about to use (brush, spray bottle, clippers, halter, cover, saddle blanket, paste worming tube, saddle or harness, bridle): click&treat, maybe several times, depending on how comfortable the horse is with the item already.
  3. Handler lifts arm with brush (or whatever) toward the horse keeping it at a distance that maintains the horse’s relative relaxation (under threshold): click&treat.
  4. Horse either leaves after the treat or touches the nose target again.
  5. If the horse touches the target again, the handler repeats approaching the horse with the brush, careful to click&treat while the horse is still under threshold, i.e. he still looks confident about what is going on.
  6. After each click&treat, the handler resumes the ‘zero intent’ position and waits for the horse to either touch the nose target again or take the option to leave.
  7. Ideally the handler will stop each mini-session before the horse feels the need to walk away. If the horse leaves, it is also the end of that mini-session. The handler now has useful feedback. He or she asked for more than the horse could offer comfortably at that time.

Done quietly and carefully with many mini-sessions that don’t push the horse beyond his comfort zone, the horse can usually relax into the new game which consists of the new things he has to allow if he wants to elicit more treats from the environment (his handler).

The horse’s comfort zone will gradually expand to include the new task we are doing with him. At that point, the acquisition stage is over, and we start to focus on fluidity, generalization and maintenance.

This is a video clip from a while ago which demonstrates the same idea. #4 HorseGym with Boots: Parking at a Nose Target.

‘Okay to Proceed’ with Mat Foot Targets

Another way to ensure consent or ‘permission to proceed’ is to ask the horse to park his feet on a mat. The horse’s willingness to stay parked lets us know that he is okay for us to proceed.

‘Okay to Proceed’ is a little different from ‘Okay to Repeat’. I use it for foot care which is a series of tasks rather than a repetition of the same task. Changing bandages and dealing with riding boots on and off, blankets on and off are also more in the line of ‘procedures’.

A procedure like putting on riding or driving tack could also be thought of in the same way, although I found a nose target also worked well for tacking up.

Once we have taught standing on a mat with some duration, we can use the horse’s willingness to stay there as a sign that he is probably okay for us to proceed with whatever we are doing.

VIDEO CLIP:

#157 HorseGym with Boots: ‘OKAY TO PROCEED’ WITH A MAT

If we use a mat with frequent short sessions for teaching vet procedures or foot care, the horse will soon realize that the mat coming out means clicks&treats are on the way.

If the horse feels the need to move off the mat it is critical that we don’t restrict or punish him in any way. We quietly walk a circuit together to return to the mat and halt on it: click&treat for the halt on the mat. We must ensure that the mat always remains a desirable place in the horse’s mind.

After returning to the mat, we can return to earlier slices with the task we are working on to find where the horse can still be continually successful, then end on a good note. Or we can use the mat to do something easy that the horse already knows to re-establish the mat as a good place to be.

Ideally, the handler will be able to read the horse’s increasing body tension before the horse moves off the mat and take one of the two options above or initiate a relaxation break before resuming the training.

Horse Specific ‘Okay’ Body Language Signals

To explore this concept with your horse, choose a simple task that the horse will probably find pleasant. Once the horse buys into the concept of giving us an ‘okay to repeat’ signal, we can expand to other physical care and vet procedures.

If you can choose one that is new to the horse it may be easier because it won’t have the baggage of past experiences. But we can also add this new dimension to a task the horse already knows.

Once I became more consciously aware of these signals, I realized that Boots had been using them in a variety of contexts and I had been taking note of them. Once I began observing more closely, I soon realized that she had several signals for letting me know when it was ‘okay to repeat’.

VIDEO CLIPS:

#154 HorseGym with Boots OKAY to REPEAT shows Boots’ signal for rubbing the inside of her ear, which we had never done purposefully before. It also has an interlude of belly-scratching with a new tool.

#155 HorseGym with Boots OKAY to REPEAT for TOOTH INSPECTION:  shows Boots’ signals for allowing me to lift her lips to inspect her teeth. This is a very early session.

Some other possibilities are:

  • Targeting the eye to a cloth.
  • Targeting the mouth to a paste worming tube.
  • Simulating injections.
  • Comfort with spray bottles.
  • Comfort with scissors or clippers.
  • Teaching specific tasks within a chained procedure such as comfort with saddle pad put on and removed, saddle put on and removed, girth tightened and loosened, handler putting foot in stirrup, handler leaning across horse, and so on.

PREREQUISITES:

  • Horse and handler are clicker savvy.

ENVIRONMENT & MATERIALS:

  • A work area where the horse is relaxed and confident.
  • The horse is not hungry.
  • Ideally, the horse can see his buddies, but they can’t interfere.
  • Horse at liberty in a safe area. The horse needs to be free to move away if he no longer wants to take part.

AIMS:

  1. Handler is consistent with returning to ‘zero intent’ to wait for the horse to give his ‘okay to repeat’ signal.
  2. Horse learns that nothing will happen until he initiates it with his ‘okay to repeat’ signal.

SLICES:

The procedure is basically the same with any task.

We have to be mindful that some horses have never been given a say in what is going to happen once they are haltered or confined in a small space, so it could take a long time for them to try something brand new to their experience.

If you have played with your horse at liberty in the past, and allowed expression of opinion, it may all happen quickly.

  1. Gently indicate to the horse what you would like to do; click&treat. Maybe repeat a couple of times to establish the task.
  2. Then remove all signal pressure and take up your ‘zero intent’ position.
  3. Observe the horse closely but don’t stare at him with intent. Keep your body language totally relaxed. It may take a while for the horse to make a movement that seems significant.
  4. When the horse makes a movement that you think is an expression of his willingness for you to repeat the task, quietly activate the task with short duration, then click&treat. When I did this with ear-rubbing, I initially rubbed only once or twice before the click&treat. Eventually I began rubbing a bit longer before the click&treat.
  5. After the treat is delivered, return to ‘zero intent’ mode and wait for the horse to repeat his signal (he may have, or develop, a variety of these signals, as Boots shows in the video clips).
  6. As with most training, doing a little bit (three minutes or 20 treats) often is the key to rapid progress. It gives the horse time to process what has happened and often he is keen to repeat next time you set up the situation.

It could be that ear-rubbing is intrinsically pleasant for a horse already relaxed in human company. Even if it is, I want the horse to eventually relate offering of an ‘okay to repeat’ signal to any task that will earn a click&treat.

Tasks like eye care and checking teeth and allowing skin pinching and toothpick pricking to prepare for inoculations will not be intrinsically pleasant.

All horses are different, both innately and due to their life experiences. Therefore, each horse and handler will together create a unique ‘okay to repeat’ signal language that works for them.

The video clips are best at demonstrating the flow of the training. So far, Boots’ body language ‘okay to repeat’ signals include:

  • bringing her attention back to me after scanning the environment
  • dropping her head
  • momentarily turning her head toward me
  • her smile, and offering to place her nose between my hands for tooth inspection.

ADDITIONAL RESOURCES AVAILABLE:

Blogs:

Mats: Parking or Stationing and Much More: https://wp.me/p4VYHH-5S9
‘Zero Intent’ and ‘Intent’: https://wp.me/p4VYHH-5RO

Training with a Marker Signal and Positive Reinforcement

Click & Scritch Bridget 01-08-2016_082102

Photo: Using targets as ‘destinations’ makes it much easier to give meaning to our request in a way that the horse easily understands. Reaching the target, whether it is putting the front feet on a mat or touching the nose on a stationary object, earns the horse a click&treat. We can then move between targets to encourage the horse to come with us willingly because there is always something for him to look forward to – the next click&treat when we reach the next destination.

Training with a Marker Signal and Positive Reinforcement

Training with the click&treat dynamic is a skill worth learning well, but it is not the only thing we have to learn well.

Some people handle/condition a horse’s behavior in a way that encourages the horse to always look to the handler – a form of ‘learned helplessness’.  The horse is asked to subjugate his own observations, feelings and natural responses in favor of what the handler requires him to do.

Other people set themselves the interesting challenge of doing everything with their horses using only positive reinforcement training (often called ‘clicker training’).  They pair each desired response with a marker signal (click) followed immediately by a food treat.  They feel that this is the only way to keep a horse’s ‘sparkle’ alive.

Somewhere between these two extremes, fall the people who teach many things with the click&treat dynamic, but they also understand, respect, learn and use universal horse language.  In their view, any horse education system that fails to acknowledge group social order, different horse character types and how horses succinctly communicate with body language, will have limited success.

From our human standpoint, we could define ‘success‘ as having a horse that is safe and fun to be with and that we can take places for exercise to maintain blood circulation health, overall fitness and mental stimulation.

Success could mean that the horse:

  • greets us willingly
  • enters our space politely
  • offers feet confidently for foot care
  • accepts gear on and off comfortably
  • leads safely and willingly in a variety of positions
  • responds equally well to upward and downward transition requests
  • confidently accepts touch and grooming all over its body
  • confidently accepts ropes draped all over its body and legs
  • willingly, at request, moves away from a food dish, pile of hay or grazing spot
  • not unduly spooked by dragging ropes, wheelbarrows, flapping things, balls, bicycles, vehicles
  • able to stay ‘parked’ quietly or stand and ‘wait’ for a further signal
  • confident moving through gates/narrow spaces/lanes and over water/unusual surfaces at our request
  • approaches new/spooky things as long as we give him the approach & retreat time to convince himself it is harmless
  • at ease with any body extensions the handler might use to clarify or accentuate signals

Once we have all that, we can endlessly refine the basics and teach new patterns and tricks.

Teaching with the click&treat dynamic is hugely helpful to horse handlers for two main reasons:

  1. Encourages accurate observation of what the horse is doing in order to pick the ‘clickable moments‘, which are also the moments that signal/cue pressure is released.  Therefore becoming a good clicker trainer also hones the skill of becoming an excellent trainer with simple ‘release reinforcement’.
  2. It teaches ‘thin-slicing’ — the cutting of a large task into its smallest ‘clickable’ components so that we can get the horse confident with each tiny ‘slice’.  Then we can chain the slices together until the whole task is achieved.  This way of teaching/learning, often called ‘mastery learning‘ keeps the horse successful all the way through the process.  A clicker-savvy horse knows that if the click&treat is withheld, they need to try something else.

Developing the two skills above will greatly increase the ‘feel‘ of the handler.  That ‘feel‘ will translate to the times when a good choice is use of ‘release reinforcement’ by itself.  Feeling what the horse is doing — understanding what his body language is saying and knowing how to respond to that with our feel and body language, is the key to training with signal pressure and release of signal pressure (‘release reinforcement’).

What horses gain from positive reinforcement  Horses trained with the click&treat dynamic discover that they can have a voice.  Once they learn that a certain behavior will earn them a click&treat, they can become pro-active in offering that behavior.  For many horses this is huge because in the past things have only been done to them or demanded of them — they could only be re-active.

When a task is thin-sliced so they understand each part of the training process, the horse’s learning can progress in leaps and bounds.  We’d all rather work for a boss who praises what he likes rather than one who only criticizes what he doesn’t like.

Horses are not blank pages on which we write what we want.  They already have a perfectly good language.  It seems logical to learn it and use it as best as we can with our non horse-shaped bodies.  Horses are very generous with their interpretation of what we mean.  No doubt we have a very funny accent, but unless they have been traumatized by humans, they are happy to learn new things and accept us as part of their personal herd.

Social Group  Once the horse accepts us as part of her personal ‘ in-group’, we have a position in the group social order.  The two things go together.  We can’t form a bond of understanding with a horse unless he or she lets us into their social group.  Once we are part of the social group, we have a ranking within it.  If the horse can move our feet at will, she or he stands above us in the social order.  If we can ask move the horse’s feet, we rank above him her in the social grouping recognized by the horse.  When people don’t understand this dynamic, or chose to deny/ignore it, things might not go well.

Horse Character Types  Like us, horses can be innately anxious or innately confident and imaginative.  They come as extroverts who like to/need to move their feet a lot and they come as introverts who prefer the quiet life.  A careful look at how our horse perceives and reacts to things can give us insight into how we can best proceed with an individualized training program.  What works perfectly with one horse can be quite problematic with another.

Universal Horse Language  Horses have a complex communication system using their body language and a few vocalizations. They ‘message’ other horses with body tension, body orientation, neck position/movement, ear position, tail activity, posturing, striking out, kicking, biting, nibbling.   How they use each of these depends on their intent at the time.  An ‘alarm snort’ will instantly have the whole herd on alert. Quietly turning the head away as another horse (or a person) approaches is an appeasement signal.

With the aid of body extensions which make us as tall and long as a horse, and simulate a horse’s expressive tail, we can more clearly emulating universal horse language.  If we are good at it and use our movements consistently, any horse will understand our intent without us ever needing to touch the horse or use a rope.  We can establish our position in the social order by ensuring we can move the horse’s feet in a variety of situations while the horse is at liberty to move away, as it would be in a natural herd situation.

Once we have established our social position, we maintain it by the way we behave.  Anxious type horses may rarely challenge our position.  Confident, imaginative type horses may well challenge our position regularly.  In a natural herd situation, they have the drive and sparkle to work their way up the group’s social order.

With an understanding of, horse character typesequine body language,  and how the social order works, we can flow with the information the horse gives us via his behavior and body language.  Skills of observation, timing and ‘feel’ allow us to decide how we will use clicker training to make his life in his strange human-dominated world a little bit more interesting and understandable.

With equine clicker training, we experiment to find out what the horse can already do, then build his skills in a way that has him being continually successful.

The link below contains a bit more information about horse character types.

PDF Ch 5 READING HORSES