This task continues the attention we gave the ‘halt’ and ‘walk on’. We also add a ‘back up’ and pay a bit more attention to ‘wait time’.
There are five different tasks, but since we do them in the horse’s left and right eyes, they are actually ten tasks. Then we consolidate the tasks by doing them in two directions, so we have a total of 20 tasks, or 10 tasks which each have two variations.
Once all the tasks are going smoothly, we can mix them up in any order, which teaches us to be crystal clear for the horse and has the horse watch us carefully to pick up our next signal.
When confusion arises, it is because we are not clear enough. Horses working for a food reward are usually super-observant of all our body language as well as carefully taught voice and gesture signals.
When we use our less dominant side, it’s common for our body language and gesture signals to be less clear until we become more conscious of what we are doing. If you haven’t usually done much on your horse’s right side, there will be a lot of learning going on.
PREREQUISITES:
Horse leads smoothly beside the handler’s shoulder. (See Additional Resource 1 at the end of the post.)
Handler and horse agree on clear ‘walk on’ and ‘halt’ signals. (See Additional Resource 2 at the end of the post.)
Horse and handler agree on a ‘back up’ signal. (See Additional Resources 3 & 4 at the end of the post.)
ENVIRONMENT & MATERIALS:
A work area where the horse is relaxed and confident.
Horse is not hungry.
Ideally, the horse can see his buddies, but they can’t interfere.
Halter and lead or liberty.
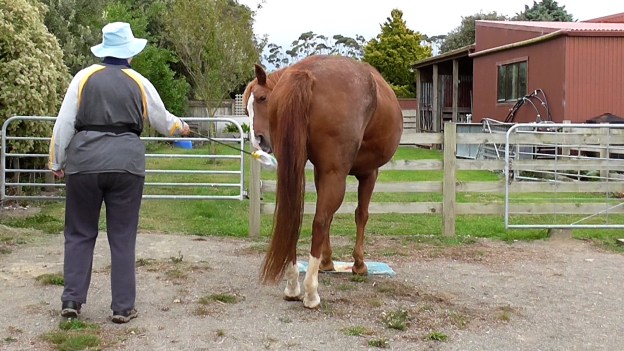
A rail. I use a round rail in the clip, but using a half-round rail that doesn’t roll is ideal to teach this. Or we can put blocks under a round rail. In the clip, I put my foot on it to stop it rolling.
One or two of these tasks during one segment of a training session is plenty. If it’s all done quietly with no fuss or drilling, the horse will think on it and remember what behaviors will earn a click&treat. It works best to do a little bit often.
AIMS:
Handler works on smooth ‘walk on’, ‘halt’ and ‘back up’ signals using a single rail as a focal point.
Handler builds small pauses into the work to encourage the horse to relax while waiting for the next set of signals.
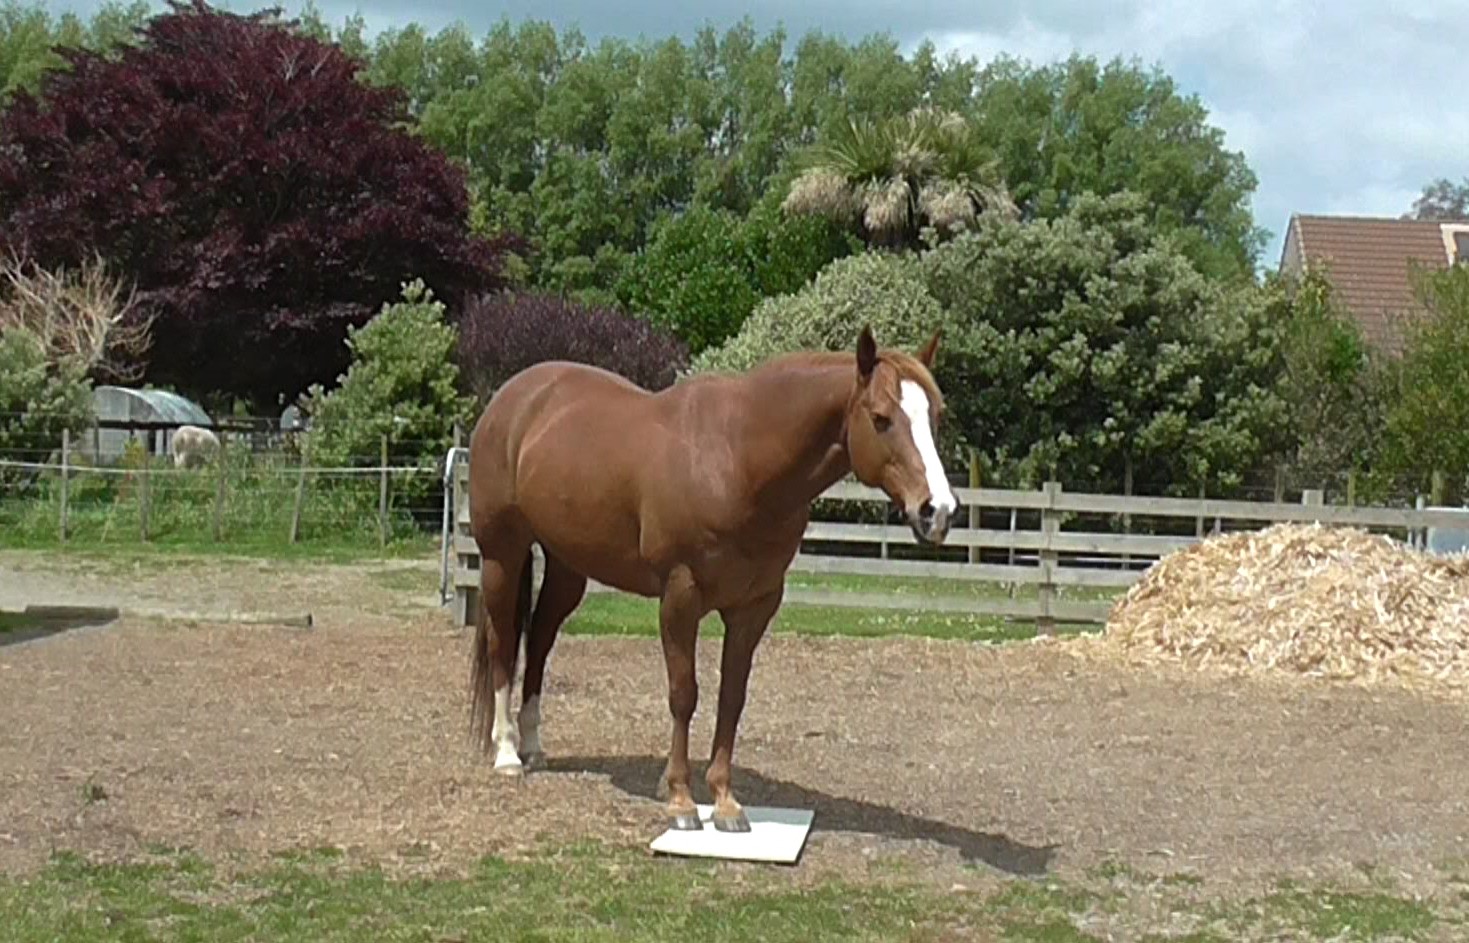
Horse develops confidence with standing over a rail under his belly.
Horse has practice to place his feet carefully in response to handler signals.
VIDEO CLIPS:
With halter and lead:
Liberty
NOTES:
In the video clip, I change between left eye and right eye for each task. An option is to teach them all smoothly with the handler on one side of the horse and then teach them again from the other side.
I didn’t film the tasks using a mat destination between repeats of the task, but when first beginning to teach the tasks, it can help to have a familiar mat some distance from the rail and head to it for an extra click&treat between repeats.
For challenges like this with multiple parts, I find it useful to carry a written memo card in my pocket.
SLICES:
Walk right over the rail, halt a few paces beyond the rail (or at a destination mat/target), click&treat.
Halt with the rail under the horse’s belly, click&treat; pause, walk on forward over the rail.
Halt before stepping over the rail, click&treat; pause, walk on over the rail.
Halt after all four feet have stepped over the rail, click&treat; pause, walk on.
Halt with the rail under the horse’s belly, click&treat. Pause, ask the horse to back his front feet over the rail, click&treat; pause, walk on forward over the rail. If you have not taught backing up, add this slice later when the horse already backs confidently in different situations.
GENERALIZATION:
Approach the rail from different directions.
Put the rail in different venues.
Use different rails.
Do it at liberty or add halter and lead if you taught at liberty.
Work on a slope.
Use a similar exercise to get a horse comfortable with stepping into and out of a hoop on the ground with front feet, then with back feet.
I learned this exercise from Alex Kurland. It seems simple but is enormously useful in maintaining both physical and mental suppleness for the horse and handler.
It also serves to practice our ‘walk on’ signals and allows us to consolidate our ‘halt’ signals each time we approach the mat, with special emphasis on our voice ‘whoa’ signal.
It is a super exercise to check the flexibility of our horse and we may also gain insight into the flexibility of our own body as we improve the timing of shifting our body axis on the approach to each marker. We are usually more flexible bending either right or left, just like horses are.
If we consistently do short bursts of this exercise over many sessions, we’ll notice that it gets easier and easier to do tighter, elegant 180-degree turns (unless horse or handler are restricted due to past injury or arthritis).
PREREQUISITES:
Horse and handler are clicker savvy.
Horse willingly moves to target his front feet on a mat. (There is a relevant link under ‘Addition Resources’ at the end of this post.)
Horse responds willingly to ‘walk on’ and ‘halt’ signals when the handler is beside his neck/shoulder. (There is a relevant link under ‘Addition Resources’ at the end of this post.)
Handler understands the skill of maintaining ‘forward energy’ at the same time as slowing down to give the horse time to scribe the bigger arc of the turn. This can be improved by practice with another person standing in for the horse. We have to remember that the horse has four legs to organize and a long body that more resembles an ocean-liner than a ballerina.
Handler is aware of using the orientation of his/her body axis as a key body language signal for the horse.
ENVIRONMENT & MATERIALS:
A work area where the horse is relaxed and confident.
Ideally, the horse can see his buddies, but they can’t interfere.
The horse is not hungry.
Halter and lead (lead kept loose as much as possible. We want to use orientation and body language for communication, not touch signals via the rope, but we may use these when we first teach teach this pattern).
6 or 8 markers set out in a relatively large circle. The markers can be anything safe: cones, stones, pieces of firewood, tread-in posts if working on grass, jump stands, barrels, 5-liter containers of water, cardboard boxes, rags. In the beginning, it’s easiest if the markers are relatively large, so the horse sees the sense in walking around them rather than across or through them.
Different-colored markers make it easier to keep track of where we are heading and where we have been. If they are the same size and shape, they give continuity to the development of the horse’s fluidity since it needs the same body adjustment around each marker. Therefore, identical markers are best to first teach this exercise.
Different-sized markers encourage the horse to vary his body adjustment to navigate each one, so they are a good generalization.
A familiar mat placed in the center of the circle.
AIMS:
To have the horse and handler execute fluid, smooth 180-degree turns (U-turns) with the horse on the outside of the turn; handler on the LEFT side of the horse.
To have the horse and handler execute fluid, smooth U-turns – horse on the outside of the turn, handler on the RIGHT side of the horse.
Handler becomes super conscious of the position and timing of his/her body axis orientation to signal the turn coming up.
VIDEO CLIP:
NOTES:
What you see Boots doing in the video clip is a result many very short sessions over a long time. I’m always striving to improve the timing of my body axis turned away from the horse as a signal for the turn.
If the horse has been resting or contained, it’s important to walk around for a general overall body warm-up before asking for this sort of flexion. A companionable walk or moving over rails and weaving obstacles are good warm-up exercises.
SLICES:
Walk on the left side of the horse to target the mat in the middle of the circle; click&treat.
Focus on one of the markers ahead of you of the circle and ‘walk on’ toward it. Ensure that you walk off together by using all your ‘walk on’ multi-signals. We don’t want the horse surprised and left behind.
Walk around the marker and back to the mat; click&treat.
Did you manage to keep up your energy while walking the inner curve around the marker? If we let our energy drop, the horse can fade out too. In the learning phase, it can help to raise our knees as in ‘marching on the spot’ to keep our energy up, as demonstrated in the video clip.
Not only does the horse have further to travel, he must organize two pairs of legs and a non-bendy torso to navigate the corner, so we have to give him time.
At first the U-turns might be wide and/or sloppy. Don’t worry, you will both gradually improve if you stick with the task over many short sessions.
The horse will soon work out that each time you go around a marker, you head straight back to the mat where he will earn another click&treat. This realization motivates him to begin making his U-turns more efficient and elegant.
As you begin the change of direction at each marker, turn the axis of your body away from the horse. This will become a body language signal you can eventually use later in many different situations and to communicate at liberty.
Add a voice signal at some point. I use “Round”. Choose a word that is short, clear, and not used in other contexts.
As you notice improvement in his flexion during the turns, you can begin to selectively click&treat nice tight ones as he comes out of the turn, then carry on for another click&treat at the mat.
After each return to the mat (click&treat), choose a different marker and repeat.
After navigating all the markers walking on the left side of the horse, repeat walking on his right side. Once around each marker on each side of the horse is usually enough of this exercise during one session.
Often it is harder for the horse and/or the handler when they are using the non-dominant sides of their bodies. With patience and extra practice on the harder side(s), it will start to feel more equal.
Signals given with the handler’s non-dominant side are often not as fluid or well timed as signals given on the dominant side. Once we become aware of this, we can focus on it as necessary.
GENERALIZATION:
The first generalization is to repeat walking on the horse’s right side.
Begin to focus on using body axis orientation in other contexts such as weaving obstacles
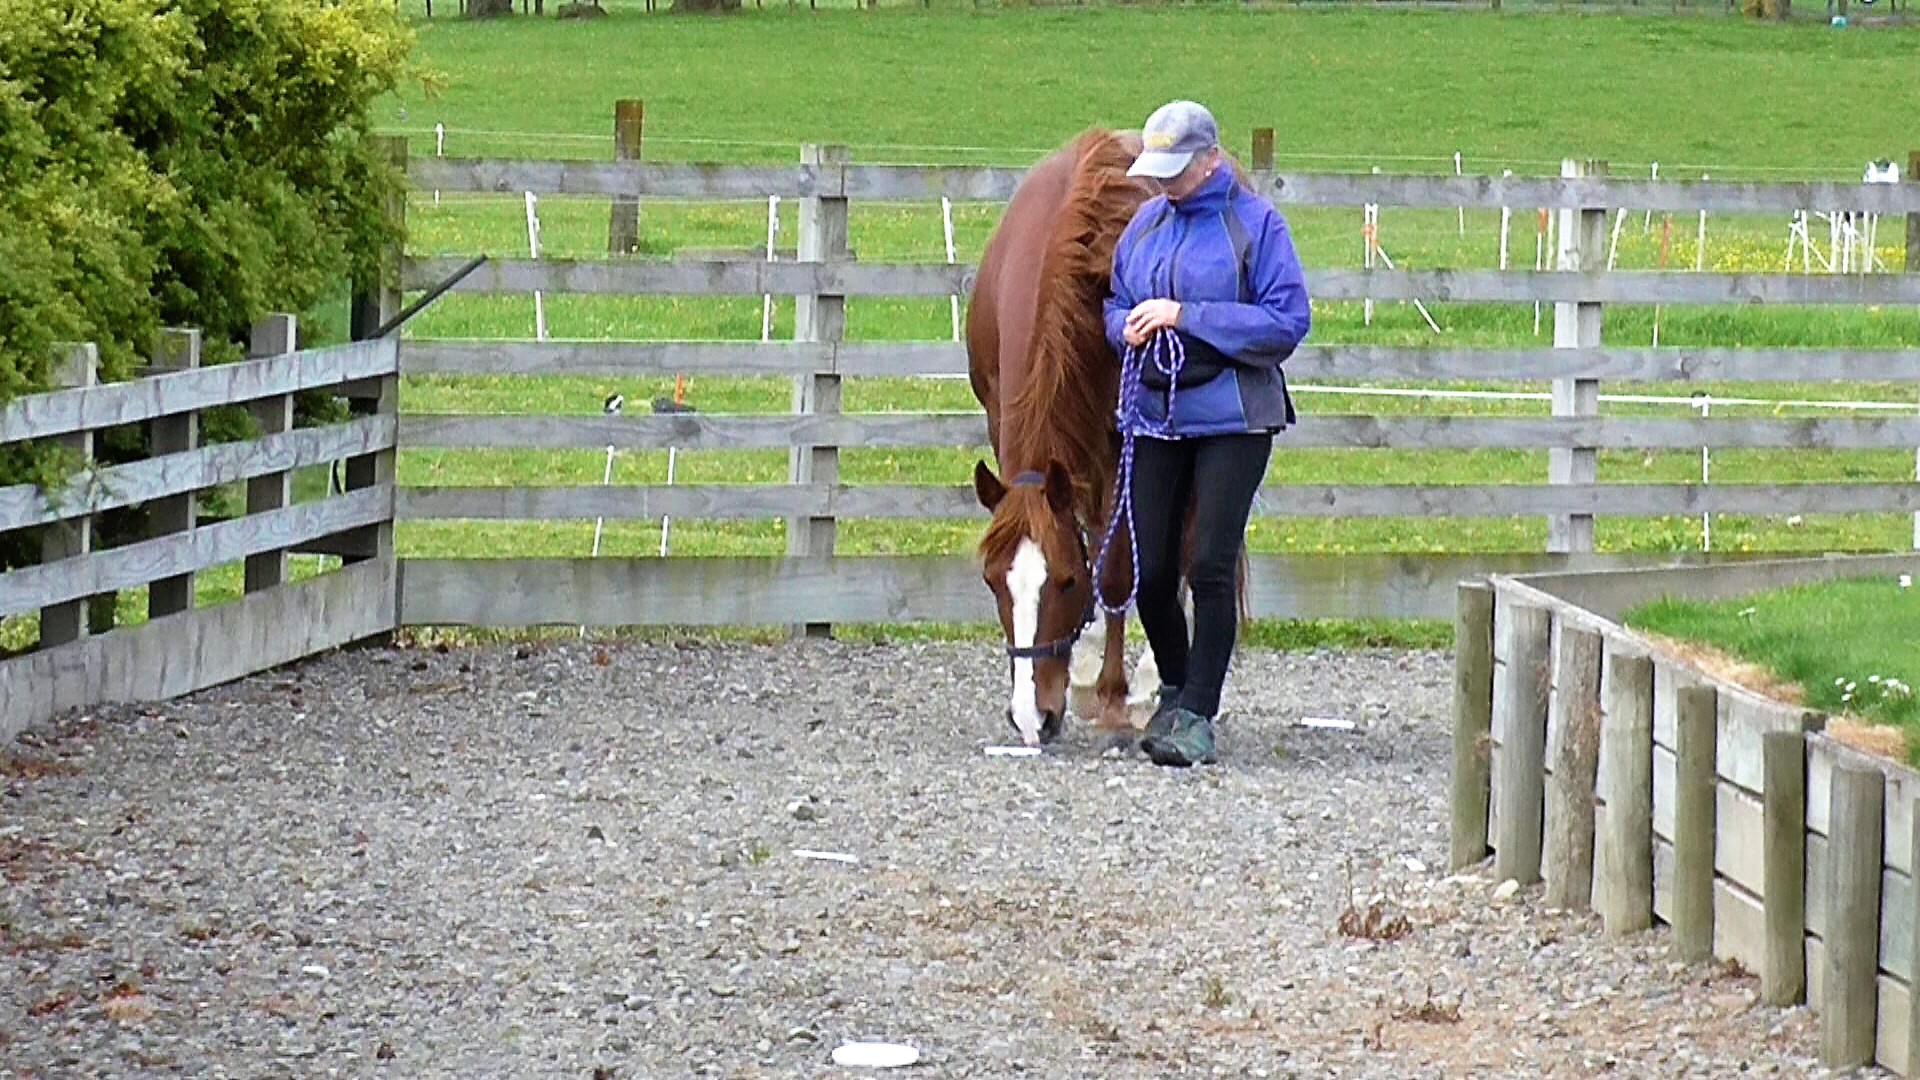
The clip below demonstrates how Boots and I use my body axis orientation to work on flexion during our walks down the road.
‘Walk On’ and ‘Halt’ are the foundation of pretty much everything we want a horse to do with us. Even teaching ‘parking’ starts with a solid, confident ‘halt’.
Teaching the basic ‘walk on’ and ‘halt’ is most easily done in position beside the horse’s neck or shoulder. I like to teach these with a ‘multi-signal’ or ‘signal bundle’. In the science literature multi-signals are referred to as “a compound stimulus”.
Using the multi-signals consistently from the beginning means that once the horse knows them well, I can use any one of them, or any combination of them, depending on what best suits the situation. It makes it easier for the horse to recognize the signals when I am walking beside his ribs or behind him (outside his blind spot).
PREREQUISITES:
Horse and handler are clicker-savvy.
Horse readily targets stationary objects with his nose and/or feet. (See ADDITIONAL RESOURCE 5. at the end of this post.)
Horse is comfortable wearing a halter and lead rope.
It’s highly recommended to practice the rope handling mechanical skills to signal ‘walk on’ and ‘halt’ first with a person standing in for the horse. Simulations are a wonderful way to get our body language and rope handling skills organized and smooth before we inflict ourselves on the horse.
MATERIALS AND ENVIRONMENT:
Horse in a familiar area where he is comfortable.
Other horse buddies in view, but not able to interfere.
Horse is not hungry and in a relaxed frame of mind.
Halter and lead. A relatively short lead rope is easier to manage.
Destination objects. These can be a series of stationary nose targets, mats as foot targets. Alternatively, we can use a Frisbee or old cap thrown out ahead for the horse to target, then thrown forward again.
AIM:
Elegant ‘walk on’ and ‘halt’ transitions with the horse and handler staying shoulder-to-shoulder, with the handler on either side of the horse.
VIDEO CLIPS:
‘Walk on’ signals are illustrated in HorseGym with Boots clip #129.
‘Halt’ signals are illustrated in HorseGym with Boots clip #131.
NOTES:
What you see Boots doing in the video clip is a result many short sessions over a long time.
We can aid the horse’s understanding if we begin teaching this along a safe fence to remove the horse’s option of swinging the hindquarters away from the handler.
We want to strive for consistently staying in the area alongside the horse’s neck and shoulder.
Photo to illustrate Slice 3 below. A ‘halt’ signal without pulling on the halter: hold the rope straight up into the air and jiggle it lightly. We can use this as part of our ‘halt’ multi-signal if necessary. We can also use it during the process of teaching backing up with a hand gesture signal staying shoulder-to-shoulder with the horse. Teach it as a ‘halt’ signal by using it as the horse approaches a fence or other dead-end where it makes total sense for him to halt .
SLICES:
Hold the rope in the hand nearest the horse with no pressure on the halter. If you need to send a ‘halt’ signal with the rope, hold the rope straight upwards and jiggle it. The instant the horse responds, stop jiggling, breathe out and lower your hand.
Halt: Ask the horse to walk beside you toward a familiar mat. As you approach the mat, use the following multi-signals almost simultaneously:
Visibly drop your weight down into your hips (like we want the horse to do).
Breathe out audibly.
Say ‘whoa’ or whatever halt voice signal you decided.
Only if necessary, raise the inside hand holding the rope straight up into the air and jiggle the rope. If the horse is initially taught the ‘rope jiggle’ halt signal using a fence or a blocked-off lane, there will be little need to jiggle the rope. As the horse halts on the mat, immediately relax your body language; breathe out; click&treat.
At first, pause briefly before walking on to the next mat; click&treat. Gradually, over many sessions, teach the horse to wait confidently for up to 10 seconds.
Walk On: Ensure you are holding the rope in the hand nearest the horse with no pressure on the halter. To send a ‘walk on’ signal along the rope, reach across with your outside hand and run it gently up the rope toward the halter. As soon as the horse moves, take away your outside hand.
We use our ‘walk on’ multi-signals almost simultaneously:
Look up toward the next destination.
Breathe in audibly and raise your body energy. Horses are very conscious about our breathing, so this can become an important signal if we use it consistently.
Run your outside hand gently up the rope toward halter to a point to which the horse responds by shifting his weight to step forward. This will eventually become a simple arm gesture without needing to touch the rope.
Step off with your outside leg (easier for horse to see).
Say ‘walk-on’ (or whatever voice signal you’ve decided). A voice signal is useful later when working at liberty, exercising on a long line, or guiding from behind, as in long-reining.
Our aim is to initiate the first intention of movement, then move in synchronization with the horse. It’s important not to move off without the horse, so losing our position beside the horse’s neck or shoulder.
People often tend to start walking without first inviting the horse to move in sync with them. The whole point of this exercise is to move forward together companionably, staying shoulder-to-shoulder.
Each time you halt, you have another opportunity to practice the ‘walk on’ multi-signals. Each time you ‘walk on’, you have another opportunity to practice your ‘halt’ multi-signals.
Every time you come to a destination marker, drop your hips and your energy, breathe out, say your voice signal and relax; click&treat. Pause, then politely use your ‘walk on’ multi-signal to ask the horse to walk forward with you to the next destination marker.
It won’t take the horse long to realize that each destination marker is a ‘click point’. He will soon begin to look forward to reaching each destination. He will also begin to organize his body to halt efficiently. Horses love to know what will happen before it happens. Remember, they have four legs and a long body to organize, so begin your ‘halt’ signals well before you reach the destination.
Many short sessions will show improvement in suppleness and body management more quickly than occasional long sessions.
Be sure to teach this in both directions and on each side of the horse. Spending a little time on this, over many sessions, will build a lovely habit of walking with you on a loose rope.
In a way, although you have the horse on a rope, you are allowing him to self-shape the most efficient way to set himself up to halt at the next marker ready for his click/treat. Because the horse has worked out his way of halting for himself, he has more ‘ownership’ of the task.
Over time, walking together companionably will become a strongly established habit. As mentioned in Generalization 2. below, we can gradually introduce the ‘whoa’ as our click point, which means we can phase out using destination targets. The horse will comfortably walk with us until we signal for a ‘halt’. Of course, we must reliably reinforce each halt request with a click&treat.
GENERALIZATIONS:
Gradually increase distances between destinations.
Gradually introduce ‘whoa’ as the click&treat indicator to replace nose or foot targets. Start by asking for ‘whoa’ between destinations. (See ADDITIONAL RESOURCE 2. below.)
Add objects and obstacles to your training spaces to walk through, across, over, weave among. (See ADDITIONAL RESOURCES 3. & 4. below.)
Walk together at liberty. (See ADDITIONAL RESOURCE 1. below.)
Walk together in different venues including public places with slopes, water, trees.
As purposeful gymnastics to help our horse keep flexible.
When it is too cold, hot, wet or windy to be out and about.
As a ‘stall rest’ activity as much as the recuperation allows.
When we feel low energy but want to do something with our horse.
The knee and hock targeting, done regularly, ensure adequate balance when we ask the horse to stand on three legs for foot care.
PREREQUISITES:
Horse and handler are clicker savvy.
Horse is comfortable standing ‘parked’ with the handler standing and moving around the horse. A link to a post about relaxed ‘Parking’ is added at the end of this post.
Handler has developed his/her ‘zero intent’ and ‘intent’ body language. Links are added at the end of this post.
Horse confidently touches a variety of targets with his nose.
We can teach targeting with the knees and hocks in the same way as outlined in the Targeting the Hindquarters to our Hand post. See the link at the end of this post.
ENVIRONMENT & MATERIALS:
A work area where the horse is relaxed and confident.
Ideally, the horse can see his buddies, but they can’t interfere.
The horse is not hungry.
A safe, enclosed area for working at liberty, if possible. Otherwise, halter and lead (kept loose or the rope safely draped over the horse’s neck).
A hand-held target on a long stick and a short target like a plastic bottle.
A familiar mat to park on when first teaching this.
AIMS:
The horse moves his nose to touch a target held in different positions while keeping his feet still.
Horse lifts his knees to touch a target.
Horse lifts his hocks to touch a target.
VIDEO CLIP: #166 HorseGym with Boots TARGET FLEXION
Notes:
What you see Boots doing in the video clip is a result of lots of very short sessions over a long time. I had to consciously improve the consistency of my body orientation and how I presented the target to make what I wanted as clear as possible for the horse.
If the horse has been resting or contained, we must do a general overall body warm-up before asking for these flexions. Walking over rails and weaving obstacles make great warm-up exercises. If this is not possible, adjust your flexion expectations accordingly.
SLICES:
Neck Flexion High and Low
As per prerequisite 2, ensure that the horse is totally comfortable standing parked while you move and stand in a variety of positions around his body.
Ask the horse to stand squarely with his front feet on a familiar mat; click&treat.
Let him know what game you are about to play by having him touch a familiar long-handled target held near his nose; click&treat.
Gradually, making sure to stay within the boundary of the horse’s comfort zone for this type of activity, hold the target progressively a little higher while you stand facing him slightly to the left side of his nose; click&treat every time he touches the target.
Ideally, do three or four repeats on each side of the horse, before moving to the other side.
Repeat 4 holding the target progressively a little higher while you stand facing him slightly to the right side of his nose.
You may not get a full upward stretch as Boots shows on the video clip until you’ve done it for several sessions, but on the other hand, you may get it quickly.
Stay with 4, 5 and 6 until the horse is ho-hum with them.
Then move on to progressively hold the target a bit lower to the ground; click&treat for each touch standing slightly to the left of his nose, then stretch out your arm so the horse’s nose stays straight in front is he lowers it.
Repeat 9 standing slightly to the right of the horse’s nose.
For each new session, begin with the upward stretches done previously, then add the downward stretches until the horse is ho-hum with them also
Lateral (Sideways) Neck Flexion
Have the horse stand as squarely as possible.
Present the target so the horse must bend his neck a little bit to the left toward his ribs to put his nose on it; click&treat. Repeat two or three times.
Repeat 2 on the right side.
Present the target so the horse must bend his neck to the left a little further to touch the target; click&treat. Repeat two or three times.
Repeat 4 on the right side.
Present the target so the horse must bend his neck to the left as far as he comfortably can to touch the target; click&treat. Repeat two or three times.
Repeat 6 to the right.
How far a horse can bend his neck laterally will depend on a variety of factors such as age, health, overall fitness, frequency and type of flexion exercises, breed conformation, past injuries, arthritis, and so on. Healthy horses can reach around to scratch an itch on a lifted hock with their teeth. Observe carefully to find out how far the horse you are working with can reach in comparative comfort.
You may find considerable difference between the right and left sides if the horse has not been trained to accomplish a variety of exercises with either side of his body leading. Most horses have right or left dominance, just as people do.
If you adopt these flexion exercises and do them several times a week, or a few daily, you may notice increased suppleness in your horse if restrictions due to past injury or chronic conditions such as arthritis are not limiting factors.
Once the extreme bend (however far that is for a particular horse) is going well on either side, ask for a bend to the left, then step behind the horse to his right side and ask for the extreme bend to the right before the click&treat.
Knee and Hock Flexion
1. At the start of each session of flexion work with a target, I ask the horse to put his nose on the target; click&treat. This lets him know what game we are playing.
2. Teach ‘knee-to-target’ by touching the target gently above the horse’s knee; click&treat. Repeat several times.
If the horse thinks you want his nose on the target when it touches his leg above the knee, don’t click&treat. Remove the target out of sight behind you and take up the ‘no intent’ position for about three seconds. Then begin again. Repeat until the horse realizes that you are not asking for nose to target in this situation. The lack of click&treat gives him this information.
It may help the horse if you use a different, shorter target to teach ‘knee to target’.
3. After several successful mini-sessions with 2 above, hold the target just a tiny bit above the horse’s knee and see if the horse will lift his knee to make the contact; click&treat the instant he does. The basic technique is the same as in my clip, Targeting the Hindquarters to our Hand to which there is a link at the end of this post. Some horses will pick up the idea quickly and some will need many days of quiet, relaxed, short repeats. A clip about teaching ‘Target Chin to Hand‘ posted at the end, may also be helpful.
4. Repeat on the horse’s other side.
5. Once 3 and 4 above are ho-hum, teach ‘hock-to-target’ in the same way, using your long-handled target. Mixing up knee and hock too soon can lead to confusion, so keep the daily focus on the knee targeting only (on both sides of the horse) until your orientation and signals are truly consistent and the horse shows he is truly confident by being 99% accurate with his responses. Then change your focus to hock-targeting and stick with only that until it is ho-hum. Then you can begin to ask them in random order.
Head Between Legs Flexion
For this, a shorter target like the plastic bottle I use in the video clip is easier to use than a long-handled target.
Ask the horse to stand squarely.
Ask him to touch the target with his nose while you hold it down and straight in front of him; click&treat when he touches it. Be sure to keep your head to the side of the horse’s head so you don’t get knocked in case he brings his head up quickly.
When 2 is good, switch to holding the target forward between his front legs. You may need to wiggle it a bit to get his attention. Click&treat the moment he puts his nose or whiskers on the target.
Present the target between his front legs standing on either side of the horse. Two or three of these per session is plenty.
Links to other resources:
This video clip looks at making the horse feel comfortable staying parked on a mat while we move into different orientations around him: Challenge: Park and Wait: https://youtu.be/UvjKr9_U0ys
This video clip looks at teaching targeting the chin to our hand, which is a nice way to introduce the whole idea of targeting body parts to our hand or a target. https://youtu.be/Fsigp8wB0LU
In the photo above Boots is leaning her weight toward me to connect with my hand which I held a small distance away from her shoulder.
Teaching the horse a signal to target his shoulder to our hand fits in nicely after we have taught him a signal to yield his shoulder away from us.
PREREQUISITES:
Horse and handler are clicker savvy.
Horse is mat-savvy.
Horse is comfortable standing ‘parked’ with the handler standing alongside. To review, check out my ‘Mats’ blog (Number 9 in the Blog Contents Quick Links at the top of the page).
Handler has developed his/her ‘zero intent’ and ‘intent’ body language. To learn or review this, check out the ‘Zero Intent’ and ‘Intent’ blog (Number 10 in the Blog Contents Quick Links at the top of the page).
ENVIRONMENT & MATERIALS:
A work area where the horse is relaxed and confident.
Ideally, the horse can see his buddies, but they can’t interfere.
The horse is not hungry.
Halter and lead (kept loose) and a safe, enclosed area for working at liberty, if possible.
Mat.
For generalization, a hoop, ground rail, mounting block or similar.
AIM:
Horse confidently moves his left or right shoulder toward the handler’s ‘outstretched hand’ gesture signal.
Video Clip: #160 HorseGym with Boots: TARGET SHOULDER TO HAND
Note:
When we request the shoulder to yield away, we project energy at the horse’s shoulder from our body’s core at the belly-button which causes our posture to be upright.
When we request the shoulder to move toward us, it is important to pull our belly-button back so that we create a ‘draw toward me’ energy with our whole body. Horses are so sensitive to advancing and receding energy from another body, that they easily read the intent of our posture as long as we are totally consistent and not sloppy.
SLICES:
Stay with each slice until it feels ho-hum and smooth for both of you.
Make each session extremely short, 2-3 minutes. The magic is not in the final result as much as it is in the process of helping the horse figure it out.
Ask the horse to park squarely; click&treat.
Take up a position shoulder-to-shoulder with the horse and relax; click&treat. Work up to standing together quietly for five seconds before the click&treat, on each side of the horse.
Reach out the flat back of your hand to lightly touch the horse’s shoulder; click&treat the moment your hand makes contact.
Take up the ‘no intent’ or ‘zero intent’ body position and wait to see if the horse is okay for you to carry on. If he continues to stand in a relaxed manner, he is probably okay to carry on, or you may have sorted out one or more ‘okay to proceed’ signals.
ZERO or ‘NO’ INTENT POSITION
Repeat 3 and 4 above, watching for any weight shift the horse makes toward your hand as you move it toward his shoulder. If he does, celebrate hugely with happy words and a jackpot or triple treat. Avoid the urge to see if he will do it again. Wait until your next session.
When you feel the time is right, hold your hand a tiny distance away from touching the shoulder and WAIT for the horse to shift his weight to make the contact; click&treat. Some horses may step toward you to make the contact right away. For either one, celebrate hugely once again. Maybe do it once or twice more to consolidate the idea.
It took Boots a couple of weeks of daily mini-sessions before she consistently leaned toward my hand to make the contact. Then it took more days before she confidently stepped toward my hand when I held it further away.
Decide whether you want to continue teaching on the side you started with, or if you want to teach slices 1-6 on the other side of the horse before proceeding.
When 6 is ho-hum, gradually hold your hand a little bit further away so the horse must take a sideways step to contact your hand; click&treat.
Whenever the response seems slow or unsure (or is missing), go back to touch the shoulder; click&treat. Then work forward again at a rate that keeps the horse being continually successful as much as possible.
When starting a new session, always introduce the task with a shoulder touch; click&treat, to let the horse know which game you are playing.
Work to having the response equally smooth on either side of the horse.
If the horse is mat-savvy, lay a mat beside the horse to act as a destination. Place the mat so the horse takes one step over to reach it. Gradually increase the distance to get two steps, then three steps.
GENERALIZATIONS:
Turn on the haunches: ask the horse to step around to complete one/quarter of a circle (90 degrees). When that is smooth, work toward 180 degrees, and finally a full turn on the haunches (360 degrees). It can take a while to build confidence to do more than a quarter or half circle keeping the hind feet relatively in one place.
Repeat 1 above on the other side of the horse. Because our bodies and the horse’s body are asymmetrical, one side is usually easier. It helps to do a bit more on the harder side until, after lots of short sessions, both sides feel smooth.
Add a hoop (made so it comes apart if it catches on the horse’s leg) to the turn on the haunches exercise. This increases the level of difficulty, so start at the beginning with just one step and work up very gradually. Be careful not to make the horse feel wrong if he steps out of the hoop with a hind foot. If he does step out, quietly walk away together and return for a reset. The video clip demonstrates where I got too greedy, wanting too much, and it blew Boots’ confidence for a while.
Keep each session super short and celebrate each new success hugely. This exercise enhances foot awareness.
Stand the horse with his hind end nearer the mounting block than his shoulder, step on the block and ask him to bring his shoulder over so he is in the mounting position.
If you want to focus on the horse moving toward you in a straight line, rather than in a circular pattern as above, stand the horse over a rail and see if he will bring his hind end along. If not, leave moving straight for now until you teach the ‘ribs toward me’ lessons.
When shoulder to hand is smooth, start again at the beginning with ‘ribs to hand’. Follow the exact same procedure but start with a touch to the center of the ribs instead of the shoulder.
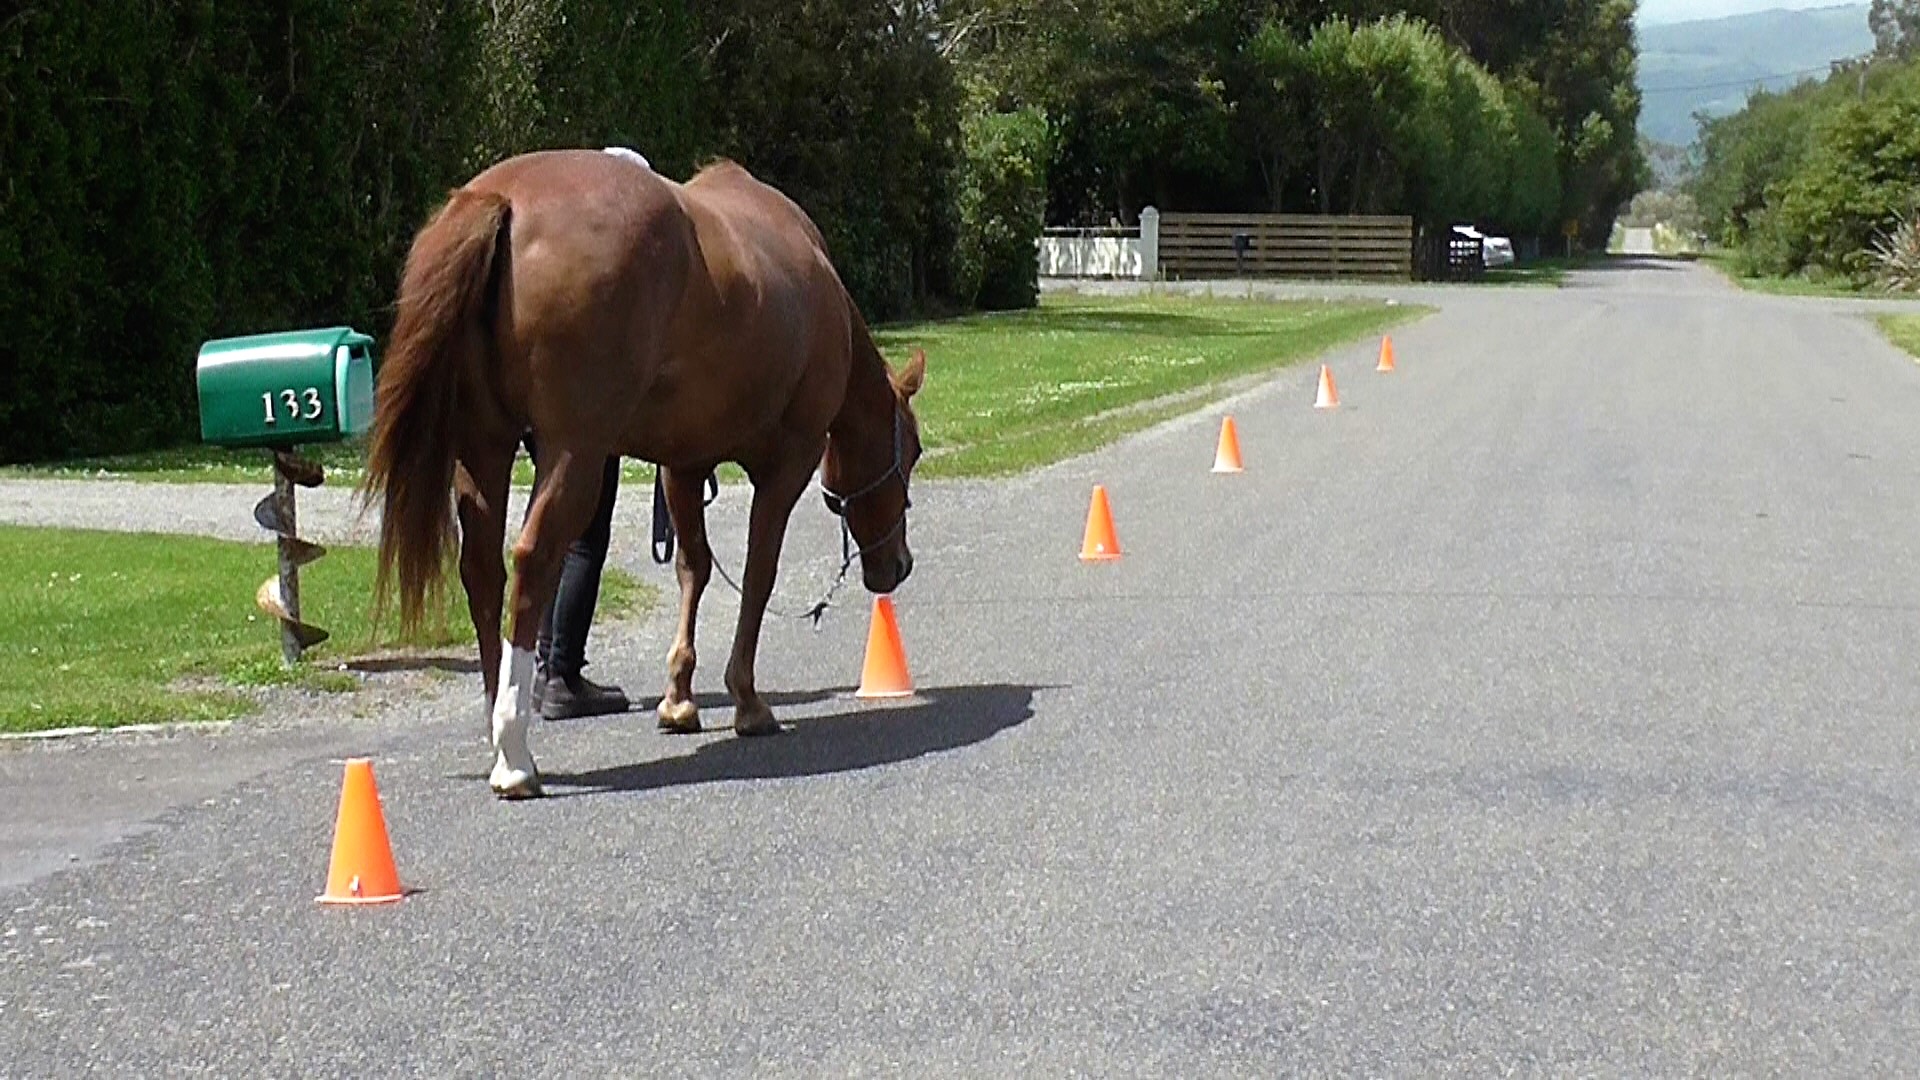
Chaining behaviors refers to linking together individual tasks into a flow of activity. The photo above shows how we chained repetitions of the task, “Go touch the cone” in order to build confidence walking down the road away from home. Once the horse understands this game, the cones can be put further apart, less in number and eventually phased out and replaced with items naturally found along the route to use as click&treat spots.
We might aim for one click&treat at the end of a series of behaviors. Alternatively, we might click for each specific behavior in the chain, or for two or three behaviors within the chain that easily link into each other.
We can also back-chain, where we begin with the last behavior in the series, and gradually link in each previous behavior. If we specifically want the horse to do a series of behaviors with only one click&treat at the end, this method can work well.
People who have spent more time studying ‘chaining’ in detail prefer to start with a concept called ‘sequencing’. They then describe different kinds of sequences.
Tandem Units – when each part of the sequence is exactly the same. Examples are the ‘cone-to -cone’ exercise in the photo above and the 20 Steps Exercise outlined below.
Conjunctive Units – when there is a sequence to be done, but they could be done in any order. For example, if we have a selection of obstacles set out to do gymnastic exercises with our horse, we can do them in any order.
Chained Units – step one of the sequence must occur before step, 2, step 2 before step 3, and so on. For example, saddling or harnessing a horse. Another example might be walking into the pasture, haltering the horse, walking back to the gate with the horse, opening the gate, asking the horse to walk through the gate, closing the gate, which is outlined in one of the clips below.
When we train by splitting a goal behavior into its smallest teachable units (slices), we link the slices together as the horse becomes competent with each bit of new learning. In most cases, the sequence is important, so each slice is part of a chained unit. The example below about Head Rocking illustrates.
Something like a dressage test, horse agility course, jumping course or western equitation course is made up of discrete units or behavior (conjunctive) but the competition requires them to be done in a strict order, so they become ‘chained’. We can train each unit in a ‘conjunctive’ context, then present them in the required chain for the competition.
CHAINING FORWARD TO CREATE DURATION (A sequence of ‘tandem units’)
This clip clearly shows how we can create a chain of ‘duration’ of the same behavior (tandem units). 20 Steps Exercise
This clip is the same as the one above but done with halter and lead and a handler new to the exercise. #30 HorseGym with Boots: Leading Position Three Duration Exercise. Increasing duration of a behavior is basically increasing the number or duration of ‘tandem units’ before we click&treat. The units might be steps, as in this exercise, or they might be increasing time staying parked or they might be the number of times your horse lifts his foot if you are teaching him to count.
CHAINING THIN-SLICES TO CREATE A COMPLEX TASK
This clip shows how we first train, then chain, tiny components of a task (slices). As the horse understands each slice, we ask for a bit more or a new variation before the next click&treat. This clip is an introduction to building confidence with pushing through pairs of horizontally set pool noodles. We start with the simplest unit and gradually work up to more complexity, so this is an example of mostly chained units
This clip is an introduction to head rocking. The slices are quite tiny and are steadily chained together to accomplish the final task. Since the order of units matters, it is a true chained sequence.
CHAINING A SERIES OF TASKS THAT OCCUR IN A PARTICULAR ORDER
This clip looks at how we chain a series of tasks when we do something like bringing our horse in from a paddock. Usually I would do the whole process with one click&treat after putting on the halter, and another when I take off the halter. The horse has previously (separately) learned each of the tasks that make up this chain of events.
The clip below looks at using a mat to help chain a series of tasks. #12 HorseGym with Boots: CHAINING TASKS. This could be seen as an ‘artificial’ chain because we have decided on the order of the tasks. They could be done in any order, making it a conjunctive chain.
The clip below shows a series of more difficult tasks. Each task is individually taught to a high standard. Then I forward chain or back-chain them according to the requirement of that month’s competition. The order of the tasks has been arbitrarily set for the competition, so this too is an ‘artificial’ chain made up of a series of unrelated tasks.
TRAINING PLAN FOR BACK-CHAINING ROPE-FREE CIRCLE WORK
Back-chaining simply means that we begin with the final behavior in a series and work backward toward the eventual starting point.
PREREQUISITES:
Horse and handler are clicker savvy.
ENVIRONMENT & MATERIALS:
A work area where the horse is relaxed and confident.
Ideally, the horse can see his buddies, but they can’t interfere.
The horse is not hungry.
Halter and lead to introduce the idea to the horse.
Safe, enclosed area for working at liberty.
Objects to create the circle outline, as in the video clip or set up a raised barrier.
AIMS:
The horse moves willingly on the outside of a circle of objects, firs to mat destination, later listening for a ‘whoa’ signal.
Back-Chaining Circle Work with a Mat (see video below)
If we want to teach a horse to move in a circle around the outside of a round pen, we can use a mat as the horse’s destination and back-chain a whole circle at walk and a whole circle at trot (energetic horses may offer a canter).
The set-up requires a round pen of ground or raised rails or tape on uprights or a collection of items to outline the circle. The horse walks around the outside of the barrier and the handler walks on the inside of the barrier.
SLICES:
Note: Keep the sessions very short – just a few minutes. We never want to turn anything into a drill. Five minutes a day over a few weeks will give a lot of results.
Stay with each slice until both you and the horse are totally comfortable with it.
With halter and lead:
Lead the horse around the circle and have him target the mat with his feet; click&treat. Repeat until the horse has a strong association with the mat due to always receiving a click&treat there.
Walk the horse and halt a few steps away from the mat. (Horse is on the outside of the barrier, handler on the inside.)
With a looped rope (or unclip the rope if you are in a safe, enclosed area) ask the horse to ‘walk on’ to the mat; click&treat. Snap on the lead rope, walk around the circle and repeat 2 at the same distance until the horse keenly heads to the mat. Walk along with the horse, at the horse’s pace, inside the barrier.
Gradually halt further from the mat before asking the horse to go target the mat. If he loses confidence, return to a smaller distance. Better to increase the distance by very small increments rather than ask for too much too soon. Click&treat each arrival at the mat.
If the horse offers a trot at any time (or a canter) and stays on the circle, celebrate hugely. Such willingness is precious.
When the horse willingly offers a whole circle, celebrate large with happy words and a jackpot or triple treat.
When it is good in one direction, teach it again, from the beginning, walking in the other direction.
Make the task more interesting by putting the mat in different places on the circle.
Once you have whole circles, and you are in a safe area where you can work without the lead, leave it off. This allows you to gradually walk a much smaller circle as the horse stays on his big circle on the outside of the barrier. Click&treat each time the horse reaches the mat. He will soon realize that even if you are a distance away from him when you click, you will quickly walk to him to deliver the treat. Some horses get anxious when they can’t stay right next to the handler.
Play with 9 until you can just rotate in the center of the circle as the horse walks around.
If you’d like to work with trot, and the horse has not already offered it, start again with slice 2 and use your body energy to suggest a trot. If your horse knows a voice ‘trot’ signal, use that too. Celebrate if he trots to the mat.
If you like, gradually make your circle larger.
This is back-chaining because you have shown the horse the final result which will earn the click&treat (targeting the mat) and then added in the previous requirements, which in this case were increasing distances from the mat. In the final behavior, the mat is both the starting point and the end point.
If you are wondering about how we can get multiple circles this way, we can eventually use our ‘halt’ signal to replace the mat and ask the horse to do more than one circle (in gradual increments) before asking him to halt for his click&treat.
Example 2: Back-chaining a 10-task Horse Agility Course (based on the clip before the one immediately above). Each of the tasks has already been taught to a high degree of proficiency.
Consolidate the final task: Trot through the plastic bottles and halt on the tarp for a click&treat.
Back up seven steps, halt, then trot over the plastic bottles and halt on the tarp for a treat.
Trot through the curtain, back up seven steps, halt, then trot over the plastic bottles and halt on the tarp for a treat.
Trot through the z-bend, trot through the curtain, back up seven steps, halt, then trot over the plastic bottles and halt on the tarp for a treat.
Through the pool noodles, trot through the z-bend, trot through the curtain, back up seven steps, halt, then trot over the plastic bottles and halt on the tarp for a treat.
Trot through scary corridor of flags, through the pool noodles, trot through the z-bend, trot through the curtain, back up seven steps, halt, then trot over the plastic bottles and halt on the tarp for a treat.
Drag the bottles, trot through scary corridor of flags, through the pool noodles, trot through the z-bend, trot through the curtain, back up seven steps, halt, then trot over the plastic bottles and halt on the tarp for a treat.
Weave five markers, drag the bottles, trot through scary corridor of flags, through the pool noodles, trot through the z-bend, trot through the curtain, back up seven steps, halt, then trot over the plastic bottles and halt on the tarp for a treat.
From halt, trot off the tarp, weave five markers, drag the bottles, trot through scary corridor of flags, through the pool noodles, trot through the z-bend, trot through the curtain, back up seven steps, halt, then trot over the plastic bottles and halt on the tarp for a treat.
Walk onto the tarp and halt, trot off the tarp, weave five markers, drag the bottles, trot through scary corridor of flags, through the pool noodles, trot through the z-bend, trot through the curtain, back up seven steps, halt, then trot over the plastic bottles and halt on the tarp for a treat.
Back-chaining works well when we want/need to consolidate the place and time for the click&treat at the very end of a sequence of events.
An easy way to teach parking with duration is to use mats as foot targets. Mats can be anything safe for the horse to put his feet on. My horses were especially fond of a small piece of foam mattress.
The series of video clips in this post begin with introducing a horse to mats, and go on to explore building duration on the mat and using mats as destinations.
PREREQUISITES:
Horse understands the basics of clicker work.
Handler can consistently time the click/marker sound to the desired action.
ENVIRONMENT & MATERIALS:
A work area where the horse is relaxed and confident.
Horse is not hungry.
Ideally, the horse can see his buddies, but they can’t interfere.
Halter and lead (with no pressure on lead) if you don’t have a space where the horse can be at liberty.
One mat to begin with, then a variety of different mats.
AIMS:
To encourage the horse to explore an object and make up his own mind that it is harmless.
To encourage the horse to see a mat as a desirable spot because standing on it always results in a click&treat.
To build duration stayed relaxed standing on a mat.
SLICES:
Lay out a mat well away from the horse while the horse is watching.
Stand back and observe the horse’s responses.
Click & walk to the horse to deliver the treat if: a) he looks at the mat. b) he steps toward the mat. c) he sniffs the mat. d) he touches the mat with a foot. e) he paws at the mat, click the moment he stops pawing OR at the moment he first touches the mat, them ask him to move forward or back from the mat to avoid pawing becoming part of what he things he has to do. (See the first video clip below.)
Once he has put a foot on the mat, move the horse or pick up the mat and toss it away, and go back to observing, repeating 3 above.
If the horse shows little interest in the mat, put a treat he really likes on it and show him it is there.
If you are working alone, it may be easier to have two mats and as he eats the treat on one mat, you can be putting another treat on the other mat.
#6 HorseGym with Boots below demonstrates introducing the mat target after a quick revision about nose targets.
Video Clips
Once the horse confidently heads over to put his feet on a mat as soon as we set one out, we can begin to build duration staying on the mat. #8 HorseGym with Boots looks at building duration.
Once the horse loves going to mats due to a strong history of reward reinforcement, we can use mats as parking spots for things like waiting tied up, grooming, foot care, vet care.
I’ve found that carpet stores are happy to give away their old carpet sample books. They are amused when I tell them what I want them for.
#14 HorseGym with Boots is the very first introduction of a young horse to the idea of stepping on something and it was also new for the young handler.
The following videos look at generalizing mats to a variety of situations.
#9 HorseGym with Boots looks at putting mats ‘on cue’ or ‘on signal’.
#10 HorseGym with Boots looks at mats in different places and using different kinds of mats.
#11 HorseGym with Boots looks at more generalization with a ‘Mat-a-thon’.
#15 HorseGym with Boots looks at the horse staying parked at a distance.
#18 HorseGym with Boots looks at the horse staying parked while the handler goes out of sight.
Photo: Mats laid out in our training area make good destinations to encourage willing movement to the next destination to earn a click&treat. First we can have them close together, then further apart. Once the horse understands the game, we can use small ‘mat’ targets like plastic lids.
Destination Training
Destination training adds an important dimension to a horse’s ability to understand what we would like him to do. We have to remember that the horse is captive to an alien species. Unless we take him through a careful, thin-sliced training program to teach him what we would like him to do, he has no way of knowing what we want.
While we are trying to figure out how to communicate with our horse, he is trying even harder to figure us out, and work out what we want him to do.
Giving the horse destinations helps him to make sense of many of our signals, because he sees a purpose to what we are asking him to do. He is not forever locked into a mystery tour. Like us, to remain confident, horses like to know what is going to happen before it happens.
Photo: Here we have set up a series of white target disks along a track. Boots earns a click&treat for targeting each one with her nose (or foot). Gradually we would spread them out further and further, eventually attach them in appropriate places along a longer walk or ride on a road or trail.
Once the horse eagerly targets hand-held targets, we can tie similar targets around our training area and ask the horse to walk with us from target to target. This gives us many opportunities to seamlessly show the horse that walking with us (being led) is a fun thing because we are always reach a destination that results in a click&treat.
We can ‘stretch the value of each click&treat’ by gradually putting the targets further and further apart and/or in more challenging places. Doing this, we continue to build the horse’s willingness to come along with us because he knows that we know where these magic ‘click&treat spots’ are.
For horses that are barn/buddy sweet (they are not confident about leaving home) we can set out targets in a curve that gently goes away from home and then returns home. As the horse becomes more confident with the game, we can make the curve further and further away from home.
Once the horse is keen to hunt out the next target to earn a click&treat, we can set the targets in a straight line leaving home, being careful to stay within a distance that allows the horse to remain comfortable. We click&treat at each target going away from home and again on the way home. Eventually the targets can be a long way apart.
Once the horse is keen to walk forward to target a familiar object, we can use something like a Frisbee to toss ahead of us, walk to it, target it to earn a click&treat. Then toss it forward again, and so on.
More About Foot Targets
When we introduce mats as foot target destinations, we open up further possibilities for seamless teaching/learning. Once the horse is eager to approach his mats because he knows he will earn a click&treat, the mats can serve the same purpose as the nose targets — desirable destinations.
But that’s not all. When a horse learns to line up his front feet tidily on a mat, he will generalize this to a tidy approach to the mat so he can step on it elegantly. We have given him a reason to line up his body and use it with more precision. An energy conserving horse will be motivated to speed up to reach the mat. A rushing horse will be motivated to calm and collect himself to reach the mat. For teaching the leading positions, the mat helps sustain the horse’s attention and focus. We can also use a mat as a positive destination or ‘relaxation spot’ to visit periodically while we work on more complex tasks.
Once the horse has established the habit of moving on with us to find the next target, we can introduce targeting of natural objects like trees or rocks, bushes, particular fence posts. We can also teach ‘target places’ like corners of paddocks or favorite grazing spots.
Video Clips Available
My video clips are available on YouTube by searching for HorseGym with Boots or Herthamuddyhorse on the YouTube search engine.
In this clip the targets are close together for ease of filming. I eventually tied rags to fences and hedges far apart so we did a lot of walking between a click&treat upon reaching each target.
Clips #3 – #14 of HorseGym with Boots go through the detail of using destinations to give the horse a sense of purpose when we are asking him to walk along with us.
Number 16 in my Blog Contents List (link at the top of this page) will take you the blog that has details about teaching smooth WALK ON and HALT signals.