Yielding the front end is an act of polite submission between horses. Bold, confident, imaginative horses especially, or fearful horses, may however not be keen to yield their forequarters. They may want to stand their ground and ask, “You and who else is going to make me move?”
Horses engaged in games nip at each other’s legs and neck in an attempt to make the other horse ‘give way’, so scoring an advantage. This can be good-natured play or in the case of stallions, it can be a serious dispute drawing blood. When young horses living a natural life play this game it teaches them where they stand in the social order among their peers and this knowledge stays with them. A predetermined social order results in a more harmonious group life with reduced confrontational behavior.
Depending on your horse’s character type and the relationship you have, he may be reluctant to move his front end away, or he may do it easily. By using clicker training, the horse can see the instant benefit (click&treat) of yielding his shoulder.
People teach the shoulder-yield in different ways. The process outlined below uses props and positive reinforcement by starting with mat destinations that already have a strong reinforcement history.
Some people use a hand-held target to lure the horse into the movement. However, I use a hand-held target for stretching exercises while the horse stands still, so also using it to ask for movement would contradict the stretching exercises.
WHY TEACH THIS?
- Safety. We want to develop a signal that easily moves the front end of our horse away from us.
- Smooth counter-turns to aid flexibility to change position easily. It also helps to create smooth weave or serpentine tasks.
- Aids proprioception (awareness of where feet are, what they are doing and how much effort is involved).
- Allows us to easily position the horse for foot care.
- Builds into a full turn on the hindquarters.
PREREQUISITES:
- Horse keenly targets mats with his front feet. (See Number 9 in my Blog Contents List.)
- Horse smoothly steps across rails. (See Number 18 in my Blog Contents List.)
- Horse understands ‘Whoa’ signals and can stand relaxed on a mat. (See Number 16 in my Blog Contents List.)
- Handler clearly moves into and out of ‘zero intent’ so the horse knows when he can relax in a ‘wait’ and when he is being asked to move. (See Number 10 in my Blog Contents List.)
- Handler has developed the habit of holding the lead rope in the hand nearest the horse.
ENVIRONMENT & MATERIALS:
- A work area where the horse is relaxed and confident.
- Ideally, the horse can see his buddies, but they can’t interfere.
- A safe fence or barrier in front of the horse.
- Something to make a barrier to create a corner. I used plastic jump stands in the video clip, but a raised rail, barrels or a couple of big cardboard boxes would do the job.
- Two mats. Place one mat in the L-shaped corner and lay the second mat at 90-degrees from the corner mat, a few steps away from the open side of your L-shaped barrier.
- A rail for the horse to step over to get into the corner.
- Halter and lead or liberty. A short lead rope is easiest to manage.
AIMS:
- Handler uses clear, consistent orientation, voice, touch and gesture signals.
- Horse crosses front feet to yield the shoulder away from the handler on request.
- Horse can eventually do a 360-degree turn on the haunches in either direction.
Video Clip:
Notes:
- STAY WITH EACH SLICE UNTIL IT FEELS SMOOTH AND EASY FOR BOTH OF YOU.
- TEACH EVERYTHING ON BOTH SIDES OF THE HORSE. Remember, we often give clearer signals on one side because of our own one-sidedness, so be sure to focus on being equally clear on either side of the horse.
- If one side is harder, stiffer, do a bit extra on that side, over many sessions, until both sides feel even.
SLICES:
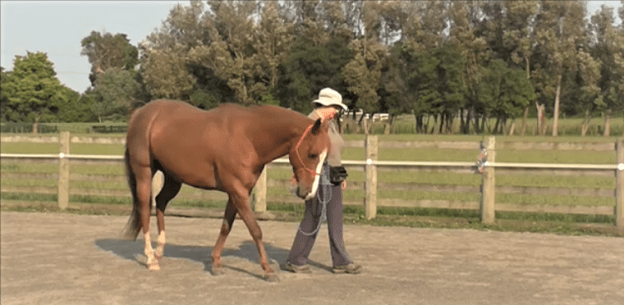
- Walk into the corner, with you on the open side of the L-shaped barrier. Ask the horse to target the mat with his front feet; click&treat.
- Stand together with zero intent* for a few moments (it’s good to vary how long you stay at zero intent each time), then ask the horse to turn with you to exit the corner and head for the second mat you have set at right angles to the mat in the corner. At this point, you are drawing him with you out of the corner. Click&treat the halt at the second mat. For this slice we are showing the horse that the task is to move himself over to target the second mat.
- Add a rail for the horse to step over to reach the mat in the corner. The rail will make it less convenient for the horse to step back when you ask for the shoulder yield. In the video, I raised this rail a little bit to make more of a barrier. Proceed as in 1 & 2 above. Click&treat each halt at the mat in the corner and every time the horse targets the second mat with his front feet. FOR THE FIRST ONE OR TWO LESSONS, REACHING THIS POINT MAY BE AMPLE AT ONE TIME.
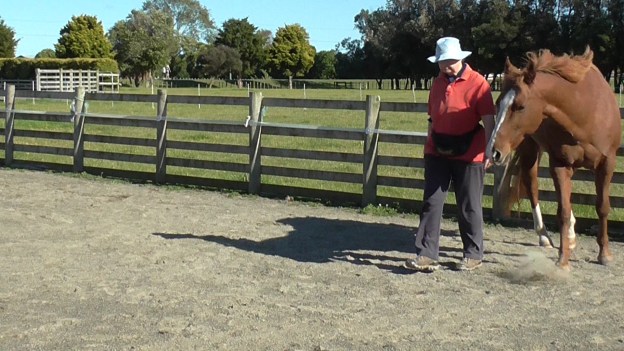
- When 1-3 above are smooth, adjust your side barrier so it has a space at the front where you can stand beside the horse’s shoulder. Walk the horse to the corner mat, with you now on the the barrier side, and end up standing in the gap you made beside the horse’s shoulder.
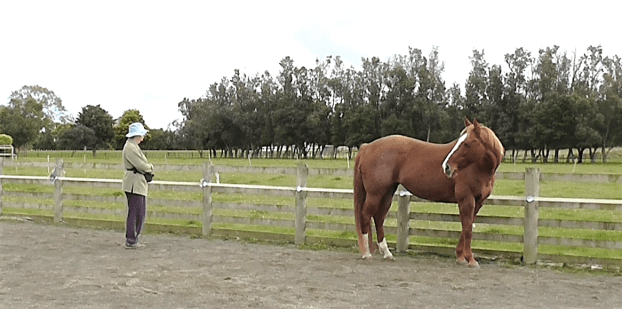
- Quietly place one hand on or toward the horse’s cheek or neck and the other hand on or toward his shoulder. Breathe in and raise your energy as you do this. Send your ‘intent’ (that the horse should move his front end away) out of your belly button. You are asking him to turn away from you and walk to the second mat for his next click&treat.
- Repeat once or twice and that is plenty at one time. Repeat in very short bursts. Two or three times during a training session, interspersed with other thing you are doing, is good. Frequent short practices work best.
- Each time you walk the horse into the corner to target the mat, put your body into ‘zero intent’ and click&treat a few times for standing quietly with you. Vary how long you stay at ‘zero intent’ each time.
- Re-arrange your props so you can do slices 1-7 on the horse’s other side.
- If you can, repeat 1-7 in different locations.
- Replace the high side barrier with a rail on the ground. The front barrier is still high. You’ll continue to use the second mat as your ‘destination’. Reaching either mat always earns a click&treat.
- When the horse smoothly moves out of the corner by yielding his shoulder and heading for the second mat, we can change a parameter. We will now click for the first step of the shoulder moving away. Ideally, we want the horse to step the near front leg in front of the far front leg. As soon as you see this happening, click&treat. In the video clip you’ll see how surprised Boots is to get clicked at this point (rather than moving all the way to the second mat) and she has a little ‘jolt’ to regain her balance when she hears the click which tells her she can stop to collect a treat. Teach in on both sides. Often one side feels harder.
- When the horse is smooth moving his shoulder over a single step as in 11 above, remove the side rail and the rail behind. But keep the front barrier in place. Hopefully he will not have formed a habit of stepping back when you ask for the shoulder to yield. Practice without side and back rails on both sides. Click&treat once for the first step yielding the shoulder, then again upon reaching the second mat.
- Once the horse smoothly yields the shoulder on both sides without the side and back rails, omit the barrier in front and work with two mats. If that is too big a leap, have a low raised barrier or just a ground rail as a front barrier.
- When 13 is good on both sides, work with one mat. Start with the front feet on the mat, then, one step at a time, ask for a full turn until the front feet end up on the mat again. Click&treat as often as often during the turn as you need to to keep the horse successfully earning his next click&treat. Click&treat too often is better than not often enough. We want to keep the shoulder-yield movement as pure as possible, without creeping back or surging forward becoming part of the behavior loop.
- When 14 is good, play at liberty without a mat. Click&treat for one good yielding step until that is excellent both sides, then ask for two and stay with two until they are excellent, etc. until you can get 180 degrees before the first click&treat, then the other 180 degrees, click&treat. Keep your ‘yield shoulder signal’ ON for the number of steps you want, then turn it OFF at the same moment you click, then treat. You want to use a ‘constant on’ signal for the duration of your request. If we are really consistent, eventually just our energy toward the horse’s shoulder will be enough of a signal for many horses.
- The day will come when you feel ready to ask for a full 360-degree turn with one click&treat upon completion. Objective reached.